Video
Adobe Photoshop CS6 • Updates and Workarounds.
Back in April, when Adobe Photoshop CS6 Beta was released, the company dropped official support for Windows Vista, but it continued supporting Windows 7 and XP users.
A couple of months later, Adobe gave an “advanced warning” that 3D feature upgrades in Photoshop CS6 would no longer be supported with Windows XP. Additionally, Photoshop CS6 (13.0) will be the last major version of Photoshop to support Windows XP.
Even though it is ancient, Windows XP is still the best selling Microsoft OS, and makes up nearly 40% of their market share (after having peaked at 76.1% in January 2007), it is somewhat expected that Adobe’s software developers now insist on the latest upgraded versions of Windows OS (Windows 7 and 8) to run their applications.
This is what Adobe had to say:
Photoshop CS6 already demonstrates that relying on a modern operating system, graphics cards/GPUs and graphics drivers can lead to substantial improvements in 3D, Blur Gallery and Lighting Effect features not available to Windows XP customers. The team hopes that by providing this information early it will help you understand our current decisions around operating system support and where we we’re headed with future releases of Photoshop.
We encourage all customers who are currently using the 3D features in Photoshop CS6 Extended to begin upgrading their video card/hardware now so they can fully take advantage of future Photoshop innovations as soon as they are available.
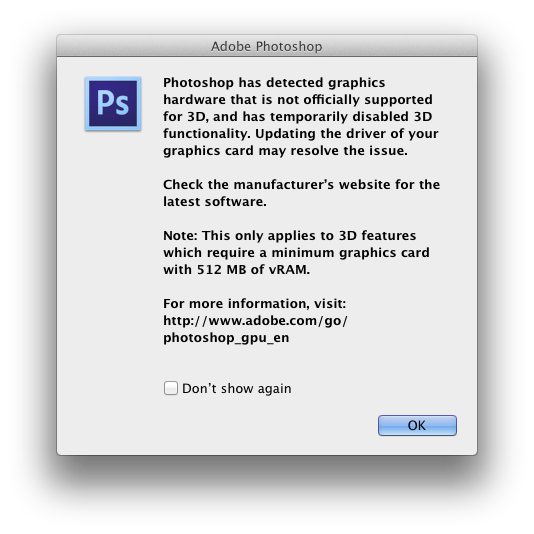
Creative Cloud members will also be required to update their vRAM to at least 512 MB in order to access 3D features found in Photoshop CS6 Extended. If they don’t update, they’ll see the following dialog box:
Click here to keep reading
It is a well-known fact that there are important performance gains by upgrading Photoshop 32-bit to the 64-bit version, especially when working with very large or handling multiple images at a time. But we are getting increasingly concerned about Adobe’s respect and dedication to its consumers.
We obviously understand that like any other corporation Adobe is trying to continually increase sales and generate profits. However, there are too many changes happening too often, making it harder for users to keep up with the company’s rapidly changing trends. We wonder how often they discuss how costly and inconvenient the constant changes are for users. Photographers, video editors, illustrators, and 3D Designers using older systems may not be able to access all of the content-aware tools, and 3D creation tools.
In a perfect world you could say “well, they simply need to get a newer, faster computer running the latest OS,” but we know that the current economic climate doesn’t offer as many option as before.
If you decide to upgrade, some issues can result when trying to import your Photoshop preferences, such as features and tools not working properly. The workaround (we love workarounds!) is to simply reset your preferences. Here’s the way to do just that:
The main preferences file is called “Adobe Photoshop CS6 Prefs.psp”. The usual locations, based on your OS are:
Windows XP
Under Windows XP the preference file will be found at:
\Documents and Settings\[username]\Application Data\Adobe\PhotoshopCS6\Adobe Photoshop CS6 Settings\Adobe Photoshop CS6 Prefs.psp
Move both the Adobe Photoshop CSx Prefs.psp and Adobe Photoshop X64 CSxPrefs.psp files to your backup folder.
Windows 7
Under Vista and Windows 7 or 8, the preference file will be found at:
\Users\[Username]\AppData\Roaming\Adobe\Adobe Photoshop CS6\Adobe Photoshop CS6 Settings\Adobe Photoshop CS6 Prefs.psp
Move both the Adobe Photoshop CSx Prefs.psp and Adobe Photoshop X64 CSxPrefs.psp files to your desktop.
If you only see one of these files and not both, just move the single file. It probably means that you have been running Photoshop only in 64-bit or only 32-bit.
Macintosh
On MacOS the preference file will be found at:
/Users/[Username]/Library/Preferences/Adobe Photoshop CS6 Settings/Adobe Photoshop CS6 Prefs.psp
Now the fun begins: Quit Photoshop, find the .PSP file, make a copy outside the preferences folder. Delete or remove the original file from the preferences folder. Launch Photoshop, which now will create a brand new “preferences” (.PSP) file.
Problem solved.
Important: Any changes to your workspace, keyboard shortcuts, color settings that haven’t been saved as their own preset will be lost when the preferences are reset.
On MacOS 10.7 and later, Apple has hidden your Library folder, so you may need to make it visible – but the location is the same for all MacOS X versions. To find it, click the Option key and click on the “Go” tab in Finder’s menu. This will show the hidden Library folder.
This is a very similar workaround to find your “missing” ICC profiles (complete instructions here).
There is another way to do this. It is called “the quick Keystroke method” to restore several preference files at once. Important: This method cleans out several preference files and does NOT create a backup. Handle with care.
Click here to keep reading
Step 1: Quit Photoshop.
Step 2: Hold down the following Keystrokes while clicking the PS icon:
Windows – CTRL-SHIFT-ALT immediately after you double-click the PS icon.
Macintosh – CMD-SHIFT-OPTION immediately after you double-click the PS icon.
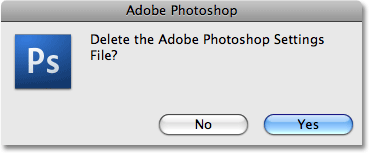
Step 3: Click Yes to the following Dialog Box
Step 4: Restart Photoshop.
Important: Any changes to your workspace, keyboard shortcuts, color settings that haven’t been saved as their own preset will be lost when the preferences are reset.
Lastly, an efficient way to increase performance is by using a secondary hard drive as a startup, data, and scratch drive. A RAID configuration is ideal. We have written several articles about RAID systems in the past.
Do you plan on upgrading your current system in order to keep up with Adobe’s software? As always, please share your thoughts, and let’s start a conversation below.


