Video
Grit and Ira Glass.
I just finished a fantastic book called “Grit” by Angela Duckworth. The book is SO good that I actually read it twice, back to back. The first time I extracted some awesome quotes like these:
“Each of the basic requirements of deliberate practice is unremarkable: A clearly defined stretch goal, Full concentration and effort, Immediate and informative feedback, Repetition with reflection and refinement.”
Angela Duckworth
“To be gritty is to keep putting one foot in front of the other. To be gritty is to hold fast to an interesting and purposeful goal. To be gritty is to invest, day after week after year, in challenging practice. To be gritty is to fall down seven times, and rise eight.”
Angela Duckworth
“Gritty people do more deliberate practice and experience more flow.”
Angela Duckworth
The second time I read the book, I took the time to pause during certain moments and really reflect on how Duckworth’s advise could be applied to my own professional life.
“Passion for your work is a little bit of discovery, followed by a lot of development, and then a lifetime of deepening.”
Angela Duckworth
I’m going to grow up to love my work as much as you love yours. I won’t just have a job; I’ll have a calling. I’ll challenge myself every day. When I get knocked down, I’ll get back up. I may not be the smartest person in the room, but I’ll strive to be the grittiest. In the long run, grit may matter more than talent.
Angela Duckworth
One of the most interesting exercises was to think who represents Grit to me. And Ira Glass, the well-know host of “This American Life” was the first one to come to mind.
I’ve watched this video by Glass endless times. I’ve used it on some of my “Storytelling” online courses and workshops. And I’ve shared it with more students than any other video. Why? Simply because in 5 minutes we condenses the process all creative people go through, not only once or twice, but pretty much every time we push ourselves, get our of our comfort zones and try new things.
On a more recent interview on “Without Fail“, the host Alex Blumberg (who worked for Glass for many years) shared a little bit of Ira’s process. If there’s no “Grit” on that, I don’t know where to find it!
If you want to learn more about Ira Glass and his creative process, I’d highly recommend watching this hour-long interview at Google.
And last but not least, I’ll leave you with one more quote by Angela Duckworth:
Grit has two components: passion and perseverance. This consistent pattern – perseverance scores more often topping passion scores – is a clue that passion and perseverance aren’t exactly the same thing.
Angela Duckworth
Video
Understanding Steven Soderbergh. Part 3.
On two previews posts (Part 1 and Part 2) I wrote about the career of Steven Soderbergh. I also discussed his preference for working with small crews and even smaller gear, including shooting TWO movies with an iPhone.
On this third (and last) article I’ll share the gear, schedule and workflow he used the the Cinemax series The Knick. Why should I and other filmmakers care? Simple because I believe Soderbergh’s production approach will be the way how many TV shows and features will be produced from now on.
The 1 Person Crew.
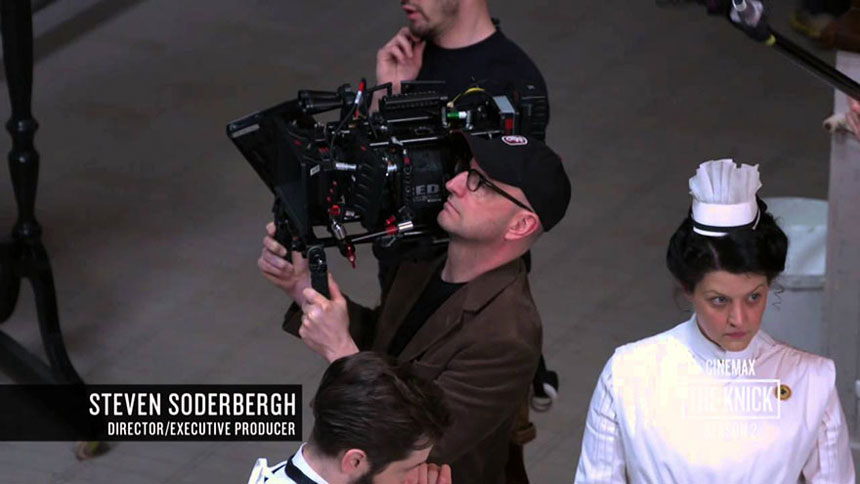
Steven Soderbergh not only directed all 20 hour-long episodes of The Knick‘s first and second seasons, doing 70 setups the first day.
Doing a quick math, Soderbergh produced, directed, shoot and edited each complete hour-long TV episode in 7 days. Just as a reference, the industry’s standard is 10 to 14 days per episode and 150 days for a 2-hour big-budget feature film.
“The Knick is easily one of the most lushly crafted shows on television: beautiful cinematography, smart editing, and just the right balance of suspense and action.”
Wired Magazine
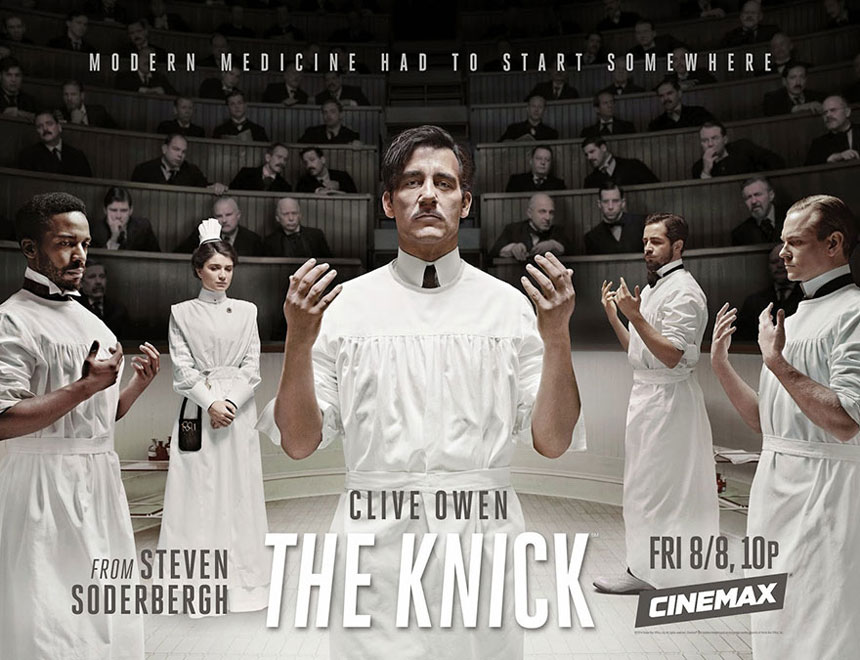
The Knick’s (incredible) production schedule.
Shooting started at 9 AM. While the crew had one hour off for lunch, SSDs with the morning’s footage were being downloaded and backed up. After lunch they kept shooting until 6 PM.
On his way home, Soderbergh edited the day’s footage, on a laptop, and was done by 8 PM. He then posted the footage (edited scenes, not dailies) on a password-protected website for the crew to watch and review. Then he went out for dinner with his wife.
Just like that.
Again, this isn’t new for Soderbergh. He’s been mastering his workflows to perfection. For HBO’s political satire K Street each 1-hour episode was plotted, scripted, shot, cut, and broadcast in five days.
How is this even possible?
I have a few thoughts:
- An essential aspect of Soderbergh’s approach is that he thinks like an editor while he’s shooting, never wasting time on anything he won’t use.
- Soderbergh has streamlined his production schedule to perfection. Two examples: the focus puller is in another room working wirelessly, freeing Soderbergh to concentrate on movement and framing.
- The sets are lit with practical lights (desk lamps, chandeliers, etc) so the actors can move anywhere they want and still be properly lit.
- Most set-ups shot in one day: 60. Least number of set-ups shot in one day: 10.
- Such crazy run-and-gun pace doesn’t allow time for elaborated compositions, but Soderbergh makes up for it with a fluid camera that often takes an unexpected perspective.
- Amount of locations where the entire principal cast worked together: one.
- Soderbergh always works with the same crew, developing short hands and perfecting their workflows on every project. For example, Gregory Jacobs, The Knick‘s executive producer, has collaborated on more than 20 projects with Soderbergh over the past 20 years.
Soderbergh’s Gear
The Knick was shot 6K HD (5:1 compression) on Zeiss Super Speed (35mm, 50mm, 85mm, all f/1.5), and an old RED 50-150mm f/2.8.
The total number of set ups was 2081 (roughly 28.5 per day). Out of those 2081, 577 were shot on an 18mm lens.
The show was shot almost entirely at ISO 1280 for texture, and almost always wide open at T1.3 for cinematic depth, often using NDs on interiors.
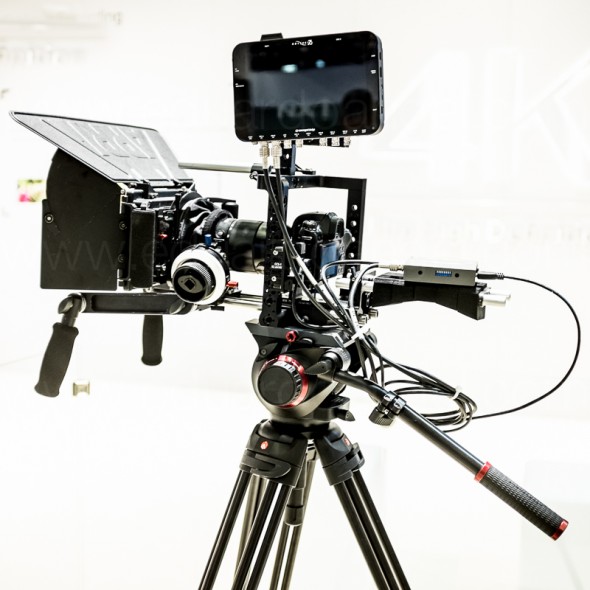
No DIT and no monitors on set with the exception on the 7″ RED on-board for operator/AC, and only two 17″ Sony OLED’s (one for each AC to pull focus via wireless video via these Teradek transmitters.
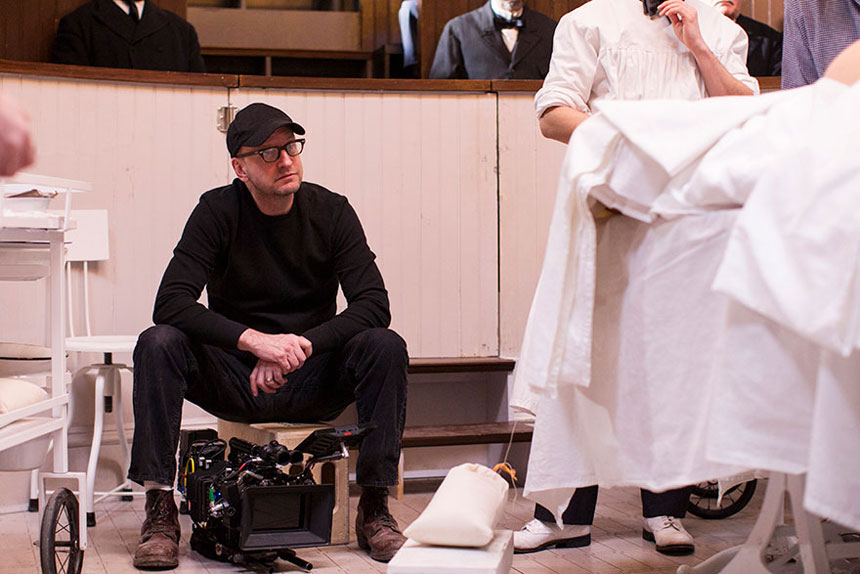
The Knick’s Post-Production schedule.
In terms of post-production, The Knick’s first season, Soderbergh spent “465 hours, 30 minutes, and 50 seconds” editing ten hour-long episodes, so that’s roughly 47 hours per episode.
- No editing on Monday nights because that day’s footage usually wasn’t fully downloaded.
- Tuesday night cut Monday’s material and first half of Tuesday if it was ready.
- Wednesday night cut Tuesday’s footage and first half of Wednesday.
- Thursday night cut Wednesday and first half of Thursday.
- No editing on Friday nights.
- Saturday and Sunday finish editing whatever was left from the end of the week.
“Edited footage gives a much clearer indication of directorial intent and also prepping, posting, and watching all the dailies is a pain-in-the-ass time-waster. Optimization of process is not just my goal, it’s something of an obsession.”
Steven Soderbergh
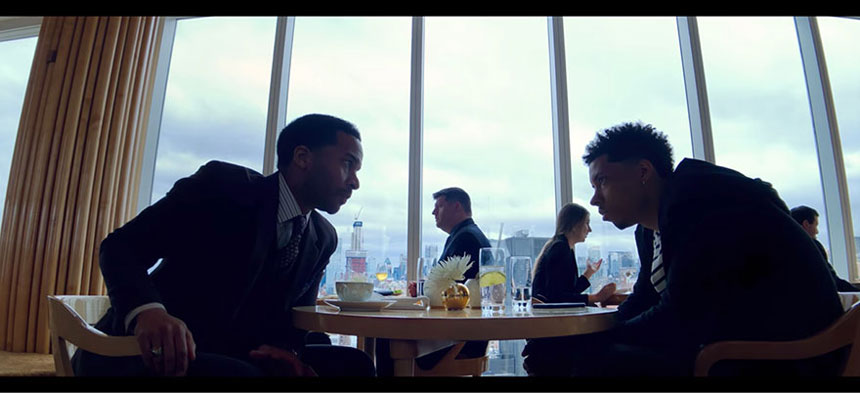
Final Thoughts
There are less and less directors doing a complete series, and even less fulfilling multiple roles on a single production. I personally believe most projects would benefit by having a unifying visual language throughout.
I believe Soderbergh’s production approach will be the way how many TV shows, shorts and even features will be produced from now on. Stay tuned.
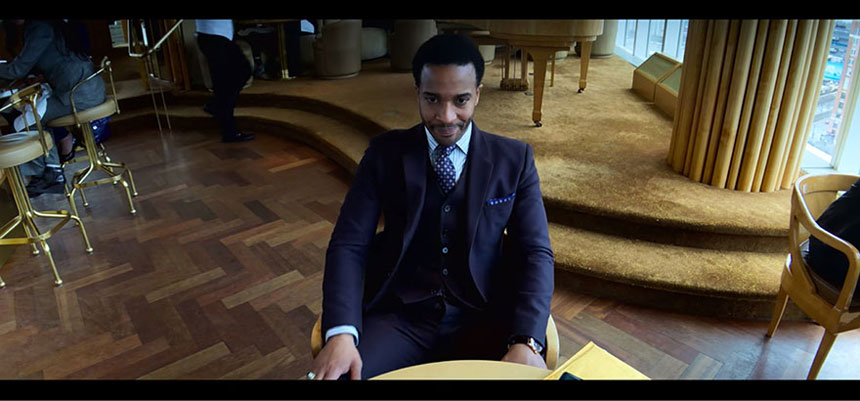
Video
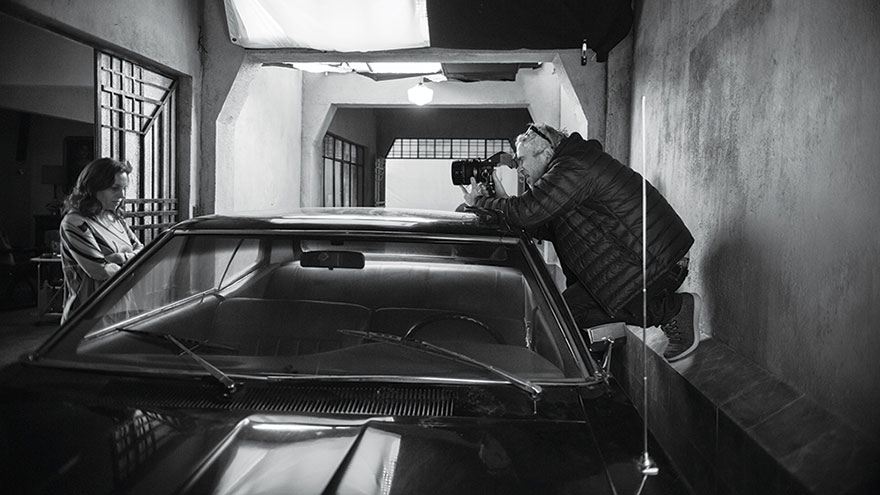
The Sound of Roma.
I started thinking about a “Roma” blog post a few minutes into the movie.
Why Black and White? What do those almost endless pans mean? How similar or different is the composition compared to “Gravity“? What’s the meaning of “water” for Cuaron?

But as I started reading more about the movie, which by the way was written, directed, produced, shot, and co-edited by Alfonso Cuarón, my attention quickly drifted to the film’s sound design.
First things first.
I am assuming you know about Roma. If you don’t, here’s the executive version. Roma is a semi-autobiographical take on Cuarón’s childhood in Mexico City in the early 70’s.
So far Roma has won the Golden Lion in Venice, received 10 nominations at the 91st Academy Awards—including Best Picture, Best Foreign Language Film, Best Director, Best Actress and Best Supporting Actress. It is tied with The Favourite as the most-nominated film, and with Crouching Tiger, Hidden Dragon (2000) for the most Oscar nominations ever received by a film not in the English language.
It also won Best Director and Best Foreign Language Film at the 76th Golden Globe Awards, Best Director and Best Picture at the 24th Critics’ Choice Awards, and at the 72nd British Academy Film Awards won Best Film, Best Film Not in the English Language, Best Direction and Best Cinematography.
UPDATE 20190225: Roma delivered Netflix its highest Oscars prestige yet, contending in 10 Academy Award categories, and wining three: Best Director, Foreign Language Film and Best Cinematography. Alfonso Cuaron gave Mexico its first foreign language film Oscar.

Sound Design.
Now, back to sound design. So it happens, the sound supervisor and re-recording mixer was the Academy Award-winning Skip Lievsay, who also worked on “Gravity“, “Children of Men“, “Y Tu Mama Tambien” and all 18 movies by the Cohen Brothers.
The most informative resource was this interview with Skip Lievsay on YouTube. Here are 3 of my favorite sections:
The full interview.
I highly recommend listening to the complete interview to learn:
- How not having a musical score keeps the audience guessing what will happen next
- Why it was important to Cuarón to have the dialog emanate not just from the screen channels but from all around the audience
- The stunning five-day loop group recording session with 350 actors
- How the final mix of the film took 10 weeks, 7 days a week, 12 hours a day.… wow…..
The technical stuff.
Filmmaker Magazine has another great article on Roma’s sound design. It’s a bit technical but enjoyable.
“In Atmos, we were able to use the x-axis and the y-axis as well as the z-axis. That’s the trick — using the z-axis in terms of extra reverbs or spatial ability.”
Filmmaker Magazine
A (much) deeper interpretation.
If you are interested in a more esoteric approach to Roma, pay close attention to these comments by another maestro, Guillermo del Toro.
Get 60 days FREE of the best music for filmmakers.
Get 30 days FREE of the best collaboration software.
Video
The Pros and Cons of external recorders.
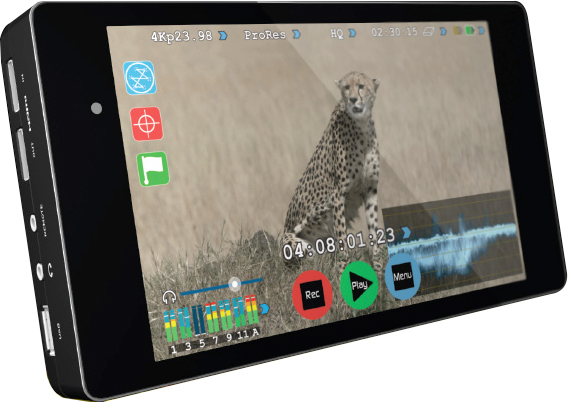
I’ve been using an Atomos external monitors/recorders for a while, and while I had very clear reasons to pick up this device, I’ve found many other very valuable and attractive features. Here I share the most interesting ones in no particular order.
1. Longer recording times
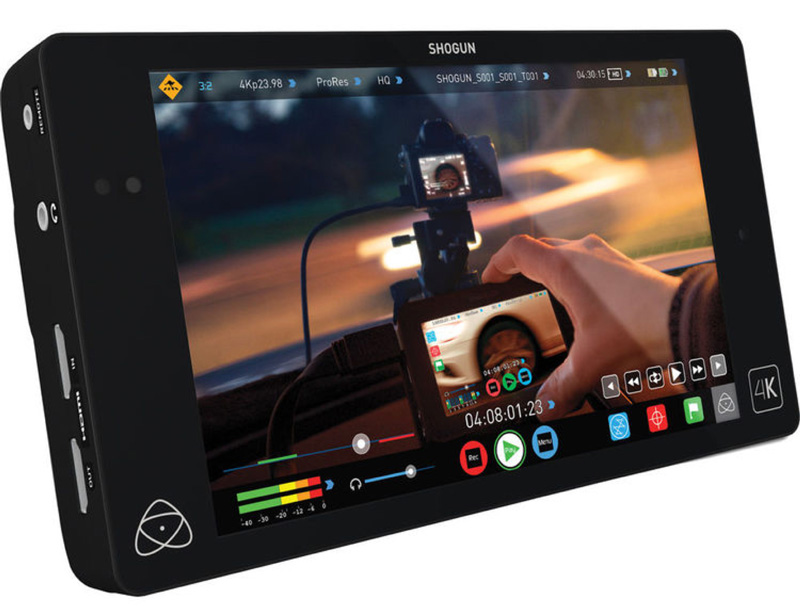
The first and most obvious reason was to record 4K and HD for extended periods of time. The Shogun utilizes 4K HDMI and 12G-SDI inputs to record clean output signals at resolutions up to UHD 4K (3840 x 2160) at 23.98, 24, 25, 29.97, and 30p, as well as Full HD (1920 x 1080) video up to 120 fps with some cameras.
We’ve been shooting a lot of corporate interviews and live events lately and swapping 32GB or 64GB is cumbersome and very inefficient. The additional steps in post to log each and backup each card are fairly simple but time consuming. Yes, SD cards are cheap, with a 64GB costing about $30 (Amazon • B&H) and a 128GB going for about $60 (Amazon • B&H), I was expecting Solid State drives to cost an arm and leg. Wrong!
You can now get an “Atomos approved” (the complete list is available here) SanDisk Pro 240GB drive for only $120 (Amazon • B&H) and a SanDisk Pro 480GB drive for only $200 or less! (Amazon • B&H). Both drives come with an impressive 10-year warranty. And here’s a special Shogun kit that includes TWO 240GB Solid State Drive for FREE. A no brainer if you ask me.
It is worth mentioning that shooting 1080 in ProRes 422 on a 240GB drive (with the Panasonic Lumix GH5 on Amazon • B&H) gives you almost 3.5 hours of recording time. Using the same drive but recording in ProRes LT gives you almost five hours.
The Shogun also allows other systems like Sony’s a7S (Amazon • B&H)that are not capable of recording 4K internally to send the 4K signal to the external device via HDMI.
2. Adding XLR ports to your cameras. No need to sync audio in post.
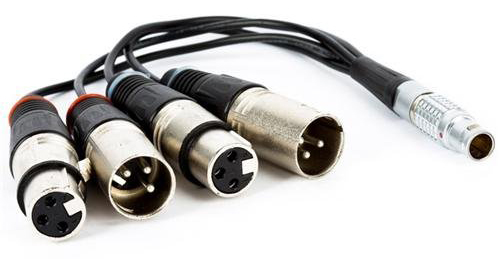
The first “ah-ha!”moment was recording audio directly into the Shogun via the provided XLR breakout cable (with two 3-pin male and two 3-pin female XLR). The Shogun provides Phantom Power which is essential when using our trusted Rode Lavalier mics (Amazon • B&H).
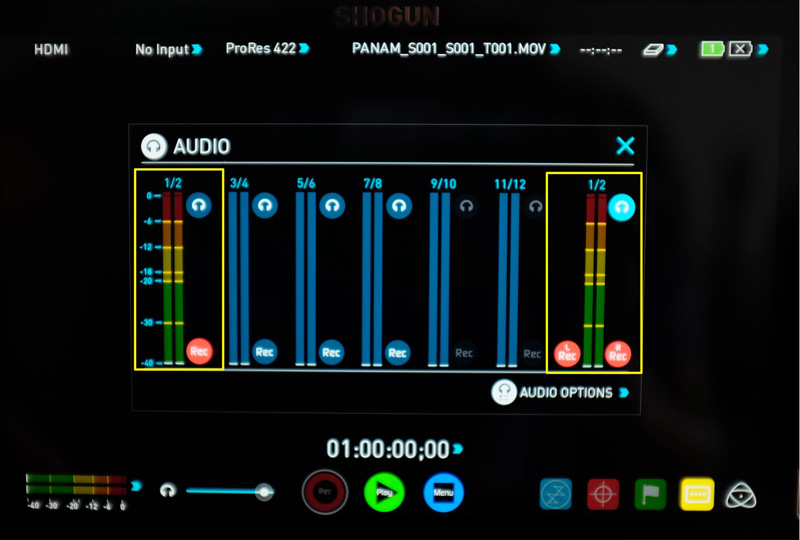
The Shogun can record 8 channels of digital audio embedded in the HDMI signal and 12 channels of digital audio embedded in the SDI signal. There’s also a 3.5mm output that doubles as a Line Out or Headphone jack. The headphone’s volume can be controlled separately within the menu. Pretty clever!
We have used the Shogun mostly with Sony and Panasonic effectively adding XLR ports to our tiny cameras. This is important: we noticed a delay or off-sync between the footage and the audio being recorded into the Shogun. After extensive tests we also noticed that the audio delay was different for Cam A and Cam B even though both were the same brand and model, and running the same exact firmware version.
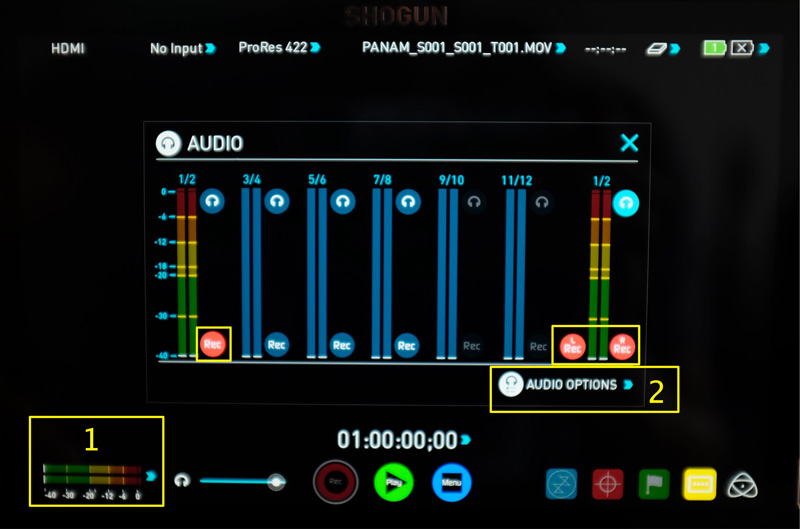
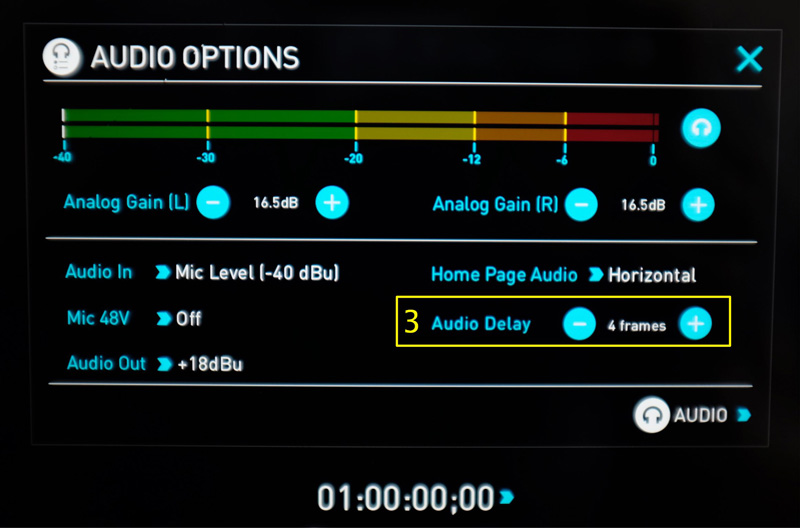
Thankfully Atomos includes a very easy fix; simply go to the Audio menu and from there navigate to the “Audio Options”where you will see an “Audio Delay”preset. We finally settled on 4 frames for the Audio delay.
For our one-person interviews and the most recent Lynda.com courses we used one shotgun boom mic on XLR A and a wireless lavalier set on XLR B. This is what the correct settings on the Shogun should look like:
3. Standardizing editing codec and no need to transcode
On most projects we try to use the same camera model. So if we need three cameras we would use three identical brand/models. We try to keep it simple.
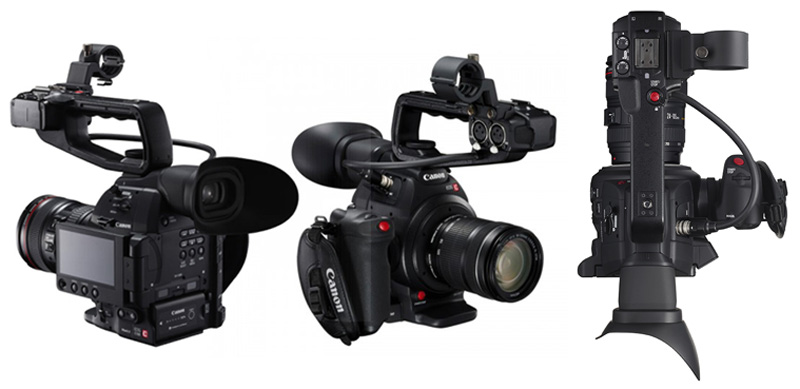
But on a recent shoot in Portland we were shooting with two Canon C200s, had a “behind the scenes”crew using two GH5s, had one Sony A7s doing time-lapses and used one Sony FS7 for some slow-motion sequences. Not the ideal “workflow” situation.
Normally this would be a post-production nightmare for our editor and/or a huge time waste for us having to transcode all that footage every night on-location. We simply attached a Shogun to each camera, shot ProRes 422 with clean audio and the only post step required on our end was backing up the Solid State Drives into our TWO G-Tech drives (Amazon • B&H). Why two? One is set as the Master and at least one as our Backup. When possible, we bring additional Solid State Drives with us so during the shoot we can leave the footage on them as a third backup.
The only disadvantage I see from this approach is the huge file size of the ProRes compared to the native on-camera files, but when taking into account the time wasted transcoding and syncing audio the investment for bigger and faster hard drives more than pays off.
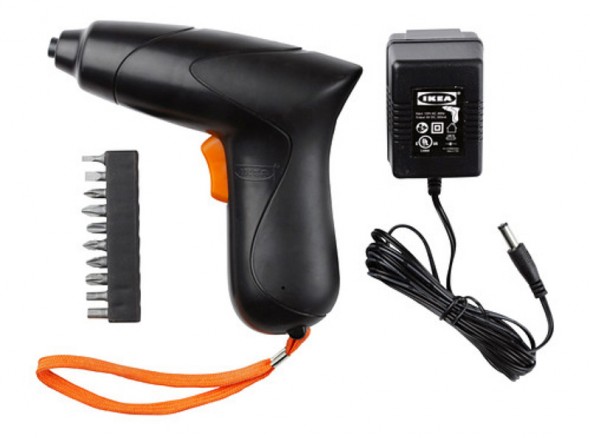
A handy tip: if you will be renting SSDs often, I suggest getting a battery-operated screwdriver to make the process of getting the drives into the Master Caddy II much faster and easier. The best bargain can be found at Ikea.
5. Camera Settings
Here’s something VERY important to consider when using the Shogun with Panasonic cameras.
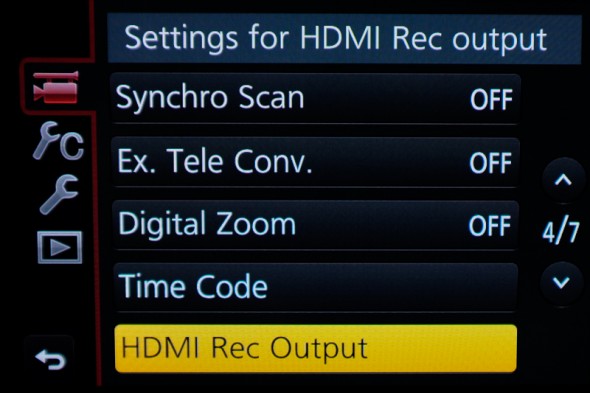
1. In the camera’s “Motion Picture”Menu, navigate to the fourth screen (as of this writing).
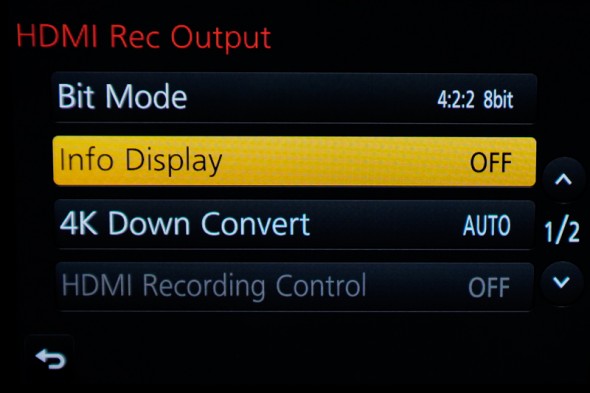
2. Go to “HDMI Rec Output.”If for any reason you are planning to record in 4:2:2 8 bit, make sure to go to “Info Display”and turn it off. Failing to do this will record the camera’s menu into the footage.
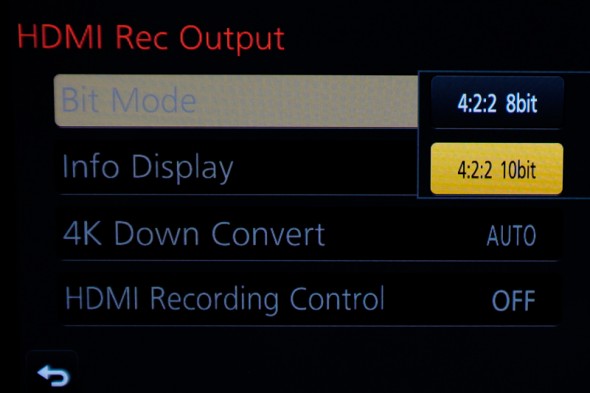
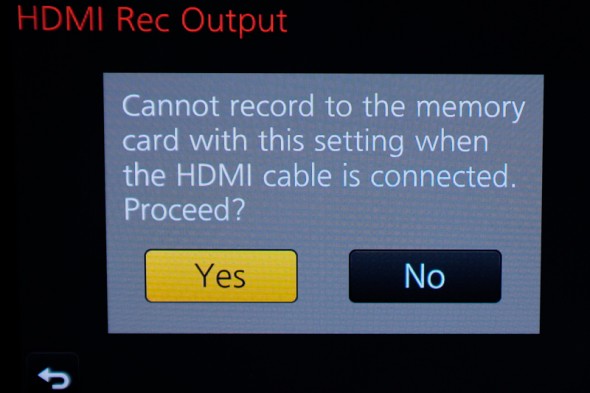
3. If instead you are planning to record in 4:2:2 10 bit, go to “HDMI Rec Output” then “Bit Mode,”select “4:2:2 10 bit”and then “yes.”
6. Focus, Exposure and LUTs
We purchased the Shogun thinking that it would be much easier to monitor focus on a 7”screen. It does work wonderfully in that regard, but we got a lot more than we bargained for. The touchscreen is very minimalist and easy to navigate, the color accuracy is extremely good. Actually, the monitor’s color standard is REC 709 and it can be calibrated with an optional Atomos Spyder.
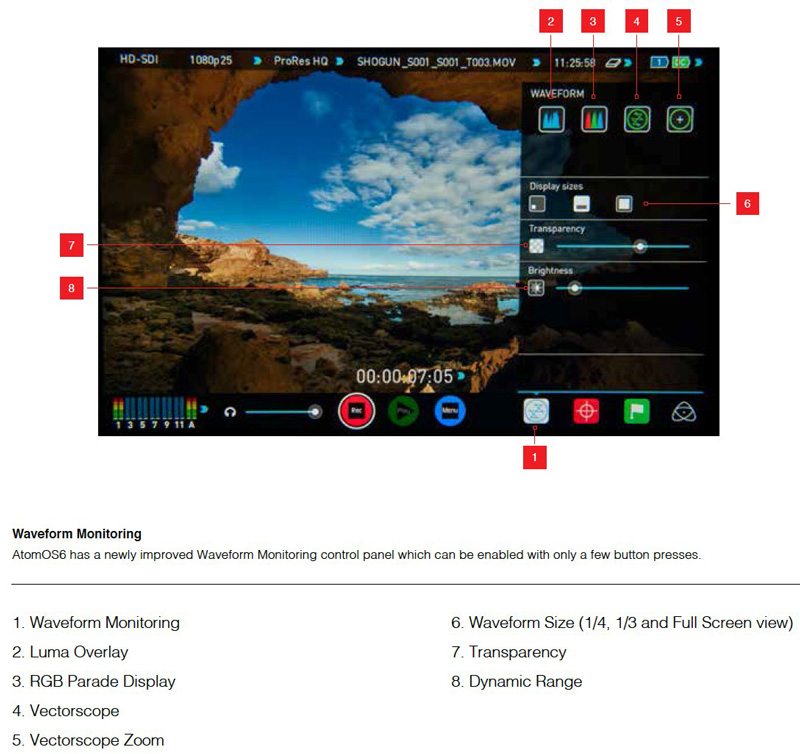
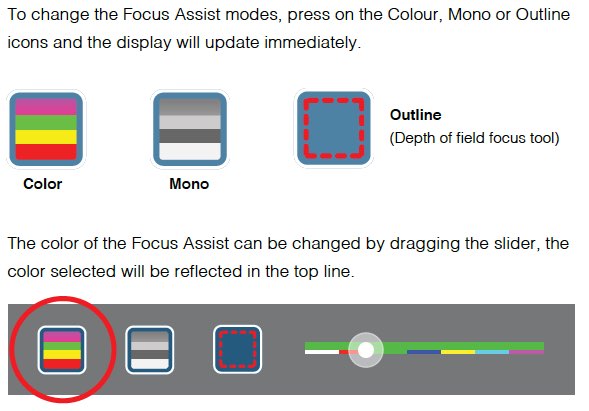
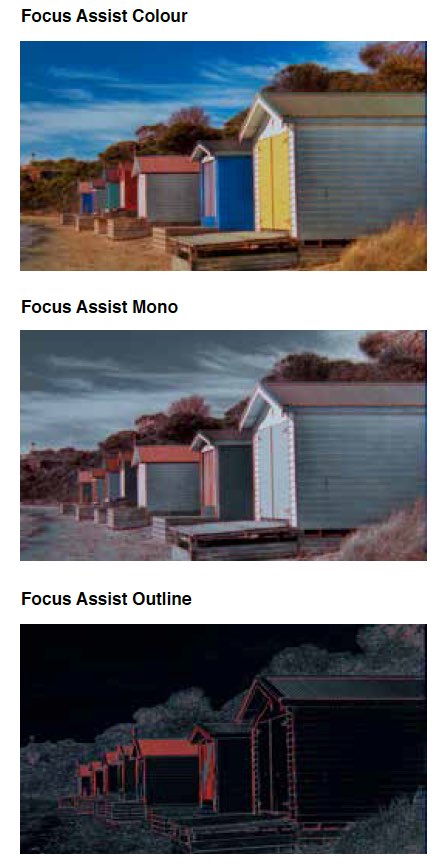
The additional benefit of having more reliable and customizable Focus Peaking is very handy. There are three flavors for peaking: Color, Monochrome, and Outline. In terms of monitoring exposure, especially when shooting outdoors, False Color is key. This feature assigns different colors to areas of different exposure in the image: overexposed areas appear as red, and underexposed appear as blue.
The ability to load LUTs and show the client what the footage will look like after grading is priceless. It is important to know that the LUTs loaded into the Shogun simply previews what the footage would look like, but the media being recorded is not affected. Here’s a short film featuring Panasonic’s recently released Anamorphic mode, and the yet to be released V-Log L gamma file color space.
7. Batteries
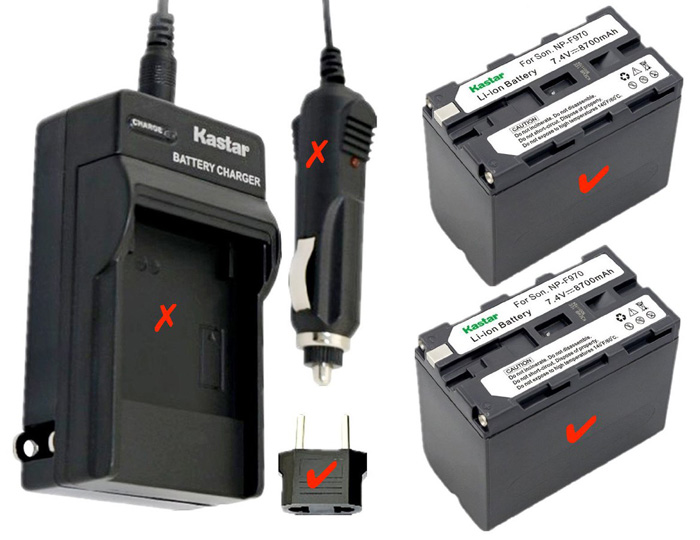
In a nutshell, get plenty of juice. Perhaps the biggest complaint from many users has been regarding battery life.The battery provided with the kit only lasts about 45 minutes, making it mandatory to buy additional ones. We went the “cheapo”route and purchased a too-good-to-be true Kastar kit on Amazon that included two batteries, a charger and a car charger for only $34. Unfortunately this time the “you get what you pay for”maxim held true. The batteries last about the same as an original Sony NP-F970, but the Kastar charger is completely worthless. An original Sony battery costs around $120.
We got stuck on location with a ton of dead batteries and a bad charger. Not a pretty day. The lesson: buy at least one good charger and always bring the Shogun’s AC charger with you (it is included in the kit).
8. Conclusions:
Clearly, the Shogun is an outstanding (but not perfect) product. While it is very light (a mere 16 ounces without batteries), which is great when used on a monopod or gimbal, it is also very fragile. Our monitor broke during our second on-location shoot and we always take great care of our gear.
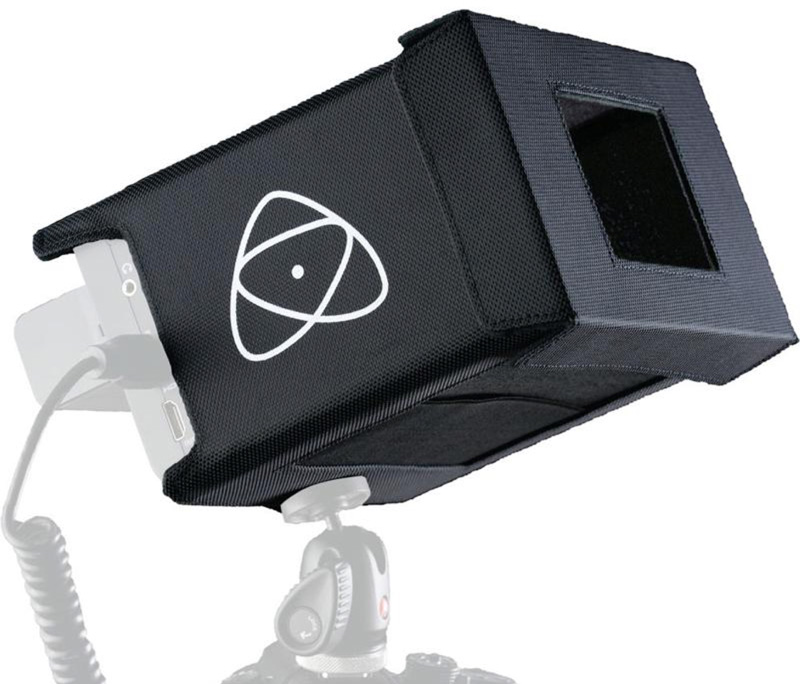
If you are planning to use the Shogun in broad-daylight I’d also STRONGLY recommend getting a sun hood, which was NOT included with our original kit.
There are at least a couple of additional features we haven’t tried yet: the optional Wi-Fi Remote Control to start/stop recording from an iOS or Android device, and flagging the footage on the Shogun as favorite/reject. Apparently this gets exported within the footage’s metadata and will work with Final Cut X and Adobe Premiere Pro CC. I can definitely see this as a time-saving feature, especially while working on interviews and marking sections with the best takes or sound bites.
For a couple grand, I believe one gets a LOT of value out of this device, especially if you can get the current deal that includes two FREE Solid State Drives.
Comments? Questions? Let’s chat on Twitter.
Video
Is a $350 ND filter three (and a half) times better than a $100 one?
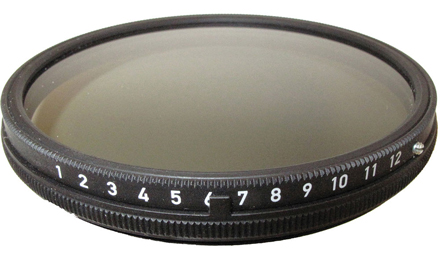
For a long time I’ve been using a Genus Variable Neutral Density (77 mm) filter with my Canon and Sigma lenses and a Metabones Speedbooster Adapter on a Panasonic GH4.
Since I recently got a couple of Panasonic Lumix lenses with a 58mm filter, it was time to buy another ND. I was originally planning to get a Genus or Tiffen filter (about $100 on Amazon), but noticed a $350 Heliopan, among many other cheaper options.
Would the Heliopan (costing three times as much as the Genus) be three times as good as the Genus? The only way to answer this would be getting one, doing a few non-scientific tests, and look at the images side-by-side. So that’s what I did.
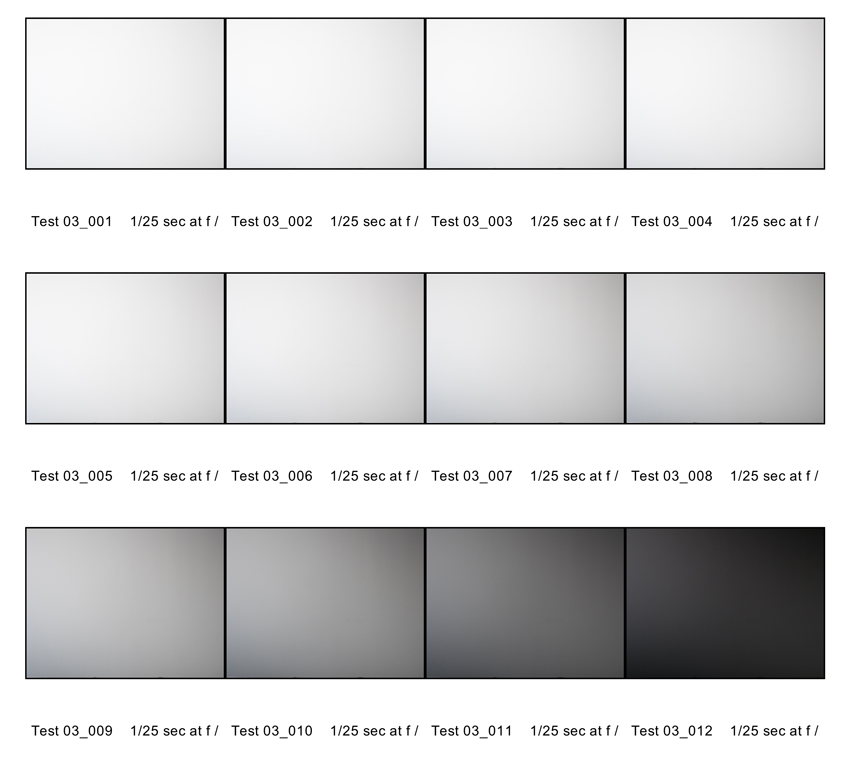
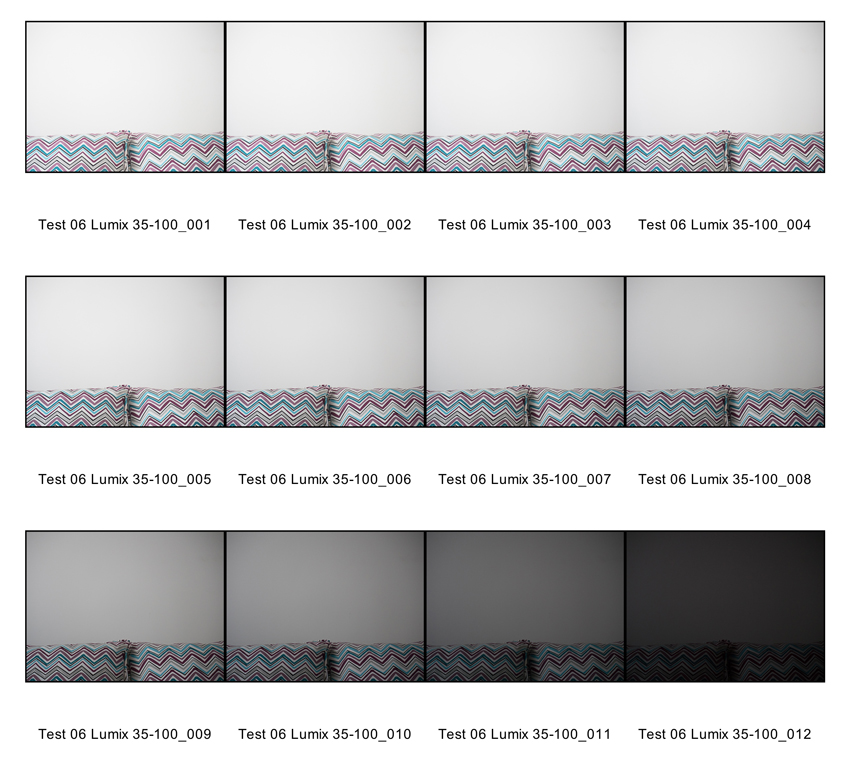
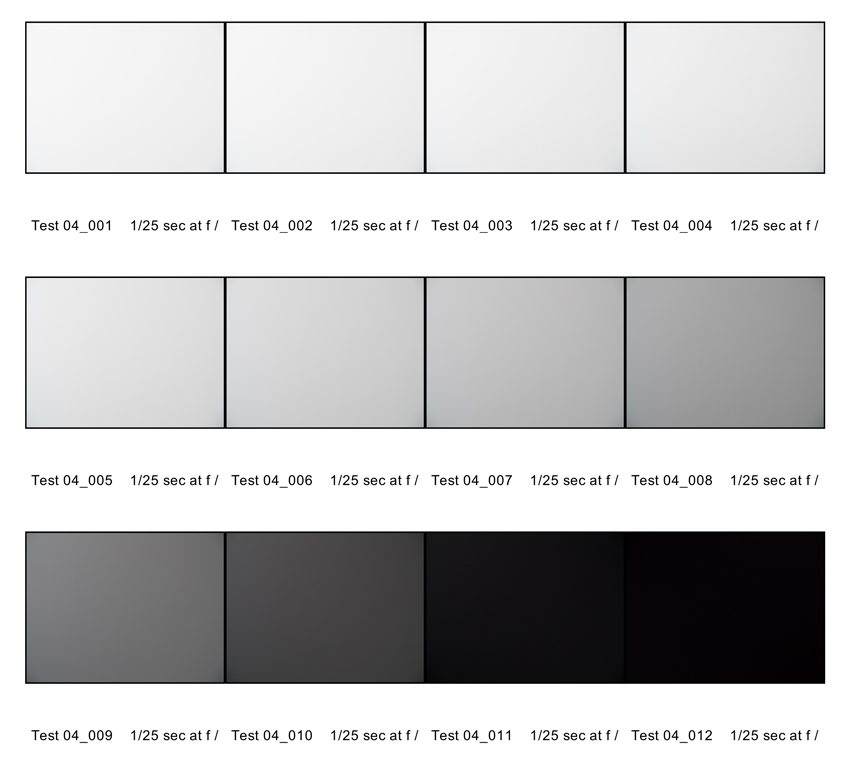
All the tests where performed with a Panasonic GH4 on a tripod, pointed to the same wall, with diffused available light, within a 30-minute period. So, even though that light might change a bit I don’t think it is a significant factor to see the drastic differences below. Here are the most meaningful tests:
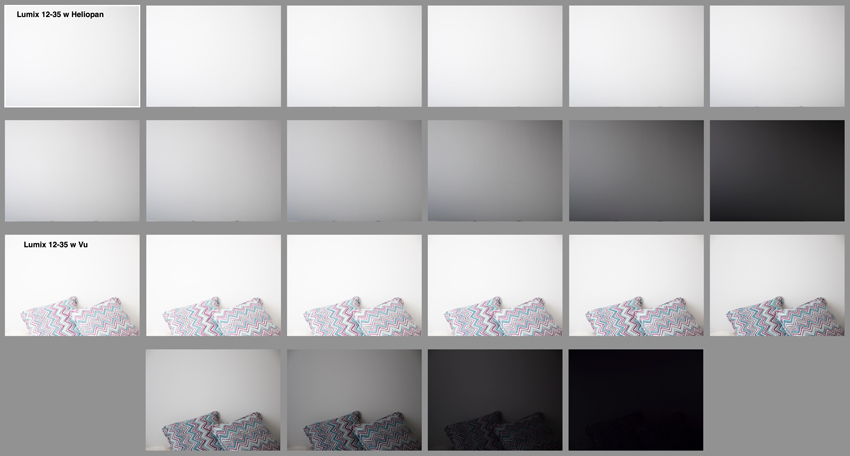
Lumix 12-35mm f2.8 at 35mm (70mm equivalent) with Heliopan Variable ND
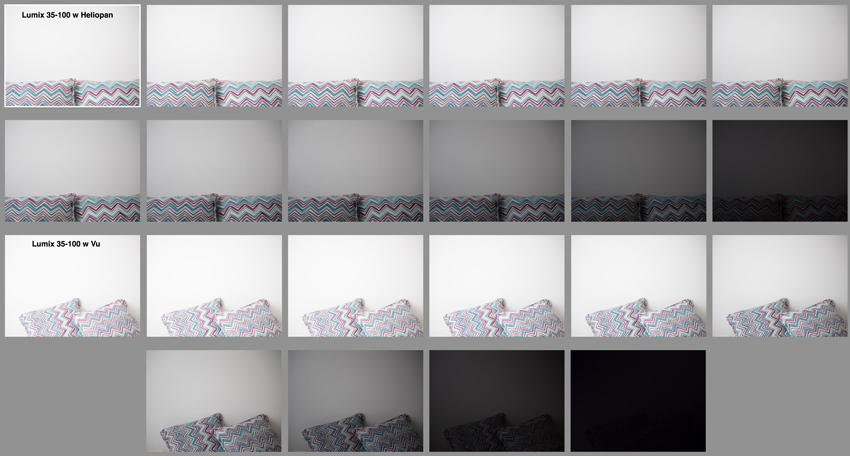
Lumix 35-100mm f2.8 at 35mm (70mm equivalent) with Heliopan Variable ND
Canon 70-200mm f2.8 at 70mm with Genus Variable ND
Wow! What a difference between the Genus and the Heliopan! The first one is not only $225 cheaper, but the vignetting wasn’t as noticeable.
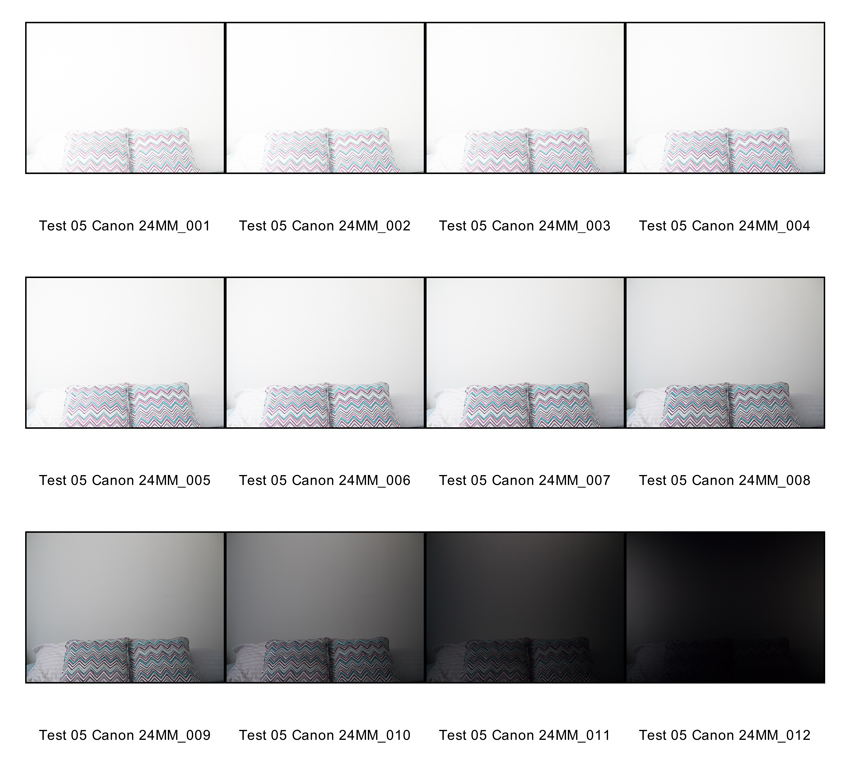
At that point I started wondering how much of that nasty vignetting was created by the lens and NOT by the ND filter. So I brought the widest Canon lens I had available a 24mm f1.4, and did another test.
Canon 24mm f1.4 at f2.8 with Genus Variable ND.
I was at a loss. There was some vignetting after drecreasing 4 stops, but never nearly as bad a the Heliopan on the Lumix lenses.
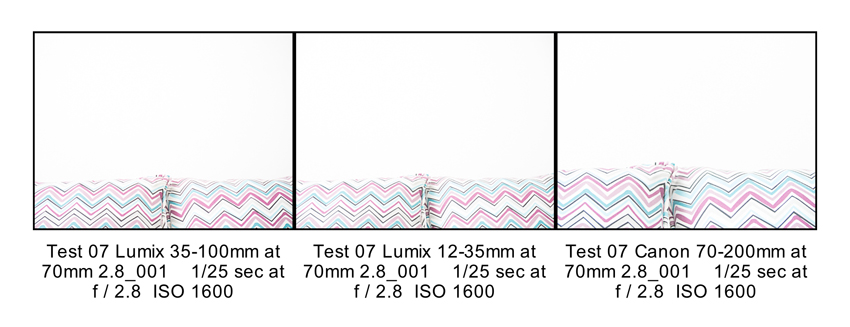
So the next step was to compare the Lumix 12-35mm f2.8 at 35mm (70mm equivalent), the Lumix 35-100mm f2.8 at 35mm (70mm equivalent), and the Canon 70-200mm f2.8 at 70mm WITHOUT any filters!
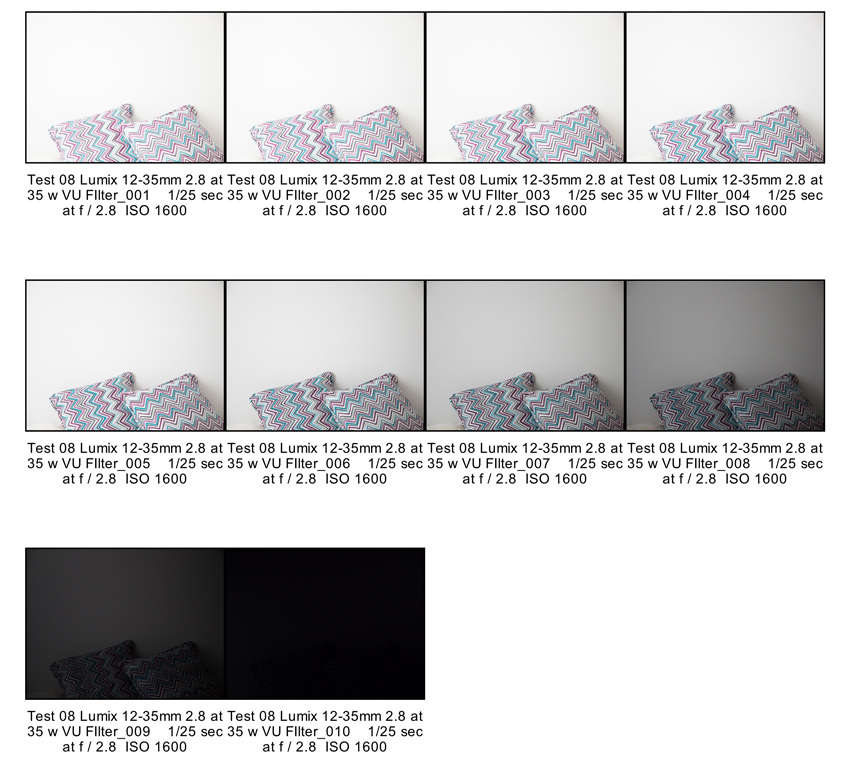
I didn’t see any issues or major differences between the Panasonic and Canon lenses, so I concluded that the Heliopan Variable ND filter was causing the vignetting issue. I returned the Heliopan and got a Vu Variable ND filter for my Panasonic lenses. Here are the results:
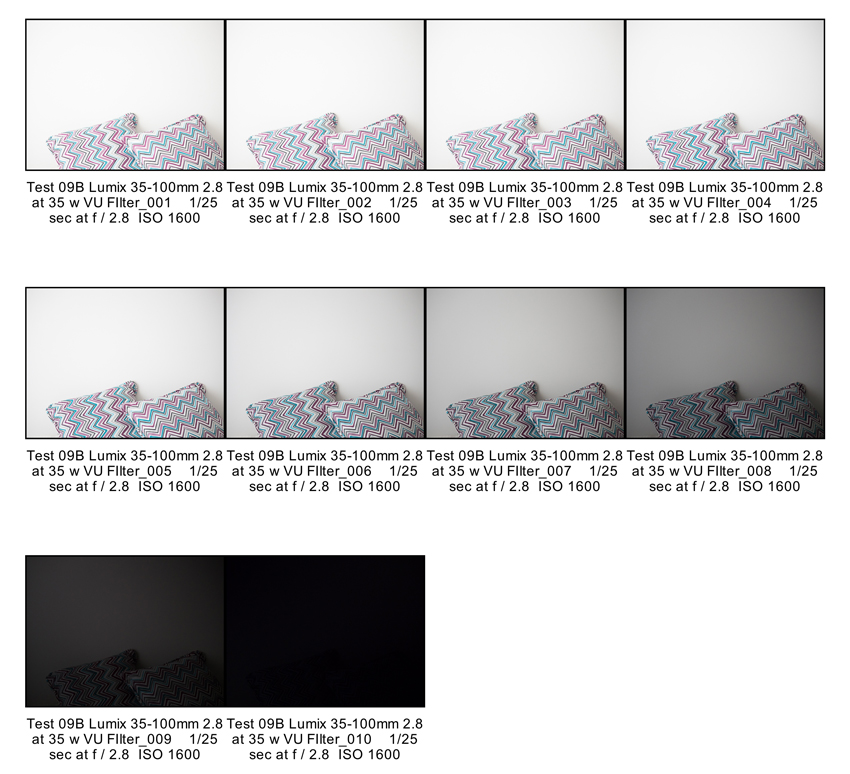
Lumix 12-35mm f2.8 at 35mm (70mm equivalent) with Vu Variable ND
Lumix 35-100mm f2.8 at 35mm (70mm equivalent) with Vu Variable ND
Lumix 12-35mm f2.8 Lens – Heliopan vs. Vu side-by-side
Lumix 35-100mm f2.8 Lens – Heliopan vs. Vu side-by-side
• Conclusions
None of this filter + lens combination is perfect. All the filters create some sort of vignette. After putting all the tests side by side, I picked the ones with a) the LEAST amount of vignetting and b) the smoothest transition between one stop and the next one. Based on my won non-scientific experiments, with MY lenses, camera, computer, software, firmware, etc and only with one (somewhat) constant lighting scenario, the $102 Genus and the $125 Vu seem far superior than the $350 Heliopan.
Are you planning to buy one of these filters? Support upcoming tests and articles by using these links: Genus, Heliopan, Vu.
Did you find this article helpful? Please check out these online courses where I cover other essential filmmaking tools and techniques. Enjoy!
Video
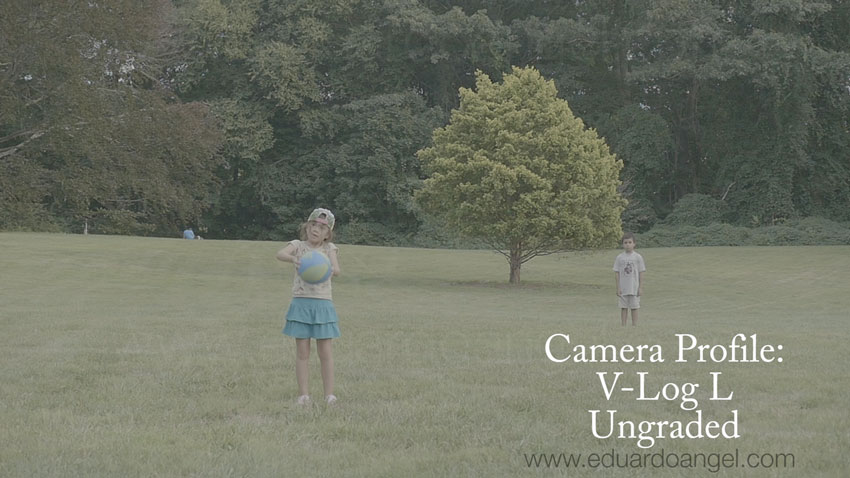
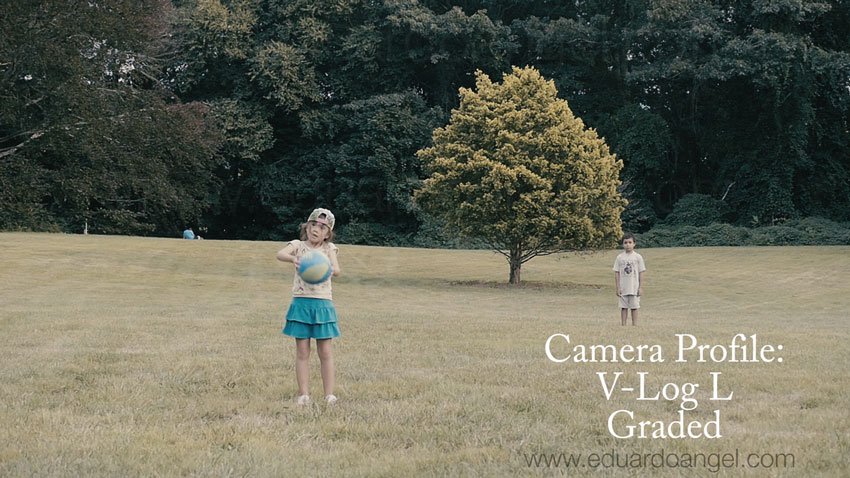
The Panasonic GH4 V-Log L. Graded and Ungraded Samples.
A few tests comparing the Panasonic GH4’s default camera profiles with the brand new V-Log L.
The (very quick) grading was done on Premiere Pro CC 2015 and the super awesome Lumetri Color Engine.

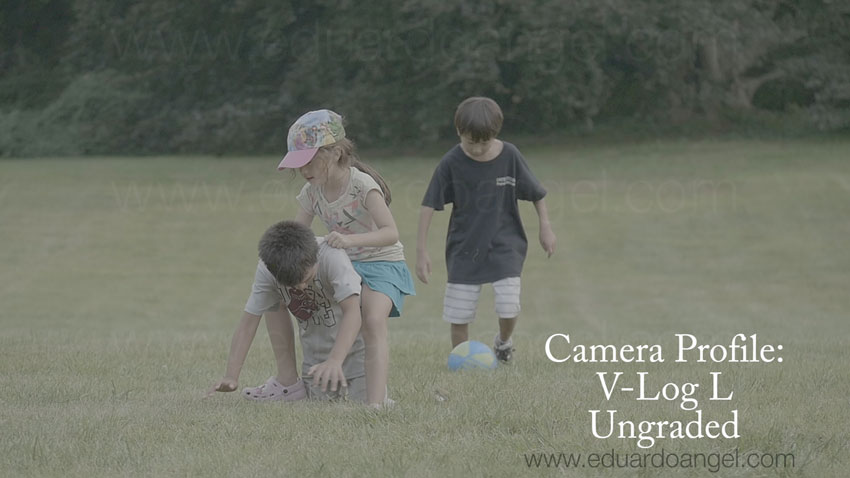
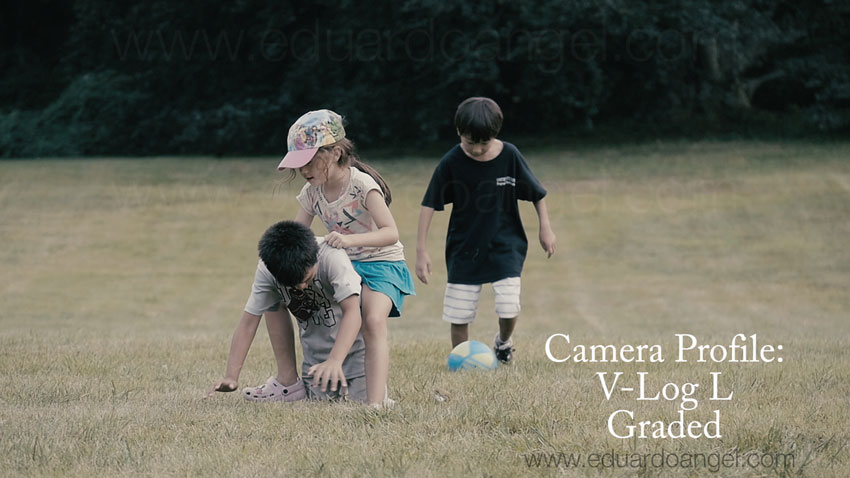
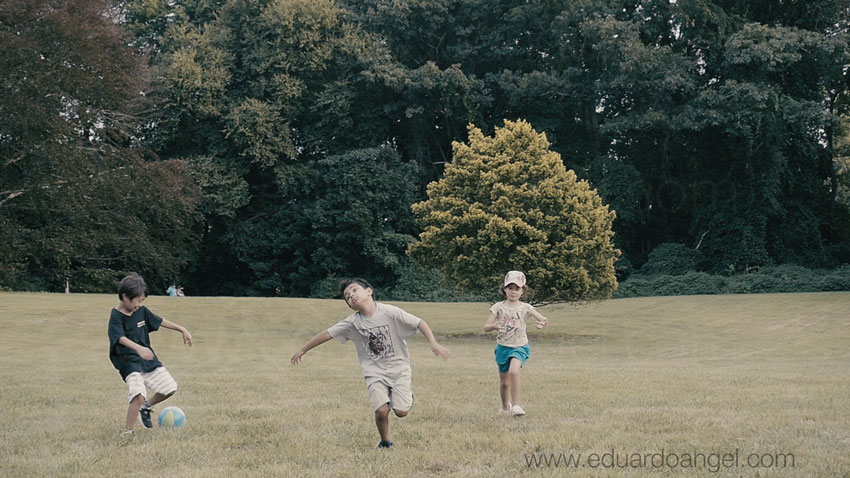
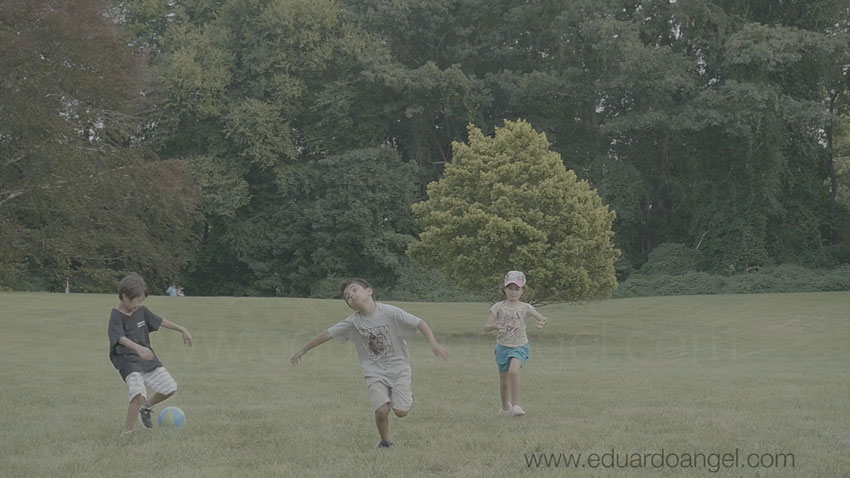
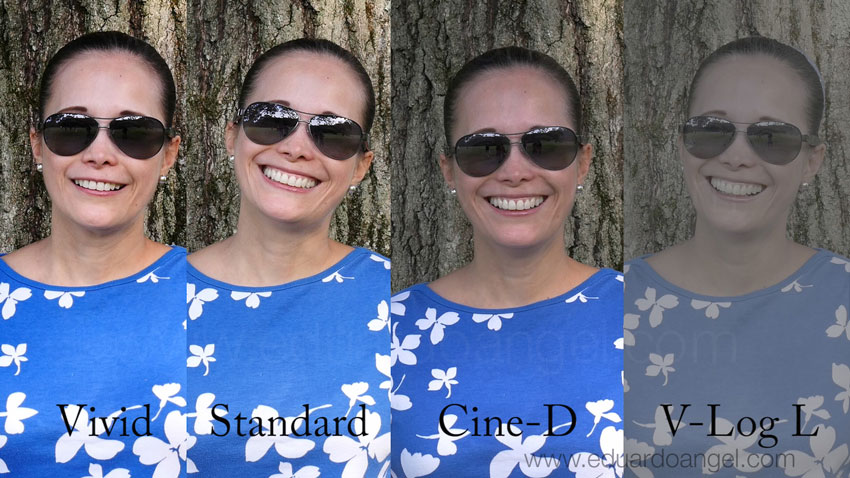
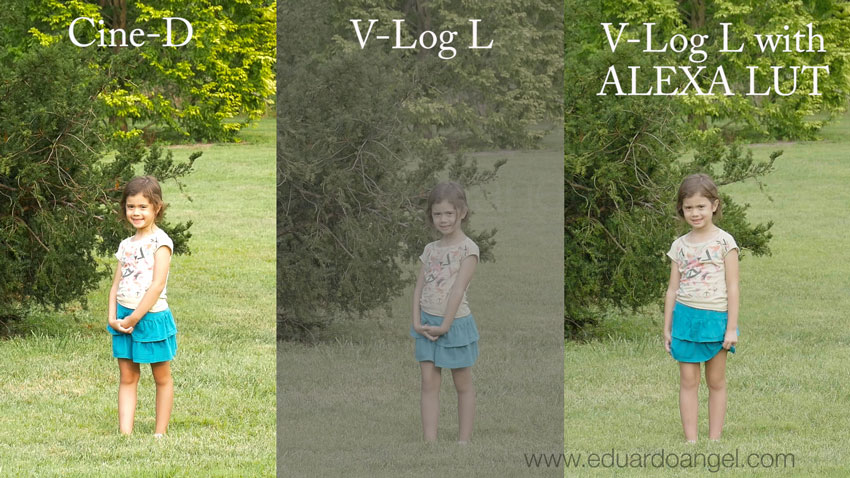
Why is V-Log important? Why should we care about camera profiles and external recorders? Read this and watch this to learn more.
Installing V-Log L on your GH4 is far from intuitive and user friendly, but we’ve got you covered. A complete step-by-step tutorial is available for free right here.
The GH4 firmware update (version 2.3) including V-Log L will cost $100, and it will be available in 2 weeks. You can pre-order it now right here.
Related Posts
- Hybrid Assignments Equipment List: The Essential 41 Items.
- The eternal quest for “the best” digital camera.
- Shooting Anamorphic and V-Log with Panasonic’s GH4. Valuable Lessons.
- 7 things we discovered after shooting 4K with the GH4. You won’t like #4.
- The Pros and Cons of external recorders: Atomos Shogun.
- 4K video under $2K. Meet the Panasonic Lumix GH4.
- I Just Got a Panasonic GH4 – Now What? Hard Drives.
- I Just Got a Panasonic GH4 – Now What? Batteries.
- I Just Got a Panasonic GH4 – Now What? Memory Cards.
Video
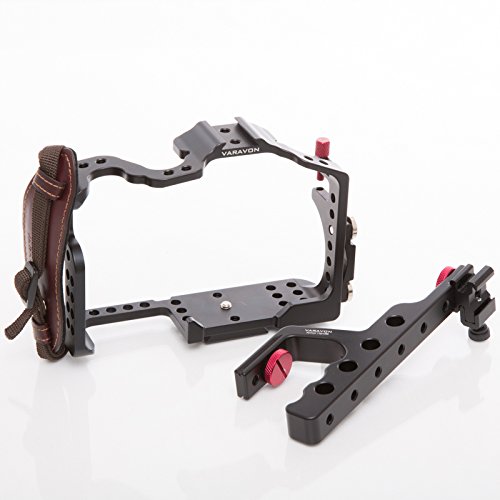
Hands-on Review: Varavon’s Armor II Cages.
There are (too) many video accessories and gadgets, so it’s becoming increasingly hard to determine where to spend our hard earned money, and what will truly make a significant impact on our video productions.
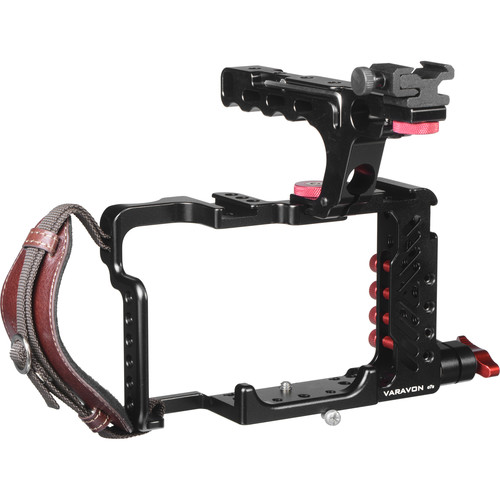
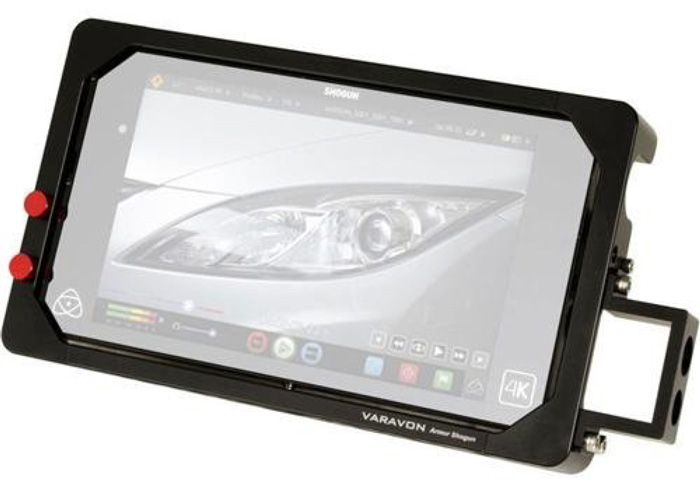
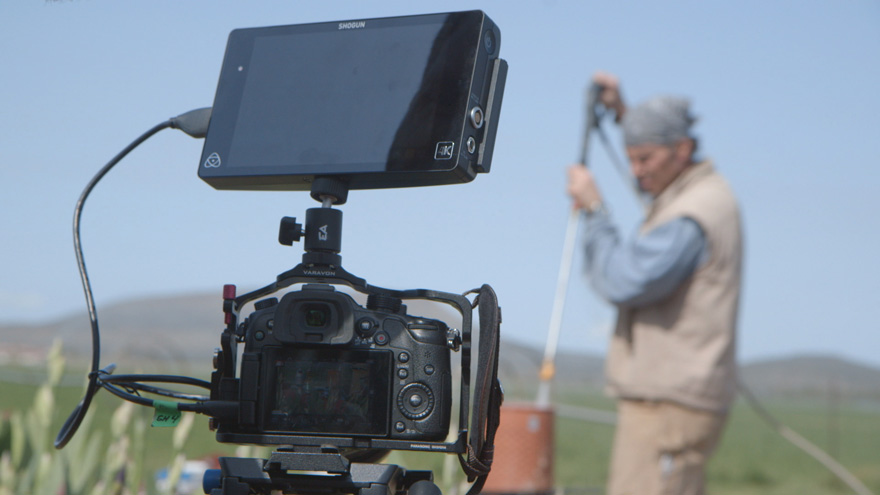
For the past few months we’ve been testing a number of new cameras and accessories. Today I’d like to highlight a company with two accessories in particular: Varavon’s Armor II Cage for the Panasonic GH4 and Varavon’s Armor for the Atomos Shogun.
You might have read my recent article titled “The eternal quest for ‘the best’ digital camera” where I posed the seemingly unanswerable question “what’s the best cinema camera (for us) right now?” Here’s the article, in case you missed it.
The article’s conclusions were somewhat vague, simply because even with all the readers’ feedback we received via Twitter (@EA_Photo), we couldn’t come up with a hard and fast answer. Most of our assignments require capturing video, stills, and sound on location, usually run and gun style, with a fast and small crew traveling as light as possible. This might or might not match your production needs, so it’s important to keep in mind that we are coming from that angle.
It is important to clarify that I am NOT being paid by anyone to write these reviews. I just want to share with others what’s working and what isn’t working for us, and hopefully save you some time. God knows I could use a few extra hours every day.
Armor II Cage – My Impressions
Varavon reminds me of the early days of Edelkrone; small, humble, and fast. Both companies share a serious commitment to true innovation through useful, high-quality products.
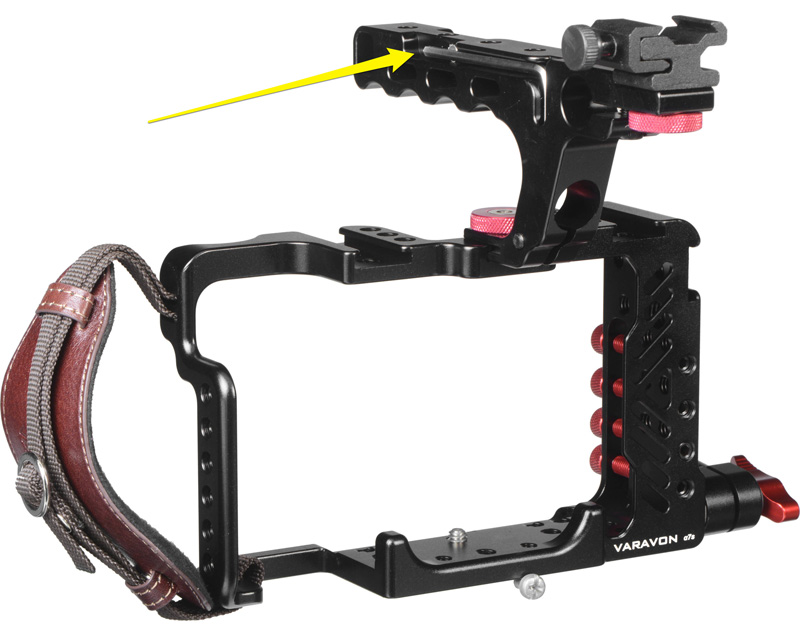
Small details matter. A lot. For example, the Armor II Cage includes a magnetic Allen key, cleverly “hidden” on the top handle’s side. It’s one of those things that makes you wonder why no one else has thought of this before! Every product that requires an Allen key (from sliders to tripods to stabilizers, all should come up with a similar solution.
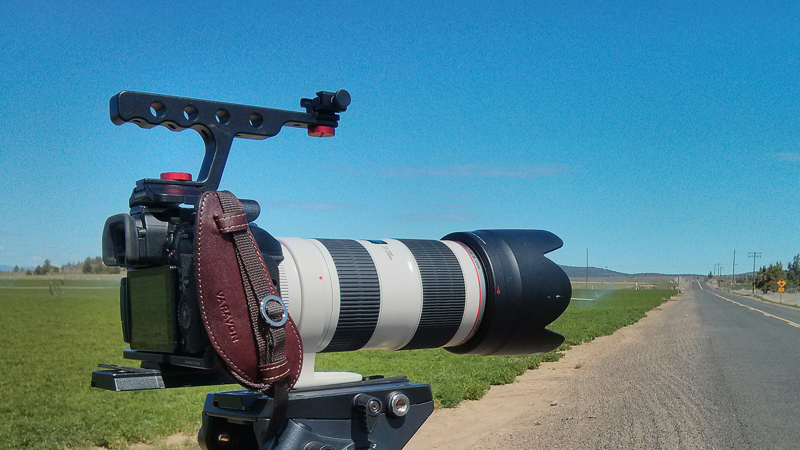
Varavon has clearly spent some serious time thinking and testing this product. With the GH4 camera mounted on the cage, one can still replace the battery and the memory card. The cage also works perfectly with a Metabones Speedbooster allowing us to use our preexisting Canon and Sigma lenses.
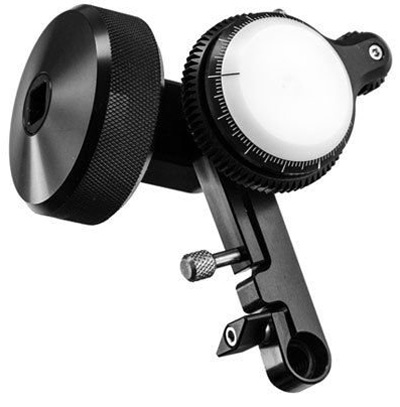
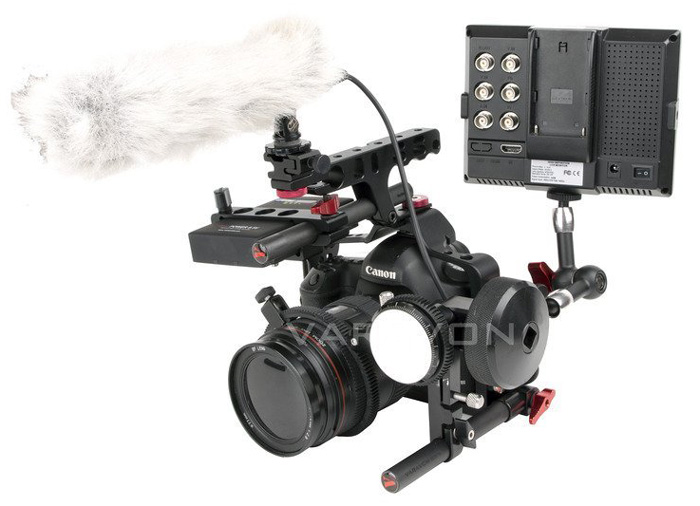
Personally, if you only need ONE reason to get this cage, it’s the top handle, as the GH4 (or 5D Mark II or a7S II) body instantly shapes into a cinema camera. In addition to the obvious ergonomical advantages (especially when doing low-angle shots or quickly mounting/removing the camera to/from a tripod) the cage provides several mounting points, a cold shoe mount and one 15 mm rod clamp, allowing us more options to attach a wide variety of accessories like focus rings, microphones, electronic viewfinders, external monitors, etc.
Around the cage there are something like 40 ¼ threaded mounting points, but in real life one can use about five or six without getting in the way of standard camera operations. The previous version of this cage (which I also own) didn’t have a “front and back rod adapter” which can be used as an additional contact point or to mount additional accessories like a follow focus.
Apparently there’s a version of the Armor II Cage with an ENG-style rotating handgrip, but mine doesn’t move. The handgrip (with beautiful leather) is fixed, yet very comfortable on most shooting situations.
If you buy the camera rig, I’d recommend adding a few 1/4″ Male to 1/4″ Male Threaded Screw adapters so you can easily attach accessories like an audio recorder or a small LED light (which, by the way, work GREAT to add some catchlight to your subjects when shooting exteriors on cloudy days). It would be even better if Varavon starts including a few of them in their kit (wink wink).
Armor for the Atomos Shogun – My Impressions
Now, let’s talk about the Armor for the Atomos Shogun. I wrote an extensive post about the Shogun, so I won’t go into a huge amount of detail here, but suffice it to say that the Shogun is a godsend.
In a nutshell, the Shogun provides an exquisite 1920 x 1080 ultra sharp (and fairly accurate) image, with many additional features (like LUTS) to record HD or 4K in ProRes with clean sound already synced into fast and reliable Solid State Drives. The not so great part is that the Shogun is VERY fragile. We take great care of our gear, and our monitor cracked on our second or third assignment.
So for additional protection, the Armor Cage is great, but it seems designed for studio situations, when heavy duty camera support is readily available as the cage alone weights almost a pound.
For the most part, Varavon’s design does not interfere with the function of the Shogun, but the Armor Cage doesn’t accommodate the much needed sunhood (which should be included on the Shogun’s kit but it is not). Not being able to attach a much-needed accessory seems like an important oversight.
The selling point for this accessory is, in my humble opinion, the many additional mounting points, the clever sliding SSD Safety Latch, an audio clamp to protect the XLR cable, and (maybe) the HDMI cable locking screws.
In our case, the optional L brackets (purchased separately) have not added significant versatility, so I probably would recommend skipping them.
Conclusion
The build quality on all Varavon products is outstanding. I like the Shogun Cage and if we are shooting for an extended period of time indoors I’d bring it along.
I love the Armor II Camera Cage for the GH4. It has changed the game for us, and as long I use the GH4 I’ll keep enjoying the added versatility and improved form factor the cage offers. I can definitely recommend this accessory for anyone who needs more versatility but is hesitant to add unnecessary weight to his/her camera package. To see the complete list of gear we bring on location, click HERE.
If you are interested in learning more about which accessories are important, why and how to use them, consider watching these courses on Lynda.com
- Video for Photographers 01: Filmmaking Essentials
- Video for Photographers 02: Filmmaking on Location
Did I miss anything? Feel free to continue the conversation here.
Video
In the Mood for Love Redux.
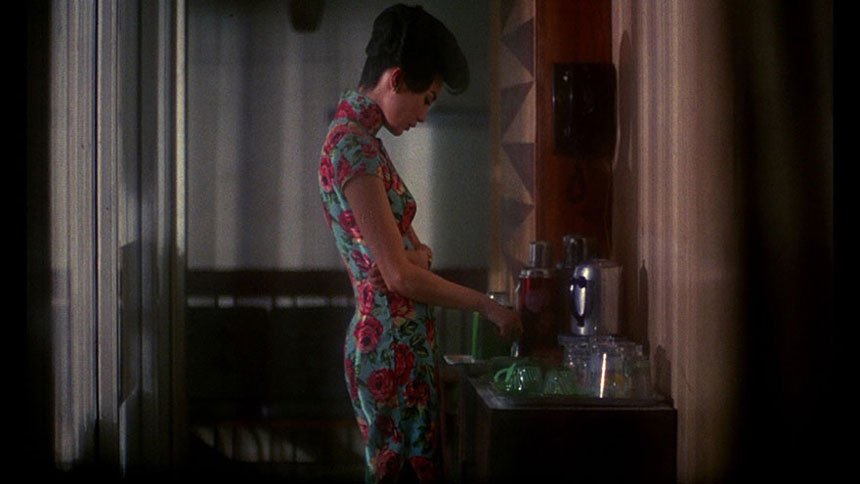
I love Asian cinema and I feel a strong and special attraction and respect for Wong Kar-Wai’s work, especially his earlier collaborations with Chris Doyle. Wong Kar-Wai is known for his “romantic and stylish films that explore—in saturated, cinematic scenes—themes of love, longing, and the burden of memory.” In terms of photographing urban landscapes, especially at night, I can’t think of a better cinematographer than Doyle.
For the past couple of months I’ve been revisiting his movies, his video interviews, and reading as much as possible about his production methods and unconventional approaches to filmmaking.
Check out the following books to learn more about this amazing director:
“The Sensuous Cinema of Wong Kar-Wai” by Gary Bettinson
“Wong Kar-Wai: Auteur of Time” by Stephen Teo
“Wong Kar-Wai” by Peter Brunette
The long-awaited and complete Kar-Wai retrospective with more than 250 photographs and film stills will be released in September but it can be can pre-ordered now.
In order to better understand his compositional and directorial choices I imported “In the Mood for Love” into Premiere Pro and selected my favorite scenes, including those critical to the story, those that are brilliantly original, and scenes that are flawlessly executed or contain a number of technical achievements (like the impeccable use of dolly moves). I then re-cut all my favorite scenes from the original 94 minutes into a single 18-minute clip (below), always trying to keep the integrity of the story. My goal here is to help someone who hasn’t seen the movie grasp its (very convoluted) story in one 18-minute clip.
If you haven’t see the movie, I highly recommend it, and I’d love to hear from you once you see it.
If you have seen the movie, did I leave any key cinematic moments out?
Video
The eternal quest for “the best” digital camera.
I often receive emails asking for advice about “the best lens” or “the best camera” or even “the best laptop.” I believe it is simply impossible to determine a “best” of anything as there are too many random factors such as experience, budget, expected lifetime of the product, intended use, availability of accessories (like lenses or batteries), and even tech support in certain areas. That’s not even considering more subjective factors like personal preference, sense of loyalty to certain brands (or dislike for others), and even the size or weight of such tools. Interestingly, we are currently experiencing one of those “what’s the best” dilemmas ourselves, and not a minor one by any means; we are reconsidering our standard camera package for 2015–16.
Renting vs. Owning:
For many reasons, I believe renting is one of the best options for most people. When all you have is a hammer, the solution to every problem requires a hammer. That’s a very limiting factor to your creativity and a disservice to clients. Sometimes you can get the job done with a Swiss Army Knife like MacGyver, sometimes you need a nice toolbox, and sometimes the best approach is to have a professional plumber do the job.
Another huge reason to rent is to keep overhead as low as possible. Unless you are shooting several times a week with the same system, having something that is guaranteed to quickly decrease in value simply collecting dust in a drawer isn’t the best financial move. Unfortunately, renting is not an easy or affordable option in many small cities.
Lenses:
In terms of lenses I own a nice selection (from 8mm all the way to 200mm) of mostly Canon L glass, some Sigma ART lenses (with Canon mounts), as well as a couple of Panasonic Lumix lenses. I also have one Metabones Speedbooster adapter (Canon EOS to MFT).
Accessories:
We own a set of LED lights and basic accessories that I use frequently and will last a long time like monopods, tripods and a few camera movement tools. I also own a complete audio kit simply because we use it quite often. Audio tools tend to be fragile, and we have a very specific preference for brands and settings. Ultimately, because sound is such an important element of any video project, completely trusting it gives me an additional peace of mind. But I digress. The point of this article is not audio equipment, but cameras.
Cameras:
We own a Panasonic Lumix GH4 bodies and still have a couple of GH3 bodies. They have served me extremely well on hybrid assignments. I am very happy with the quality of the footage and always having the option to shoot 4K, HD, built-in slow-motion, and time lapses with the same camera and media. For video-only productions we usually rent Canon C100 Mark II or C300 Mark II bodies, which I also like very much.
The Challenge:
Several upcoming projects will require a more “complete” camera package, and we seem to have enough projects in the pipeline that it might make sense to own instead of rent, not only financially, but to save time picking up/returning and to be certain that the tool we plan on having in pre-production is the same tool we use on location weeks or months later. So, what’s the best cinema camera (for us) right now?
Technically speaking, we will need a main camera (Cam A) that ideally shoots 4K and has all the standard bells and whistles like XLR ports, HDMI, a good viewfinder, variable frame rates, peaking, ND filters, etc. Great low-light performance is key. For several projects we’ll need to shoot high-quality behind the scenes footage, so we will need a second camera (Cam B) that is either the same or very close to the quality of Cam A.
To make the riddle even more interesting, some of these projects will be “hybrid” projects that require on-location, mostly unplanned, and available light shooting with a very small crew (two or three people max). So the gear package needs to deliver great stills, great footage, and be easily operated by one person, which means light and compact.
Possible Solutions:
I will only discuss the main components of the package, so additional batteries, cables, memory cards won’t be included in the total price.
1. Canon
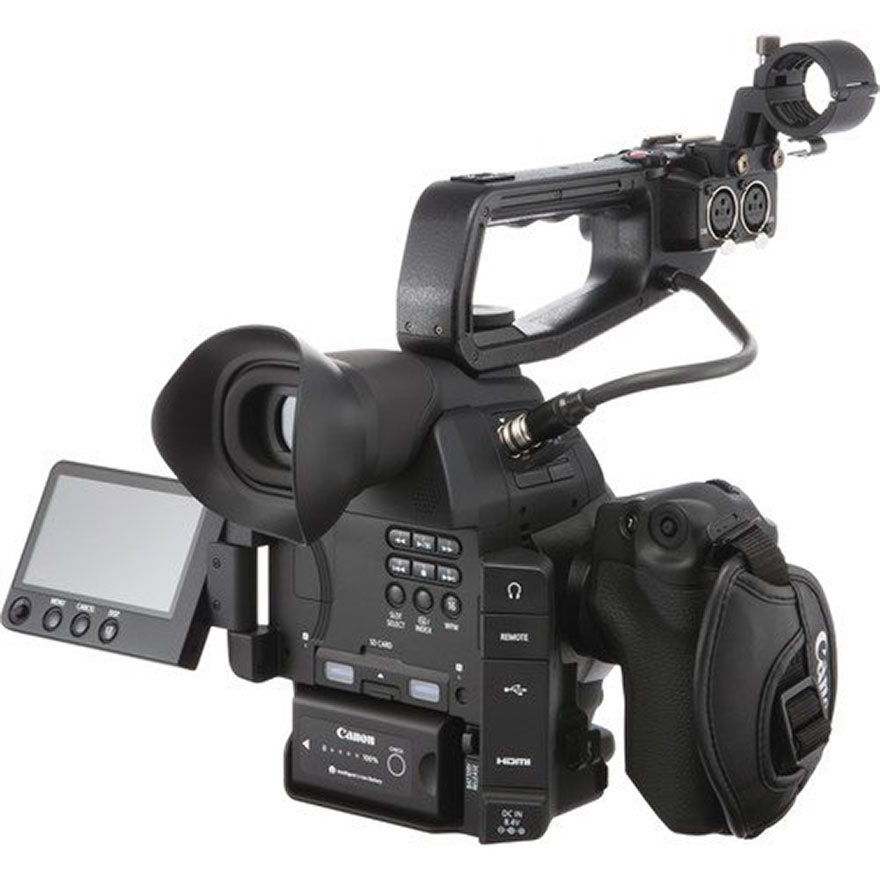
The first and obvious move would be to buy a couple of Canon C100 Mark II bodies. We already know and like the system, and own the lenses, so there’s no need for adapters. Unfortunately the C100 Mark II does not offer 4K, it is good but not great in low-light performance, it is small but not super light or compact, and it does not shoot stills, so I’ll need to get a Canon EOS 5D Mark III or at the very least a Canon EOS 70D. I’ll get the cinema features I need on only one of the systems.
1x Canon C100 Mark II = $5,500 (Amazon • Adorama)
1x Canon EOS 70D = $900 (Amazon • Adorama)
Total = $6,400
2. Sony
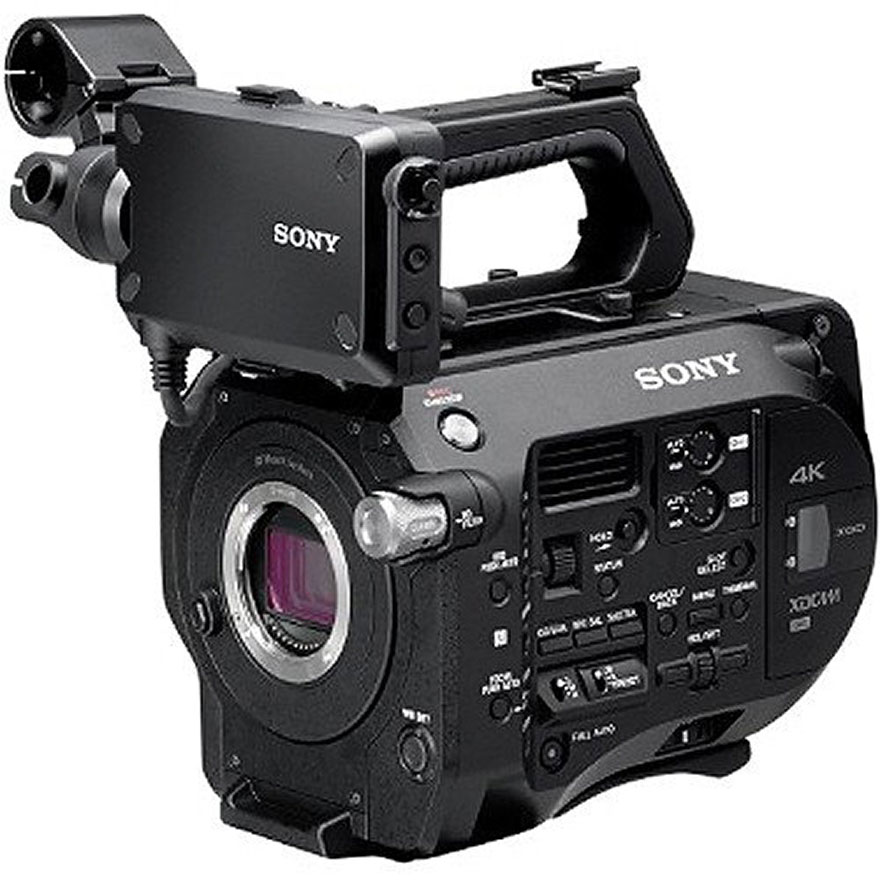
The second option would be to get a Sony FS7 AND a Sony a7S as a B Cam (and also for stills and BTS). The first one seems to be the new cool kid on the block, with raving fans and over the top reviews. It seems portable enough for a cinema camera and matches most of our technical requirements (I still need to test the low-light performance). Its little sister, the a7S shares the same outstanding reviews, it is clearly number one in low-light performance and it can even capture 4K to an external recorder. The catch, and this is a big one, is the cost. The FS7 goes for $8,000 and the a7S goes for $2,500. In order to use my existing lenses I’ll need two Metabones Speedbooster adapters (Canon EOS to NEX) at $650 each, but I will not have AF capabilities when shooting stills, which is a major issue. Also, in order to fully use the a7S as the B Camera we probably would need an Atomos Shogun adding a lot to the budget.
1x Sony FS7 $8,000 (Amazon • Adorama)
1x Sony a7S $2,500 (Amazon • Adorama)
2x Metabones adapter (Canon EOS to NEX) $800 (Amazon • Adorama)
1x Atomos Shogun $2,000 (Amazon • Adorama)
Total = 13,300
3. Panasonic
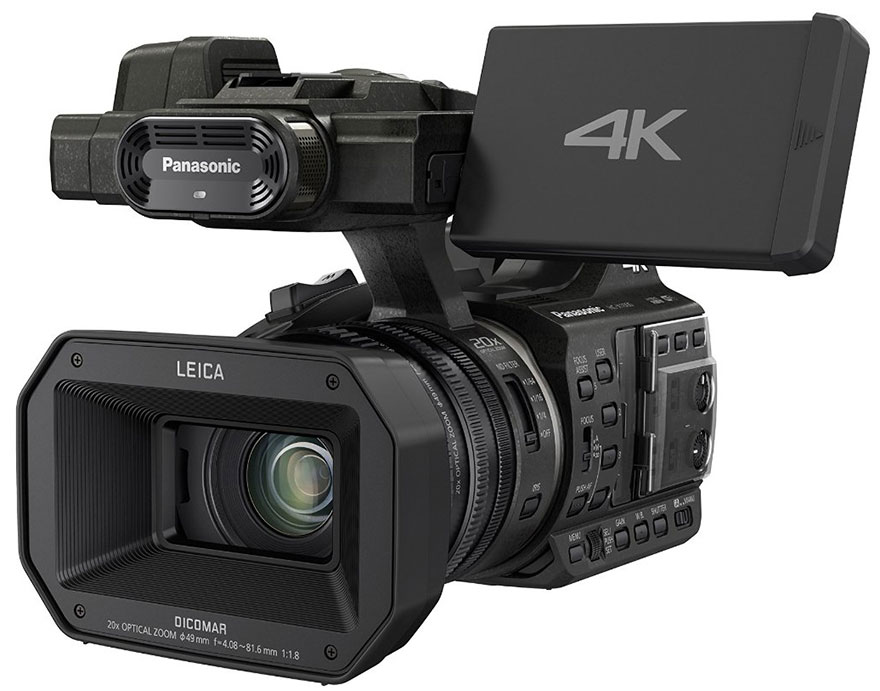
A third, and more affordable option would be to get a second Panasonic Lumix GH4 body and keep them as A Cam and B Cam (4K, HD, and stills) and something like the Panasonic HC-X1000 as a C Cam for BTS. I am still missing the “standard bells and whistles” I mentioned above, and I still have to test the X1000’s performance under low-light. Getting the YAGH (“brick”) wouldn’t make much sense in terms of money, size, weight, and additional power sources.
1x Panasonic Lumix GH4 $1,500 (Amazon • Adorama)
1x Metabones Speedbooster adapter (Canon EOS to MFT) $600 (Adorama)
1x Panasonic HC-X1000 Camcorder $3,200 (Amazon • Adorama)
Total: $5,300
4. Blackmagic
We briefly considered Blackmagic systems but found too many cons to even add them here. Another topic for another day.
Conclusions:
Honestly, there aren’t any. Not yet, anyway. We are still trying to figure out what to do. The Panasonic Package (#3) is the cheapest and easiest as we would have a very small learning curve (with the HC-X-1000) but low-light performance remains to be seen (and it is good but not great on the GH4). The price is great but we would only have the cinema features we need in one of the three cameras.
The Canon Package (#1) is right in the middle, but we would lack 4K, slow motion, a codec over 50mb/s, and only one of the two cameras offers the bells and whistles we are looking for.
Sony (#2) seems to offer the best solution, but costs twice as much as Option #1 and $8,000 more than Option #3. We would lack autofocus for stills, only one camera will have the cinema features, and the FS7 could require a significant learning curve.
An alternative, suggested by an experienced filmmaker, would be to keep using our GH3 with the Panasonic lenses as our stills camera ($0), use the GH4 with our Metabones and Canon and Sigma glass as Camera B, and simply buy one Sony FS7 ($8,000) and a second Metabones (Canon EOS to NEX) adapter $400 for a total investment of $8,400. Altogether we would get AF for stills, 4K, slow-mo, no need for new lenses, but only OK low-light performance, and only ONE system with XLR ports, ND filters, etc. I am also seriously concerned with the additional time (and expense) in post to make everything look somewhat close.
Money and lenses are obviously very important considerations, but there are many other things that have to be factored into camera choices like post workflows (software and hardware), internal codecs, etc. Color science is something else we tend to overlook, and we shouldn’t, as certain camera choices will multiply the amount of time you need to spend in post to get them to look like what you’re used to.
So, clearly, there isn’t a “perfect” camera that will meet all our requirements. So the best approach is to consider what we have (budget, lenses, software, hardware, accessories, etc.) what we need, and what we are willing to sacrifice. So, what is “the best” camera package for us, giving our existing gear, ideal requirements and upcoming needs? Now I need YOUR help to figure this one out.
UPDATE 01: Since I wrote the first draft for this article I’ve been hearing highly reliable complains about the FS7 working with lens adapters and Canon lenses. That pretty much kills the Sony package option for us.
UPDATE 02: There are strong rumors that Panasonic will be announcing an updated version of the AG-AF100 at NAB, which apparently would include 4K. That could be a great solution for our full blown cinema camera.
UPDATE 03: Another strong rumor is that Canon will replace/update the 3-year old 5D Mark III with a 4K version. Kinda cool, but it still doesn’t solve our “bells and whistles” camera dilemma.
UPDATE 04: For the past 3-4 weeks I’ve been using the Atomos Shogun (Amazon • Adorama) and I must admit I’m VERY impressed. This gadget not only provides an exquisite 1920 x 1080 ultra sharp (and fairly accurate) image, but it’s main purpose is being a 4K (or HD) recorder via Solid State Drives. The best price/quality I’ve found are these 240GB Sandisk for $146 with a 10-YEAR warranty. Not bad at all.
Something I didn’t consider when getting the Shogun is that now I have XLR options, making the GH4 a much more powerful beast. The provided batteries only last about 30 minutes of recording time. I got this off-brand ultra cheap ($36) set of 2 batteries with chargers and so far they have performed perfectly. To keep in perspective, a single Sony battery costs $199….
UPDATE 05: The Varavon cage for the GH4/GH3 works perfectly with a Metabones Speedbooster. This set up and the Atomos Shogun are making me rethink my camera strategy. Now I can have a very comfortable grip, add a shotgun for run and gun or a monitor/recorder with XLR mics on sticks. Hmmmm this is getting REALLY interesting!
More to come.
Video

On Film Directors and Styles.
According to Woody Allen there are two kinds of film directors: “the ones who have it, and the ones who don’t.”
It is well-known that there are two other kinds of movie directors: the ones who write their own material, like Tarantino, and the ones who adapt, like Alfred Hitchcock or Steven Spielberg. The Coen brothers are crystal clear on this: “We are willing to write for other people, but we would not direct a script that has been written by somebody else.” To Scorsese “the script is the most important thing, but it is not everything. What matters is the visual interpretation of what you have on paper.”
John Boorman believes that “directing is really about writing, and all serious directors write.” But there are extremely serious directors who do not work with scripts, like Wong Kar-Wai. “I write as a director, not as a writer, so I write with images. I start with a lot of ideas but the story is never clear. I know what I don’t want, but I don’t know what I want. The shooting process is the way for me to find all the answers. Sometimes I find them on the set, sometimes during the editing, sometimes three months after the first screening.”
Martin Scorsese has, as usual, something interesting to say about the difference between being a director and a being filmmaker. According to him, a director is “someone who only interprets the script and transforms it from words into images.” A filmmaker is “someone who is able to turn his own or somebody else’s material and still manage to have a personal vision come through.”
From a more technical perspective, we have directors who arrive to the set knowing exactly what they are going to shoot, with how many cameras and which lenses (like the Coen Brothers) and there are others who arrive with simply an idea and then follow their gut instincts (like Woody Allen).
When it comes to directing styles there are also antagonistic approaches. Some directors watch the actors rehearse and then decide with their DP where the camera should be, and how many shots will be needed. Fellini is a prime example of this approach. Scorsese disagrees: “you need to know where you are going and you need to have it on paper.” But some directors do the exact opposite. They walk around the set, decide where the camera goes, where the action will take place, and then ask the actors to accommodate.
Wim Wenders used to spend “every evening painstakingly preparing the next day’s shoot, making detailed drawings mimicking storyboards.” After “Paris, Texas” he has taken the opposite approach, “finding the scene construction in the action, and arriving on set without any preconceived ideas about the shots, and only deciding where to place the camera after working with the actors.”
There are some filmmakers who prefer to edit “in the camera,” such as Clint Eastwood or Hitchcock. Others, such as David Fincher, have no problem shooting 50 takes of a single scene and then figuring it all out later in the editing room over the course of months or even years. Woody Allen’s take on this is “it’s a grave error to start shooting a film with a script that is weak or not ready and think, “I’ll fix it on the set or in the editing room.’”
I could probably add two additional kinds of directors: the ones who make films because they have something to say, and the ones who make movies to find out what they have to say, but that would be a whole different article!
Video
The most popular cameras at Sundance.
Indiewire published recently the list of cameras used by the filmmakers included in the 2015 Sundance Festival.
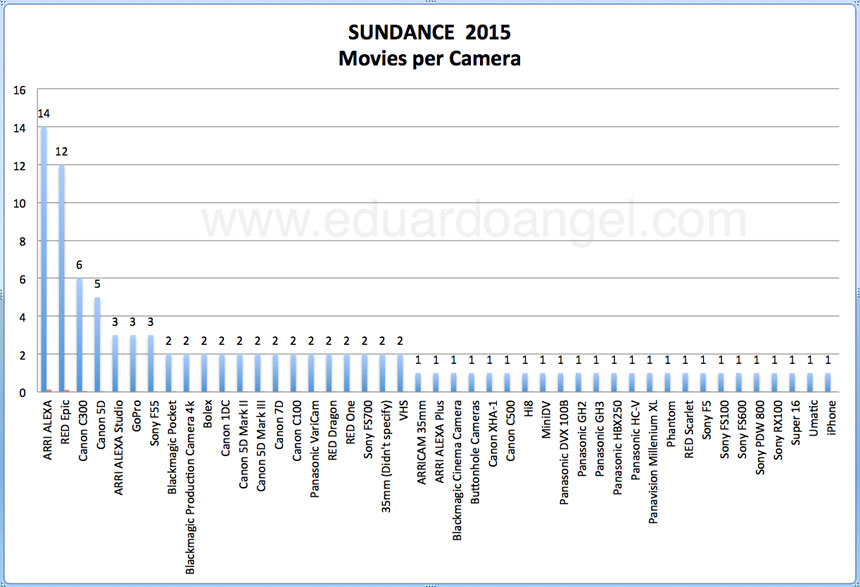
The article matched each camera with the film, which was awesome. But I was also curious to see a chart that showed more precisely how many cameras where used and how often. So, I dropped the list from Indiewire into Excel and created this chart.
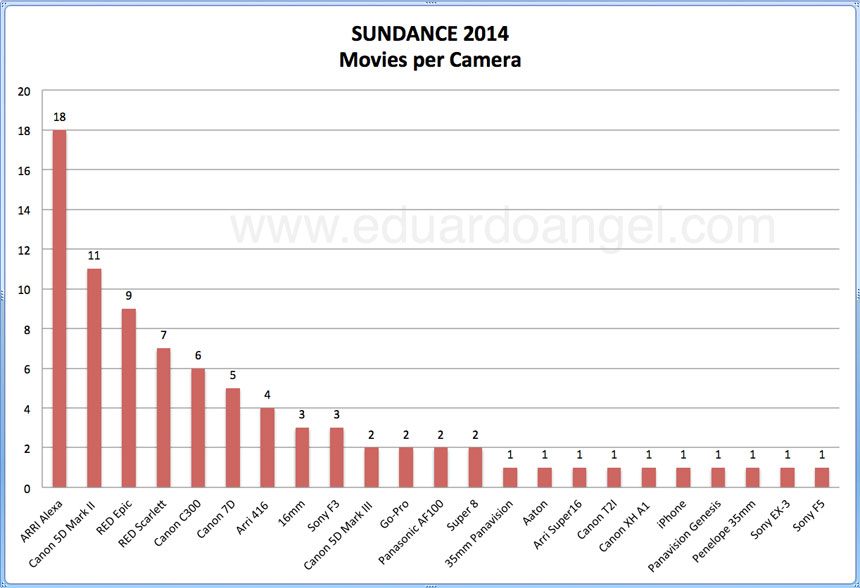
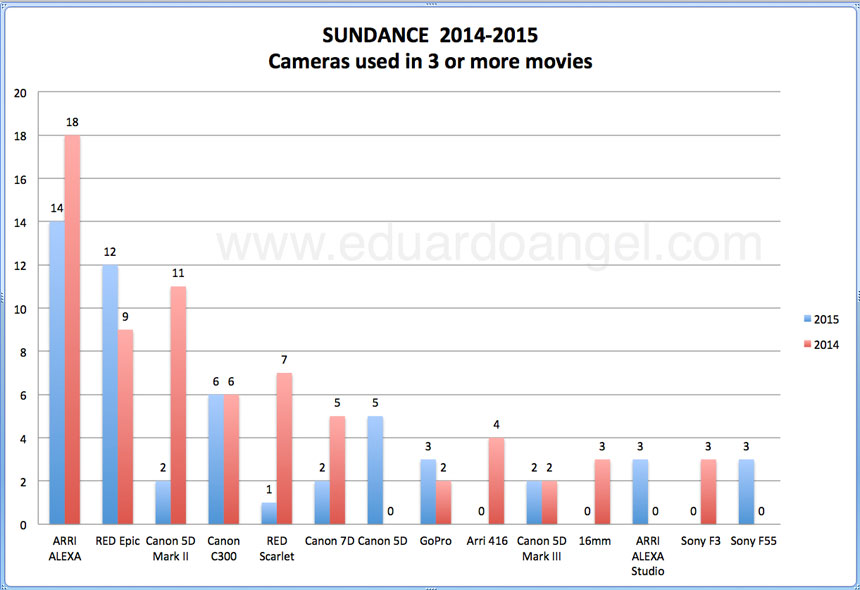
A total of 23 cameras were used in 2014 to shoot 84 movies. In 2015 almost twice the amount of cameras (44) were used to shoot 97 movies. My guess in this discrepancy is that a) Not enough filmmakers in 2014 provided enough or complete information on their cameras or b) the filmmakers in 2015 felt the need to use different cameras on the same movie.
I also wanted to compare the cameras used at the 2014 Festival, so I also created this second chart, again using Indiewire as my sole resource. From the article, it is hard sometimes to tell exactly which camera was used. For example, one of the filmmakers said, “We used Super 35mm with some Red Epic, and a little super 16mm. There is also one Canon 5D shot in the picture.” Which Super 35? And obviously it had to be a Canon 5D Mark II or Mark III as the first version didn’t shoot video. In those cases I only added the Red Epic to the tally.
How can this information become useful? To me it’s simply curiosity, as I believe a great storyteller can be as effective with an iPhone as with any high-end $50K camera. Give ME an Alexa and a million dollars and I still wouldn’t be able to shoot a single frame better than Emmanuel “Chivo” Lubezki or Roger Deakins.
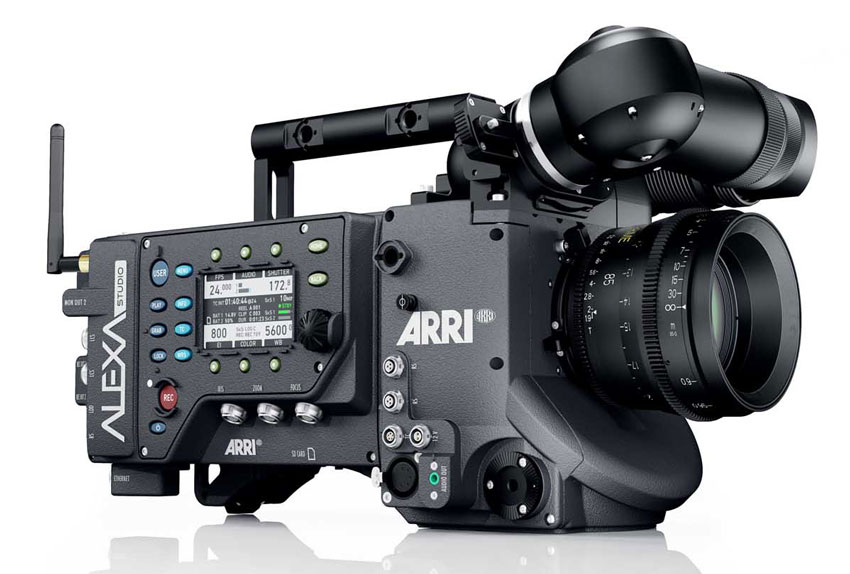
The camera is just a tool, but these charts could be used as a reference by film programs trying to determine where to spend their camera budgets this year. Or perhaps a film student wanting to work as a DIT or as an AC [insert link http://en.wikipedia.org/wiki/Film_crew ] can look at these charts and determine, “well, I better get REALLY comfortable with the Arri Alexa and Red Epic in order to get some high-end jobs.” The charts can also be used by filmmakers planning to upgrade their gear.
What I find most interesting about this data is how consistently some of the cameras are used, such as the Arri Alexa, and how one of my go-to cameras, the Canon EOS C100, was used only twice last year and wasn’t used at all on any of the 2015 movies. Another interesting takeaway is how much more diverse the cameras used for Sundance are compared to the cameras used on Oscar nominated movies, where the Arri Alexa also rules, RED and Blackmagic have been absent, and we don’t see a VHS or an iPhone. Or, at least not yet, I should say..
Video
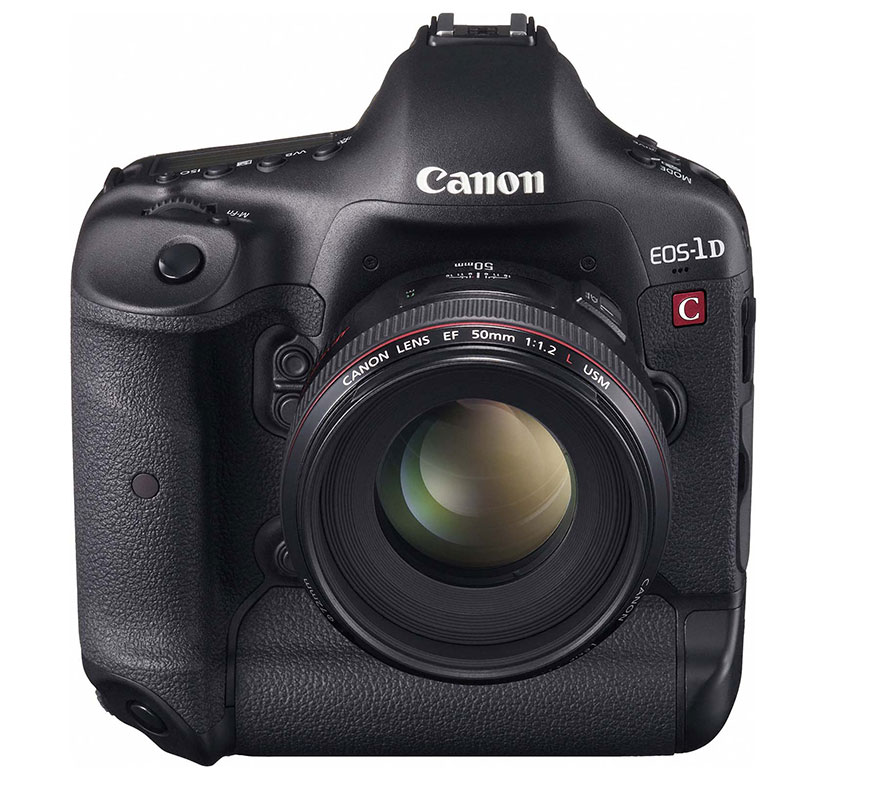
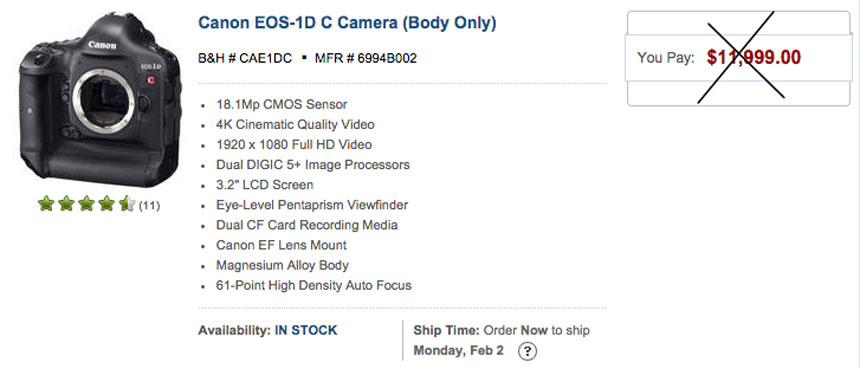
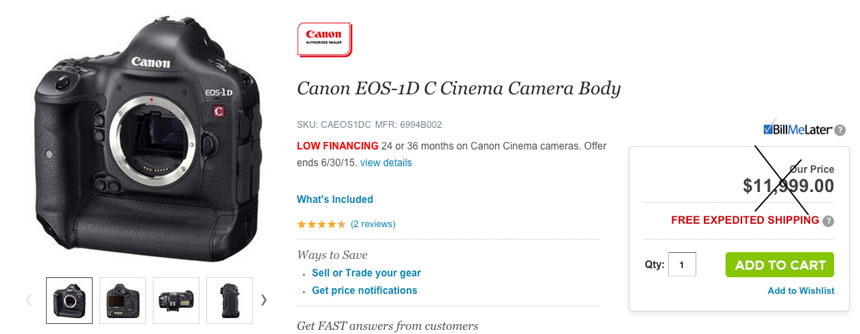
Canon EOS-1DC 4K DSLR price drops 34%.
The price for Canon’s EOS-1D C has effectively dropped 34%, from $12,000 as of yesterday to $7,999 right now.
Canon EOS-1D C $7999: Adorama | B&H
The 1D C is the first Canon hybrid DSLR to offer onboard 4K motion imaging and Full HD motion imaging on CF cards and it is considered part of Canon’s Cinema EOS system, right next to the C100/300/500 models.
The main (and huge) difference between the EOS-1D C is that it features a full frame CMOS sensor that can capture 4K (4096 x 2160) as Motion JPEG and HD (1920 x 1080) as H.264 and can also shoot 18-megapixel (5184 x 3456) still images recorded as RAW or JPEG. An important (and also huge) difference between the EOS-1D C and the other C series bodies is that it lacks important features like built-in ND filters and XLR ports among others.
The camera’s rugged, ultra-compact form factor and huge sensor makes it an interesting option for challenging hybrid assignments when low-light performance is critical. For example, underwater or wildlife photographers capturing 4K and not needing XLR ports or other advanced video videos can find a great solution on the 1DC. Another instance is corporate assignments when the photographer is expected to shoot high-end video as well as stills. Unfortunately I believe the camera’s price have seriously challenged its market penetration. Let’s see what happens with this new price.
Now, while simultaneously shooting stills and video is certainly possible, I prefer to keep separate systems with different settings and features assigned to each task. It is hard enough to THINK about sound and movement and lighting simultaneously. the last thing I need is to be switching settings back and forth.
As of right now I’m happy with our current systems; a couple of Panasonic GH4 4K bodies with Canon and Sigma lenses (using a Metabones Speedbooster adapter), and a couple of Canon C100 Mark II bodies when stills are not necessary.
Here’s our current standard camera package:
Bodies:
• Panasonic GH4 at Adorama | Amazon | B&H
• Canon C100 Mark II at Adorama | B&H
Lenses:
Sigma:
• 35mm F1.4 DG HSM Art at Adorama | Amazon | B&H
• 50mm F1.4 DG HSM Art at Adorama | Amazon | B&H
• 18-35mm F1.8 DC HSM Art at Adorama | Amazon | B&H
• 24-105mm F4 DG OS HSM Art at Adorama | Amazon | B&H
Canon:
• Canon 24mm F1.4L II USM at Adorama | Amazon | B&H
• Canon 70-200mm F2.8L IS II USM at Adorama | Amazon | B&H
Panasonic:
• 12-35mm at Adorama | Amazon | B&H
• 35-100mm F2.8 at Adorama | Amazon | B&H
Metabones Canon EF Lens to Micro Four Thirds at Adorama | Amazon | B&H
If you are ready to buy any of these items, I’d suggest checking all three stores as the prices constantly change. Happy shooting!
Video

Photokina, after the dust has finally settled.
It feels like six months but it’s been only a month since we had the great privilege to once again attend the largest and arguably most important trade show in the photo industry: Photokina.
One month on and the dust has settled, sample photos and videos are popping everywhere, most specs are now confirmed, and rumor websites have moved on to tell new tall tales.
This time I found the show less crowded and less exciting than previous years. Perhaps it’s because most manufactures now announce products before, not during, trade shows, and the expectation and surprise factor is quickly ebbing away. But there are always interesting surprises, especially in the “Chinese” hall, and it is also nice to be able to touch the toys everybody is drooling over.
The following is my very personal, unscientific, but also unbiased list of products that got my attention, in no specific order.
• Canon offered a mind-blowing low light test. If I remember correctly, they called it “See in the dark.” They used an EOS C300 and a 7D Mark II to shoot some props in a darkroom. There were only a few tiny light bulbs covering the scene. When I entered the room I couldn’t even see the cameras, but somehow the cameras saw the props and were able to get a decent exposure. I believe the 7D Mark II was set at 12,500 ISO and the image on the camera’s monitor looked usable but not amazing. The C300 was set at something like 25,000 ISO and the image on an external monitor looked decent. Other than that, nothing else was remarkable at the Canon booth.
The Canon 7D Mark II is currently available for pre-order from Amazon and B&H.
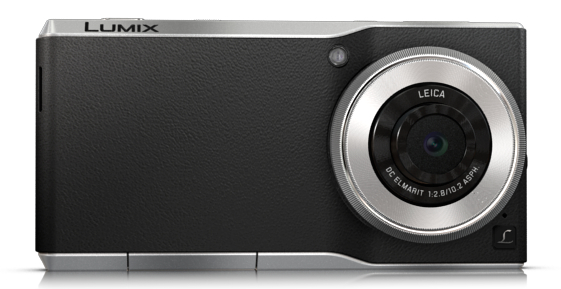
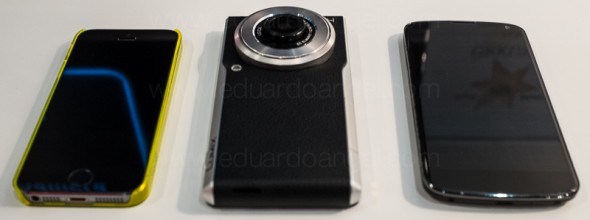
• Panasonic consistently surprises me. The CM1 is something I have NEVER seen before, and I’m very surprised with the lack of coverage this amazing piece of technology has received.
Take a Nexus 5, iPhone 6, or Lumia 1320, stick a tiny and beautiful Leica 28mm F2.8 Elmarit DC lens coupled with a 20MP MOS sensor, a crazy fast Qualcomm MSM8974AB 2.3GHz Quad-Core running on Android 4.4 (Kit Kat), then add a super user-friendly interface with all kinds of clever and customizable options including Manual Exposure setting, 1920 x 1080 video, and just for fun throw in Wi-Fi, Bluetooth, NFC, and GPS. Did I mention that this CELL PHONE also captures 4K video? I’m still processing that too! Simply mind blowing. Forget the iPhone 6 or Nexus 6. The CM1 will be my next camera/phone.
Complete specs for the Panasonic CM1 are available here.
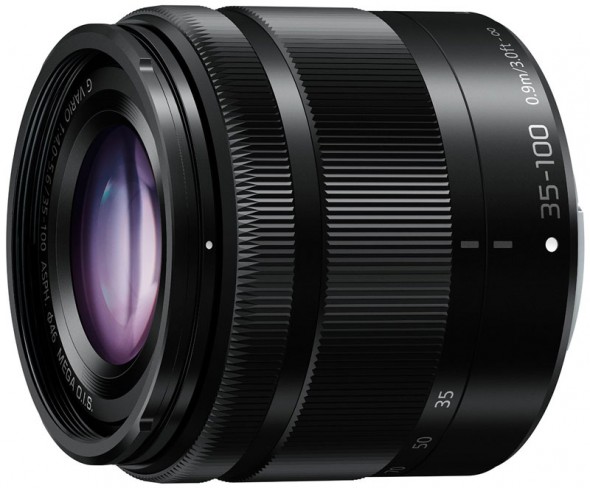
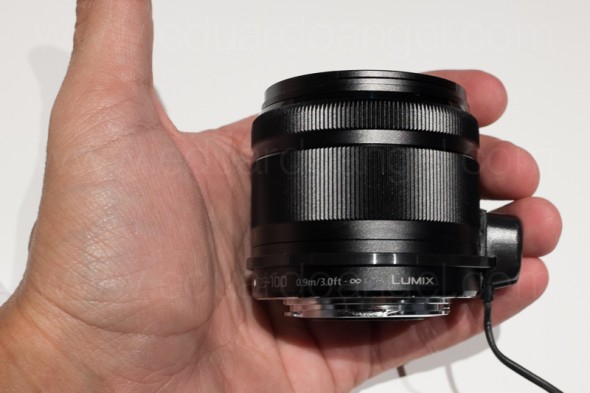
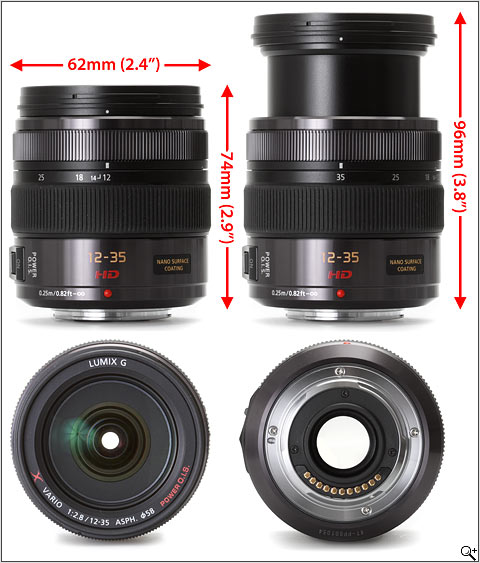
Panasonic’s ultra-compact Lumix 35-100mm f/4 lens, equivalent to a 70-200mm on a full frame camera, is incredibly small and lightweight (0.48 pounds), and it’s about 75% the size of the already tiny (and excellent) Panasonic Lumix 12-35mm f/2.8 ASPH X lens (68.0 x 74.0 x 1.0 inches and 0.7 pounds). Regardless of its size, it comes with O.I.S. (Optical Image Stabilization) and it is fully compatible with high-speed AF cameras up to 240 fps. That should do it…
The Panasonic ultra-compact Lumix 35-100mm f/4 lens is currently available for pre-order from Amazon and B&H.
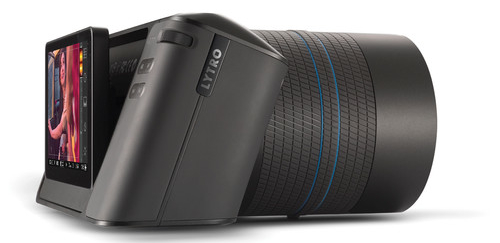
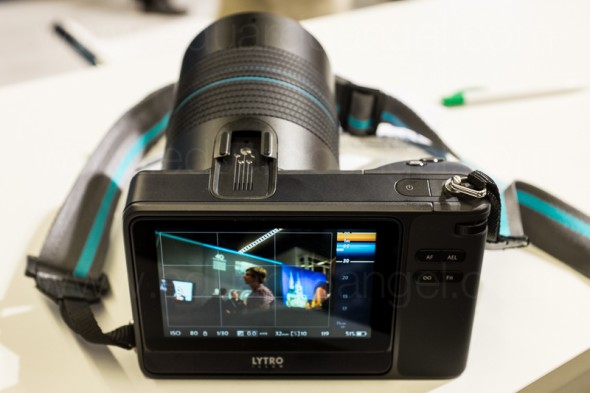
• Light field photography has been on my radar for a while and we finally had a chance to play with a Lytro camera. The ability to focus images after they have been captured, change the perspective, increase the sharpness, and create 3D images or presentations are some of the many potential developments. I had a chance to play with Lytro’s Illum camera, and while I find the technology amazing, the software still needs some serious work. Here are the camera’s specs.
The Lytro’s Illum is currently available now from Amazon and B&H.
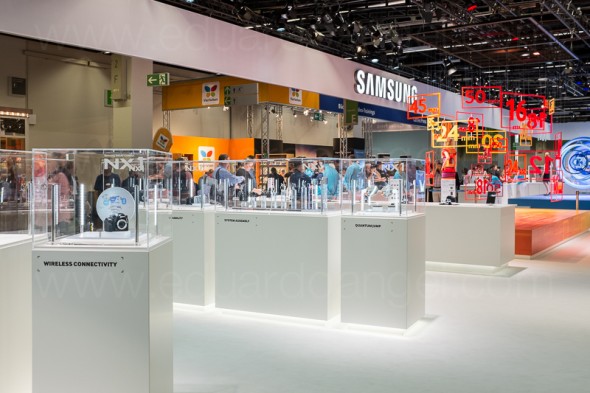
• I simply don’t get it. Samsung released several interesting products and the booth was almost empty. And, that’s the GOOD news. The company reported earlier this month a 60% drop in operating profit for Q3 2014.
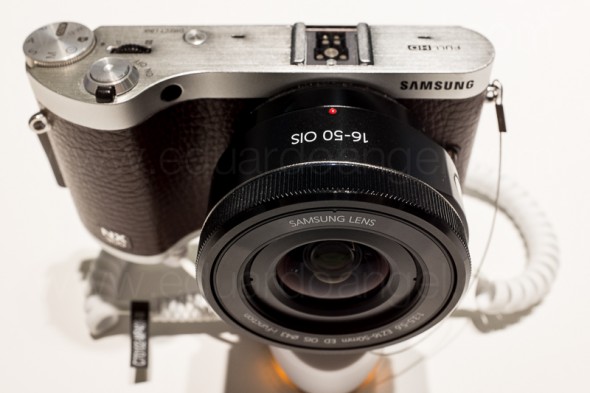
I asked a Samsung staff member what the unique features were on the brand new NX1. He replied that it has a 28MP APS-C CMOS sensor, it can record 4K and UHD video using H.265 codec, it offers a weather-resistant magnesium alloy body… I interrupted and asked him this: if I’m debating over a Nikon D7100, a Canon EOS 7D Mark II, a Panasonic GH4 or a Fujifilm X-T1, why should I consider the NX1? Picture a deer caught in the headlights. His answer was, “I guess I wouldn’t consider the NX1.”
Wow! And that’s exactly how I feel about Samsung’s flagship camera. Nice, decent specs, but unremarkable overall. An additional potential issue is Samsung’s relatively new NX mount, so you can use Samsung’s proprietary lenses, or other brands’ with an adapter, which requires an additional investment.
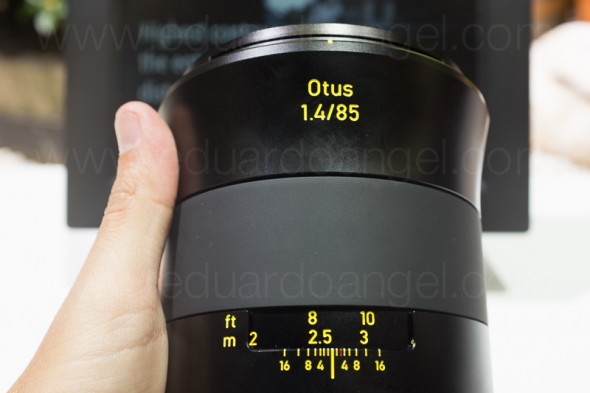
Some other quick notes I took while playing with the NX1: The 3″ tilting Super AMOLED touchscreen display works well. Very fast shutter, nice colors, the 85mm f/1.4 is very sharp, pretty standard menus, kinda slow AF tracking, interesting built-in color corrections and presets. The lenses come with “i-function” which allows you to control them from the touchscreen.
In case you are curious, the Samsung NX1 is currently available for pre-order from Amazon and B&H.
• We saw some of the coolest developments at Fujifilm, but for some reason not even Fuji’s staff knew about them. There are two new services: Magic Video Print and Magic Video Print Share, which according to the company will be available in the “1st half of 2015”. Not to be confused with Fuji’s Instax Printer (also available here), which is basically a portable printer that allows users to print smartphone photos on the go.
Magic Video Print is basically a software that extracts 10 still images per second from videos, analyzes faces, focus, brightness, and other characteristics, and then recommends approximately 20 images from the video to be printed. That’s cool.
But, what is REALLY cool is Magic Video Print Share. Using Augmented Reality voodoo, the technology allows users to share prints extracted from video footage. Using a smartphone or tablet (and soon, I imagine, a smart watch) to “scan” the printed image, the original video with sound is replayed automatically on the scanning device. Are you finding it hard to imagine all of this? I don’t blame you. I saw it and couldn’t believe it.
Here’s a quick cellphone video:
Now, the potential for this is huge. Proud grandparents framing their favorite images and watching the kids play? Wedding images that contain laughs and special songs? Awesome!
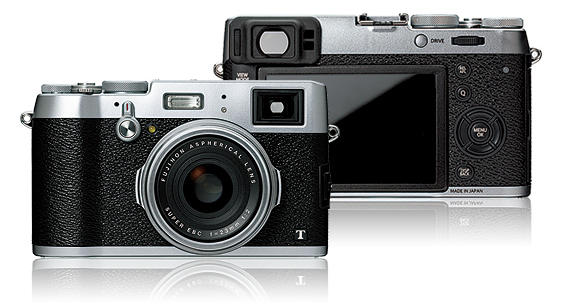
Oh yeah, and Fuji also announced the new X100T (here are the specs), but I LOVE my X100S so much (full hands-on review) that I simply don’t care.
In case you do, the Fuji X100T is currently available for pre-order from Amazon and B&H.
A few more cool things we saw during the show:
Some Post-Photokina thoughts
Every year and every trade show comes with a set of buzzwords and catch phrases. Sometimes it seems that manufactures have a pre-show meeting and agree to only talk about two or three topics. Remember 3D? You get my drift. The flavors of the year have been 4K, WiFi, GPS, Curved Sensor, and even CGI.
Image capturing and recording devices, be it stills or motion, have become much more multifunctional. Photographers can now handle many tasks with a single device. Because of this, over the years I’ve been happy to see (at WPPI, NAB, Photokina, and most likely at the upcoming PhotoPlus) that the focus has shifted (slightly) from the megapixels war to perhaps more important topics like image editing, archiving, presentation, and file sharing.
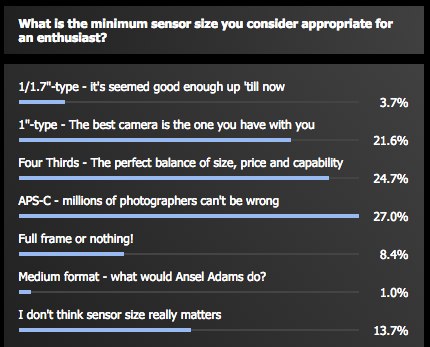
For the longest time, the 24 x 36 has been considered the “gold standard” for sensor formats, but in the past couple of years, the clear improvements on Micro Four Thirds systems have blurred the lines between professional and non-professional camera equipment. Is the $500 GoPro Hero4 capable of 12MP stills, and 4K 30 fps, 2.7K 50 fps, 1080p 120 fps video LESS professional than a three-year old DSLR? Good example: even the Medium Format systems are shrinking with the Pentax 645z.
Take a look at this recent poll on DPReview:
So, what’s coming next? Nobody can predict the future, but the current trends seem to give us some clues on what to expect:
• Newer systems are becoming smaller and extremely powerful, with the incredible Novo camera, Panasonic’s GH4 and Sony’s a7R.
• Cheaper and more efficient processors, faster transfer rates and huge but increasingly cheaper storage devices will enable higher quality videos in 4K or higher resolution. Ultra fast frame rates, continuous-tracking, internal RAW processing and perspective correction, Wi-Fi, Bluetooth, NFC, and GPS will become standard features.
• Cameras and photo and video hardware will be easier to operate, will require less people to do so, and they will be controlled wirelessly via tablets and smartphones. Redrock Micro’s One Man Crew, the heavy but amazing DJI’s Ronin and Syrp’s Genie are just but a few quick examples. With the complete separation of camera support and camera operation, the camera can transition to and from cranes, hand-held, or flying drones with no significant effort from the comfortably seated operator.
• Lenses will continue to improve, not only in resolution and speed, but also with much better internal optical image stabilization for action shooters and filmmakers. Good examples of lenses that are setting the path are Sigma’s 18-35mm f/1.8 DC HSM and Sigma’s 120-300mm F2.8 DG OS HSM, two of the most amazing lenses I’ve ever used.
• For monitors, I expect to see higher resolutions, better contrasts and expanded gamuts, but also the possibility to use smaller screens as color-accurate external monitors and viewfinders while also controlling the capturing device.
• We have talked about pulling stills from video for a while, and RED shooters have been able to do this for a while, but the tools to do it quickly while keeping as much data as possible are still lacking. This is about to change; Panasonic’s “4K Photo” system allows users to pull images (16:9, 4:3, 3:2 and even 1:1) with complete EXIF data from 4K footage captured on a number of devices, including the Panasonic GH4, the super compact FZ1000, the high-end HC-X1000, the tiny LX100 and even the CM1 camera phone!
Fuji’s Magic Video Print Share is a huge leap forward and I expect other manufacturers (hear that Adobe?) to quickly jump in the ring.
Video
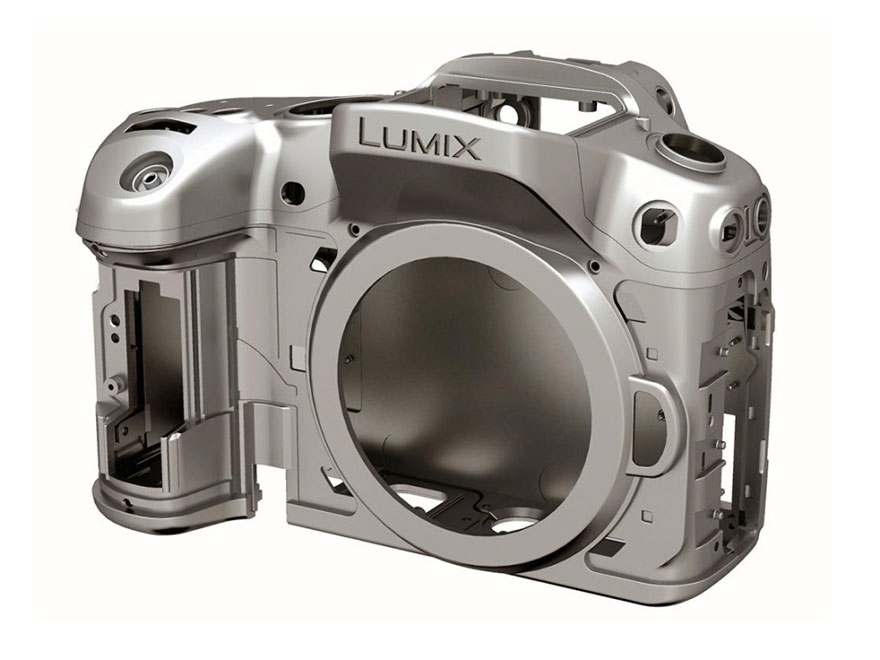
DP Review issues Panasonic Lumix DMC-GH4 Final Review.
DP Review releases final conclusions on the Panasonic GH4. I agree 100% with them.
- The DMC-GH4 sets a new bar in terms of the video capability available in a camera that a significant number of people can afford.
- In a professional setting the GH4 is unusual in being compatible with an interface unit (the DMW-YAGH aka “The Brick”) that adds industry-standard 3G-SDI and XLR connectors.
- The GH4’s image quality is very solid, producing nice JPEG images and usefully flexible Raw files. The color and tonality of its images seem improved over previous generations of camera. In video mode the camera is equally solid.
- Despite the increased competition, the GH4 remains the king of accessible stills/movie hybrids.
- A remarkably capable all-in-one package that lets you capture good quality footage and excellent stills from a sensibly-sized standalone camera.
- The GH4’s video quality and well implemented touchscreen control system give it the edge over less expensive cameras, such as the a6000, while its price and ability to capture 4K internally will give it broader appeal than the Sony a7S.
- What makes the GH4 so strong is its balance of capability, size and price. Its ability to slot into a professional setup, via the optional interface unit can only help expand this appeal.
- Low light performance is solid if not exceptional – so you’ll need to think about lighting and bright lenses for low light shooting – but in many situations the GH4 produces good footage with a little subject/background distinction.
- If you’re only interested in stills then it’s not quite such a compelling proposition – the competition is fierce at this price point. However, if you have any inclination towards moving images, there’s not a camera that offers nearly as much capability and support as the GH4 does, for anywhere near the price.
The complete review is available here.
I hope you’ll take a moment to check out these additional links:
- 7 things we discovered after shooting 4K with the GH4. You won’t like #4.
- I Just Got a Panasonic GH4 – Now What? Hard Drives.
- I Just Got a Panasonic GH4 – Now What? Batteries.
- I Just Got a Panasonic GH4 – Now What? Memory Cards.
- Discussing the Panasonic GH4 Live!
- Panasonic GH4 Firmware Update.
And here are some samples clips:
Everything in Slow Motion was shot at FHD 96 fps. Everything else was shot at 4K (3840×2160). We used the Cine-D Profile. The only “grading” done was the B&W preset on Adobe Premiere Pro CC.
Disclaimer:
I’m extremely proud of the 100% free content we provide and I hope you enjoy it as well. Thank you all for your support, encouragement and constructive criticisms – I appreciate each and every one of them.
I only promote products, services, and companies that I use and trust, and that in my opinion deliver great value to our industry. If you are purchasing something, please consider using my affiliate links to help support this site. Thank you in advance.
News
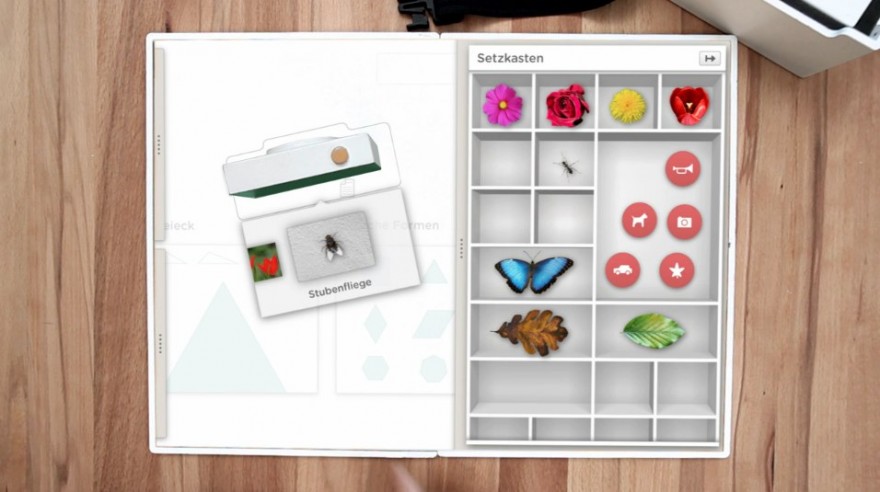
How to fix our broken education system. Some thoughts.
For several weeks we’ve been seriously talking about our education system, and we’d like to share some of our ideas on the subject.
The current education system is broken, outdated, and, dare I say it—dangerous. How did we arrive at this point, and what can we do to remedy the situation? (more…)
Video
Panasonic Lumix DMC GH4 Sample Video • Behind the Scenes Fashion Week New York.
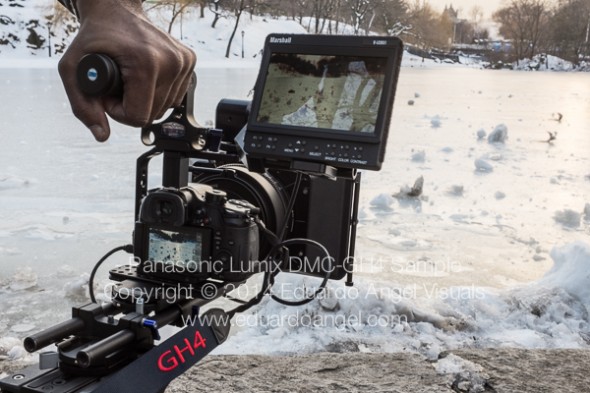
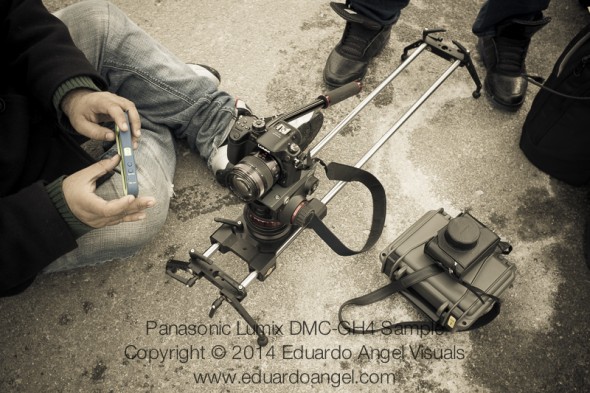
Panasonic Lumix DMC GH4 Sample Video. Behind the Scenes shot during Fashion Week in New York. Another test was shot in Central Park and a third one at the Chelsea Piers.
We learned a lot of interesting things about this new camera. To see the specs and what this system represents to hybrid photographers check tis article.
Video
7 things we discovered after shooting 4K with the GH4. You won’t like #4.
The invitation from Panasonic USA to perform a field test arrived quite suddenly, with multiple commitments for Fashion Week already in place, and with nasty weather that didn’t really allow access to tried and true locations. Great!
It is very important to mention that the camera we tested was a preproduction model running firmware v0.3. As it is always the case with preproduction models, as well as some early production models, many features were disabled or not working as expected. We also wanted to test if our current workflow, which we generally use with Blackmagic’s Pocket Cinema Camera and Canon products—ranging from the 60D to the 5D Mark III to the C300 and even some 1DCs—would work at the same or needed adaptations for the GH4.
1. Comparisons
Instead of a side-by-side comparison between the GH4 and other brands, Sean Davis and I were more interested in exploring the new features of the GH4, compared to the GH3 and a hacked version of the GH2 that we have used in the past. Obviously, shooting 4K was at the top of the list.
2. Look and Feel
The GH4 is the exact same size as the GH3. Not only that, unlike other camera manufacturers that feel inspired to sell new batteries and chargers with every new camera, we were pleased to see that the GH4 shares the same exact DMW-BLF19 battery (here’s a much better deal). In other words, all your GH3 “power rigging accessories” will continue to work. Great news for Panasonic users and rental houses. An important difference (and a small hiccup in our field test) is that the GH4 uses Micro HDMI, and not the GH3’s Mini HDMI.
Before you ask, the answer is no. We did not have the Lumix DMC-YAGH Interface Unit (aka The Brick) with us.
3. The 4K Footage
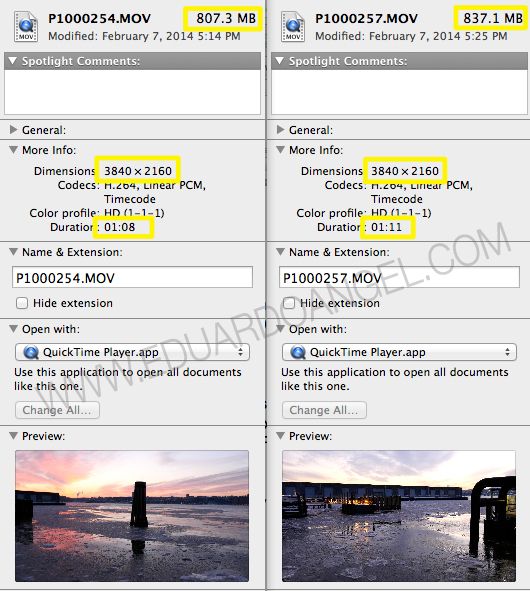
As you can see from the image below, the GH4’s 100 Mbps is broadcast 4K or Quad HD (3840 x 2160), not DCI compliant 4K cinema spec (4096×2160), but the camera is capable of recording DCI compliant 4K at 200Mbps. This article explains what DCI is.
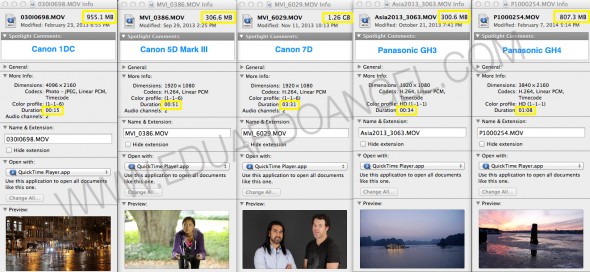
Just for fun, I created this side-by-side file size comparison between the cameras I use most often.
Everything in Slow Motion was shot at FHD 96 fps. Everything else was shot at 4K (3840×2160). We used the Cine-D Profile. The only “grading” done was the B&W preset on Adobe Premiere Pro CC.
4. Storage
Regarding memory cards, we were ALSO testing a pre-production version of a SanDisk. The GH4 didn’t like the SanDisk 95mbs SDXC that we always use with our Blackmagic’s Pocket Cinema Camera. To spice things up a bit more, we had to use a beta SDHC II 280mbs 32GB card provided by SanDisk. I hope that once the camera ships, it will take “standard” SD cards, but they won’t come cheap.
Shooting 4K @100mb/s 30p on a 64GB card will give you about 29 minutes of shooting time. So we are looking at three to four cards per shoot at $150 each. All things considered, I’d get Panasonic 64 GB microP2 cards. If you have a better suggestion please send me a tweet.
This extra budget consideration of $450-$600 doesn’t even include hard drives for storage and backups. Definitively a G-RAID 4TB Dual Thunderbolt drive is the way to go.
5. High ISO
Per multiple requests via Twitter, we shot the same exact cityscape in Central Park with the GH3 and the GH4.
The exposure settings were identical:
• Manual Exposure
• The beautiful Lumix G X Vario 12-35mm f2.8 Lens
• f/2.8
• 1/30th
• 1600 ISO
• WB at 5500K
The only difference was that the GH3 was recording at its highest video resolution 1920×1080 at 72mb/s ALL-I 24fps while the GH4 was recording at 4K at 100mb/s IPB 30fps. Note: This was the ONLY video setting working on our prerelease GH4. Other settings were available but the camera was not able to record.
Here are some tests:
6. Workflow
The workflow we tested was intentionally kept as plain and simple as possible. The idea was to mimic a “normal” setup for an “average” shooter.
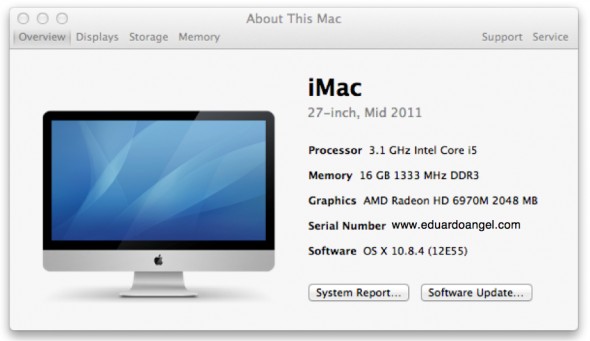
1. Download the SD card directly to a G-RAID 4TB Dual Thunderbolt External Drive connected to a 27-inch mid-2011 iMac.
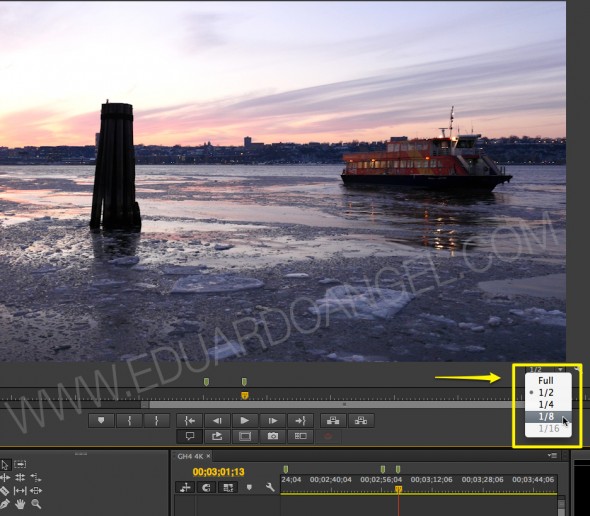
2. Open the MOV directly into Adobe Premiere Pro CC v7.2.1 without transcoding to ProRes or doing anything special to the files. This is exactly why I switched from Final Cut Pro to Premiere Pro a few years ago. Another feature I love on Premiere is the ability to change the playback resolution. In a few words, with high-resolution footage, you can set playback resolution to a lower value.
3. Start editing
7. Other Observations:
• The GH4 comes with two options for focusing magnification: Full frame and PIP which I find much more applicable for video. Even though PIP was not working while shooting video on our pre-production model, I’m sure it will be there when the camera ships.
• The peaking feature was working perfectly. A wonderful addition to our tips and tricks arsenal.
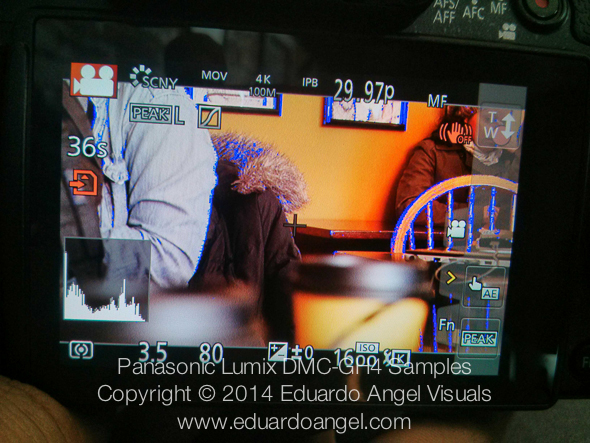
• The camera didn’t have, and won’t have, built-in ND filters. I was really hoping this would be an improvement over the GH3, but we will need to keep using our variable ND filters.
• There’s a lot to like about this system and I am confident Panasonic will add enough improvements to the firmware to make your shooting experience even better.
Related Posts
I Just Got a Panasonic GH4 – Now What? Hard Drives.
I Just Got a Panasonic GH4 – Now What? Batteries.
I Just Got a Panasonic GH4 – Now What? Memory Cards.
Video
Amazon adds storytelling tools to its arsenal.
updated 20140114
Amazon Studios was launched 3 years ago to develop feature films and episodic series. In a new effort to pack another punch to its arch enemy Netflix, as well as increasing its original content catalog, the company has rolled out the beta for “Storyteller,” a free online storytelling tool that (more…)
Video
2013 Roundup and our favorite Top 10 Lists.
If there’s one thing we love, it’s lists! Here’s a short and sweet compilation of our favorite “Top 10” lists from 2013. (more…)
Video
Special Adobe Creative Cloud plan for Photographers.
We previously wrote about the advantages and disadvantages of Adobe’s Creative Cloud. We also discussed using Adobe Lightroom with other Cloud solutions.
If you don’t need all the Adobe Creative Cloud bells and whistles, consider their photography plan which includes Photoshop CC + Lightroom 5 plus feature updates and upgrades as they are available, 20GB of cloud storage for file sharing and collaboration, and a Behance ProSite.” All for $9.99/month when you sign up for a one-year plan.
Until now, the only way to get a similar deal was having a Photoshop CS3 (or later) registered license. That requirement seems to be gone. Do your math or check with your accountant, the end of the year is often a great opportunity to upgrade your gear and apps.
Click here to get the special deal.
Video
The Future of Storytelling is Transmedia.
What is the future of storytelling? We’ll begin our day with a story on our phone. On our subway ride to work a new character will be added to the story and we’ll learn all about him on a tablet computer. At lunch we’ll catch up with the character’s newest adventure on our office computer via Facebook. Later in the day the story takes an unexpected turn—and we’ll learn about it from a digital billboard. Before going to bed we’ll plant the seeds for tomorrow’s developments while playing a video game on our television. This is transmedia—the future of storytelling. (more…)
Video
How to quickly enhance your photography portfolio.
On my previous post (I’d recommend reading it first if you haven’t) I walked you through my personal process to edit a large group of images into a more manageable portfolio.
Now is the time to enhance and fine-tune those “final” photos. (more…)
Video
Is Canon following Adobe’s steps?
Canon just released their “EOS Digital Solution Disk V28.1” software suite. As usual, it contains the “Digital Photo Professional”, “EOS Utility” and “Picture Style Editor” applications. So what’s the big deal? For the first time (as far as I can remember) the Solution Disk has been issued only on CDs, but this time it will be available as a download.No conspiracy theory needed here. The real reason behind the online delivery is that many new computers, including the latest Apple iMac (which is super fast and awesome) no longer come with CD drives, so we are all being forced to move to the cloud.
Support for Mac OS X includes:
• Mac OS X v10.8
• Mac OS X v10.7
• Mac OS X v10.6
And support for Windows OS includes:
• Windows 8
• Windows 8 (x64)
• Windows 7
• Windows 7 (x64)
• Windows Vista
• Windows Vista (x64)
• Windows XP
Keep in mind that you will need a serial number in order to download the software.
Supported cameras will include Rebel SL1, T5i and 1DC along with other updates.
And talking about Clouds and Adobe, on this post I added a link to Adobe’s MAX 2013 Keynote AND and a second link to the best deal for Cre¬ative Cloud I can find ($20 per month). Here’s a previous article on using Adobe Lightroom with Cloud Storage Solutions.
Video
10 (new) Cool Gadgets for Photographers and Filmmakers. Part 2
6• Convergent Design Odyssey 7.
Two super interesting monitor/recorders are the Odyssey7 and Odyssey7Q by Convergent Design. For $1295 and up you get a 7.7” 1280 x 800 OLED external monitor that also doubles as an external recorder capable of receiving 4K RAW data as well as other compressed and uncompressed formats onto two 2.5” SSDs.
Here’s the twist; out-of-the-box, these two products are monitors only, with all the usual settings (waveform, histogram, false color, vectorscope, zebras, and focus assist) but without any recording or playback capabilities. (more…)
Video
10 (new) Cool Gadgets for Photographers and Filmmakers. Part 1
1• Edelkrone SliderPLUS
Edelkrone’s SliderPLUS is a super-compact and very smooth slider that easily fits onto Tenba’s Video Backpack. Unlike other sliders, this one moves with the camera, taking full advantage of rails’ length. With a price tag of $500, this toy is at the top of my shopping list.
2• Redrock Micro’s One Man Crew Parabolic Camera Motion System
This amazing gadget consists of a motorized parabolic track slider that “guides the camera on a precision-curved track at any speed while keeping the subject stationary in frame.” The system includes speed control, automatic in and out stops, and 36” of track for camera systems under 20lbs. All for $1,500. If you are part of a small crew doing a lot of corporate interviews or a single photographer creating educational content or product demos, this is an extremely attractive option.
Video
Post-NAB 2013 wrap-up.
Our Digital Technology Resource is a monthly conversation about news, trends, and events for photographers and filmmakers. On our upcoming issue we highlight the most relevant products and trends we witnessed at NAB, including:
• Edelkrone SliderPLUS
• Redrock Micro One Man Crew
• Blackmagic Pocket and 4K Production Cameras
• Atomos Ninja 2
• Convergent Design Odyssey 7
• Tascam DR-60D and Samson Zoom H6
• G-Tech Evolution Series.
• Adobe Lightroom 5 and Premiere Pro “6.5”
• Imagine Products ShotPut Pro
It is never too late to sign up. Do it now!
Did you miss a previous issue? Don’t worry, be happy. Here are the links:
January 2013 Issue
February 2013 Issue
March 2013 Issue
Video
Adobe Lightroom 4.4 is out. 25 new cameras supported.
Adobe just released a new Lightroom update making this version 4.4. Lightroom now officially supports over 25 different RAW file formats. Here is the complete list.
This version adjusts the White Balance for a number of Nikons, includes a correction to the demosaic algorithms for Fujifilm cameras with the X-Trans sensor, and adds support for new lenses like Canon’s EF 24-70mm f/4 L IS USM and Nikon’s AF-S NIKKOR 70-200mm f/4G ED VR are included. Unfortunately the Panasonic Lumix lenses are still missing.
According to Adobe, users are now (finally!) able to add contacts from their Address Book to email (on Mac). I’ll try this ASAP.
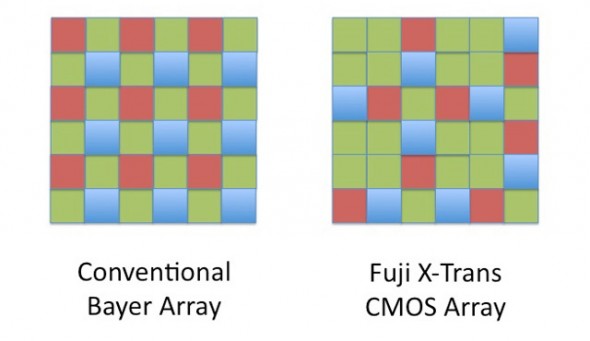 These are the main improvements added and bugs fixed:
• The crop overlay tool resized incorrectly when used in conjunction with the “Constrain to
Crop” checkbox in the Lens Correction panel
• Background graphics were not correctly rendered within the Book Module
• Reading metadata from file would sometimes result in keyword and and GPS metadata to
not save for video files
• Updated the “Missing File Icon” for HiDPI / Retina dispalsy
• The supplied lens profile for the Sony RX-1 did not contain vignette information
• Preview in Develop Module was not updated with the latest adjustments
• Square tile artifacts while painting with brush
• Previews of photos in portrait orientation were blurry when viewed in the filmstrip in the
Develop module. (Mac only)
Click to keep reading (more…)
Video
Shooting with the Panasonic Lumix DMC-GH3. Field report and impressions.
The friendly waiter at the Turkish restaurant in Sohar, Oman, saw the camera on the table and asked “Nikon? Canon? Which one is better?” To which I replied, “actually, this is the Panasonic GH3.” He stared at me, his expression turned from excited to perplexed to confused to annoyed within seconds. After an uncomfortable silence he finally asked, “Are you ready to order?”
That was pretty much my reaction when, a few weeks ago, just two days before I started teaching a “Digital Cinema for Photographers” event in Dubai, I found out that Panasonic, a major sponsor of the event, REALLY wanted me and my students to use a couple of GH3s and several lenses in my hands-on workshop.
Panasonic is one of the largest consumer electronics companies, and the GH3 is the third generation of their very successful Micro Fourth Thirds DSLM (Digital Single Lens Mirrorless) system. For a while I have been aware of the low-budget-filmmaking community’s devotion to the hacked DMC-GH2 and its ALL-I codec. I saw the DMC-GH3 at Photokina last year, but I had never before shot a single frame with a Panasonic camera. The bodies that I was given were running Firmware v0.5. Add to this a nine-hour time zone difference and jet lag, and you can begin to imagine my pain.
While I’ll be using some geeky terms, this is not an in-depth technical review, nor a scientific analysis of the GH3. You can dig into tech specs and MTF charts somewhere else. My goal is simply to share my honest and independent impressions, go over the things I liked and didn’t like, and communicate my wish list for future features. I want to emphasize that all the conclusions in this article are subjective and strictly based on my own personal experience.
“I have to warn you, I’ve heard relationships based on intense experiences never work.”
-Keanu Reeves in “Speed”
I have to respectfully disagree with Keanu on this one. Much to my surprise, the camera was much more intuitive than Sony’s NEX system, and several video features got my full attention right away.
FEATURES
• Full HD 1920×1080 60p/50p (NTSC/PAL) with 30p/25p/24p options.
• Ultra-high bit rate video recorded at 72 Mbps (ALL-I) or 50 Mbps (IPB).
• Capable of recording continuously for an unlimited time for NTSC and 29 min 59 sec for PAL.
• Native support for MOV (h.264), MP4, and AVCHD formats.
• Time Code support in the MOV and AVCHD formats.
• Extremely fast and accurate contrast-detection Autofocus.
• A 3.5mm mic input AND a headphone jack AND the option to manually adjust the sound recording levels via touchscreen controls.
• Full-time AF, AF Tracking, and Face Recognition AF are available for VIDEO. The Touch AF mimics rack focusing.
THE WORKSHOP STORY
Not having enough time to field test the Panasonic systems before the Workshop, I shot dummy clips in my hotel room and made sure that the footage would work in Adobe Premiere Pro CS6. The test went surprisingly smoothly. I then set both GH3 cameras to the same video settings: MOV at 1920×1080, 24p, 72 Mbps ALL-I, Standard Photo Style, White Balance at 5500K, got ND filters for all the lenses, extra batteries, and a few Class 10 SD cards. And then I prayed.
Note: It’s extremely important to point out that full HD on this camera requires memory cards with the fastest speed available. My “older” memory cards didn’t work, giving me only four seconds of recording time.
VIDEO
We spent the first day of my three-day Digital Cinema Workshop covering all the technical similarities and differences between stills and video. On the second day, we planned a location shoot with a Capoeira team and spent a couple hours shooting in the afternoon. On the third and last day we covered the different hardware and software requirements for post production and spent three hours editing the footage. I am especially proud of the short clip my students put together in such a limited amount of time and with newly acquired knowledge (and using brand new gear!).
Capoeira in Dubai. Student Project. from Eduardo Angel on Vimeo.
We could obviously use a few more days sweetening the audio, fine tuning transitions, and grading, but for a two-hour shoot and a three-hour edit, I believe this is a good example of what can be accomplished with great teamwork, interesting subjects, and the GH3’s many customizable options.
SAMPLE CLIPS
Below you will see a few additional sample clips, all shot as H.264, 1920 x 1080, 23.976 72Mbps ALL-I, using the GH3’s “Standard” profile (Contrats = 0, Sharpness = 0, Saturation = 0, Noise Reduction = 0). The Exposure and White Balance were set manually. The lens was the Lumix GX Vario 12-35mm F2.8 set on AF Tracking mode, which worked very well most of the time. Despite the lens having “environmental sealing,” as you can see the fine desert’s sand inevitably found its way to the sensor. I put the clips together on Adobe Premiere Pro CS6, and have NOT done any grading nor sharpening. These short clips are intended to show you what the GH3 is capable of, not to tell a specific story.
SOMETHING INTERESTING
So, mission accomplished, right? Not so fast. A couple of days later, as I was wrapping up my day, a friend asked “Are you busy? I wanna show you something interesting.” With only the GH3, the 12-35mm 2.8 lens, a 4GB card and a low battery I jumped into his car. The “something interesting” happened to be access to the Royal Suite at the 7-star Hotel Burj Al Arab—a notoriously difficult area to access. With limited amount of storage space and battery life I managed to capture a few keepers.

The 7-star Burj Al Arab hotel resembles a giant sail rising over the Gulf, with changing colors visible for miles at night.
The very next morning (on my “day off”), I headed out to meet an old friend for brunch at the Atlantis. Should you ever find yourself in this neck of the woods, I strongly recommend that you pay the Atlantis a visit. As we enjoyed the seemingly endless food, my friend received a call to drive to Abu Dhabi right away to pick someone up and then drive back to Dubai. Would I like to come? Guess what I had hanging on my shoulder? This time I had a full battery and a 16GB card, but nothing else to shoot the magnificent mosque and the impossibly opulent Emirates Palace. Once again, the GH3 did a fantastic job.
MORE FEATURES
These are some of the GH3’s features that are not obvious to the naked eye, but are interesting once you are aware of them:
• A magnesium alloy camera body that Panasonic describes as “splash proof and dust proof.”
• The Panasonic RAW files (RW2) work fine in Adobe Lightroom [add link to LR workshop] but the most current version (4.3 as of this writing) is needed. Unfortunately there are no Panasonic lens profiles available as of this writing.
• All the video formats worked seamlessly on Adobe Premiere Pro CS6. Even the video recorded at 72 Mbps was easy to preview and edit on a two-year old MacBook Pro (with 8GB of RAM and an external 7200 RPM Hard Drive as a Scratch Disk).
• HDMI monitor output can be sent with or without information overlays.
• I had a DMW-MS2 Stereo Shotgun Mic with me, but was happy to learn that the camera’s built-in internal microphones provide stereo audio.
• The GH3’s sensor has a 4:3 aspect ratio.
• Built-in Time Lapse, and HDR but unfortunately it works only for JPGs not RAW.
• Five physical function buttons, and two touch-screen function buttons, all customizable with close to 40 options to choose from.
• Virtually all the key shooting controls are within the right hand’s reach. This frees up the left hand to hold the camera or focus manually.
• Excellent battery life, lasting a full day under normal operation. For extended video sessions I’d consider getting the DMW-BGGH3 Battery Grip.
• Apparently (I have not tested this) the GH3 is also capable of real-time image output to the LVF or the rear monitor AND to an external monitor via HDMI.
LENSES
I shot extensively (more than 2,000 images in 18 days) with the Lumix GX Vario 12-35mm F2.8. The lens is tiny. And fast. And awesome. It has the equivalent focal length to a 24-70mm F2.8 on a 35mm system but it is a fraction of the size and weight. As you already know, this is a very good start when dealing with packing issues.
In terms of depth of field, the lens behaves like a 16-45mm F3.5 lens on an APS-C sensor, or a 24-70mm F5.6 lens on a Full Frame sensor. It is hard to get used to this, especially when shooting another system simultaneously, but it is not a disadvantage per se.
Click to keep reading (more…)
Video
Photography Trends, according to Google.
The “interest over time” in photography for the past eight years has remained pretty much constant. The interest for “digital photography” went from a 100 to a current 20. The term HDSLR only started by the end of 2009, with a peak in early 2001. Smartphone photography is showing a wild uptrend.
This is interesting, but hardly surprising. 700 million smartphones were shipped in 2012, up from 490 million in 2011. Samsung owns a 30 percent share (213 million devices) of the global mobile market, Apple follows with 19 percent (135 million devices) and Nokia is third with 5 percent global market share. The 2012 numbers are even more meaningful when you know that they represent almost TWICE the expect amount of laptop shipments for this year. It gets even more interesting when Intel announces that it will stop producing desktop motherboards in three years. Apple’s highly expected announcement for a new Mac Pro tower, might be the last one we see from Cupertino.
Video
Traveling with photography and video equipment. Technical and Practical Tips.
These are some travel tips I’ve learned over 20 years of traveling with photo equipment. Most of the recommendations below will be most helpful for photographers shooting video.
• Format all your memory cards on the specific system you are planning to use them with (7D vs. 60D vs. H4N).
• Change and charge all your batteries before leaving.
• Test all your devices.
• Test that the software on your laptop is working. Trying to update the OS, an Adobe application, or plugins from an airport lounge or hotel’s WiFi is NOT fun.
• Match memory cards. The 7D takes CF cards and the 60D takes SD cards. Use the same capacity (32GB cards or 16GB) for each system at the same time. It will make your asset management on location much easier.
• Bring enough additional storage. Photographers tend to underestimate the size of video files. I can easily shoot more than 100GB in a day. And you will need a backup. Twelve minutes of video take approximately 4GB of space. With two cameras we then have 8GB. With a backup we now have 16GB for the same 12 minutes of footage.
• I recommend G-Tech hard drives. The G-Technology G-DRIVE Mini 500GB is an excellent product. Make sure your external hard drive is 7200 RPM (as opposed to 5400). It will make editing video much faster.
• Buy only hard drives with multiple Interfaces (USB 2.0, FireWire 400, FireWire 800). When (not if) your one and only USB port breaks, you won’t be able to retrieve your information.
• Bring a backup of all the essential items. My list includes: reading glasses, camera, lenses, memory cards, hard drives, chargers, card readers, all cables, and quick release plates.
• Use TSA-approved locks. I preferred padlocks and use the same combination on all of them.
• Simplify. I purchased my specific Android tablet because it matched the power adapter for my phone. And both can be charged via USB using the card reader cable, which is the same as Canon’s camera cable!
• Simplify some more. Bring a multi-card reader. I can simultaneously download the 7D’s CF Card and the 60D’s SD Card using the same reader and the H4N’s SD card using the laptop’s built-in SD card slot.
• Simply even more: One of the reasons why I purchased the 60D as my B camera is because it uses the same batteries/charger as my 7D. I also liked the fact that it uses DIFFERENT memory cards, so it is much easier to keep track what was shot with what.
• Before you leave, check the electrical plug/outlet and voltage information at your destination. Oman and the United Arab Emirates seem to use three kinds.
• Test your workflow. It goes without saying, but never bring new equipment to a shoot, especially overseas. Make sure your files work well with your software and that your cards work well with your cameras.
• If you are capturing Full HD video (1080p) you shouldn’t be using older/slower memory cards, otherwise you might experience dropouts and stuttering. Been there, done that. Not a good day.
• Don’t forget your business cards! The more the better.
If you’re nervous about upgrading gear or making the leap to HDSLR cinema we can help. Book a virtual one-on-one consulting session today!
Video
What’s the big deal with ND filters?
What’s the big deal with Neutral Density (ND) filters? Do we REALLY need to use them when shooting motion? We created a short video tutorial using Canon’s (super awesome) EOS C300 to demonstrate what happens when you can’t really control the light (shooting outdoors), you have too much of it (bright day, noon) and you want to use the aperture as a creative tool, not only as an exposure compensation tool. Remember that when shooting video we pretty much set and forget the shutter.
The C300 has three built-in ND filters; ND1 (+2), ND2, (+4) and ND3 (+6). We don’t have that luxury when using HDSLR systems, but we can always get a very nice variable ND filter that covers up to 8 stops!
Check the video below:
Looking for answers to your workflow questions? Want to make the most of your new gear? Book a virtual or on-site consulting session today.
Video
Schindler’s List Cut by Cut: Part 2.
Last week, we analyzed one of the most important scene’s from Schindler’s List and the amazing editing work by Michael Kahn. We suggest you read Schindler’s List Cut by Cut: Part 1 first.
Great editing can only be accomplished if there is great footage to begin with. Look closely at Kaminski’s compositions; whether handheld or locked down he constantly plays with all the corners of the frame, showing dynamic blocking and camera movement to work in conjunction with the pace set by Kahn’s editing. This is what making a good picture is all about.
Michael Kahn’s editing is just phenomenal. His transitions are abrupt, but we never lose sight of the story. Let’s continue dissecting Schindler’s and Stern’s dialog while they create THE list of “essential” people.
Cut 15 Two-shot: Stern and Schindler trying to remember a name.
Cut 16 Typing a name.
Cut 17 Low-angle close shot of Stern trying to recall a name. Schindler seconding him off screen.
Cut 18 Typing a name.


Click here to continue reading (more…)
Video
Schindler’s List Cut by Cut: Part 1
Steven Spielberg’s Schindler’s List, tells the story of a German businessman who devises a plan to save over a thousand Polish Jews from annihilation by the Nazis. The picture’s narrative, acting, music and emotional impact are all outstanding. For obvious reasons, one of our favorite aspects of this movie is the beautifully composed and lit black-and-white cinematography by Janusz Kaminski. But the editing…..wow! Michael Kahn who happens to be the most-nominated editor in Academy Awards history (eight nominations) received the the Best Editing top recognition for this movie (and also for Raiders of the Lost Ark and Saving Private Ryan).
Throughout Schindler’s List, the story is pieced together with the use of “parallel editing“, or “cross-cutting”, a cinematic convention in which “two or more concurrent scenes are interwoven with each other.” Kahn and Spielberg successfully illuminate the hardships of the Jews and the opposing comfort and optimism of Schindler and the Nazis in Poland through this convention.
Why this blog post? In 2012 the Cinema Editor Magazine published a great article where the author dissected, cut-by-cut, one of the most important scenes of “Schindler’s List.” Last week we rented the DVD, went back to the article, and created screen grabs of each of the cuts in order to better understand Kahn’s editing. There are so many cuts (28) that we will split this post in two. We wanted to post the entire sequence but due to copyright issues, we can’t.
Schindler (Liam Neeson) and Itzhak Stern (Ben Kingsley) falsify documents and create a list of names to ensure that as many people as possible are deemed “essential” by the Nazi bureaucracy.
Cut 1 Extreme close-up of typewriter keys pounding out three names: as the screenplay puts it, “the letters the size of buildings, the sound as loud as gunshots.”
Cut 2 Medium shot of Stern typing; camera tracks with Schindler pacing past him, reciting the names of Poldek Pfefferberg, his close crony among the Jews, and Poldek’s wife, Mila.
Cut 3 Extreme close-up: “Pfefferberg” being typed.
Cut 4 Medium shot: Schindler giving another name. Pan right to include Stern at typewriter.
Cut 5 Extreme close-up of the name “Stagel” being typed.
Click to keep reading (more…)
Video
The Crème de la Crème: The best articles of 2012.
Wow! What a year! We completed 200 Consulting projects, over 30 Photography and Video Workshops, 50 videos, 50 tutorials and close to 200 blogs posts….all in one year.
How was this even possible? One, this is a team effort, where everybody does what they love and excel at. Second, great time and project management, which is paramount in an industry that keeps changing (and sometime evolving) every single day.
We want to sincerely thank our subscribers (if you are not one, it is not too late. Join here) and followers for all of their continued support and feedback.
Today we would like to highlight our 10 most popular articles of the year. Later this week we will publish the 10 articles that for whatever reason didn’t get much attention but we feel are very relevant and worth your time.
Here we go!
1) Upgrading to Adobe Lightroom 4 in 7 simple steps.
No matter what previous version of Adobe Lightroom you use, it is very easy to install and upgrade to the latest Lightroom 4 platform. Find out how easy this is below.
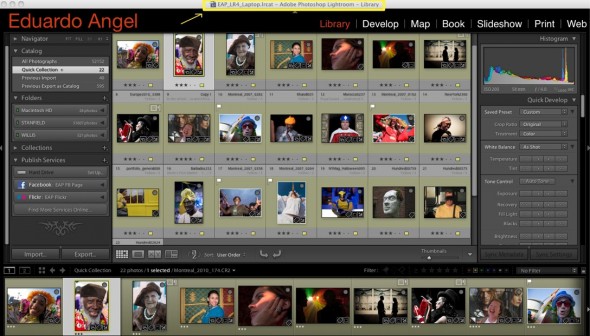
2) Canon EOS M Hands-on Review and Canon EOS M Images.
After several tests, we discussed the best and not so great features of Canon’s EOS M. Also, we shot some sample images with this mirrorless gem.
Canon EOS M Review & Canon EOS M Images
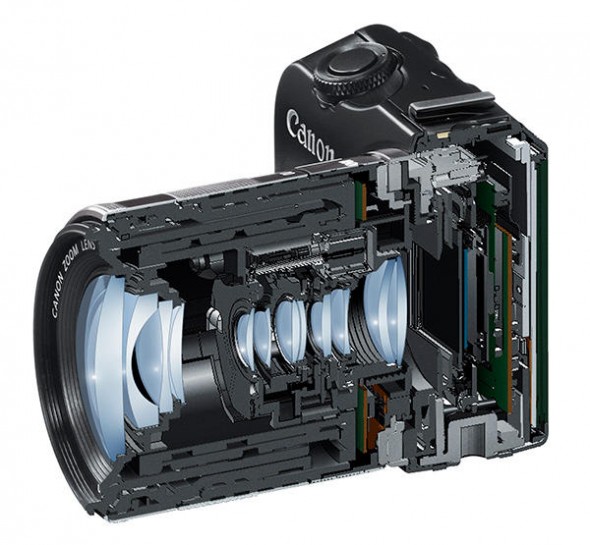
3) Canon EOS Mark III, 5D3, 5D Mk III has arrived!
An in-depth technical analysis on the latest, newest, meanest Canon EOS system. Our overview included the most important and newest features.
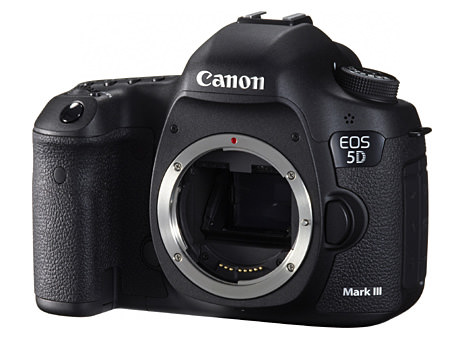
(more…)
News
Gold, silver and the end of film.
Our previous “Inkonomics” article triggered a LOT of interesting emails from readers.
Thank you for sharing your opinions. We just wish more people would comment below each post (instead of email) so not only we could benefit from different views. Perhaps a New Year’s resolution?
A really intriguing comment was “the economic recession triggered the end of film.”
The conclusion of a lengthy and fascinating discussion: When looking for safer investments than stocks and bonds, many people purchased gold, driving the ounce from $800 in 2008 to $1,700 in 2012.
What has this to do with film?
Click here to keep reading (more…)
Photography
Inkonomics.
Think a $5 gallon of gas is crazy? Drivers in Norway are currently paying $9 a gallon, and Germans pay just over $8.
That’s cheap compared with gold, which right now is at $1,700 per ounce.
Think gold is expensive? Consider this: If cars ran on printers’ ink instead of gasoline, each trip to the gas station would cost $100,000. According to PetaPixel, to fill an Olympic-sized swimming pool with ink would cost billions of dollars.
My tiny office printer uses HP21 black ink cartridges. The best deal (often on Amazon) goes for $12. Each cartridge is 1.4 ounces. Now, if you can remember your high school conversions, 1 US gal = 128 US oz. That means at $12 per cartridge, a gallon of the cheapest ink in our office costs about $1,536 per gallon, and the cheapest color cartridge is about $3,364 per gallon. Yikes!
What about my fancy photo printer? A long time ago I learned a valuable lesson: the cheaper the printer, the more expensive the inks. I have also learned that over time, the market leaders tend to be more stable in their pricing of consumables, because they are better equipped to react during rough economic times.
Keep this in mind during the holiday season when you see some “impossibly good printer deals.”
News
Dare to think for yourself? Join a forum.
Online forums, the ultimate demonstration of democracy and freedom of opinion. As the wise Voltaire said: “Dare to think for yourself.” I also like Benjamin Franklin’s famous quote: “If everyone is thinking alike, then no one is thinking.”
Video
Meet the Alpa 12 FPS. The Ultimate Open Platform.
The Alpa “12 FPS” (for Focal Plane Shutter) is the best example of both “modular” and “open platform” we have seen. The concept is fairly simple: take a small sliding back adapter and attach a digital “brain.” In reality, it is obviously way more complicated than that.
On the front, the system can take virtually any lens (with the corresponding adapter), including Nikon and Canon lenses, Hasselblad V, Mamiya M, Leica S, view camera lenses from Schneider and Rodenstock, and even Cine lenses from Zeiss.
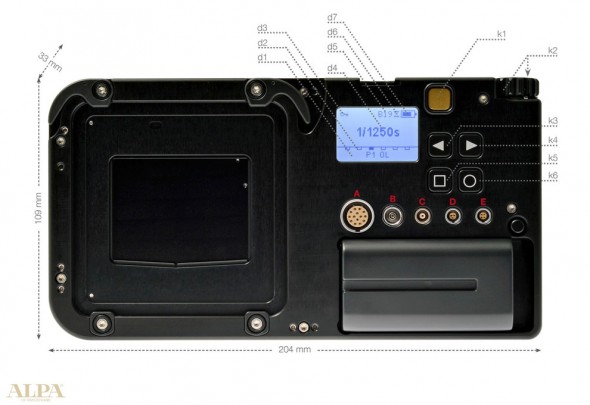 On the Back, the system works with pretty much any Medium Format Digital Back. What makes this system unique and brilliant is not only the amazing flexibility but the “brain” that can be configured to control shutter speed, aperture, bracketing, (even for HDR) and flash-sync. I was told that the very well finished prototype I saw was finished just hours before Photokina started.
The system configuration I played with had the FPS body, a Leaf Digital Back with a Zeiss 21mm CP.2 lens and was being triggered with Pocket Wizards…a true digital Frankenstein!
I can see an important demand for this system from landscape and architectural photographers, as well as rental houses all over the world. More images and complete tech specs are available here. If you are truly interested, here are the prices.
UPDATE 20121207 We attended a great event this week by Andre Oldani at Foto Care and learned a lot of new and interesting things. Just a couple of months after we first saw the FPS system at Photokina, Alpa has clearly worked hard and fast to finalize some loose ends and deliver a truly impressive platform.
These are a couple of images from Oldani’s presentation.
Video
Cloud Storage Solutions and Adobe Lightroom.
In the past couple of weeks, we have done several One-on-One Consulting sessions where the “Cloud Storage” question came up. This is a very quick overview of the most popular online storage options with pricing and direct links to each.
My own situation:
• My Lightroom Catalog has 70,000 RAW Images. I shoot a lot, but I am merciless editing.
• The entire catalog (NOT the RAW files) takes about 26GB of space.
• The RAW files take about 860GB of space.
This means I need about 900GB of storage space if I wanted to move my Lightroom Catalog, including all RAW files, to the Cloud.
 Dropbox customers are provided with 2 GB for free.
100 GB
Monthly $9.99
Yearly $99.00
200 GB
Monthly $19.99
Yearly $199.00
500 GB
Monthly $49.99
Yearly $499.00
IMPORTANT: If you don’t have a Dropbox account, use this link to get started. You get 2GB for free, and we both get an additional 500MB as a bonus. Hurry up!
Click to keep reading (more…)
Video
How NOT to announce new products. Google Nexus.
UPDATE: 20121123 Google’s Nexus 4 Smartphone and Nexus 10 Tablet sold out 20 minutes after the Google Play store opened. http://ow.ly/fg1mo
By now it is pretty clear that we love Google (most of the time). But the company can learn a thing or two from Apple, especially when it comes to important product announcements. On Monday, while Hurricane Sandy was hitting the East Coast ,and 7.5 million people in 16 states have lost power, Apple announced that the company’s senior vice president of iOS was getting fired for (apparently) refusing to apologize publicly for the Apple Maps mess. The timing was impeccable, since nobody noticed nor cared. Well, at the very same time, Google was announcing three new Nexus devices; a smartphone, a 7-inch tablet, and a 10-inch tablet. Guess what happened? Nobody noticed nor cared. They sold out.
All three devices run Android 4.2, which Google describes as “a new flavor of Jelly Bean.” The Nexus 4 is Google’s latest 4.7-inch, quad-core Nexus smartphone, developed with LG, and priced well below analysts expectations. It will be available for $299 (8GB) and $349 (16GB) for unlocked, contract-free units. However, the best deal seems to be the 16GB unit on T-Mobile for $199. We can’t really predict how sales will perform, but what is certain is that the Nexus 4 will make a strong impact on the smartphone market.
Based on the promo video, it seems that Google is focusing the tablets on education. We have written extensively about technology and education here, here, and here.
Although we are more excited with Samsung’s Galaxy Camera, one of our favorite features of the new Nexus smartphone is Photo Sphere, a camera app/Google Maps hybrid that allows users to create and share 360-degree panoramas.
Click to keep reading (more…)
