Video

The 20 Best Books on Filmmaking.
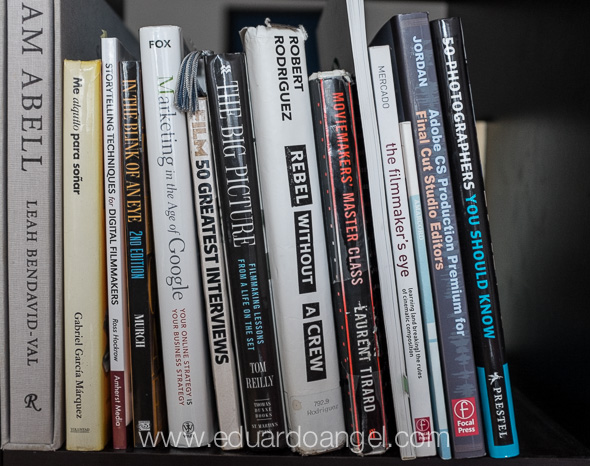
Over the years I have been steadily collecting the best books on filmmaking. Most of these titles have been thoughtfully recommended by friends and students. A few have been fortuitous purchases inspired by intriguing reviews found on Amazon. And, of course, there are some that have come to find a home on my bookshelf in other mysterious ways.

Moviemaker’s Master Class with my geeky notes.
1. The Oxford History of World Cinema by Edward O’Neill
“This is NOT a Summer reading book. Over 800 pages and (4 pounds), this one is perfect for rainy afternoons while sipping coffee and dreaming away.”
2. In the Blink of an Eye Revised 2nd Edition by Walter Murch
“One of my favorite and most inspiring books. Anyone interested in video editing, sound design, directing or screenwriting should buy this book immediately.”
3. MasterShots 100 Advanced Camera Techniques to Get an Expensive Look on Your Low-Budget Movie by Christopher Kenworthy
“Effective camera techniques to increase the production value of your productions.”
4. The Filmmaker’s Eye: Learning (and Breaking) the Rules of Cinematic Composition by Gustavo Mercado
“Understanding the rules of cinematography and how to successfully break them.”
5. Directing: Film Techniques and Aesthetics by Michael Rabiger
“An interesting approach (from a director’s persepctive) to script analysis and development.”
6. The Color Correction Handbook: Professional Techniques for Video and Cinema by Alexis Van Hurkman
“Grading is such an important aspect of post-production that understanding the possibilities, and limitations, is key.”
7. The Technique of Film and Video Editing: History, Theory, and Practice by Ken Dancyger
“A “precise look at the artistic and aesthetic principles and practices of editing for both picture and sound.””
8. Rebel without a Crew: Or How a 23-Year-Old Filmmaker With $7,000 Became a Hollywood Player by Robert Rodriguez
“A true inspiration to “stop dreaming and start doing.””
9. Cutting Rhythms: Shaping the Film Edit by Karen Pearlman
“There are so many ways to cut and present a story. Understanding the right “rhythm” of each story is an essential skill.”
10. The Conversations: Walter Murch and the Art of Editing Film by Michael Ondaatje
“Would you pay $20 to hang out with the editor behind “American Graffiti” “The Conversation,” “Apocalypse Now,” “The Godfather,” “The Talented Mr. Ripley,” and “The English Patient?”
Then buy this book.”
11. The Five C’s of Cinematography: Motion Picture Filming Techniques by Joseph V. Mascelli
“First published in 1965 this classic is now more relevant than ever. My go-to textbook on all my Filmmaking Workshops.”
12. Moviemakers’ Master Class: Private Lessons from the World’s Foremost Directors by Laurent Tirard
“Witness the thought process behind Almodovar, Bertolucci, David Lynch, the Coen Brothers, John Woo and Woody Allen. Their processes are all very different and all very effective.”
13. Guillermo del Toro Cabinet of Curiosities: My Notebooks, Collections, and Other Obsessions by Guillermo del Toro
“Guillermo del Toro’s notebook, the genius behind Hellboy, The Orphanage, and Pan’s Labyrinth. Foreword by James Cameron, afterword by Tom Cruise, and contributions from Neil Gaiman and John Landis, among others.”
14. Cinematography: Theory and Practice: Image Making for Cinematographers and Directors by Blain Brown
“Getting this book and Amazon’s Instant Video is like getting an MFA in Cinematography.”
15. The Big Picture: Filmmaking Lessons from a Life on the Set by Tom Reilly
“The book covers 50 short, to the point, extremely useful tips that have helped us save an incredibly amount of time and money on pre-production and production. This book is a fantastic resource.”
16. The Philosophy of the Coen Brothers by Mark T. Conard
“A book about the Coen Brothers. Enough said.”
17. Directing Actors: Creating Memorable Performances for Film & Television by Judith Weston
“Understanding the technical aspects of filmmaking is as important as learning how to communicate with the people you work with, especially when they are NOT professional actors.”
18. Hitchcock (Revised Edition) by Francois Truffaut
“Simply put, this is a book-length conversation between two of the best film directors in history.”
19. The Complete Film Production Handbook by Eve Light Honthaner
“Everything you need to know to set up and run a production. An essential resource if/when you need to work and communicate with much more experienced producers.”
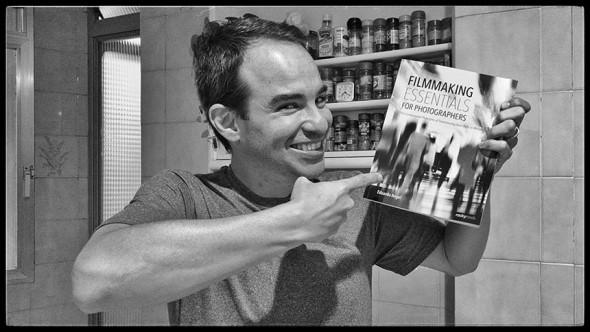
20.Filmmaking Essentials for Photographers: The Fundamental Principles of Transitioning from Stills to Motion by Eduardo Angel (yes, that would be me!) UPDATE: The PDF version is now available here.
To remain relevant and in demand in today’s visually driven world, image makers must learn to craft both still photographs and motion in order to attract clients. While there are many similarities between photography and cinematography, there are key aspects of shooting motion—such as sound and camera movement, to name just two—that are uncharted territory for most photographers.
These are books that I own, have read multiple times, truly enjoy, and highly recommend. My hope is that they help you sharpen your skills, improve your craft, and give you many hours of joy and wonder.
Here’s the complete list on Amazon.com: my top 20 favorite books on filmmaking.
Video
Dove’s Sketches.
As a producer I’m always looking for great stories by real people and meaningful messages. As a filmmaker I appreciate nice lighting, clean sound, interesting framing and editing and overall high-production values. Dove’s latest video for their “Real Beauty” campaign checks everything on my list.
The 3-minute video is called “”Real Beauty Sketches” and it’s about a police sketch artist comparing with drawings how women describe themselves and how they are described by others.
The campaign has been going on for almost 15 years, sometimes with lots of controversy, sometimes with great success. The “Sketches” video won the Titanium Grand Prix at Cannes.
Video
Video for Photographers: Filmmaking Essentials.
As we have covered in numerous articles before, still photographers can reasonably quickly learn the most essential filmmaking techniques and greatly expand their creative options and the range of professional services.
In our latest Lynda.com course we help bridge the gap between still pictures and moving images, by explaining and showing, what it takes to transition from one craft to the other. We tried our best to include the most essential video productions techniques; from framing and lighting for continuous shots to directing the viewer’s attention and incorporating camera movement and sound, and even offering a brief overview of our post-production workflows.
This course, our fifth on Lynda.com is the “theory course.” Our goal is to explain why certain techniques, steps or tools are important. Other topics include:
• Understanding the 5 Cs of cinematography
• Choosing the right camera
• Framing for continuous shots
• Lighting techniques
• Using camera movement to enhance your story
• Leading the senses with sound
• Working with different microphones
• Editing and post-production considerations
A follow-up “practical” course (available in a few weeks) will cover hands-on composition, camera movement, sound and lighting techniques, among other useful tips like packing and working with very small budgets and crews.
Enjoy!
Video
Hybrid Assignments Equipment List: The Essential 41 Items
In aviation, an MMEL (Master Minimum Equipment List) is a categorized list of on-board systems, instruments and equipment that must be operative in order to flight. Any additional equipment not included in the MMEL may break temporarily but it won’t make the aircraft inoperative. Here’s an attempt to create a hybrid MMEL for three different crew sizes.
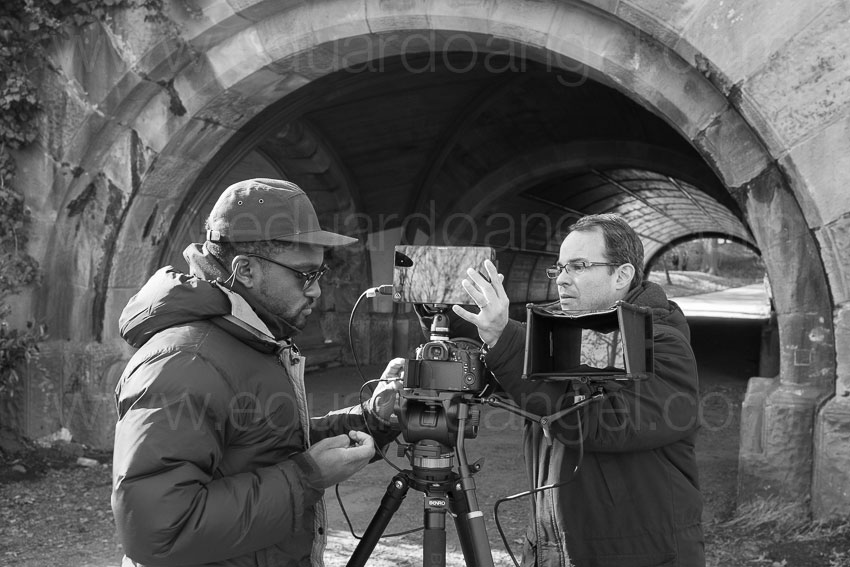
Let’s start with the definition of “Hybrid.” What I normally mean by this term are productions or assignments where one or two people are required to be the photographer, filmmaker, sound recordist, producer, and even editor. And, these gigs are becoming increasingly popular. It sounds crazy and these sorts of shoots can be. One of the keys to making them run smoothly relies on great planning and working with less equipment that gives you more control in less time. It also helps to team up with other people who can complement our weaknesses.
Short and one-man crew hybrid projects
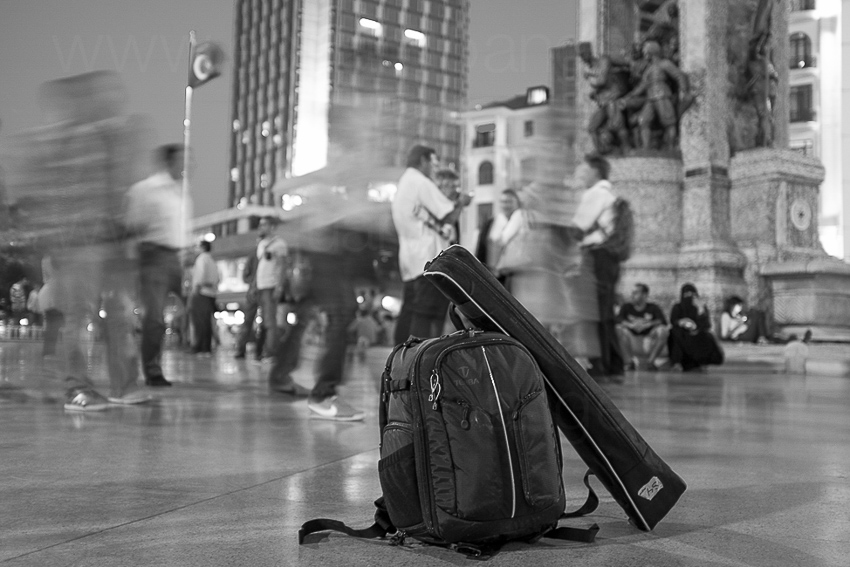
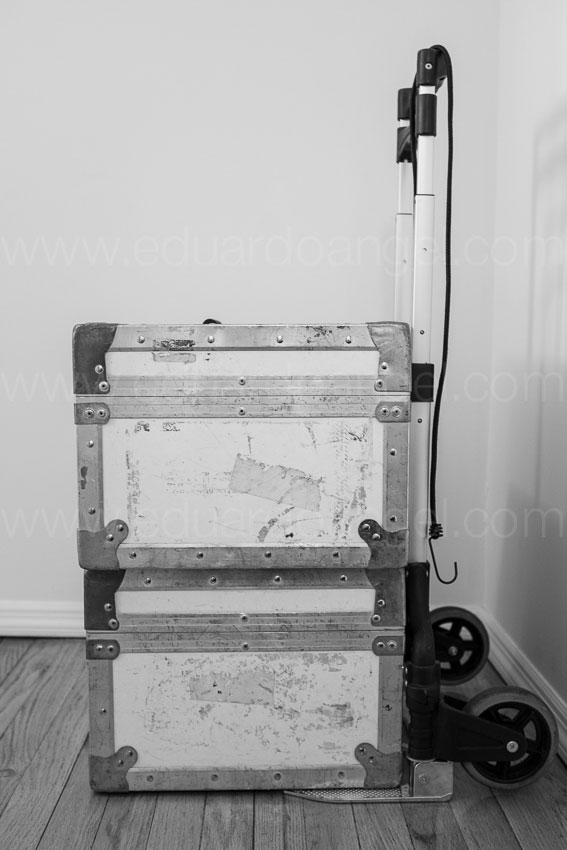
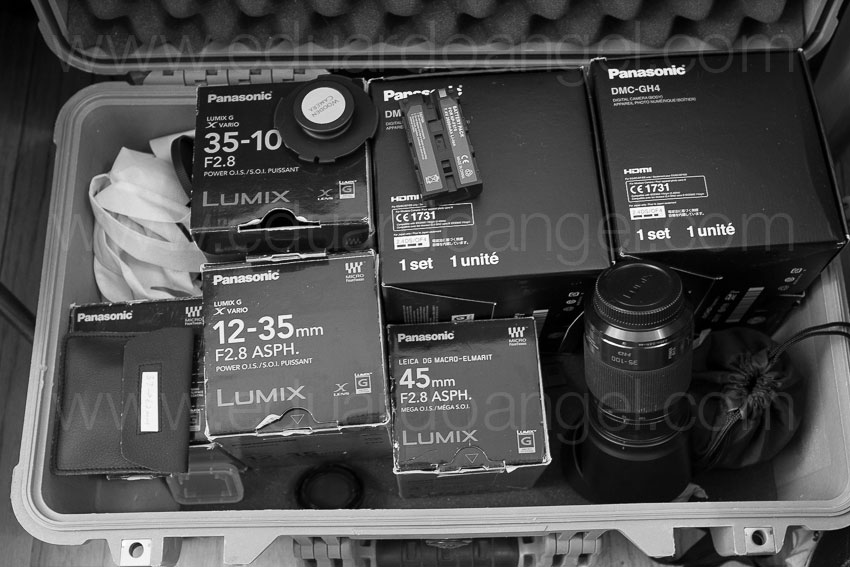
One substantial challenge for photographers shooting video is how to travel as light as possible while carrying a full production and post-production setup that is literally on their back. Here’s a picture of my backpack, which contains every single piece of gear that I’d need for from one up to three days, except some clothes and toiletries that will go on a small backpack.

Bag for a 1-day or 2-day gig by myself.
1. Media Credentials which sometimes, but not always, can give you special access, get you discounts and the most important part, allow you to travel with some heavy or oversized gear without paying a fortune. Here’s a link to Delta, American, and United Media Baggage policies.
2. Two external portable hard drives. I suggest this one, or this one.
3. Audio field recorder like the H4n (or a more current model and smaller version like Tascam’s DR-05) to capture interviews and my own production notes.
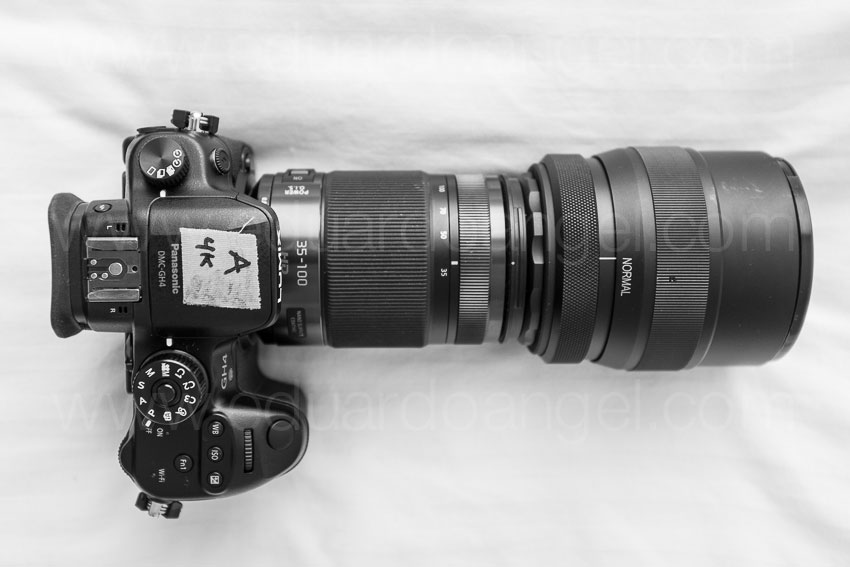
4. Camera A for video, in this case a Panasonic GH4 (Amazon and B&H) with a Lumix 35-100mm 2.8 lens (Amazon and B&H). I’m in love with this lens. So small, yet so sharp!
5. Camera B for video, another Panasonic GH4 with a Lumix 12-35mm 2.8 lens (Amazon and B&H)
7. Camera for stills and location scouting; I always carry my Fuji X100s (Amazon and B&H)
8. A variety of Tenba Tool Boxes (Amazon and B&H) to pack all the batteries, chargers, cables, adapters and other small accessories.
9. A small tripod (Amazon and B&H)that sometimes serves as an improvised handheld rig. A car mount works great for time lapse and even to hold the H4n or small lights during interviews.
10. At least one Rode VideoMic (Amazon and B&H) to capture some ambient sounds or interviews.
11. A 15″ MacBook Pro (Amazon and B&H) with Adobe Creative Suite (Amazon and B&H) and Shot Put Pro.
12. One of my favorite photo bags ever, the new Tenba Shootout (Amazon and B&H)
13. In terms of lighting, for these assignments I try to use mostly available/natural light, but I bring a 5-in-1 Collapsible Reflector.
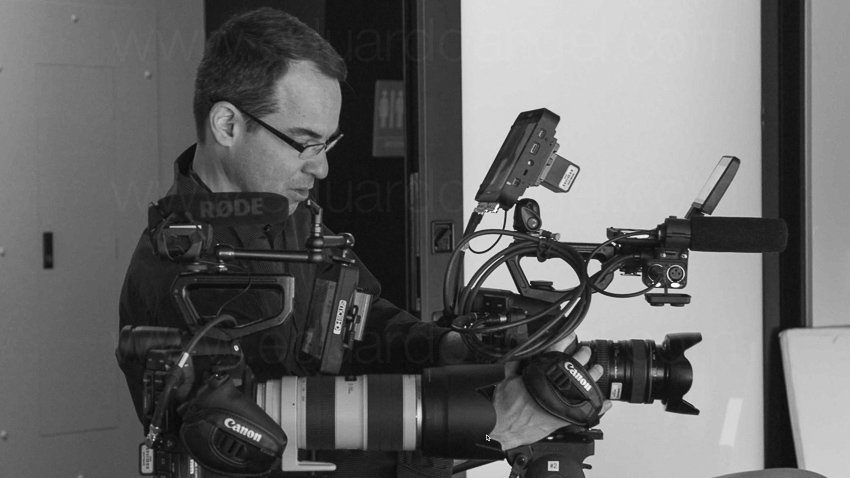
And here’s my typical outfit and setup for some of these solo hybrid gigs.
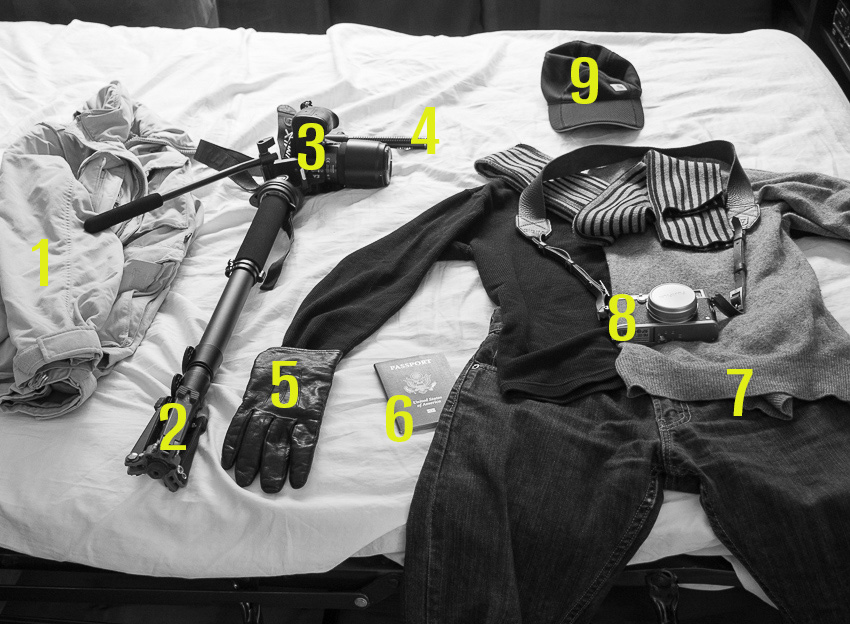
My outfit for hybrid shoots.
1. My good ol’ Columbia jacket/vest has been traveling with me to more than 40 countries. It has lots of pockets, a hoodie, and because it has a self-stowing pocket, it sometimes doubles as a pillow on the road. A priceless item, to be sure.
2. Benro S4 Video Monopod. Small, relatively light, and sturdy. Works great.
3. Panasonic GH4 with a Lumix 35-100mm 2.8 lens.
4. Rode VideoMic Shotgun
5. I always bring gloves unless I’m going to the Caribbean in July. Montreal was pretty cold and wet!
6. Obviously, the most important tool if you are crossing any borders: the passport. This website compares the “power” of passports from many different countries, and, as Americans, we are blessed to have the most powerful one.
7. I like to dress in layers and in dark colors when shooting on the road. Black hides dust and stains very easily. A cashmere sweater is worth its weight in gold.
8. Camera for stills: The Fuji X100s is especially handy after a very long day, when I don’t want to carry more gear but still want to capture a few night scenes of nice-looking dishes during my evening meal.
9. A hat—another essential item.
Longer projects and bigger crews
For a longer hybrid assignment where I’ll have one or two more people (gaffer/grip and a second camera/DIT) I’d bring a few more items. In this case we wouldn’t need to carry everything on our backs, but we definitely need to pack as little and light as possible.
We would bring a Tenba Transport Rolling Tripod/Grip case, to pack one or two Benro S8 tripods, a Benro S4 monopod, a very compact and portable slider that would take the same fluid head from the S8 tripod and/or the S4 monopod. Some grip accessories that I consider essential are at least a couple of adjustable Gaffer Clamps, and a couple Collapsible Reflector Holders which also double as boom stand. These two light and inexpensive items effectively function as one, and sometimes two, additional crew member. A no brainer if you ask me.
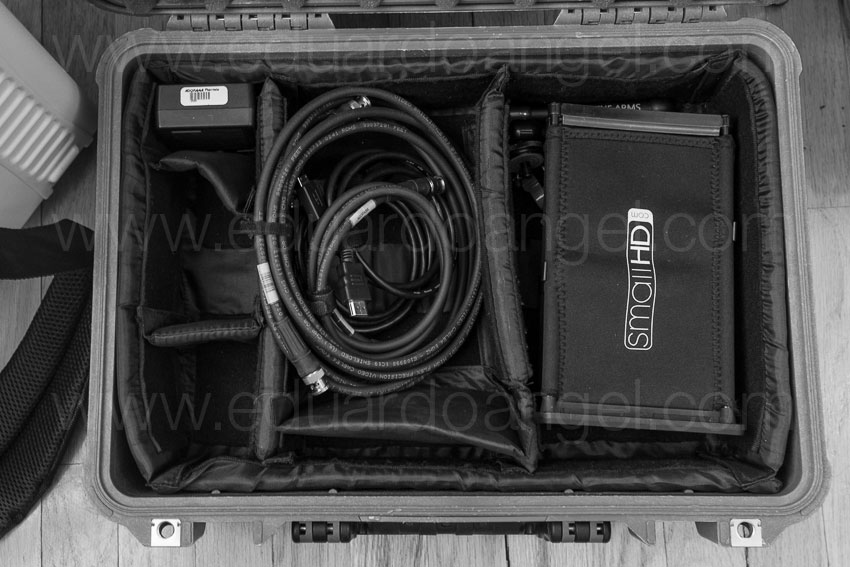
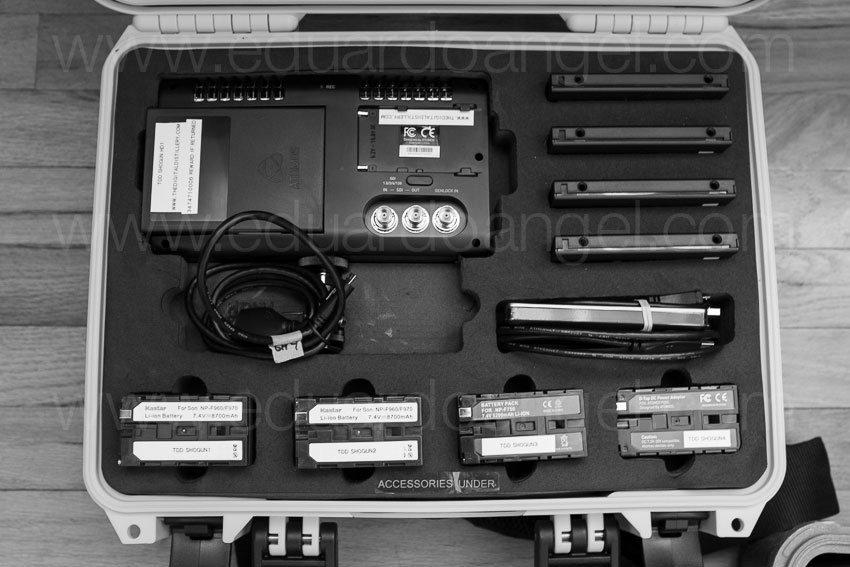
On the camera package I’d include an external monitor/recorder like the Atomos Shogun with plenty of Solid State Drives (you can also rent them for only $28 per day!), and all the charges and cables you can imagine, and a power strip (get one with a long cord) that becomes essential when downloading all the footage every night AND charging all the batteries for the next day. I use one Tenba Roadie Hybrid bag for the most expensive, essential and fragile items, namely cameras, lenses, Shogun and hard drives. The brilliant design of the Roadie Hybrid allowa me to treat is as a standard rolling carry-on, but I can also use it as a (very heavy) backpack on uneven terrain, subway stations, etc.
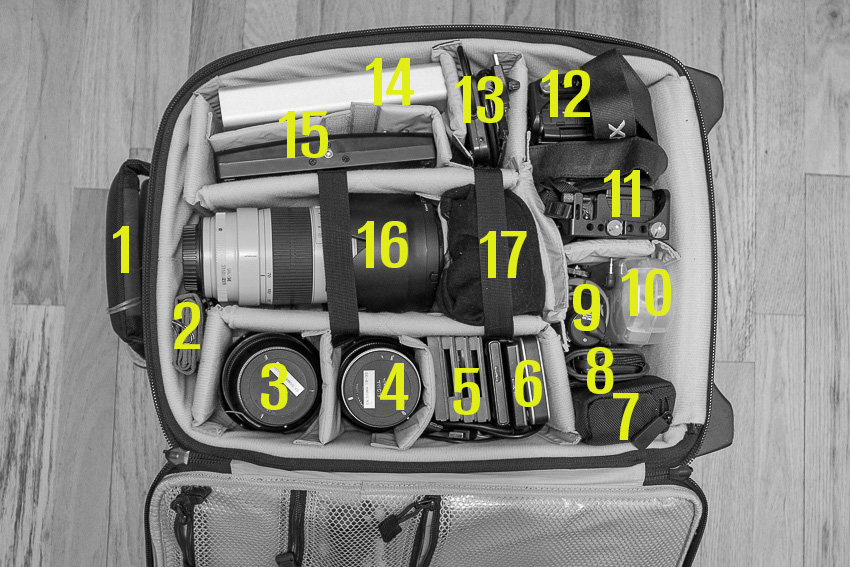
Here’s a view of my carry-on bag.
My carry-on bag for longer jobs and/or when I have a bigger crew.
1. Tenba Roadie Hybrid bag
2. Media pouch with ten 64GB SD cards
3 and 4. Sigma 18-35mm f/1.8 and Sigma 24-105mm f4. These are the same lenses I used last year on another one-man Hybrid project in Istanbul and Europe
5. SanDisk Solid State Drives for the Atomos Shogun
6. Two external portable hard drives
10. H4n Audio field recorder.
11 and 12. A couple of Panasonic GH4 bodies with Varavon cages, one with a Metabones Speedbooster (for the Sigma and Canon lenses) or a couple of Canon C100 Mark II or C300 Mark II bodies if the job doesn’t require stills.
13. USB 3 reader for Solid State Drives (included with the Atomos Shogun kit)
14. 6TB G-Tech External Hard Drive (compact, super fast and awesome)
15. Atomos Shogun
16. My sharpest and heaviest lens, Canon 70-200mm f/2.8 [
17. Panasonic Lumix 12-35mm 2.8 lens and Panasonic GH4 with a Lumix 35-100mm 2.8 lens. These lenses are the equivalent to a 24-70mm 2.8 and a 70-200mm 2.8 but super light and small
18. In terms of lighting I usually bring two or three 1×1 Bi-Color LED Panels with batteries and two Chimera 1×1 Lightbanks with grids. That pretty much covers all me needs. Another option is a Fiilex kit, which I like a lot, but find it way too expensive. I’ll need light stands and cables.
19. Depending on the job we would add another camera movement tool, like a Glidecam or a Ronin or even jibs and dollies. It depends on too many different factors.

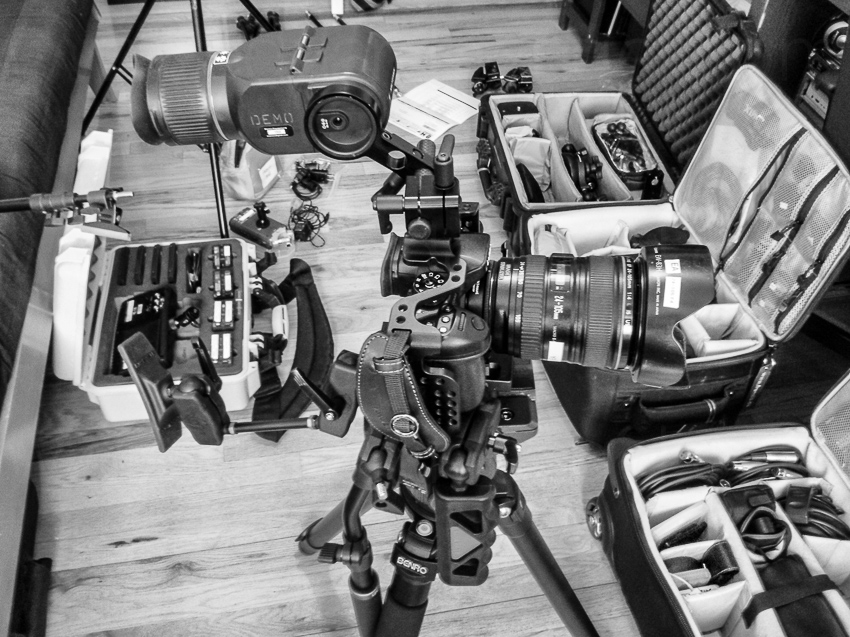
All the bags packed. The LED lights are in the back seat.
Well, there you have my little setups for hybrid assignments. Obviously, there isn’t a perfect setup of gear list, just like there isn’t a perfect camera, but these items have been working great for us. I hope this article benefits some of you involved or interested in run and gun, single-operator scenarios like weddings, events, corporate shoots, documentaries, red carpet premieres, product launches, sporting events, video podcasts, and even student films.
If you are interested in some packing and traveling tips, especially when shooting overseas, or what to do the day before your video/shoot shoot, we have written about that too. Did I forget anything? Let me know here!
And of course, there are those crazy long, crazy hectic, crazy complex and crazy awesome projects that require everything and the kitchen sink.

Video

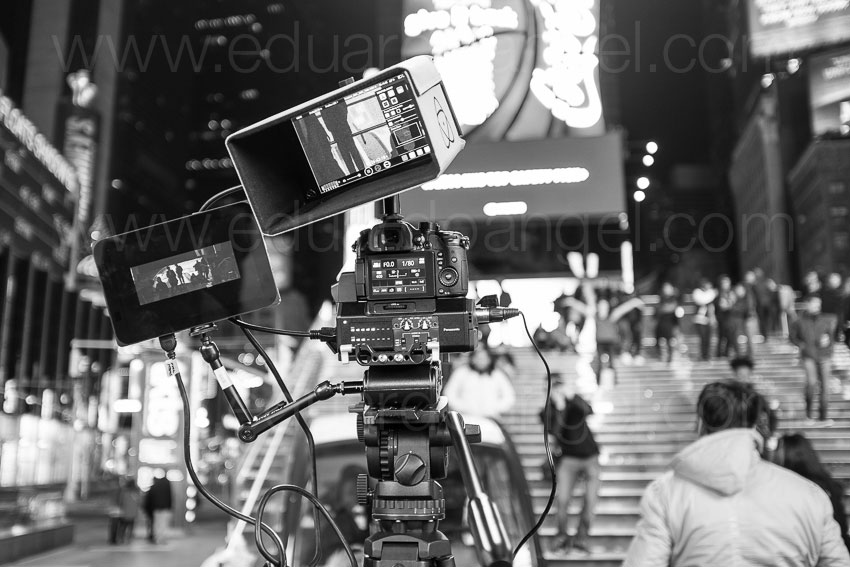
Shooting 4K Anamorphic and V-Log with Panasonic’s GH4. Ten Valuable Lessons.
UPDATED: I just added two video tutorials: one comparing “Panasonic’s V-Log L vs. Cinelike D” and the second one “Conforming 4K Anamorphic Footage in Adobe Premiere Pro.”
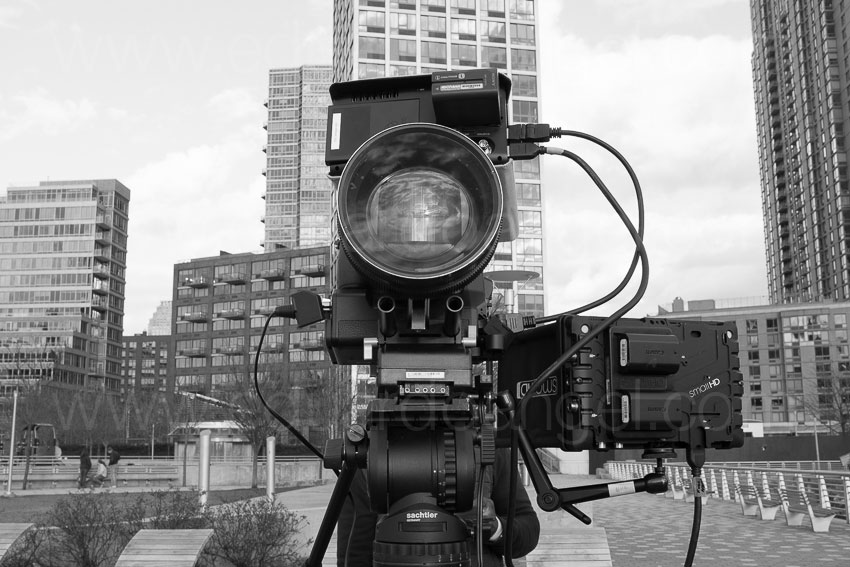
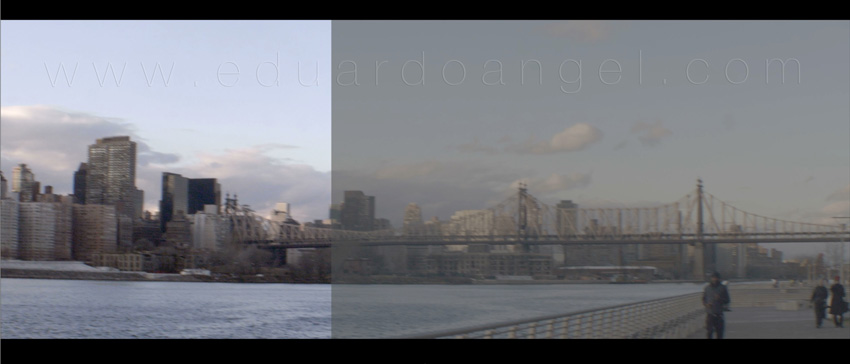
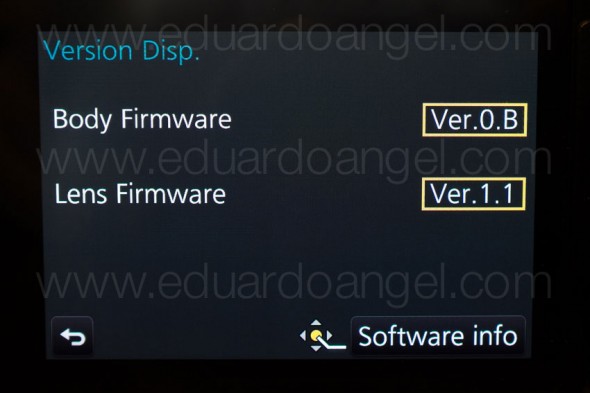
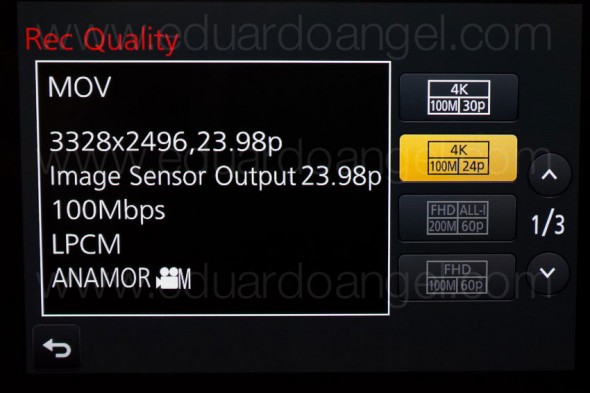
Anamorphic is enjoying a huge comeback. The reasons to go this route vary from project to project, but generally it’s the desire to achieve a different look and use as many pixels from the sensors as possible. Panasonic’s Firmware Update v.2.2 (available here) enables an Anamorphic (4:3) Mode capable of recording video in 3328 x 2496 pixel (equivalent to approx. 8.3-megapixel) resolution at a frame rate of either 23.98, 24, 25 or 29.97 fps. With an anamorphic lens such as 2x Lomo lenses (see below) we now can capture and un-squeeze a 3356×2496 image in post-production. To make things even better, 4:2:2 / 10 bit HDMI output is also available.
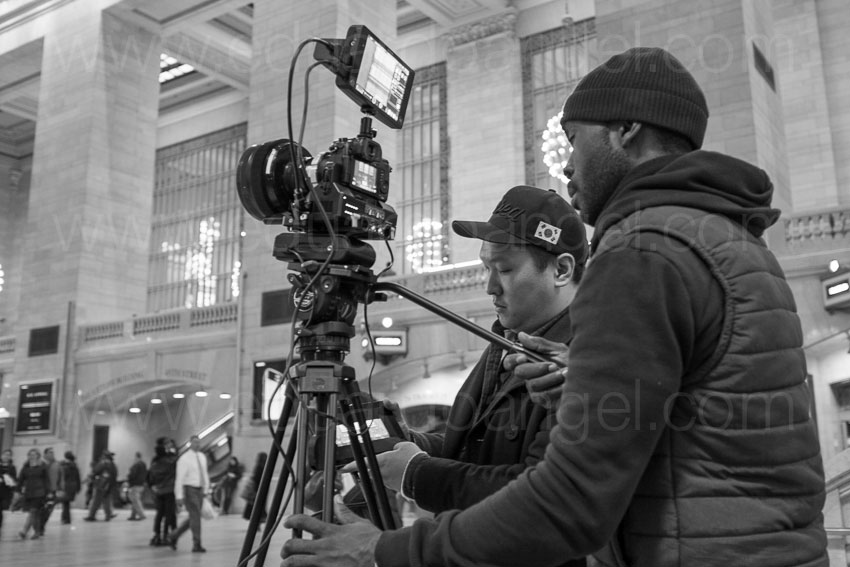
Just like in 2013 when we had the opportunity to field test a GH3 in the Middle East and last year when we shot with one of only three prototypes world-wide of the GH4, for the past couple of weeks I had the privilege to work with director Davis Northern, DP and tech wizard Sean Davis and many other talented people on one of the very first GH4 Anamorphic AND V-Log L projects, shot exclusively for Panasonic North America and produced by The Digital Distillery.
Panasonic 4K Anamorphic and V-Log L – Official Video from The Digital Distillery Inc. on Vimeo.
The project was exciting and very challenging, as working with hardware prototypes and beta versions of software or firmware always is. We had a lot of moving pieces and an extremely tight deadline, but I’m proud of the final results and very satisfied with the lessons learned. This article covers some of the most significant ones, and it is written from my very own personal perspective. As always, I try my best to be as objective and brand agnostic as possible. The lessons aren’t in any specific order and some links will take you to articles with additional information . Please consider using our links to help support our very time consuming articles and tutorials.
Ready? Let’s go!
1. Shooting Anamorphic
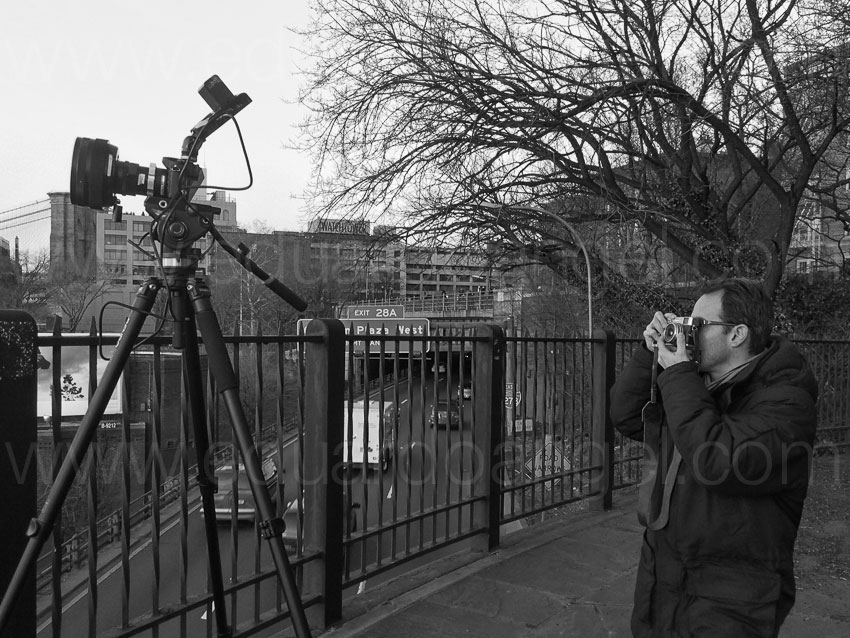
It can definitely be achieved by a very small crew on a small budget. We mostly shot with a crew of three, with very limited gear and time. I’ve always assumed you needed a 2-ton truck and a crew of 30 to pull this off. Clearly, this was not the case for us.
2. Lenses
In terms of lenses, we opted to keep a “low profile” while keeping our options open. In other words, we rented a set of vintage anamorphic Lomo lenses (35, 50, and 75mm) and tested an SLR Magic as well as a Letus AnamorphX 1.8X Pro Adapter and a Veydra Mini Prime.
A. Lomo:
The lenses are huge and heavy. Lomo 50mm + 75mm with case = 25lbs. Lomo 35mm with case = 35lbs with each case weighting about 30lbs. Not ideal for the “guerilla” approach we needed for this project. They definitely have a unique look, but are very hard to focus, especially when using a very flat profile. We rented the set for $500/day or about $1,700 for a week including tax. Not cheap by any means but definitely worth the investment in terms of time and quality.

If I were to shoot this project again (or on upcoming anamorphic projects) I probably would test the Cooke Anamorphic/i Lenses (25, 32, 40, 50, 75, 100, and 135mm with a 2x squeeze). Unfortunately these lenses cost about $30,000 each, and the rental rate is about $500 per lens, per day.
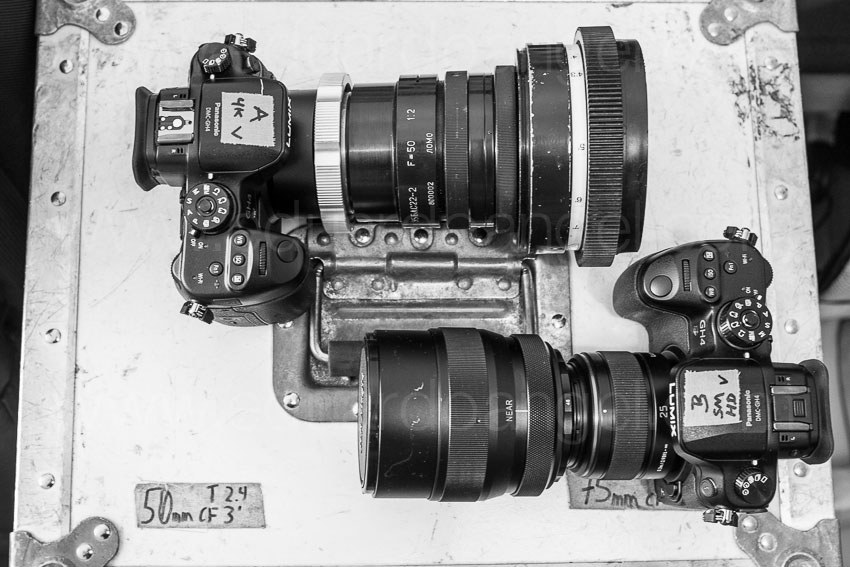
B. SLR Magic:
We had access to a very nice selection of Panasonic glass that we wanted to use with an SLR Magic adapter. The first challenge was that the front diameter on all the lenses has to be below 62mm in order to use the step down rings. The second limitation was (for the Panasonic lenses) that anything wider than 28mm would vignette. We could have used the Panasonic 12-35mm lens, at 28mm or longer (kind of pointless), but for some odd reason with the SLR Magic adapter it vignetted all the way even at 35mm. The Panasonic 35-100mm didn’t vignette at 35mm. Go figure. The next usable lens on our Panasonic arsenal was the beautiful 42.5mm Noticron f/1.2, but we needed a step DOWN ring (from 67mm to 62mm) that wasn’t included with the kit. The last option was the Panasonic 35-100mm f/2.8 lens, which worked well but focusing was a MAJOR issue (not Panasonic’s fault). I found the SLR Magic system very finicky and unreliable and unfortunately I can’t recommend using it.
C. Letus Anamorphx:
The Letus Adapter worked much better than SLR Magic but it was also cumbersome. A matte box is pretty much required and there was an issue with one of our widest lenses. The lesson here is, if you are shooting anamorphic, use the real thing.

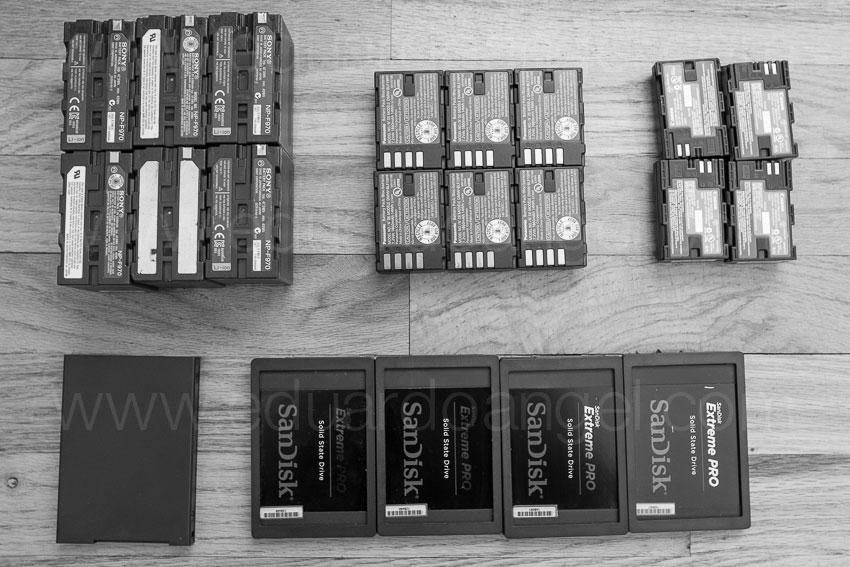
3. Storage
There’s some heavy math involved when shooting Anamorphic. An anamorphic lens produces roughly a 2X horizontal squeeze of the image onto film. Traditional anamorphic lenses were designed to work on a 4:3 standard. The anamorphic footage captured with the GH4 on the Atomos Shogun is 3840×2160, so not technically 4K but pretty close. Shooting internally (to an SD card) the footage is 3328×2496, so greater vertical resolution than the 4K standard, but not full 4K horizontal resolution. To keep things in perspective, the 4K footage out of the GH4 4096×2160.
As you would expect, the files are huge. Shooting ProRes 422 you need about 4GB per minute of footage. Two cameras: 8GB, after only one backup you are at 16GB per minute. So somewhere around 20GB per minute is a pretty safe storage estimate for a two-camera setup. As always, we trusted all our very valuable assets to G-Tech Hard Drives.
Regarding Solid State Drives, Atomos has a great chart with all the supported drives for the Shogun and other devices. Make sure you triple check the chart before investing in one.
One SECOND of footage takes about 50MB so even if you are shooting into seemingly endless Solid State Drives, being smart about when to start rolling and when to stop can save a lot of storage.
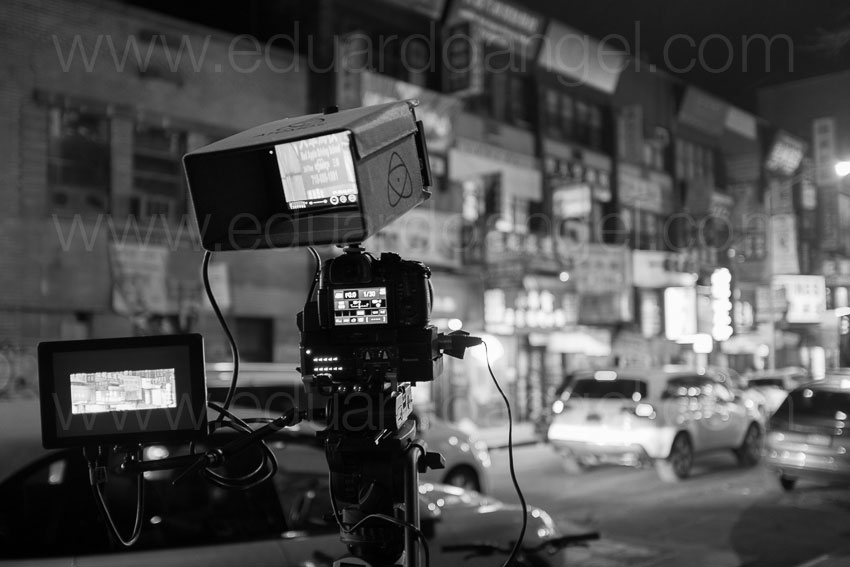
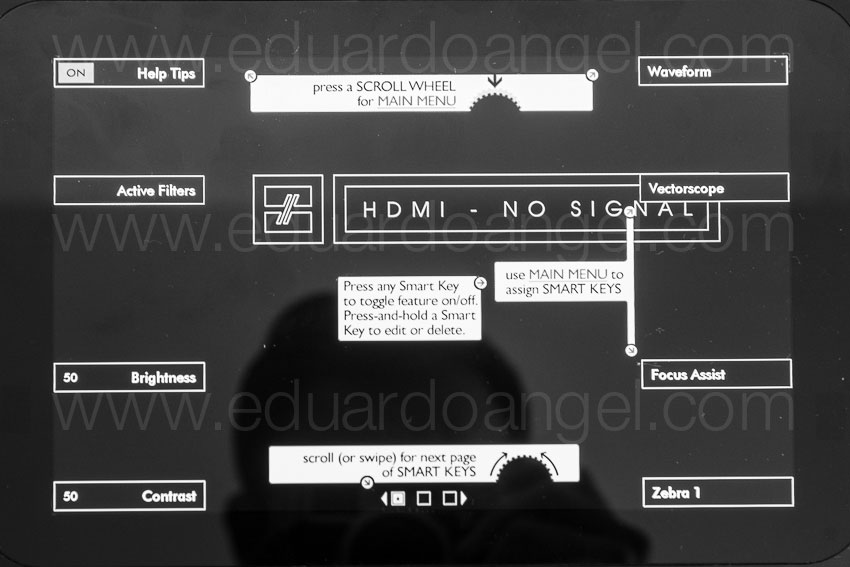
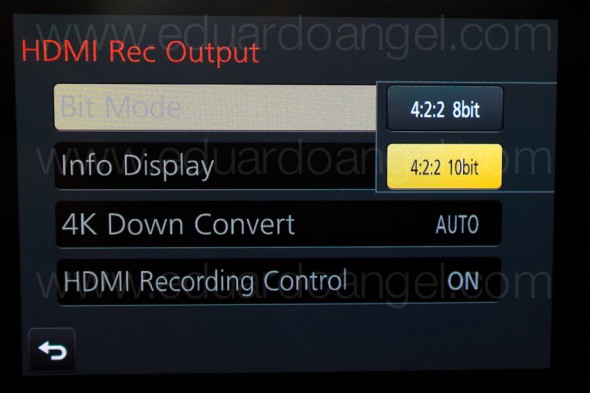
4. HDMI
As we were shooting, Atomos was literally finishing writing the Shogun’s firmware update (available in May or June as a free download) will enable a number of awesome features:
- Anamorphic de-squeeze for Panasonic GH4 and standard lenses
- RAW recording to ProRes, DNxHR and Cinema DNG for compatible RAW formats
- Expanded RAW compatibility to include Sony FS series, Canon, Arri and AJA
- 3D LUTs on HDMI/SDI output
- Cinema 4K DCI support
- Uncompressed V210 support
- Genlock
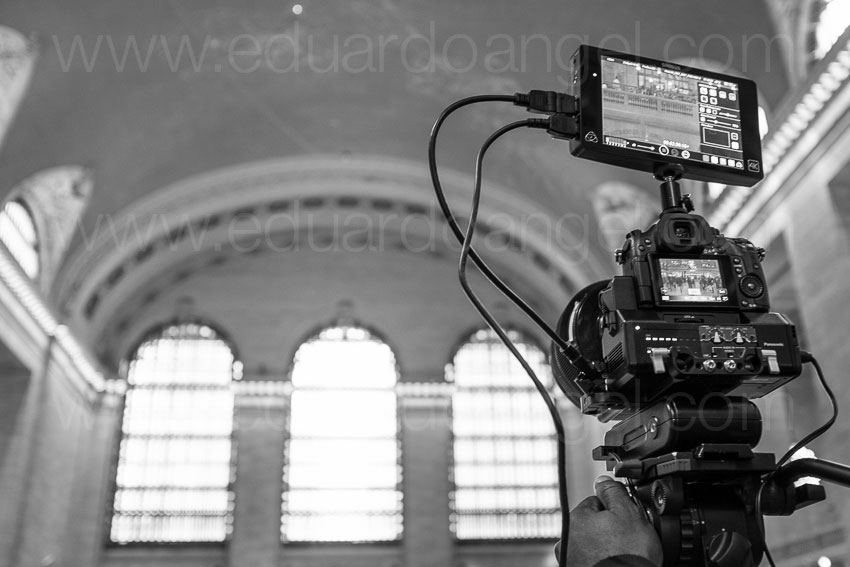
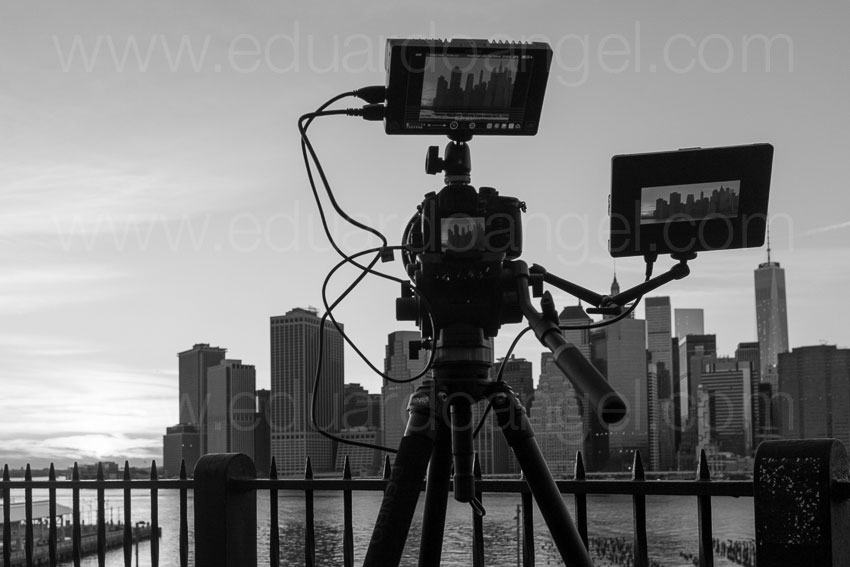
We had to use a Small HD Pro7 (to de-squeeze) and the Shogun (to record in 4K). The setup seems pretty obvious after a lot of trials but it wasn’t at first. Here’s the executive summary that will hopefully save you some time and stress:
1. Micro HDMI to Standard HDMI cable from the GH4’s HDMI OUT to the Atomos Shogun HDMI IN
2. Standard HDMI to Standard HDMI cable from the Atomos Shogun HDMI OUT to the Small HD HDMI IN
3. In the Shogun, the 4K downconvert option should be OFF while connecting the Small HD and turned ON when everything is properly connected.
Our Small HD had a nasty tendency to constantly lose signal for no apparent reason, so step #3 had to be repeated many times throughout each shoot.
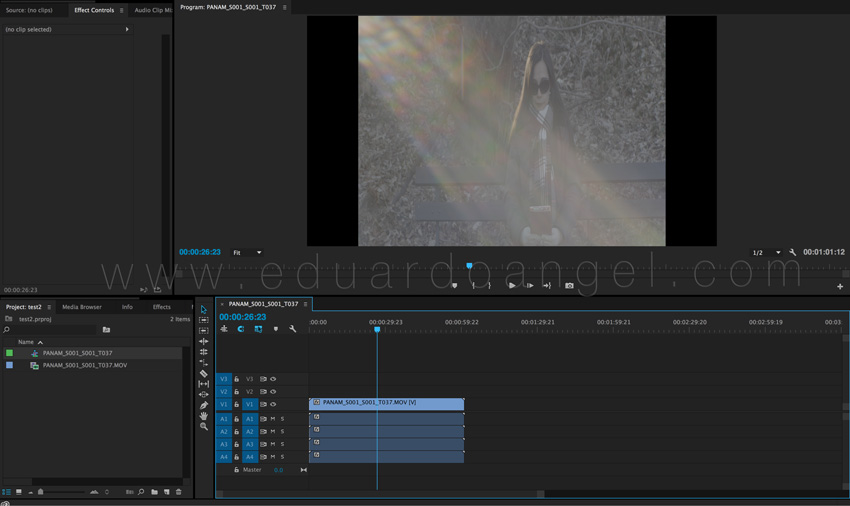
5. Premiere Pro CC 2014 Workflow
To be totally honest, I was shocked by how easy it was to conform the footage in post. Here’s what you need to do:
1. Import the footage the way you normally do.
2. Select the anamorphic clips.
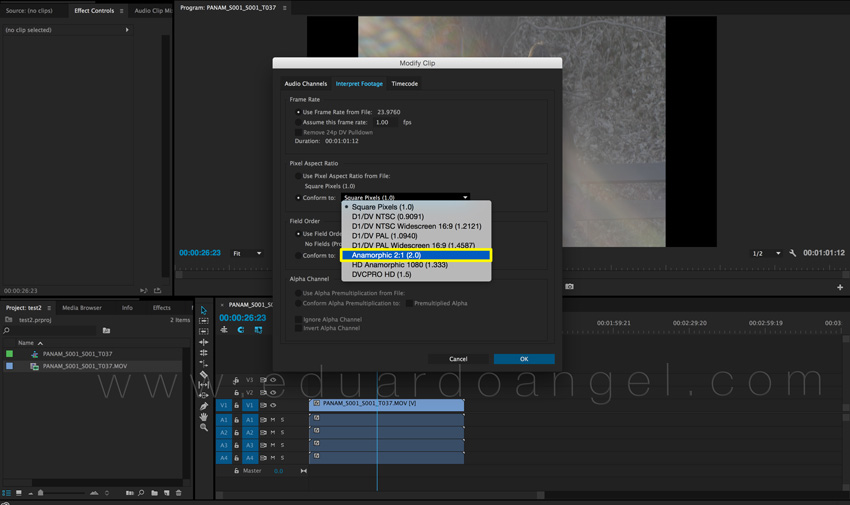
3. Go to clip > Modify > Interpret Footage
4. Under “Pixel Aspect Ratio” select “Conform To” and “Anamorphic 2:1 (2.0).
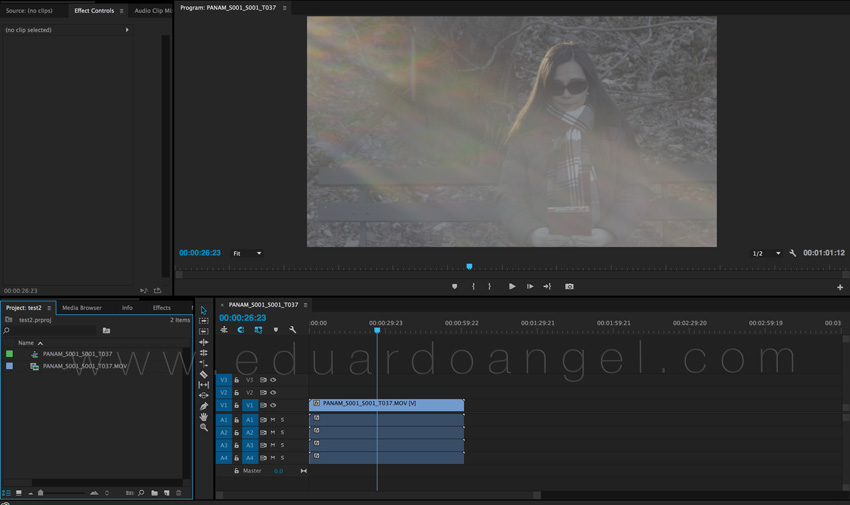
5. Create a “new sequence from clip” and start cutting.
6. Done and done. Wow!

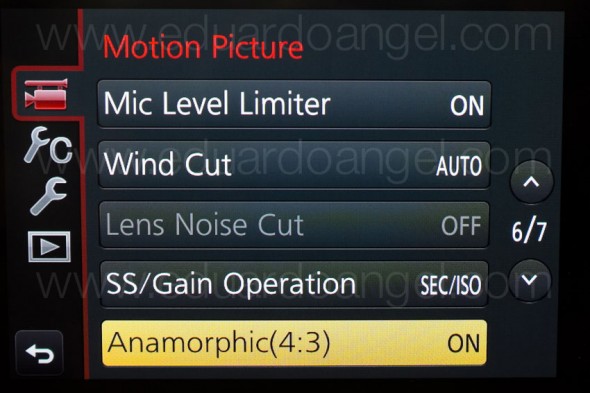
Here are some screen grabs from the camera’s LCD:

6. Focus
Focus is super, extra, hyper critical, especially when shooting with a very flat profile like the one we used. Unfortunately we couldn’t trust the SmallHD and had to rely 100% on the Shogun at a 1:2 zoom.

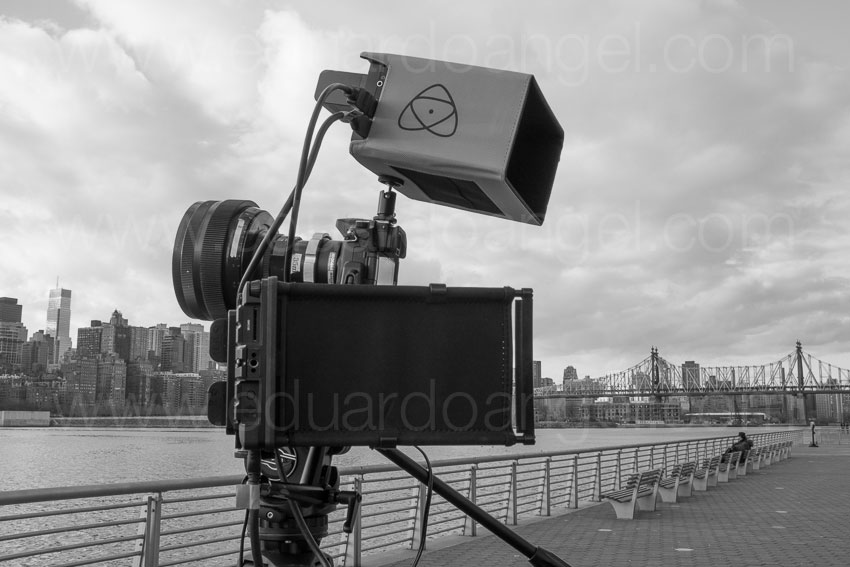
7. Accessories
• A sun hood for your external monitor is absolutely essential (if given the option get the black version).
• Obviously you will need lens adapters if you are planning to use the SLR Magic or Letus AnamorphX options.
• Make sure you get plenty of batteries, The small battery that comes with the Shogun lasts about 30 min only and we got about one hour of recording time with TWO Canon batteries on the Small HD. Instead of buying tons of batteries I’m a big fan of renting them (more here). The same goes for additional Solid State Drives.
8. Bonus lessons:
• Shooting anamorphic takes a lot practice and fine-tuning. I’d recommend scheduling at least a full day to test all the gear before a shoot.
• If we keep a small footprint and move fast, we can get a lot done.
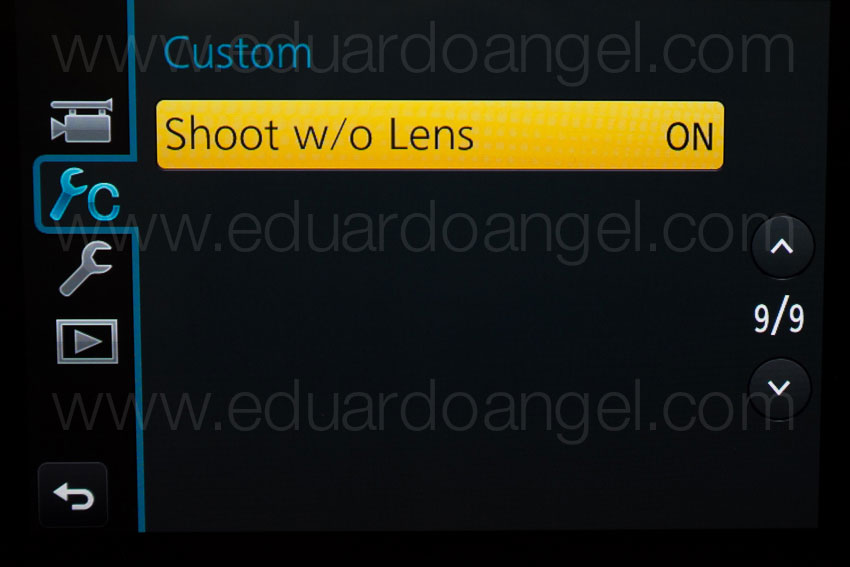
• The “shoot without lens” on the GH4 must be turned on in order to work with the Anamorphic lenses.
And…..here are two more videos (not anamorphic) shot with the Panasonic GH4. Check them out and let me know if you have any questions or comments via Twitter (@EA_Photo)
Video

The eternal quest for “the best” digital camera.
I often receive emails asking for advice about “the best lens” or “the best camera” or even “the best laptop.” I believe it is simply impossible to determine a “best” of anything as there are too many random factors such as experience, budget, expected lifetime of the product, intended use, availability of accessories (like lenses or batteries), and even tech support in certain areas. That’s not even considering more subjective factors like personal preference, sense of loyalty to certain brands (or dislike for others), and even the size or weight of such tools. Interestingly, we are currently experiencing one of those “what’s the best” dilemmas ourselves, and not a minor one by any means; we are reconsidering our standard camera package for 2015–16.
Renting vs. Owning:
For many reasons, I believe renting is one of the best options for most people. When all you have is a hammer, the solution to every problem requires a hammer. That’s a very limiting factor to your creativity and a disservice to clients. Sometimes you can get the job done with a Swiss Army Knife like MacGyver, sometimes you need a nice toolbox, and sometimes the best approach is to have a professional plumber do the job.
Another huge reason to rent is to keep overhead as low as possible. Unless you are shooting several times a week with the same system, having something that is guaranteed to quickly decrease in value simply collecting dust in a drawer isn’t the best financial move. Unfortunately, renting is not an easy or affordable option in many small cities.
Lenses:
In terms of lenses I own a nice selection (from 8mm all the way to 200mm) of mostly Canon L glass, some Sigma ART lenses (with Canon mounts), as well as a couple of Panasonic Lumix lenses. I also have one Metabones Speedbooster adapter (Canon EOS to MFT).
Accessories:
We own a set of LED lights and basic accessories that I use frequently and will last a long time like monopods, tripods and a few camera movement tools. I also own a complete audio kit simply because we use it quite often. Audio tools tend to be fragile, and we have a very specific preference for brands and settings. Ultimately, because sound is such an important element of any video project, completely trusting it gives me an additional peace of mind. But I digress. The point of this article is not audio equipment, but cameras.
Cameras:
We own a Panasonic Lumix GH4 bodies and still have a couple of GH3 bodies. They have served me extremely well on hybrid assignments. I am very happy with the quality of the footage and always having the option to shoot 4K, HD, built-in slow-motion, and time lapses with the same camera and media. For video-only productions we usually rent Canon C100 Mark II or C300 Mark II bodies, which I also like very much.
The Challenge:
Several upcoming projects will require a more “complete” camera package, and we seem to have enough projects in the pipeline that it might make sense to own instead of rent, not only financially, but to save time picking up/returning and to be certain that the tool we plan on having in pre-production is the same tool we use on location weeks or months later. So, what’s the best cinema camera (for us) right now?
Technically speaking, we will need a main camera (Cam A) that ideally shoots 4K and has all the standard bells and whistles like XLR ports, HDMI, a good viewfinder, variable frame rates, peaking, ND filters, etc. Great low-light performance is key. For several projects we’ll need to shoot high-quality behind the scenes footage, so we will need a second camera (Cam B) that is either the same or very close to the quality of Cam A.
To make the riddle even more interesting, some of these projects will be “hybrid” projects that require on-location, mostly unplanned, and available light shooting with a very small crew (two or three people max). So the gear package needs to deliver great stills, great footage, and be easily operated by one person, which means light and compact.
Possible Solutions:
I will only discuss the main components of the package, so additional batteries, cables, memory cards won’t be included in the total price.
1. Canon
The first and obvious move would be to buy a couple of Canon C100 Mark II bodies. We already know and like the system, and own the lenses, so there’s no need for adapters. Unfortunately the C100 Mark II does not offer 4K, it is good but not great in low-light performance, it is small but not super light or compact, and it does not shoot stills, so I’ll need to get a Canon EOS 5D Mark III or at the very least a Canon EOS 70D. I’ll get the cinema features I need on only one of the systems.
1x Canon C100 Mark II = $5,500 (Amazon • Adorama)
1x Canon EOS 70D = $900 (Amazon • Adorama)
Total = $6,400
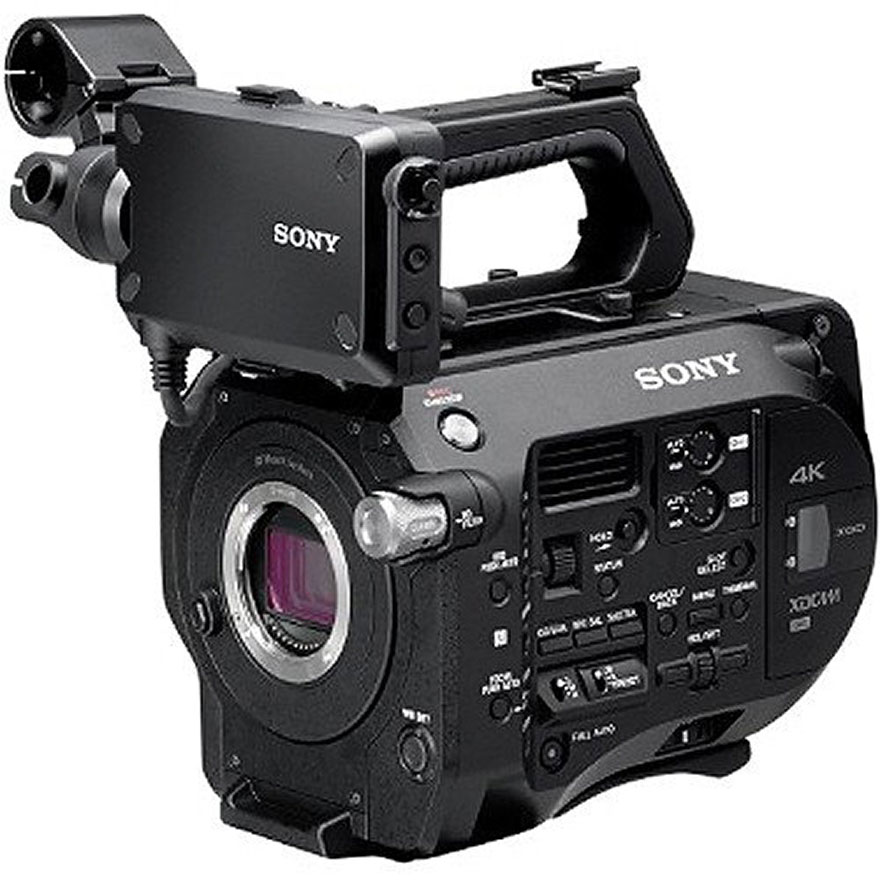
2. Sony
The second option would be to get a Sony FS7 AND a Sony a7S as a B Cam (and also for stills and BTS). The first one seems to be the new cool kid on the block, with raving fans and over the top reviews. It seems portable enough for a cinema camera and matches most of our technical requirements (I still need to test the low-light performance). Its little sister, the a7S shares the same outstanding reviews, it is clearly number one in low-light performance and it can even capture 4K to an external recorder. The catch, and this is a big one, is the cost. The FS7 goes for $8,000 and the a7S goes for $2,500. In order to use my existing lenses I’ll need two Metabones Speedbooster adapters (Canon EOS to NEX) at $650 each, but I will not have AF capabilities when shooting stills, which is a major issue. Also, in order to fully use the a7S as the B Camera we probably would need an Atomos Shogun adding a lot to the budget.
1x Sony FS7 $8,000 (Amazon • Adorama)
1x Sony a7S $2,500 (Amazon • Adorama)
2x Metabones adapter (Canon EOS to NEX) $800 (Amazon • Adorama)
1x Atomos Shogun $2,000 (Amazon • Adorama)
Total = 13,300
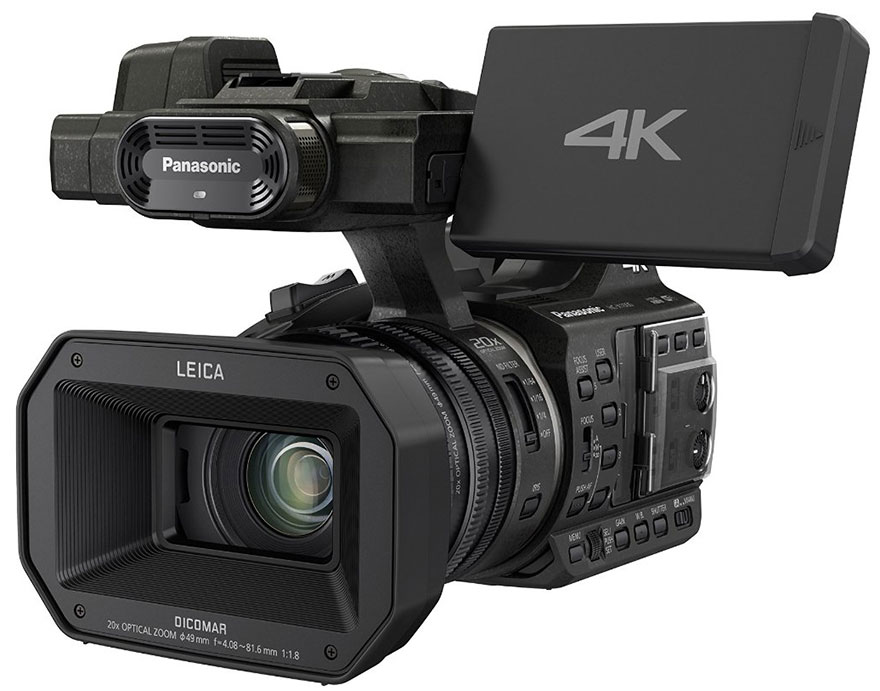
3. Panasonic
A third, and more affordable option would be to get a second Panasonic Lumix GH4 body and keep them as A Cam and B Cam (4K, HD, and stills) and something like the Panasonic HC-X1000 as a C Cam for BTS. I am still missing the “standard bells and whistles” I mentioned above, and I still have to test the X1000’s performance under low-light. Getting the YAGH (“brick”) wouldn’t make much sense in terms of money, size, weight, and additional power sources.
1x Panasonic Lumix GH4 $1,500 (Amazon • Adorama)
1x Metabones Speedbooster adapter (Canon EOS to MFT) $600 (Adorama)
1x Panasonic HC-X1000 Camcorder $3,200 (Amazon • Adorama)
Total: $5,300
4. Blackmagic
We briefly considered Blackmagic systems but found too many cons to even add them here. Another topic for another day.
Conclusions:
Honestly, there aren’t any. Not yet, anyway. We are still trying to figure out what to do. The Panasonic Package (#3) is the cheapest and easiest as we would have a very small learning curve (with the HC-X-1000) but low-light performance remains to be seen (and it is good but not great on the GH4). The price is great but we would only have the cinema features we need in one of the three cameras.
The Canon Package (#1) is right in the middle, but we would lack 4K, slow motion, a codec over 50mb/s, and only one of the two cameras offers the bells and whistles we are looking for.
Sony (#2) seems to offer the best solution, but costs twice as much as Option #1 and $8,000 more than Option #3. We would lack autofocus for stills, only one camera will have the cinema features, and the FS7 could require a significant learning curve.
An alternative, suggested by an experienced filmmaker, would be to keep using our GH3 with the Panasonic lenses as our stills camera ($0), use the GH4 with our Metabones and Canon and Sigma glass as Camera B, and simply buy one Sony FS7 ($8,000) and a second Metabones (Canon EOS to NEX) adapter $400 for a total investment of $8,400. Altogether we would get AF for stills, 4K, slow-mo, no need for new lenses, but only OK low-light performance, and only ONE system with XLR ports, ND filters, etc. I am also seriously concerned with the additional time (and expense) in post to make everything look somewhat close.
Money and lenses are obviously very important considerations, but there are many other things that have to be factored into camera choices like post workflows (software and hardware), internal codecs, etc. Color science is something else we tend to overlook, and we shouldn’t, as certain camera choices will multiply the amount of time you need to spend in post to get them to look like what you’re used to.
So, clearly, there isn’t a “perfect” camera that will meet all our requirements. So the best approach is to consider what we have (budget, lenses, software, hardware, accessories, etc.) what we need, and what we are willing to sacrifice. So, what is “the best” camera package for us, giving our existing gear, ideal requirements and upcoming needs? Now I need YOUR help to figure this one out.
UPDATE 01: Since I wrote the first draft for this article I’ve been hearing highly reliable complains about the FS7 working with lens adapters and Canon lenses. That pretty much kills the Sony package option for us.
UPDATE 02: There are strong rumors that Panasonic will be announcing an updated version of the AG-AF100 at NAB, which apparently would include 4K. That could be a great solution for our full blown cinema camera.
UPDATE 03: Another strong rumor is that Canon will replace/update the 3-year old 5D Mark III with a 4K version. Kinda cool, but it still doesn’t solve our “bells and whistles” camera dilemma.
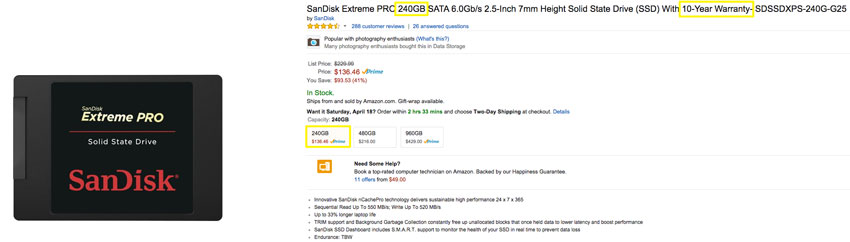
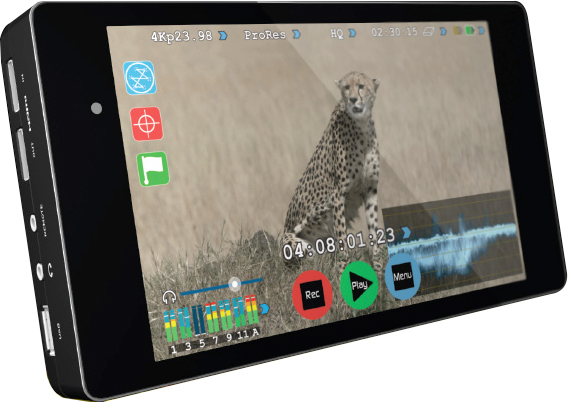
UPDATE 04: For the past 3-4 weeks I’ve been using the Atomos Shogun (Amazon • Adorama) and I must admit I’m VERY impressed. This gadget not only provides an exquisite 1920 x 1080 ultra sharp (and fairly accurate) image, but it’s main purpose is being a 4K (or HD) recorder via Solid State Drives. The best price/quality I’ve found are these 240GB Sandisk for $146 with a 10-YEAR warranty. Not bad at all.
Something I didn’t consider when getting the Shogun is that now I have XLR options, making the GH4 a much more powerful beast. The provided batteries only last about 30 minutes of recording time. I got this off-brand ultra cheap ($36) set of 2 batteries with chargers and so far they have performed perfectly. To keep in perspective, a single Sony battery costs $199….
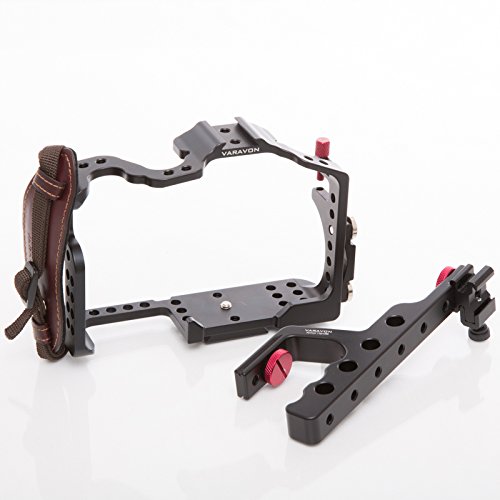
UPDATE 05: The Varavon cage for the GH4/GH3 works perfectly with a Metabones Speedbooster. This set up and the Atomos Shogun are making me rethink my camera strategy. Now I can have a very comfortable grip, add a shotgun for run and gun or a monitor/recorder with XLR mics on sticks. Hmmmm this is getting REALLY interesting!
More to come.
Video

On Film Directors and Styles.
According to Woody Allen there are two kinds of film directors: “the ones who have it, and the ones who don’t.”
It is well-known that there are two other kinds of movie directors: the ones who write their own material, like Tarantino, and the ones who adapt, like Alfred Hitchcock or Steven Spielberg. The Coen brothers are crystal clear on this: “We are willing to write for other people, but we would not direct a script that has been written by somebody else.” To Scorsese “the script is the most important thing, but it is not everything. What matters is the visual interpretation of what you have on paper.”
John Boorman believes that “directing is really about writing, and all serious directors write.” But there are extremely serious directors who do not work with scripts, like Wong Kar-Wai. “I write as a director, not as a writer, so I write with images. I start with a lot of ideas but the story is never clear. I know what I don’t want, but I don’t know what I want. The shooting process is the way for me to find all the answers. Sometimes I find them on the set, sometimes during the editing, sometimes three months after the first screening.”
Martin Scorsese has, as usual, something interesting to say about the difference between being a director and a being filmmaker. According to him, a director is “someone who only interprets the script and transforms it from words into images.” A filmmaker is “someone who is able to turn his own or somebody else’s material and still manage to have a personal vision come through.”
From a more technical perspective, we have directors who arrive to the set knowing exactly what they are going to shoot, with how many cameras and which lenses (like the Coen Brothers) and there are others who arrive with simply an idea and then follow their gut instincts (like Woody Allen).
When it comes to directing styles there are also antagonistic approaches. Some directors watch the actors rehearse and then decide with their DP where the camera should be, and how many shots will be needed. Fellini is a prime example of this approach. Scorsese disagrees: “you need to know where you are going and you need to have it on paper.” But some directors do the exact opposite. They walk around the set, decide where the camera goes, where the action will take place, and then ask the actors to accommodate.
Wim Wenders used to spend “every evening painstakingly preparing the next day’s shoot, making detailed drawings mimicking storyboards.” After “Paris, Texas” he has taken the opposite approach, “finding the scene construction in the action, and arriving on set without any preconceived ideas about the shots, and only deciding where to place the camera after working with the actors.”
There are some filmmakers who prefer to edit “in the camera,” such as Clint Eastwood or Hitchcock. Others, such as David Fincher, have no problem shooting 50 takes of a single scene and then figuring it all out later in the editing room over the course of months or even years. Woody Allen’s take on this is “it’s a grave error to start shooting a film with a script that is weak or not ready and think, “I’ll fix it on the set or in the editing room.’”
I could probably add two additional kinds of directors: the ones who make films because they have something to say, and the ones who make movies to find out what they have to say, but that would be a whole different article!
Video
The most popular cameras at Sundance.
Indiewire published recently the list of cameras used by the filmmakers included in the 2015 Sundance Festival.
The article matched each camera with the film, which was awesome. But I was also curious to see a chart that showed more precisely how many cameras where used and how often. So, I dropped the list from Indiewire into Excel and created this chart.
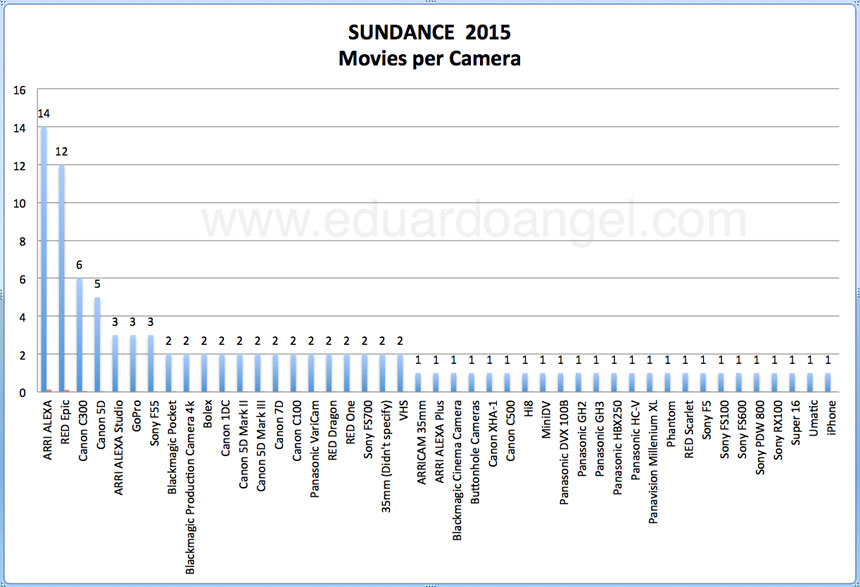
A total of 23 cameras were used in 2014 to shoot 84 movies. In 2015 almost twice the amount of cameras (44) were used to shoot 97 movies. My guess in this discrepancy is that a) Not enough filmmakers in 2014 provided enough or complete information on their cameras or b) the filmmakers in 2015 felt the need to use different cameras on the same movie.
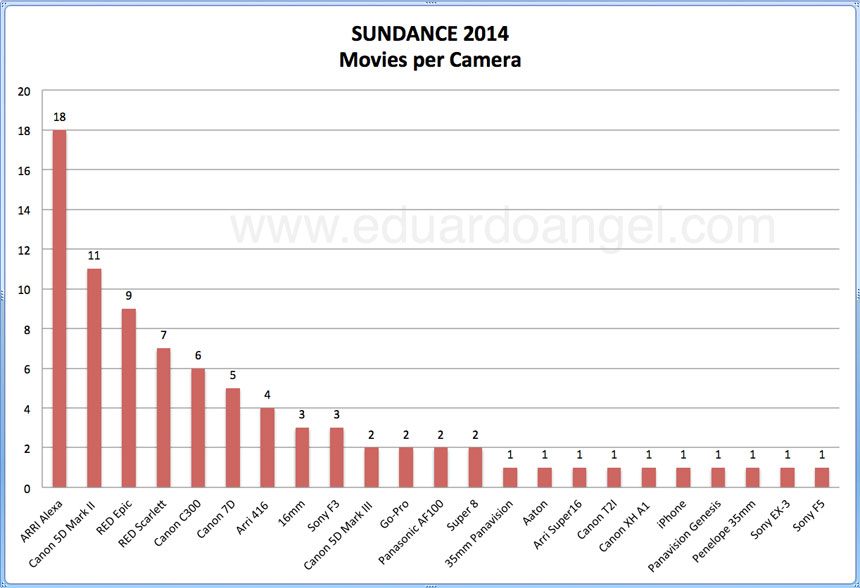
I also wanted to compare the cameras used at the 2014 Festival, so I also created this second chart, again using Indiewire as my sole resource. From the article, it is hard sometimes to tell exactly which camera was used. For example, one of the filmmakers said, “We used Super 35mm with some Red Epic, and a little super 16mm. There is also one Canon 5D shot in the picture.” Which Super 35? And obviously it had to be a Canon 5D Mark II or Mark III as the first version didn’t shoot video. In those cases I only added the Red Epic to the tally.
How can this information become useful? To me it’s simply curiosity, as I believe a great storyteller can be as effective with an iPhone as with any high-end $50K camera. Give ME an Alexa and a million dollars and I still wouldn’t be able to shoot a single frame better than Emmanuel “Chivo” Lubezki or Roger Deakins.
The camera is just a tool, but these charts could be used as a reference by film programs trying to determine where to spend their camera budgets this year. Or perhaps a film student wanting to work as a DIT or as an AC [insert link http://en.wikipedia.org/wiki/Film_crew ] can look at these charts and determine, “well, I better get REALLY comfortable with the Arri Alexa and Red Epic in order to get some high-end jobs.” The charts can also be used by filmmakers planning to upgrade their gear.
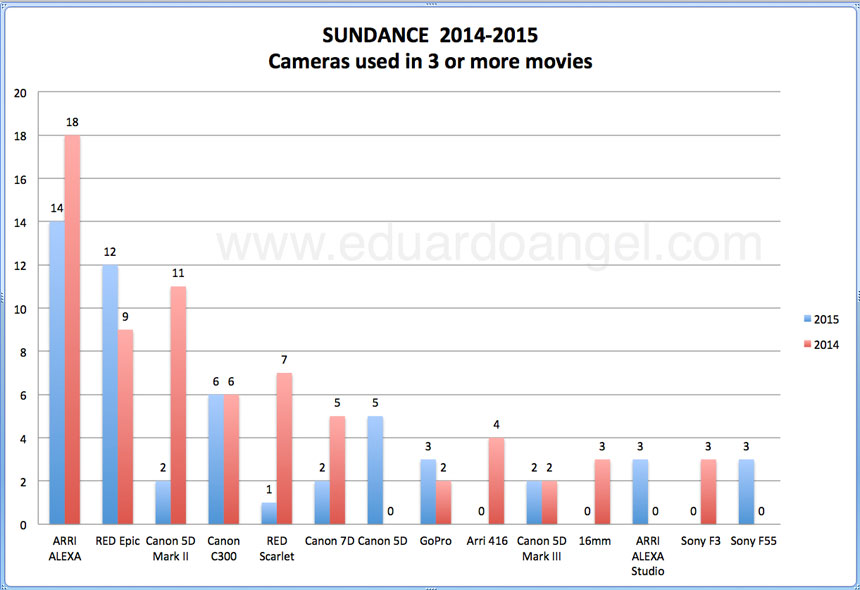
What I find most interesting about this data is how consistently some of the cameras are used, such as the Arri Alexa, and how one of my go-to cameras, the Canon EOS C100, was used only twice last year and wasn’t used at all on any of the 2015 movies. Another interesting takeaway is how much more diverse the cameras used for Sundance are compared to the cameras used on Oscar nominated movies, where the Arri Alexa also rules, RED and Blackmagic have been absent, and we don’t see a VHS or an iPhone. Or, at least not yet, I should say..
Video
Cinematic Composition for Video Productions on Lynda.com
Composition is one of the least understood yet most important aspects of video. Like good storytelling, in order to achieve good video composition you have to make every detail count and keep the audience engaged in your story. In this course, we break down effective cinematic composition, to show how to create different compositional effects using a variety of techniques. Beginning with basics such as shot size, depth of field, and the rule of thirds, we show how to establish a scene, play with perspective and movement, and incorporate some of the most common shot types, including close-ups and group shots. Once you’ve learned the rules, see how to break them, using warped perspectives and intentionally confusing sequences, before exploring technical considerations such as lenses and lighting.
Topics included on this course:
- The basics of composition
- Exploring the rule of thirds
- Comparing balanced and unbalanced compositions
- Understanding the importance of using establishing shots
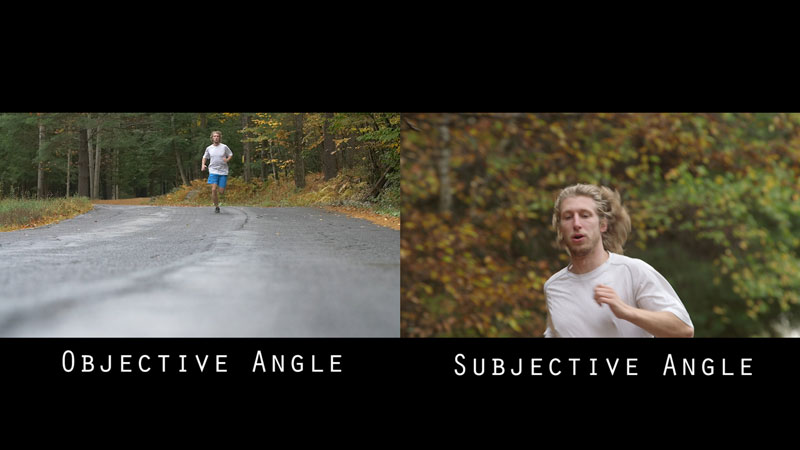
- Working with point of view
- Modifying the height of the camera
- Understanding the lines of a scene
- Creating depth
- Incorporating unusual or unexpected angles
- Knowing when to break the rules
- Using viewfinder apps
The complete course is currently available on Lynda.com. If you aren’t a Lynda.com subscriber, feel free to use my link for 10 days of unlimited access.
Here are some of the many examples on this course:


Video
Camera Movement for Video Productions on Lynda.com
Filmmaking is a medium defined by motion: not only the action that occurs within a frame, but also movement of the camera itself. It’s the ability to employ camera movement that separates new videographers from the pros. In this course, we cover the importance of camera movement and the benefits of integrating it into your video productions. The lessons are explained through a series of examples that compare static shots to their dynamic counterparts, showing exactly how camera movement contributes to each scene, whether it’s increasing drama, following action, directing viewers’ attention, revealing key details, or simply transitioning between shots in a sequence.
Topics included on this course:
- Exploring the different types of camera motion
- Panning and tilting
- Zooming
- Racking
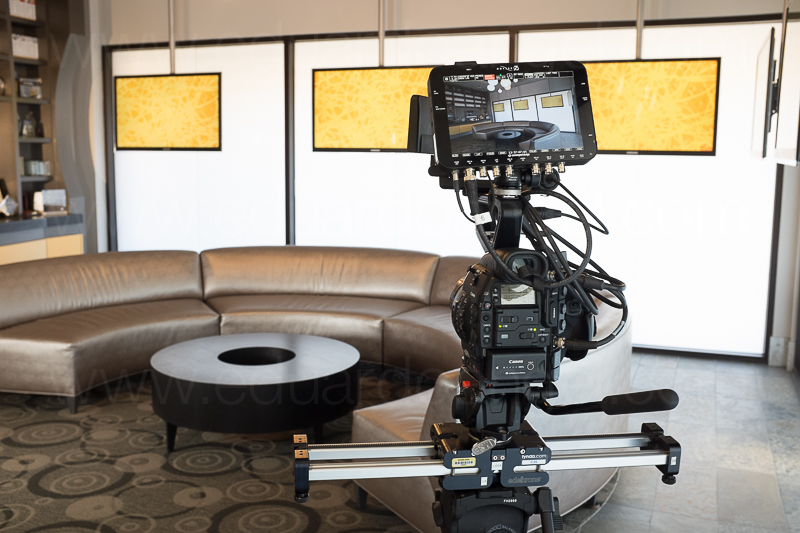
- Tracking on sliders vs. dollies
- Stabilizing camera movement
- Working with cranes, jibs, and mounts
- Choosing the right camera for motion
The complete course is currently available on Lynda.com. If you aren’t a Lynda.com subscriber, feel free to use my link for 10 days of unlimited access.
Video
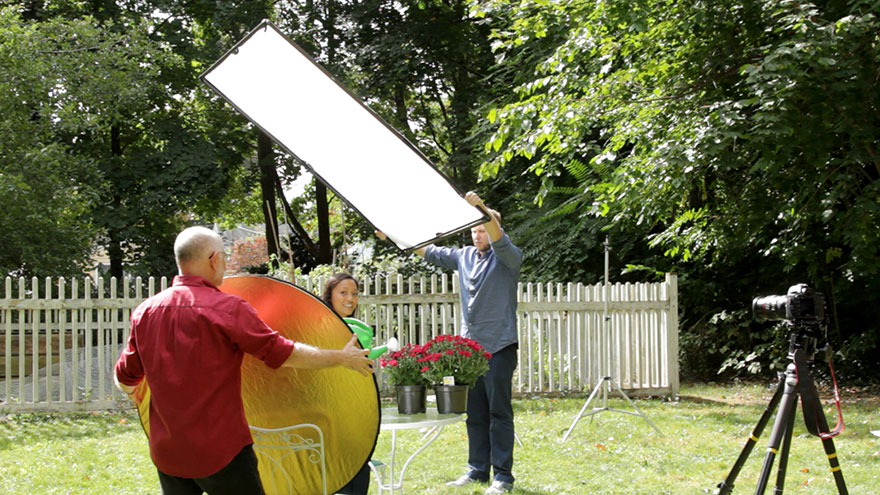
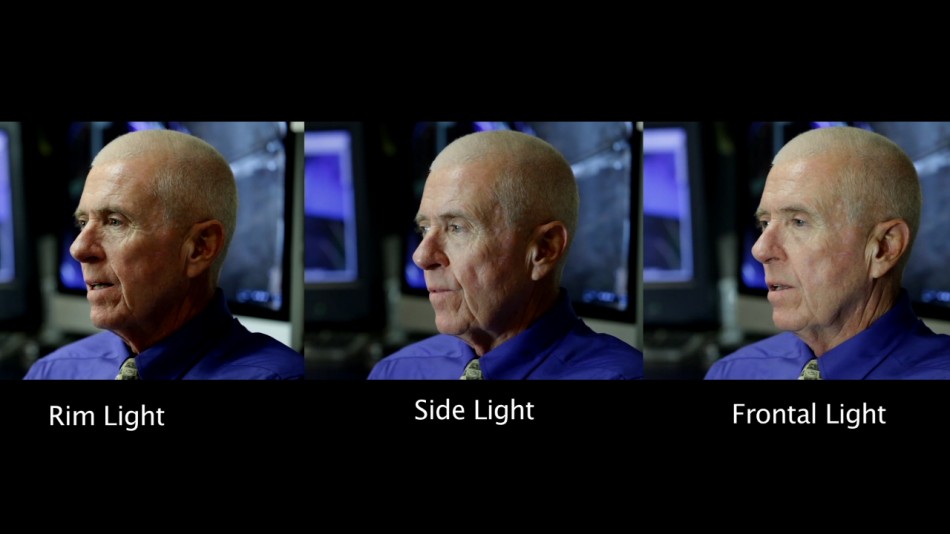
Lighting Design for Video Productions on Lynda.com
Understanding the importance of lighting and the proper use of a light meter and colorimeter raises an average shot to a more sophisticated visual level. And it doesn’t take a Hollywood budget. In this course, we show you how to use simple tools and techniques to make your lighting and your location work together, how to make the most of natural light and augment it with artificial lighting, and how to reveal or obscure objects and subjects in your scene. Along the way, we’ll show you how to evoke certain moods and feelings with light.
Topics included on this course:
• Understanding the role of lighting
• Lighting interior and exterior scenes
• Directing the viewer’s attention
• Enhancing mood in a scene
• Achieving great light under harsh conditions
• Deciding on the right lighting style for your story
If you aren’t a Lynda.com subscriber, feel free to use my link for TEN days of unlimited access.
Here’s one of MANY examples provided during this course:
The complete course is currently available on Lynda.com. As I mentioned above, if you aren’t a Lynda.com subscriber, feel free to use my link for 10 days of unlimited access.
Many folks have been asking about the equipment used for this course. Here are the answers:
We used a variety of lights, but the main ones were Bowens Limelite Mosaic 30x30cm Daylight LED Panel.
As our A Camera we used a Canon EOS C100 Cinema EOS shooting to an Atomos Ninja-2 recorder. As our B and C Cameras we used a couple of Canon EOS 5D Mark III. We used a variety of lenses, but the main one was the Canon EF 70-200mm f/2.8L IS II USM.
And here’s list with our standard camera package.
Video
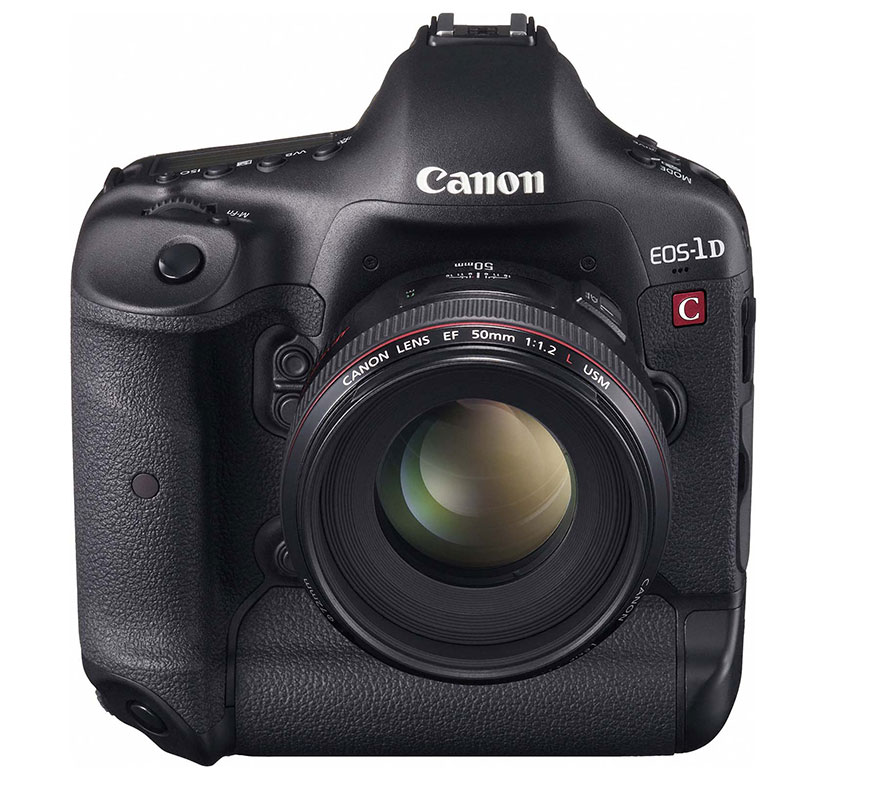
Canon EOS-1DC 4K DSLR price drops 34%.
The price for Canon’s EOS-1D C has effectively dropped 34%, from $12,000 as of yesterday to $7,999 right now.
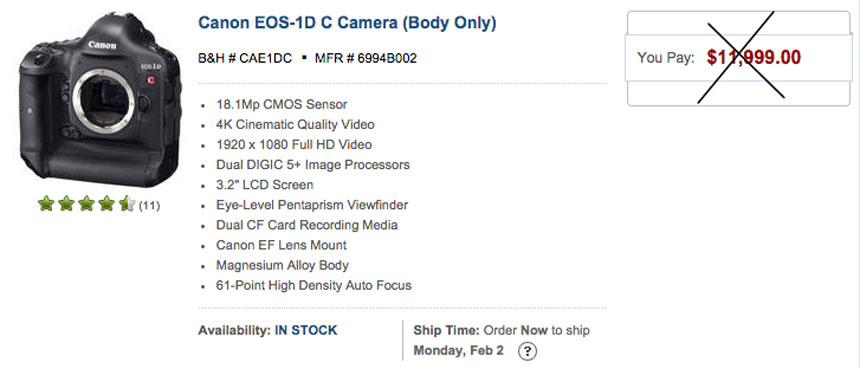
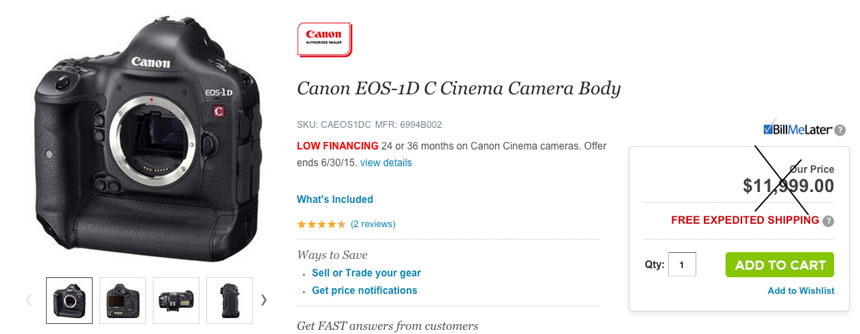
Canon EOS-1D C $7999: Adorama | B&H
The 1D C is the first Canon hybrid DSLR to offer onboard 4K motion imaging and Full HD motion imaging on CF cards and it is considered part of Canon’s Cinema EOS system, right next to the C100/300/500 models.
The main (and huge) difference between the EOS-1D C is that it features a full frame CMOS sensor that can capture 4K (4096 x 2160) as Motion JPEG and HD (1920 x 1080) as H.264 and can also shoot 18-megapixel (5184 x 3456) still images recorded as RAW or JPEG. An important (and also huge) difference between the EOS-1D C and the other C series bodies is that it lacks important features like built-in ND filters and XLR ports among others.
The camera’s rugged, ultra-compact form factor and huge sensor makes it an interesting option for challenging hybrid assignments when low-light performance is critical. For example, underwater or wildlife photographers capturing 4K and not needing XLR ports or other advanced video videos can find a great solution on the 1DC. Another instance is corporate assignments when the photographer is expected to shoot high-end video as well as stills. Unfortunately I believe the camera’s price have seriously challenged its market penetration. Let’s see what happens with this new price.
Now, while simultaneously shooting stills and video is certainly possible, I prefer to keep separate systems with different settings and features assigned to each task. It is hard enough to THINK about sound and movement and lighting simultaneously. the last thing I need is to be switching settings back and forth.
As of right now I’m happy with our current systems; a couple of Panasonic GH4 4K bodies with Canon and Sigma lenses (using a Metabones Speedbooster adapter), and a couple of Canon C100 Mark II bodies when stills are not necessary.
Here’s our current standard camera package:
Bodies:
• Panasonic GH4 at Adorama | Amazon | B&H
• Canon C100 Mark II at Adorama | B&H
Lenses:
Sigma:
• 35mm F1.4 DG HSM Art at Adorama | Amazon | B&H
• 50mm F1.4 DG HSM Art at Adorama | Amazon | B&H
• 18-35mm F1.8 DC HSM Art at Adorama | Amazon | B&H
• 24-105mm F4 DG OS HSM Art at Adorama | Amazon | B&H
Canon:
• Canon 24mm F1.4L II USM at Adorama | Amazon | B&H
• Canon 70-200mm F2.8L IS II USM at Adorama | Amazon | B&H
Panasonic:
• 12-35mm at Adorama | Amazon | B&H
• 35-100mm F2.8 at Adorama | Amazon | B&H
Metabones Canon EF Lens to Micro Four Thirds at Adorama | Amazon | B&H
If you are ready to buy any of these items, I’d suggest checking all three stores as the prices constantly change. Happy shooting!
Video
The 8 Best Tools of 2014.
Here are some of the tools that made a real difference for us last year. Just in case, the order in the list is completely random.
Panasonic GH4
What can I say that I haven’t already said about this gem? Tiny, inexpensive, intuitive, sharp, full of features—this is a truly remarkable feat of engineering to take our visual stories to a new level.
Fuji X100S
No, it’s not a typo! I know this is not the latest model, and that’s exactly the point. This little camera is so good that I see no need to upgrade, change, or even try something else. This is the perfect camera to take out on weekends, and when paired with a super sexy, real leather camera strap, the camera not only works well, it makes ME look good!
Sigma 35mm
In the next couple of weeks, Sigma will release a couple of videos I shot for them in Istanbul, Paris, and Belgium. All the lenses I brought with me were extremely good, but the 35mm was so extraordinary that I ended up NOT returning it.
Fiilex Lights
I rented these lights from Adorama for a Lighting Workshop I did in D.C. Among the reasons not to bring my own light kit were size, portability, and the ability to use multiple accessories with the same fixtures. For example, did you know that these lights can use all the accessories available for Profoto? Mind blowing.
The Fiilex more than delivered on all ends, and the guys at Adorama Rental provided their usual stellar job of testing, packing, and shipping the gear in time for my presentation.
Transcend 64GB UHS-3 SD Card
My tendency is to not put all my eggs in one basket, and to not keep all my day’s footage or photos on one card. I resisted switching from 8GB to 16GB for a while, while HD “forced”me into 32GB cards, and 4K made me seriously consider the 64GB Transcend, not only for the additional capacity, but for speed. The card was affordable when it was released and now it is almost half the price I paid for it just months ago. This one’s a no brainer.
DJI Ronin Camera Gimbal
Heavy. Difficult to set up. Costly. But when you make it work, it sings! We shot a lot of stuff with this toy, and the production value it added to our projects was simply outstanding.
Adobe Premiere Pro CC 2014
I was very much against Adobe’s Creative Cloud concept (and wrote about it here, here, here, and here), but after a year or so of using the apps pretty much on a daily basis, I love always having the latest version to work with. The significant efforts that Adobe has put into their video applications is totally worth the monthly payment.
13” Apple MacBook Pro Retina
This turned out to be not as fast as expected, more expensive than expected, and the latest OS X Yosemite was way worse than expected. Yet it made it into my “top tools”list. Why? Simply because the MacBook Pros are still, in my opinion, the best line of laptops available. The fact that we can edit, grade, and export 4K video on a plane or from a coffee shop still blows my mind. But Apple’s reign might be coming to an end very soon. 2015 will be a VERY exciting year for technology. I can tell you that much.
If you like what you saw in this summary and want to know more about how we actually use these tools, please check out our new online courses on Lynda.com along with some of the video projects we worked on during the year.
We look forward to keeping the conversations going this year.
Video

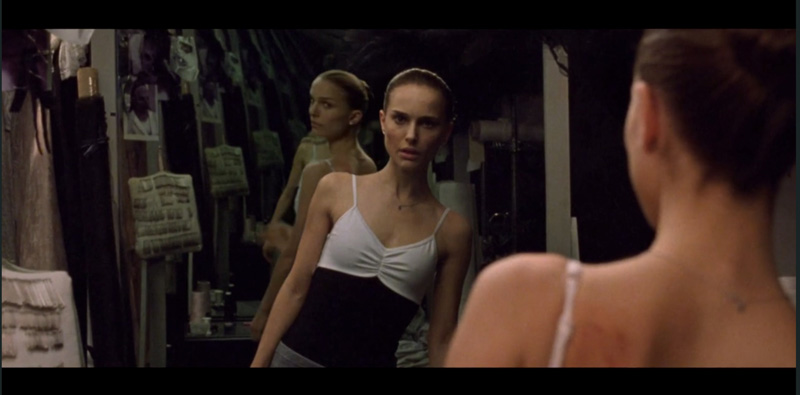
Shooting the Black Swan.
How was the film Black Swan shot? How did the filmmakers deal with all the mirrors? How many lights did they use and what kind? Those were my thoughts while watching Natalie Portman’s remarkable performance. Here, I have compiled the most interesting technical aspects of the movie, gathered from several articles and forums, including a great interview by American Cinematographer’s Stephen Pizzello with the Director of Photography Matthew Libatique.
Mirrors
Regarding the mirrors and avoiding camera reflections, which is the real reason why I did some serious research on this movie, Libatique says “we did as much as we could practically, but we knew there would be moments when we wanted to create seemingly unachievable shots, and for those we just removed the reflections digitally with the help of Dan Schrecker, our visual-effects supervisor at Look Effects. A good example of Look’s work is the scene where Nina is rehearsing in front of a mirror, the lights go out, and her reflection starts moving independently; the camera was right where you see the reflection, but Darren wanted to get tight eye lines, so we had to paint ourselves out in post. For other scenes, it was easier to just hide the camera or shoot from angles where you couldn’t see it. We also used one-way mirrors to get a shot where we created an ‘infinity reflection’ of Nina sitting in front of a dressing-room mirror. We positioned Natalie between two one-way mirrors and just shot from behind them. We wanted the film’s horror beats to be a bit more stylistic.”

Lighting
The main lighting source was “a strip above the dancers’ heads. We had about eight rows of 1K cinema globes running 60 feet across the stage. We just used different gels and put the lights on different channels; we’d go from a green gel to white to magenta, and we also started to mix them, which was nice. It was less complicated than using moving lights. For one sequence, we combined a moon backdrop with a rain effect that we created by filling a pool of water with broken glass and placing it at the base of the background. We just powered Source Fours into the pool and modulated the water movement with fans.”
 Cameras
“The movie was a single-camera shoot except for maybe one day, and our main camera was an Arri 416, which we used with Arri Ultra Prime 16 lenses. We used a Canon 7D or 1D Mark IV for all the subway scenes; I could just carry a 7D and shoot on the subway all day with a very small crew. I did some tests with my wife beforehand to figure out my ASA, my stop, and how I was going to deal with the focus. I didn’t use any rigs with it because I wasn’t trying to shoot in the traditional way. I tested a bunch of different exposures and then brought the footage to Charlie Hertzfeld at Technicolor, who put it in the system so I could look at the highlights, the moiré and the resolution. Then I went back to the drawing board to do more tests. The 7D has more depth of field than the 5D, but I needed that because I didn’t have a follow-focus unit and needed to work really fast. I shot everything documentary-style. I did all the focus pulls by hand, and we’d just look at it on the camera’s monitor. I ended up shooting on a Canon 24mm lens at 1,600 ASA to get as much depth of field as possible at a stop of T81?2.”

Special Effects
Check this short documentary on this movie’s special effects.
Camera Movement
Every performance was covered in long master shots, which “we just augmented with other moves as necessary. To Natalie’s credit, we rarely did more takes for her; if we required additional takes, it was usually for us. We knew we’d be shooting her from the chest up most of the time, but we knew we’d be in great shape, performance-wise, as long as we could see her face and arms. For wider shots, we could just use her dance double. We did almost everything handheld.” The only Steadicam shot is at the climax of the final dance number. Unreal.
The movie is now available on Blu-Ray.
Video
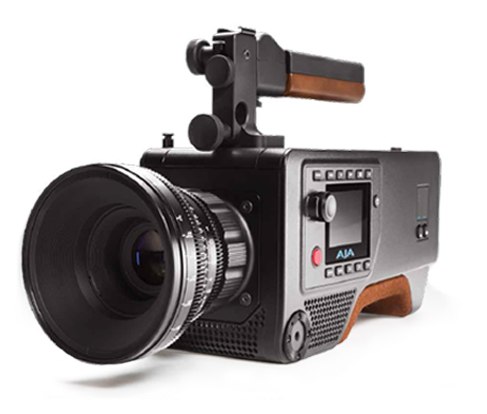
NAB 2014 Wrap-up. Top 10 Products. AJA’s CION.
AJA’s CION
By Sean Davis
Hello sexy!
If I had to pick a camera to shoot strictly based on camera body aesthetics it would be this camera—a throwback to the years of ATON film cameras and Arri 416s. So AJA decided to make a camera, and make a camera they did. It’s a cinema camera that actually looks like a cinema camera, feels like a cinema camera and operates like a cinema camera.
CION – The New Production Camera from AJA from AJA Marketing on Vimeo.
It’s got the prerequisite feature set to compete in today’s crowded camera marketplace: DCI compliant 4K, quad HD, 2K and 1080 P recording internally to AJA’s proprietary SSD the AJA pak in Apple prores. It will also do up to 120 frames to an outboard recorder via the 4 sdi outs on the camera. Any RAW recording is also done in outpolled recorder.
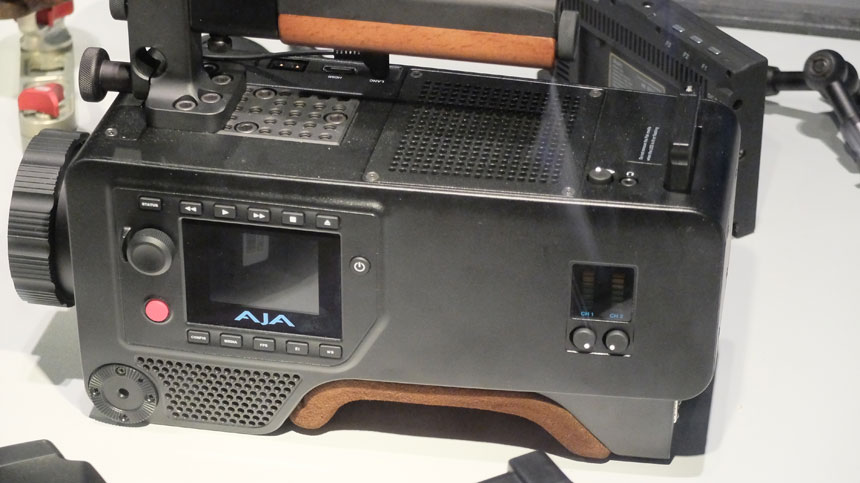

The images are recaptured on a super 35 CMOS sensor with the global shutter. AJA also added a high-quality optical low pass filter to the camera so we all can stop worrying about aliasing (the talent can dig out their favourite herringbone jacket and throw it on for the shoot—the camera can handle it!).
Since this camera costs under $10,000 (actually an MSRP of $8995.00) the global shutter and optical low pass filter will cost you some light sensitivity. Although the AJA reps did not have an exact number for the base sensitivity of the sensor, native ASA is being speculated to be somewhere between 200 and 320 ISO.
Even with this I’m still impressed because I view these tools from the perspective as someone who has been shooting proper video cameras and proper digital cinema cameras—I remember what I paid for my first serious camera, the HVX200, and what I paid for my Sony EX3, less than four years ago. The Sony EX3 cost me approximately $9,000 and did not do a third of what the AJA CION does.
—-
For more in-depth technical articles visit Sean’s company Across 100th Media and follow him on Twitter (@across110media)
Video
Amazon adds storytelling tools to its arsenal.
updated 20140114
Amazon Studios was launched 3 years ago to develop feature films and episodic series. In a new effort to pack another punch to its arch enemy Netflix, as well as increasing its original content catalog, the company has rolled out the beta for “Storyteller,” a free online storytelling tool that (more…)
Video
Best of the Bronx.
“Best of the Bronx” is a series of 1-minute video vignettes to help promote New York City’s northernmost borough. The Bronx is well known for landmarks like the Yankee Stadium, the New York Botanical Garden or the Zoo, but the project’s goal was to highlight lesser-known gems.
The first video on the series profiled City Island, a place known for its rich maritime history, museums, and seafood restaurants. The remainder of the series includes the Andrew Friedman House, Bronx Community College’s Hall of Fame, Wave Hill, Little Italy (video below), and the Grand Concourse, among other exciting locations. (more…)
Video
Milk + Honey Coffee Shop in Brooklyn. Fun promo video.
This is a short piece about Milk + Honey—by far one of the coolest coffee shops in New York City. (more…)
Video
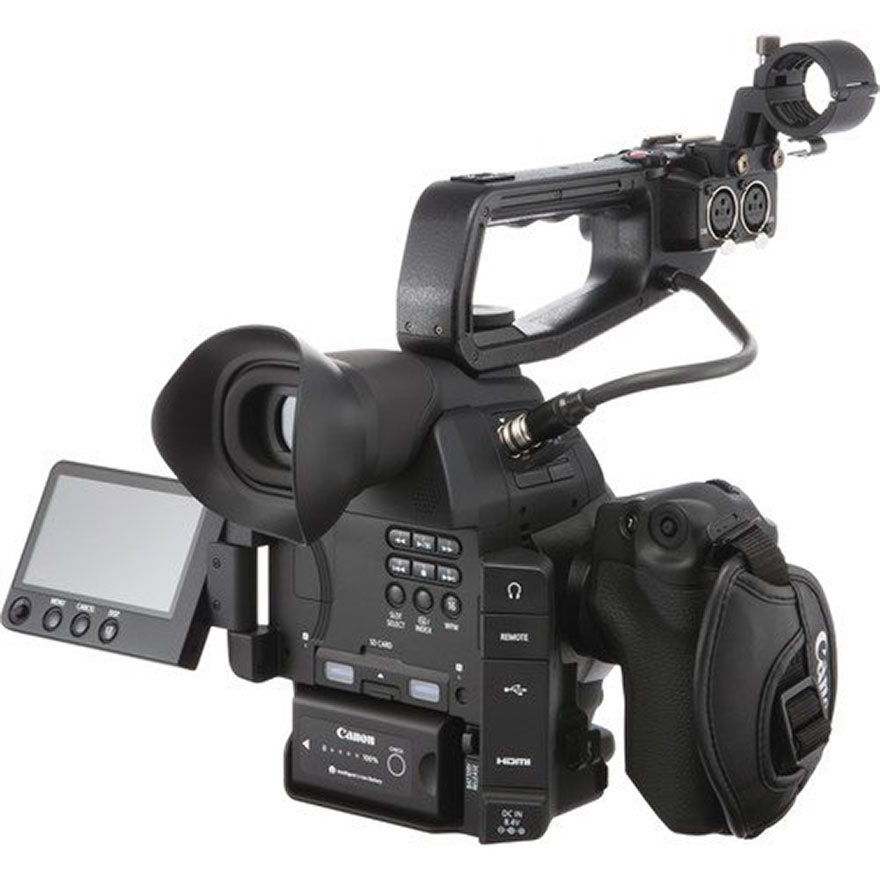
Canon EOS C300 explained for photographers.
For starters, the C300 is NOT “just bigger than the EOS 5D Mark III.” Well, it IS bigger, but it is also a completely different system. The Canon EOS C300 comes in two flavors, one with EF mount (EOS C300) which takes your good ol’ Canon lenses, and another one (C300 PL) with a PL mount.
The camera is compact box, similar in size to a Mamiya RZ with a viewfinder. It is a bit heavy, but very comfortable to use for extended periods of time. (more…)
Video
Wes Anderson’s Top 10 Movies, and the Color Trilogy.
I recently read an article where Wes Anderson picked his 10 favorites movies from the Criterion Collection. Guillermo del Toro does the same here. Some of their picks are “Pigs and Battleships“, “The Insect Woman“, and “Kuroneko.” Clearly, I have a LOT of movie watching to do this Summer.
I will also be reading the latest Criterion’s Film Essays. The one about Krzysztof Kie?lowski’s “three colors trilogy“; Blue (1993), White (1993), and Red (1994) is simply spectacular. (more…)
Video
10 (new) Cool Gadgets for Photographers and Filmmakers. Part 2
6• Convergent Design Odyssey 7.
Two super interesting monitor/recorders are the Odyssey7 and Odyssey7Q by Convergent Design. For $1295 and up you get a 7.7” 1280 x 800 OLED external monitor that also doubles as an external recorder capable of receiving 4K RAW data as well as other compressed and uncompressed formats onto two 2.5” SSDs.
Here’s the twist; out-of-the-box, these two products are monitors only, with all the usual settings (waveform, histogram, false color, vectorscope, zebras, and focus assist) but without any recording or playback capabilities. (more…)
Video
10 (new) Cool Gadgets for Photographers and Filmmakers. Part 1
1• Edelkrone SliderPLUS
Edelkrone’s SliderPLUS is a super-compact and very smooth slider that easily fits onto Tenba’s Video Backpack. Unlike other sliders, this one moves with the camera, taking full advantage of rails’ length. With a price tag of $500, this toy is at the top of my shopping list.
2• Redrock Micro’s One Man Crew Parabolic Camera Motion System
This amazing gadget consists of a motorized parabolic track slider that “guides the camera on a precision-curved track at any speed while keeping the subject stationary in frame.” The system includes speed control, automatic in and out stops, and 36” of track for camera systems under 20lbs. All for $1,500. If you are part of a small crew doing a lot of corporate interviews or a single photographer creating educational content or product demos, this is an extremely attractive option.
Video
Post-NAB 2013 wrap-up.
Our Digital Technology Resource is a monthly conversation about news, trends, and events for photographers and filmmakers. On our upcoming issue we highlight the most relevant products and trends we witnessed at NAB, including:
• Edelkrone SliderPLUS
• Redrock Micro One Man Crew
• Blackmagic Pocket and 4K Production Cameras
• Atomos Ninja 2
• Convergent Design Odyssey 7
• Tascam DR-60D and Samson Zoom H6
• G-Tech Evolution Series.
• Adobe Lightroom 5 and Premiere Pro “6.5”
• Imagine Products ShotPut Pro
It is never too late to sign up. Do it now!
Did you miss a previous issue? Don’t worry, be happy. Here are the links:
January 2013 Issue
February 2013 Issue
March 2013 Issue
Video
NAB 2013 is here. Ghost Town goes wild with DSLR Shooters.
This coming weekend I’ll be working with Jem Schofield and a very talented crew on a unique DSLR Video Field Workshop in Nelson, Nevada. The event, hosted at an awesome Ghost Town and surrounded by incredible landscapes, focuses on the craft of filmmaking, camera movement and lighting controls.
Attendees will have four production stations to shoot:
• Tripod, Slider & Dolly Station (with actors)
We will learn how to properly balance a tripod system, operate a camera on a slider and how to use a proper dolly system (including being a dolly grip).
• Rigs Station (with actors)
How and when to use handheld and shoulder mounted rigs from a number of manufacturers to get different looks in camera. Students will focus on tracking shot and other set ups while filming live actors.
• Jib Station
Learn how to operate small to medium sized jib systems, to get “money” shots of the town for establishing shots, reveals, etc.
• Filters & Exterior Light Station
Controlling natural light for exterior shots using a selection of filters, reflectors and silks is paramount.
We’ll have great equipment from sponsors such as Genus, Ikan, Indie Dolly, Induro, Kessler, Lastolite, Manfrotto, Marshall, Nice Industries, Redrock Micro, Tiffen and Zacuto.
Check the video below, and I hope to see you there!
Registration includes round-trip transportation from Las Vegas Convention Center to Nelson Nevada Ghost Town, lunch and on-site instruction.
Video
Traveling with photography and video equipment. Technical and Practical Tips.
These are some travel tips I’ve learned over 20 years of traveling with photo equipment. Most of the recommendations below will be most helpful for photographers shooting video.
• Format all your memory cards on the specific system you are planning to use them with (7D vs. 60D vs. H4N).
• Change and charge all your batteries before leaving.
• Test all your devices.
• Test that the software on your laptop is working. Trying to update the OS, an Adobe application, or plugins from an airport lounge or hotel’s WiFi is NOT fun.
• Match memory cards. The 7D takes CF cards and the 60D takes SD cards. Use the same capacity (32GB cards or 16GB) for each system at the same time. It will make your asset management on location much easier.
• Bring enough additional storage. Photographers tend to underestimate the size of video files. I can easily shoot more than 100GB in a day. And you will need a backup. Twelve minutes of video take approximately 4GB of space. With two cameras we then have 8GB. With a backup we now have 16GB for the same 12 minutes of footage.
• I recommend G-Tech hard drives. The G-Technology G-DRIVE Mini 500GB is an excellent product. Make sure your external hard drive is 7200 RPM (as opposed to 5400). It will make editing video much faster.
• Buy only hard drives with multiple Interfaces (USB 2.0, FireWire 400, FireWire 800). When (not if) your one and only USB port breaks, you won’t be able to retrieve your information.
• Bring a backup of all the essential items. My list includes: reading glasses, camera, lenses, memory cards, hard drives, chargers, card readers, all cables, and quick release plates.
• Use TSA-approved locks. I preferred padlocks and use the same combination on all of them.
• Simplify. I purchased my specific Android tablet because it matched the power adapter for my phone. And both can be charged via USB using the card reader cable, which is the same as Canon’s camera cable!
• Simplify some more. Bring a multi-card reader. I can simultaneously download the 7D’s CF Card and the 60D’s SD Card using the same reader and the H4N’s SD card using the laptop’s built-in SD card slot.
One tiny cable works for six of my devices: tablet, cell phone, 2 cameras, and 2 card readers.
• Simply even more: One of the reasons why I purchased the 60D as my B camera is because it uses the same batteries/charger as my 7D. I also liked the fact that it uses DIFFERENT memory cards, so it is much easier to keep track what was shot with what.
• Before you leave, check the electrical plug/outlet and voltage information at your destination. Oman and the United Arab Emirates seem to use three kinds.

• Test your workflow. It goes without saying, but never bring new equipment to a shoot, especially overseas. Make sure your files work well with your software and that your cards work well with your cameras.
• If you are capturing Full HD video (1080p) you shouldn’t be using older/slower memory cards, otherwise you might experience dropouts and stuttering. Been there, done that. Not a good day.
• Don’t forget your business cards! The more the better.
If you’re nervous about upgrading gear or making the leap to HDSLR cinema we can help. Book a virtual one-on-one consulting session today!
Video
What’s the big deal with ND filters?
What’s the big deal with Neutral Density (ND) filters? Do we REALLY need to use them when shooting motion? We created a short video tutorial using Canon’s (super awesome) EOS C300 to demonstrate what happens when you can’t really control the light (shooting outdoors), you have too much of it (bright day, noon) and you want to use the aperture as a creative tool, not only as an exposure compensation tool. Remember that when shooting video we pretty much set and forget the shutter.
The C300 has three built-in ND filters; ND1 (+2), ND2, (+4) and ND3 (+6). We don’t have that luxury when using HDSLR systems, but we can always get a very nice variable ND filter that covers up to 8 stops!
Check the video below:
Looking for answers to your workflow questions? Want to make the most of your new gear? Book a virtual or on-site consulting session today.
Video
Canon EOS C300 Cinema Camera Insights.
Over a year ago, when Canon’s EOS C300 was announced, we wrote about the significance of the new EOS CInema system for photographers (you can read some of our previous articles here, and here). Since then, we practiced on the very clever online “Menu Simulator,” attended several Canon events, watched all the outstanding tutorials on Canon’s Digital Learning Center by Jem Schofield, wasted hours day-dreaming with the Accessory Configurator and played with the system on and off.
But not until last week did we have the chance to really go down and dirty with the system, shoot for several days, tweak some hardcore settings, create “custom picture presets” and see what the camera was made of.
The verdict? Absolutely impressive. Instead of writing a long post about it, we decided to use our 10-minute break and shoot a quick video with our impressions. Here it is, and we hope you enjoy it.
Canon EOS C300 Cinema Camera Insights. from Eduardo Angel on Vimeo.
Photography
Visual Serendipity meets Mrs. Doubtfire.

After a bitter divorce, Robin Williams disguises himself as a female housekeeper to spend secret time with his children held in custody by his ex wife. This was shot at the awesome Museum of the Moving Image in Queens, New York. If you don’t remember the movie, or haven’t seen it in the past TWENTY years, here’s the trailer.
Video
Wall Street’s Inside Job – good and bad examples.
I recently watched “Inside Job” a fascinatingly disturbing documentary about the reasons that caused Wall Street’s last financial meltdown. Rotten Tomatoes said it best:
“a disheartening but essential viewing, Ferguson’s documentary explores the Global Financial Crisis with exemplary rigor.”
Besides the story, and the shocking realization that most of the culprits are still in positions of power, I was very intrigued by the lighting, framing and camera placement. My guess is that the documentary was shot by different crews, one skilled and one not so much.
Let’s take a look at the following good examples:

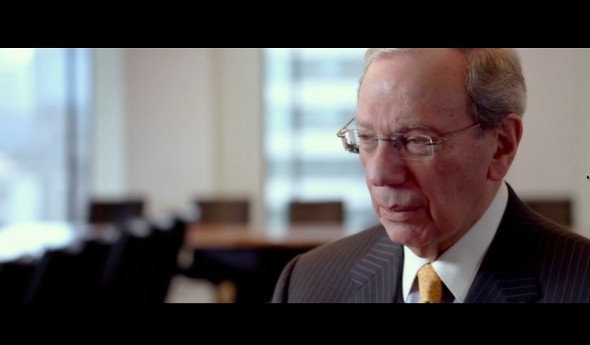

Nice establishing shot, very nice lighting, a well-framed extreme close up that makes sense, and even a well organized room. This is good.
Now, let’s take a look at a couple of not so great examples:
Click to keep reading (more…)
Video
Our 10 hidden gems of 2012.
Earlier this week we shared with you our “Crème de la Crème” of 2012, the 10 most visited articles on this site. Today, we would like to share 10 more articles that we feel should have made our top ten list. As a team of educators, technology consultants, and visual storytellers, we are very proud of these posts as we feel that they are extremely relevant and worth your time. We encourage you to read them, share them with those who might be interested, and respond by starting a conversation below.
Without further ado here they are:
1) How to fix a broken education system. My thoughts.
We believe young students should be learning flexibility, teamwork, accounting, time management, project management, and languages (especially Spanish and Chinese), to be prepared for the future job markets.
Fixing a broken education system.

2) Notes from the Field.
Check out my personal notes and pre-production techniques for photographers and filmmakers.
3) Same, but different: An Intro to Digital Cinema.
We explained the 5 main similarities, and 5 main differences between shooting stills and shooting motion.

Click here to keep reading (more…)
News
Dare to think for yourself? Join a forum.

Online forums, the ultimate demonstration of democracy and freedom of opinion. As the wise Voltaire said: “Dare to think for yourself.” I also like Benjamin Franklin’s famous quote: “If everyone is thinking alike, then no one is thinking.”
Video
Looking for inspiration? Find a Mutoscope.
After three jam-packed weeks attending Photokina, the Glimpse Conference, Cloudforce, and PhotoPlus Expo, I have something to confess: the most interesting and inspiring gadget/technology/trend I saw was NOT Samsung’s innovative Galaxy Camera, Fuji’s slick X-E1, Blackmagic’s Cinema Camera or a new powerful software application.
It was a Mutoscope I saw at Frankfurt’s Film Museum. “A what?” you may ask.
The Mutoscope, an early motion picture device, was patented by Herman Casler in 1894. Cheaper and simpler than Edison’s Kinetoscope, it did NOT project on a screen, and it provided viewing to only one person at a time. The system was marketed by the American Mutoscope Company and quickly dominated the coin-in-the-slot “peep-show” business.
I am in love with the simplicity of this device, the way the viewer interacts with the story by using a hand crank. And story is what really matters. In under 60 seconds (the “movie” starts below at 00:34) we get to see a “crazy wheel” running free through a small town, and the villagers trying to catch it. See, this is about storytelling, not technology. It’s not about sensor size, firmware updates, bigger-is-better, or faster-is-better. It is about the story, something I feel we have been loosing at an ever-increasing speed. If you are looking for some inspiration or motivation, look no further.
Events like hurricane Sandy make us revalue some of our priorities, the real significance of things we often take for granted, like running water, electricity, and true friends. In a similar way the Mutoscope hit a nerve. For some strange reason, the idea of producing something simply for fun or pleasure is becoming obsolete. We should, and we will, go back to the basics. Work harder on telling more engaging stories, developing new angles, communicating better ideas and asking deeper questions. Technology is great, but it is not the be-all and end-all that most photographers assume it to be. I’m sure some of you feel the same way. Want even more inspiration? Check this out.
Video
Photokina TV Interview.
Earlier today we sat down for an interview for Photokina TV in Cologne, Germany. Here’s a segment that is available online:
Video
The Dawn of the Innovated Dead.
Photokina started a few hours ago, and Sony is banging its drums. And loud!
Kazuo Hirai, the brand new CEO (since April), seems to finally come to the realization that in order to compete with Canon and Nikon in the HDSLR arena the company needs to provide products that photographers and filmmakers need, and understand.
The most impressive announcement is the Cyber-shot RX1, which is basically a point-and-shoot with a full-frame sensor.

 • The Specs:
35mm full-frame 24.3MP Exmor CMOS sensor, ISO 100-25600, 14-bit RAW image capture, f/2.0 Carl Zeiss Sonnar T lens with 9 aperture blades, P/A/S/M modes, Full HD 24p/60i/60p video with manual control. Check all the features here.
• The Good:
1080p video recording at 60fps or 24fps.
Manual exposure controls for both stills and video.
RAW shooting.
Automated modes for HDR photography.
• The Bad:
35mm fixed lens, even if it is an F2.0.
For $2,800 it is pretty hard to consider this camera over a full-featured HDSLR. If you are still interested, Amazon is taking pre orders now.
Video
Photokina 2012 focuses on HDSLR Video.
Every two years there is one focal point in the Photo industry: Photokina, the world’s leading imaging fair. Photokina covers the entire spectrum of imaging, from image capture to image processing and storage to image output. This is where new trends and major innovations are presented to the world, and where the spotlight is on groundbreaking technological developments including mobile imaging, connectivity, and moving images. The show always delivers an impressive program of workshops, symposiums, photography exhibitions and many special events at the exhibition centre and at sites all over Cologne.
As you might know every Photokina show focuses on one single topic. Because filming withHDSLR systems is increasingly becoming a necessity for professionals, this year’s topic is HDSLR Video.
The show has created a “Shoot Movie Park” in Hall 4.1, offering a unique area where suppliers have an optimal location to present themselves to the attendees. The Movie Park will be supplemented by a series of lectures, workshops and exhibitions. Canon will present Richard Walch, sailor, snowboarder and photographer. Zeiss will have Sebastian Wiegärtner, one of the first users in the German-speaking region to understand and make use of the capabilities of the new HDSLR systems. We are very excited to be representing X-Rite, and show our most recent Color Management Video Tutorials (Video 1, Video 2 and Video 3).
Representatives of ADF — Arbeitskreis Digitale Fotografie (digital photography working group) will also be sharing their expertise as they answer visitors’ questions about digital photography and film. More information about the “Shoot Movie” program can be found here.
Stay tuned! We will be sharing the most exciting news and products live from Photokina via Twitter and Facebook. If you are not yet following us, do so today!
Video
A movie about the most inspiring Brazilian artist you’ve never heard of.
UPDATE 0905: Mission Accomplished!!!!!

My extremely talented friend Andre Constantini has been working on a feature film called “Bel Borba Aqui.” The movie is about the most inspiring Brazilian artist you’ve never heard of.
While chatting with Andre about the film and his current Kickstarter campaign, I was schocked to know that they have well over 600 hours of footage. Andre shares here snippets of our conversation.
It’s Exponential
I just recently completed my first feature documentary film. With over 600 hours of footage and 3 years in the making, there has been a lot of time invested into the project. I had made short films before but increasing the scope of any project of this magnitude seems to exponentially increase the time it takes to complete it. But I digress, before you start a documentary it helps if you know the story you want to tell or the topic you want to explore.
Put It Out There
One year before I even knew that the subject of my film, a Brazilian artist living in Salvador, Brazil existed, I had a conversation with a colleague of mine expressing my desire to make a feature documentary on a living artist. A year later, I received a phone call from the same colleague stating that he found him and he was in Brazil and that I should come and meet him to see if it would work out.
Always Be Ready to Go
Even though we were just supposed to discuss the possibilities, on the first trip, I brought all of my equipment to shoot and after meeting the first day, we started shooting the second day. When I returned from my week long trip, I had already filmed for three days. This was enough to start cutting a short piece together to excite the subject and support.
The Edit Room
The editing process went along simultaneously with the shooting to some extent, coming up with rough sequences or themes. The key is not the is not where you start, it’s THAT you start. I find that as you have an idea for one scene or footage that you know worked out or you like, start there and find other footage that supports it visually or thematically (maybe even both). This part always takes the longest. But plan to have plenty of time to do this. Personally, I am best when I have large chunks of time where I can focus without distractions.
Here’s the Trailer:
The film is scheduled to release theatrically on October 3rd for a two week run at Film Forum in NYC. Let’s support Andre with his Kickstarter campaign. It could be you needing financing in a few years…
Video
Notes from the Field.
This is a scan from my journal that I bring with me to every preproduction meeting that I have with clients, directors, producers, and others. In this scan you can see my handy “preproduction notes.”

Here’s how my system works: first, I like to get the conversation going by sharing movies that we like and movies that could be related to the project at hand. This helps tremendously in our effort to understand both technically and aesthetically what the client or director is going after, and if we are a good match for the project.
About a year ago I sat down with a director who began envisioning a project as “film noir meets science fiction/kung fu—but in a funny way,” which saved us both a lot of time, as I was definitively not interested!
Let’s take a look at the other things I consider on every video production:
• Script: Do we have a script? Is it from a book or is it an original script? When can I see it? If there isn’t a script, who is going to write it and when? This is a very important step. Even though I always write the scripts for my own projects, it needs to be clearly defined who will perform this integral part when it comes to someone else’s project. I have been using Celtx, and I am very happy with the results. The script is by far THE most important piece on any video production puzzle.

• Shot list: As soon as I have the script, I start creating a shot list: what kind of gear do we need? Do we own it? Do we need to rent it? How many shots can we accomplish in one day? The answers to these questions can vary greatly depending on location, the scenes’ complexity, permits, and even the weather.
• Location Permits: Since most of us don’t have access to Hollywood’s sets and production budgets, being creative is extremely important. Having access to locations that other people don’t have access to is key. There are several beautiful abandoned buildings on Wall Street that no one knows about. In Harlem there are fantastic mansions that you can shoot if you know the right people. Battery Park is Federal property while Central Park is not. Both require shooting permits, issued by different offices.

• Location Scouting: I am often surprised to see how many people ignore this critical step. In cities like New York things change, and they change fast. The park that you so fondly remember is now a parking lot. And that awesome abandoned building? Well, it’s now a luxury condo.
Video
Canon EOS M Images.
UPDATED 0828 Canon EOS M – Part II. Hands-on Review
Yes, the answer is a most emphatic YES to everyone who has asked if I plan to purchase the brand-new Canon Mirrorless system. I just placed my order here. You have until October to change your mind. I seriously doubt I’ll change mine.
So, in a nutshell, we have a tiny camera body with a powerful DIGIC 5 image processor, and a very nice APS-C 18.0 Megapixel CMOS sensor, which is the same sensor size one finds in the wonderful EOS 7D and EOS 60D. The touch screen and UI are virtually identical to the brand new Rebel T4i. Apparently you can purchase the body only, but I have only seen the kit with the EF-M 22mm ƒ2.0 pancake lens. All the expected features like ISO settings from 100 to 12800, with expansion to ISO 25600, standard aspect ratios (3:2 plus 4:3, 1:1 and 16:9), and 1080p at 24/25/30 fps and 720p 50/60 fps are there, BUT now we have continuous autofocus.

The hybrid (stills and video) AF system uses “phase-difference AF to achieve approximate focus and drive the lens at high speed, then switches to contrast AF for final focusing.” The movie files are recorded in MPEG-4 format, using AVC.H.264 compression and a variable bit rate. Program as well as and manual shooting modes are supported in movie mode.
And the cherry on top? The EOS M will take EF lenses thanks to the adapter shown below. Enjoy the view.


Canon EOS M Lens Mount Adapter
click to keep reading
Video
H.265: A New Standard for Digital Cinema?
A new video codec is expected to replace H.264 as early as next year. H.264 is one of the most common formats for recording, compressing, and distributing high-definition video, not in small part because it is the codec found on several HDSLR systems such as Canon’s EOS 5D Mark III. Another big advantage is that it is currently supported by for most video sharing websites like YouTube and Vimeo. Additionally, runs natively in both Lightroom 4 and Adobe Premiere Pro CS6, which dramatically decreases the time wasted transcoding and rendering files.
But, apparently there is (or technically, will be) a new kid on the block. The Moving Picture Experts Group (MPEG) and the Video Coding Experts Group (VCEG) are teaming up and plan to release H.264’s successor as early as January 2013. The new kid’s name will likely be H.265 or MPEG-H Part 2.
Just how much more efficient will H.265 be? Well, H.265 is expected to provide a significant improvement in data transmission and streaming efficiency compared to H.264. It will have almost twice the amount of compression ratio from for a similar quality level. This means that I’ll need to buy less memory cards, and less external hard drives. Both will make my accountant really happy. Below is the only video test comparing H.264 and H.265 we were able to find. It was performed on an Android tablet by Qualcomm, a San Diego-based chip-maker that is listed as a member of the international standards group developing H.265.
H.265 will be designed to support all new and current streaming technologies including devices working at 4K and Ultra HDTV (also known as 8K or 4320p) resolutions. Did you know that Ultra HDTV definition contains about 16 times the amount of pixels that are present in a 1080p video stream? That’s kinda insane! Check out the chart below to see things in perspective.

The H.265 codec sounds promising, but (there’s always a but) it will have to fight for widespread implementation with another codec called VP8. This format was purchased by Google two years ago and was released it as a royalty-free alternative under the Creative Commons license. Nvidia (Qualcomm’s main competitor) has built VP8 decoding support into its newer Tegra 3 chips alongside H.264 support, and several companies including Skype have adopted VP8 as their preferred format. Adobe also announced that the Flash Player will support VP8 playback in a future release. Who will win? Let’s wait and see.
Video
The Sounds of Aronofsky.
The sounds of Darren Aronofsky, including fantastic movies like Black Swan (2010), Requiem for a Dream (2000), Pi (1998), and The Fountain (2006). Simply brilliant.
