Video
The Panasonic GH4 V-Log L is out! Step-by-step installation tutorial.
While the first steps to update the firmware to version 2.3 (which now FINALLY includes V-Log L) are the same as before, there are many new ones. I just installed the firmware myself and found the original instructions too confusing, so I rewrote the steps, captured screen shots and the camera’s menus hoping to save you some valuable time. I’m not a Panasonic employee, and I’m not being paid by anyone to write this post. If you have further questions or issues please contact Panasonic Tech Support directly. The link to purchase the firmware is here.
To watch a comparison between the default GH4 profiles and the V-Log L watch this video.
Ready? Let’s go!
Step A – Updating the camera’s Firmware.
- Prepare a fully charged battery and a blank SD card.
- Download the firmware version 2.3
- Extract the zip file and copy the firmware (xxx.bin) to the SD card.
- Insert the SD card into a camera.
- Set the camera to P mode.
- Turn the camera ON
- Press and hold the playback button
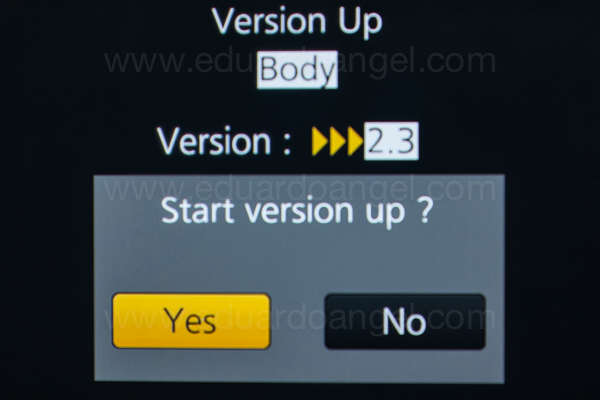
- Select “YES” on the screen.
- The firmware update process only takes about 4 minutes.
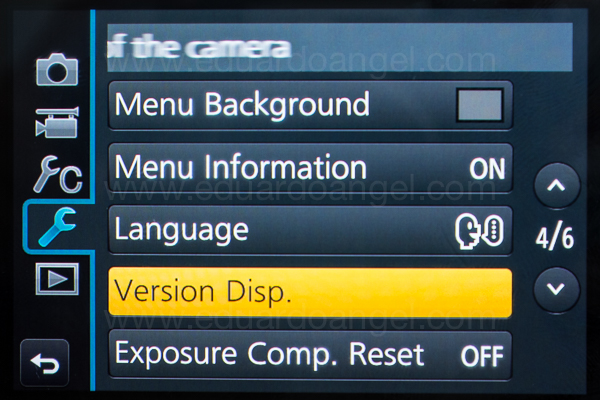
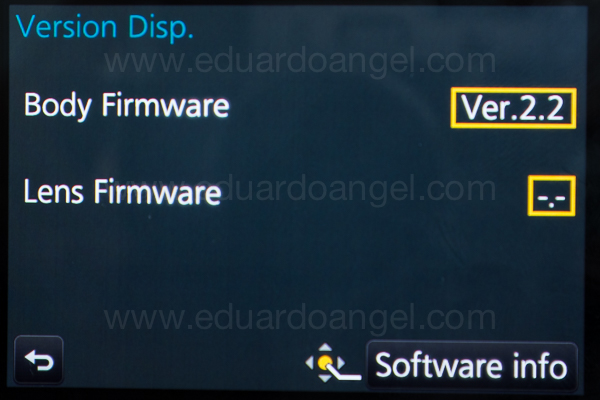
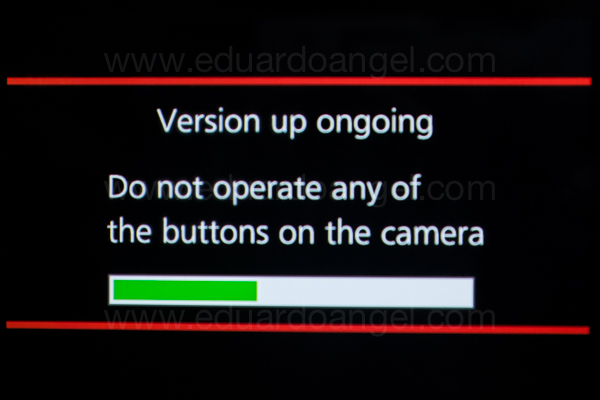
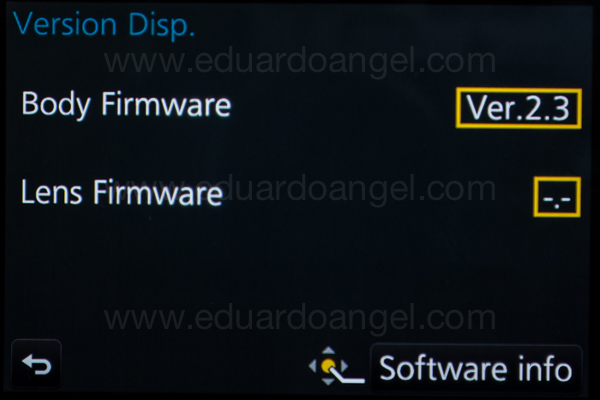
Turn the camera OFF and ON again, and check the firmware version

At this point, pretty much everything else is new.
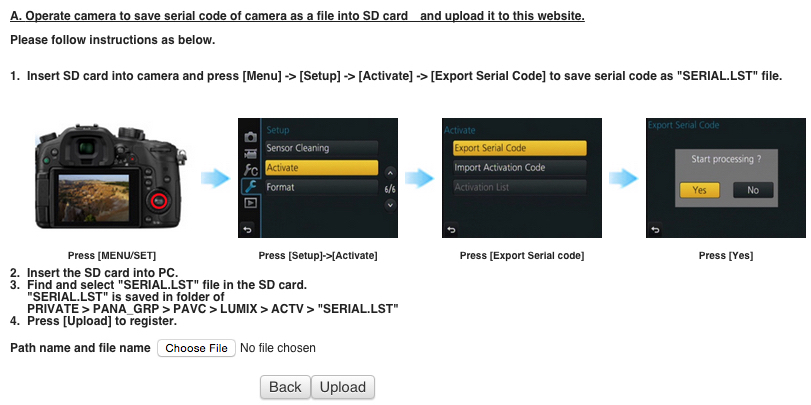
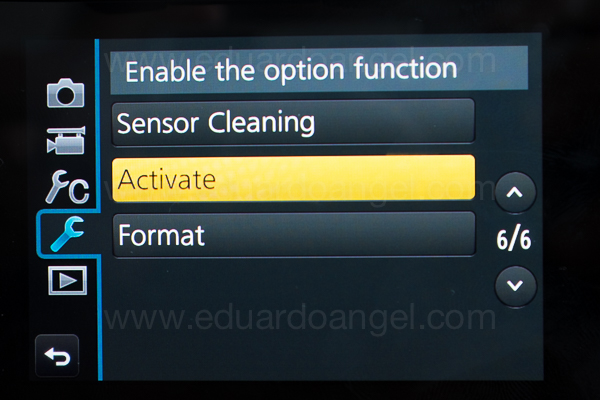
Step B – Exporting the camera’s information
1. Insert (ideally another) formatted memory card into de camera
2. Select the menu:

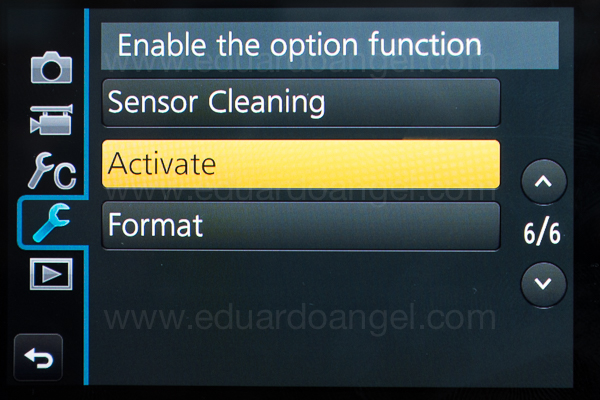
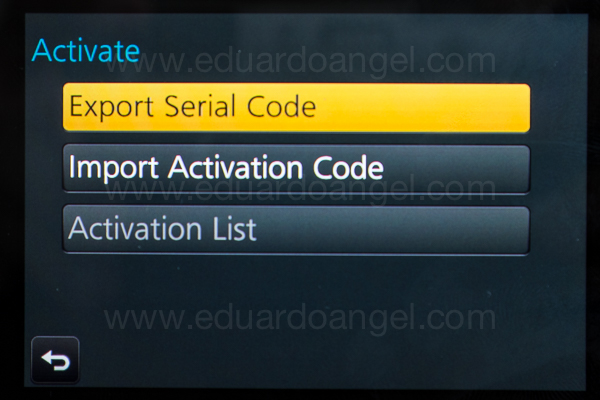
3. Select EXPORT SERAIL CODE and then press MENU/SET
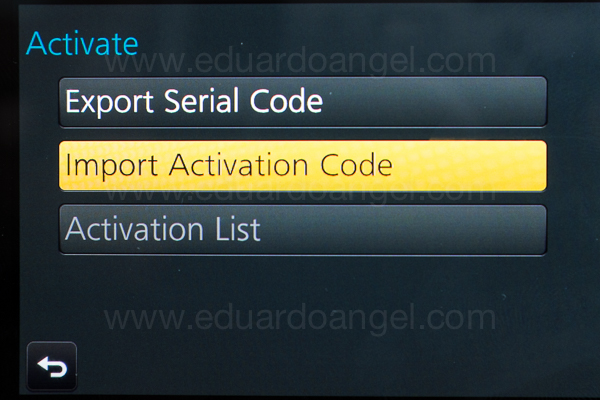
Step C – Acquire the Activation Code
1. Insert the SD card into your computer’s card reader. The computer must be online.
2. On your browser, paste the provided URL.
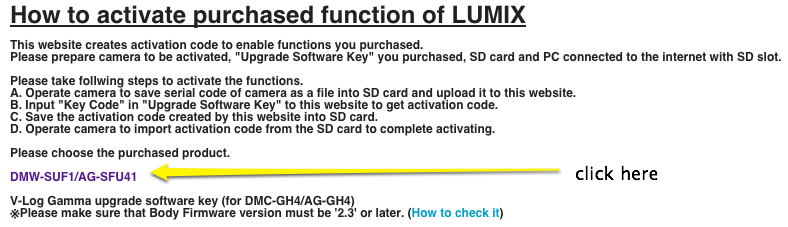
3. Click on DMW-SUF1/AG-SFU41
Then:
Follow this path to select the .LST file and click upload

Then:
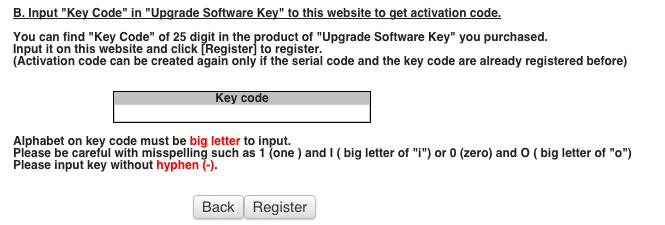
Then:
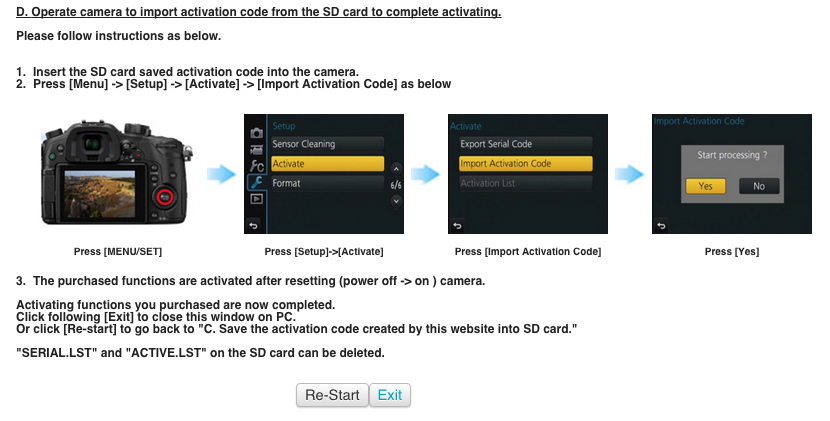
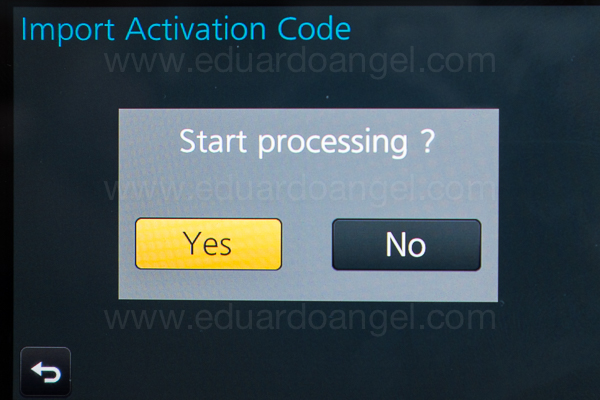
Step D – Import the Activation Code
1. Select the menu

2. Select “IMPORT Serial Code” and press MENU/SET

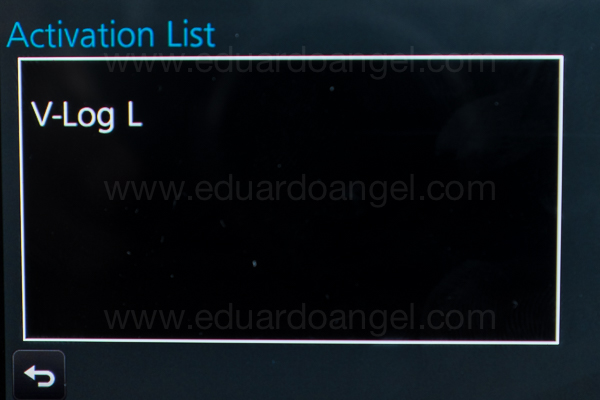
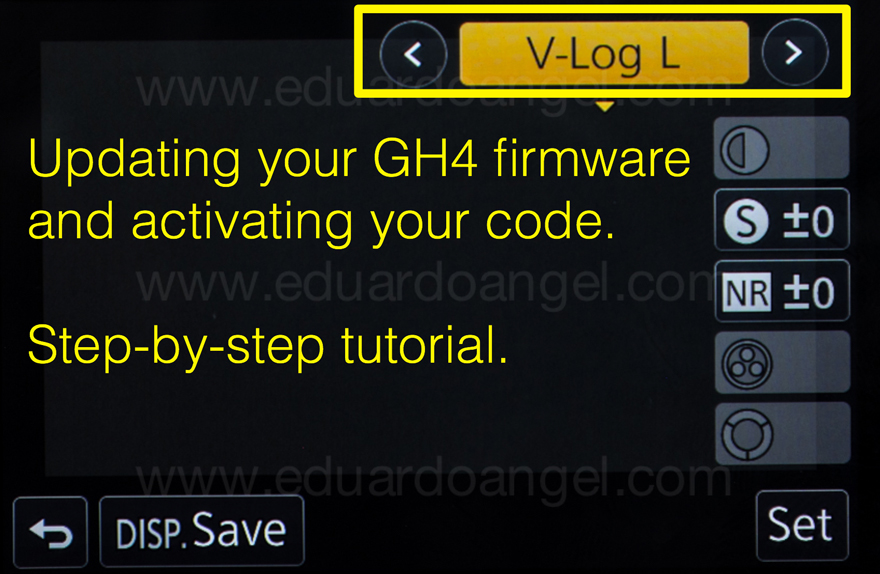
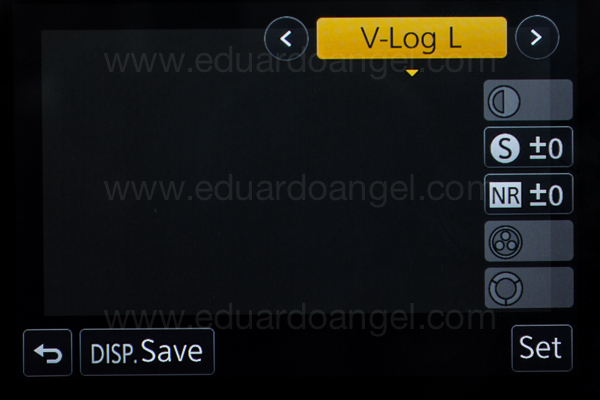
3. Turn the camera OFF and ON again. Switch to Motion Picture Mode, go to Photo Style, and Select V-Log L.
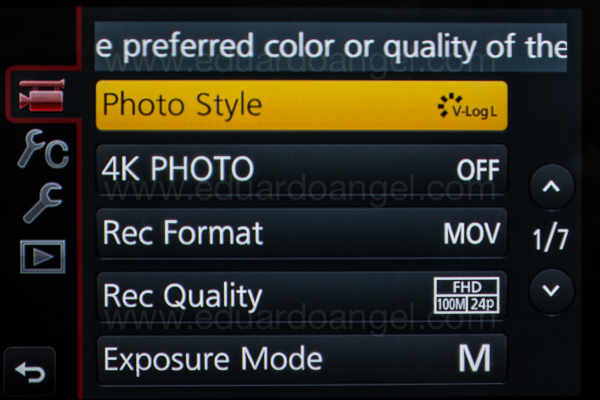
Something VERY important: While using the V-Log L profile the new base ISO is 400, not 200, so make sure to bring some ND filters along of you are shooting daytime exteriors.
The Panasonic GH4 V-LOG update can be purchased for $99 here by mid-September.
Happy Shooting!
Related Posts
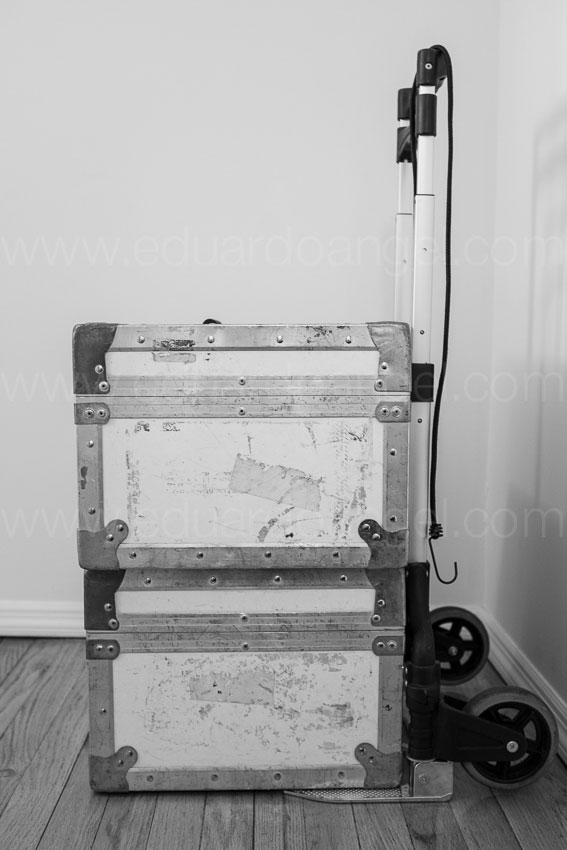
- Hybrid Assignments Equipment List: The Essential 41 Items.
- The eternal quest for “the best” digital camera.
- Shooting Anamorphic and V-Log with Panasonic’s GH4. Valuable Lessons.
- 7 things we discovered after shooting 4K with the GH4. You won’t like #4.
- The Pros and Cons of external recorders: Atomos Shogun.
- 4K video under $2K. Meet the Panasonic Lumix GH4.
- I Just Got a Panasonic GH4 – Now What? Hard Drives.
- I Just Got a Panasonic GH4 – Now What? Batteries.
- I Just Got a Panasonic GH4 – Now What? Memory Cards.
Video
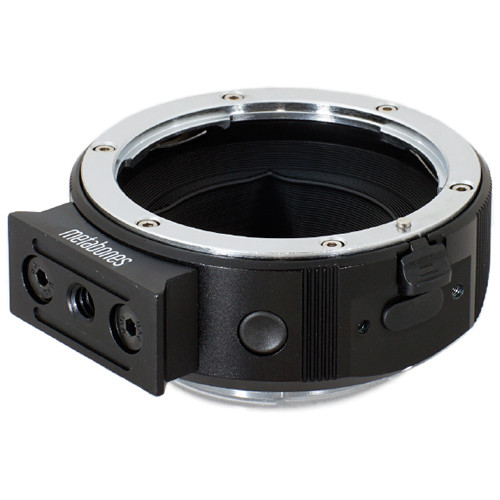
Metabones Speed Booster Firmware update.
Metabones released a new firmware update (v1.6) for the Smart Adapters and Speed Boosters Canon EF to Micro Four Thirds.
The update fixes or improves the following:
1– Iris click noise issue while zooming a variable aperture zoom lens. Fixed OM-D E-M1 depth-of-field preview button inoperative issue.
2– The connection reliability if lens is attached to adapter after camera is powered on.
3– An intermittent pincushion distortion issue on Panasonic bodies.
4– IBIS on OM-D series of Olympus cameras.
5– Lens hot swapping with passive MFT mount of BMCC.
We have constantly experienced issue #3 and sporadically #2 so this is a welcome update.
For some odd reason Metabones makes it extremely hard to find the link with the firmware update, so here’s the direct link for your convenience and some screen grabs of the process on a Mac.
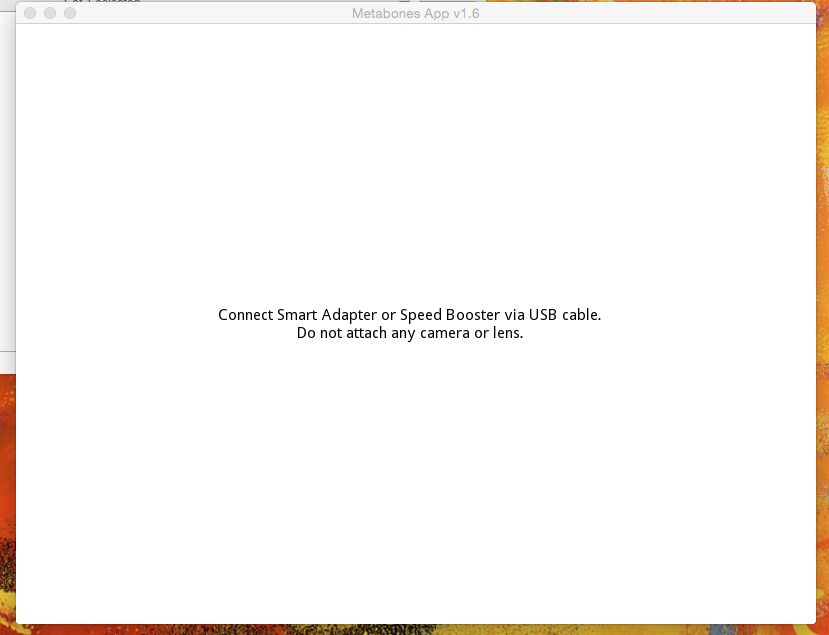
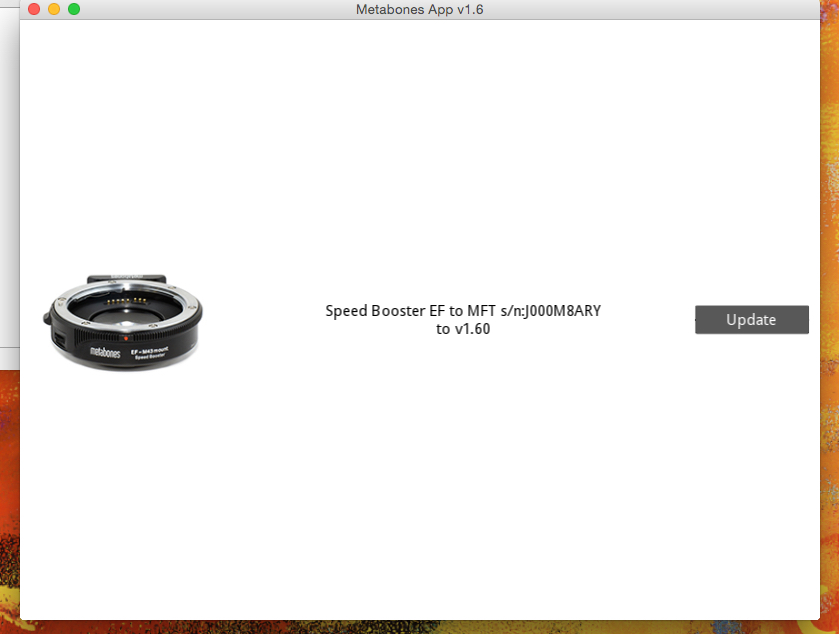
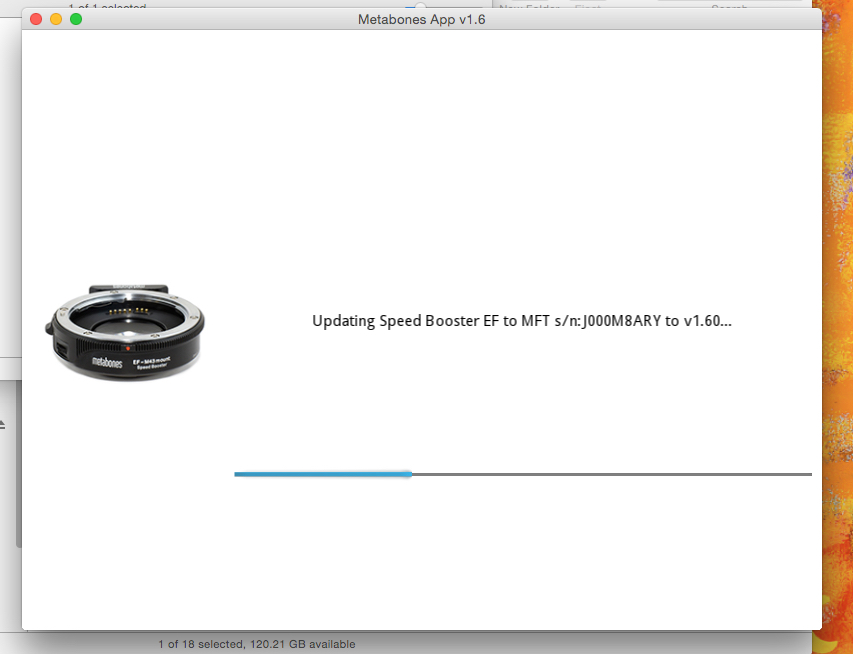
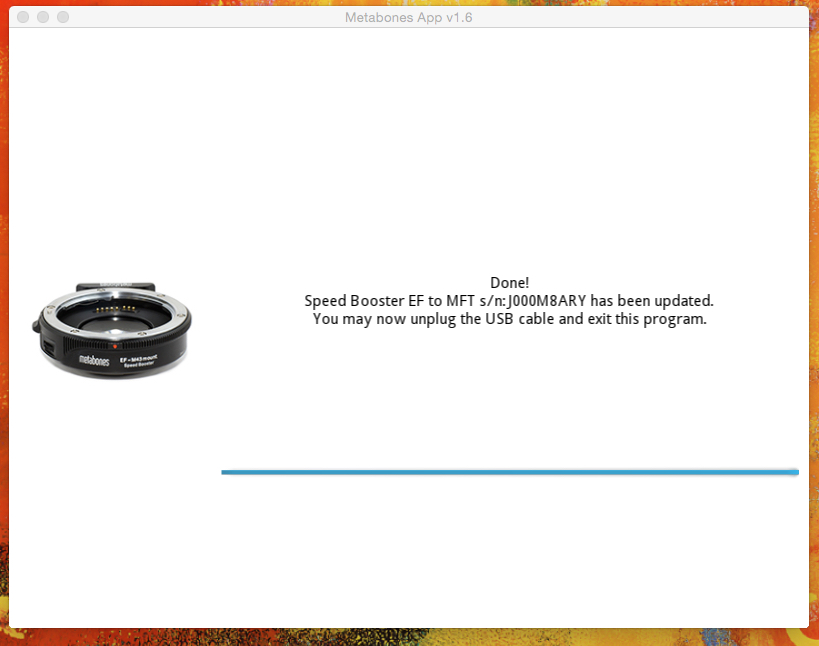
The update takes a couple of minutes.
Video

Shooting 4K Anamorphic and V-Log with Panasonic’s GH4. Ten Valuable Lessons.
UPDATED: I just added two video tutorials: one comparing “Panasonic’s V-Log L vs. Cinelike D” and the second one “Conforming 4K Anamorphic Footage in Adobe Premiere Pro.”
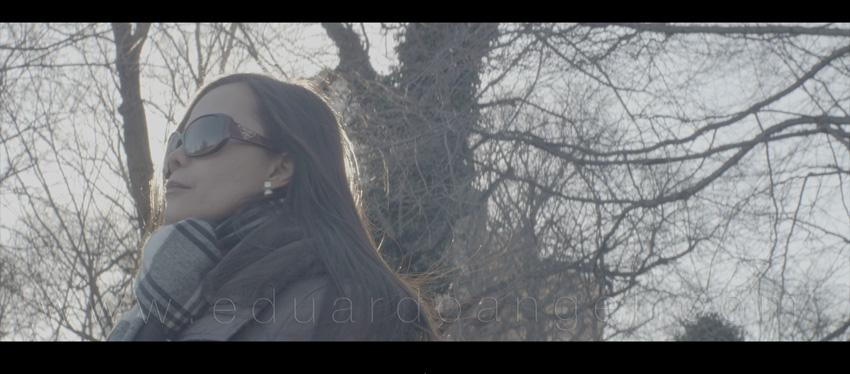
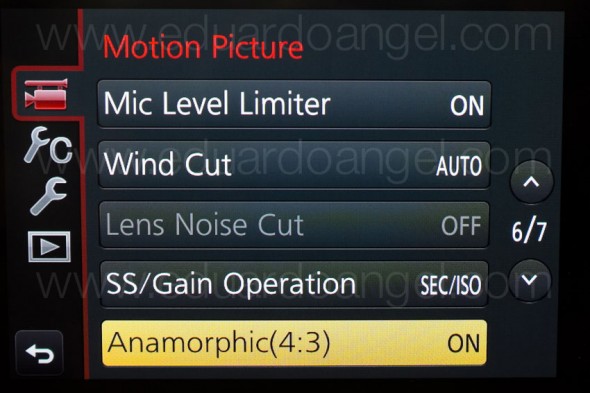
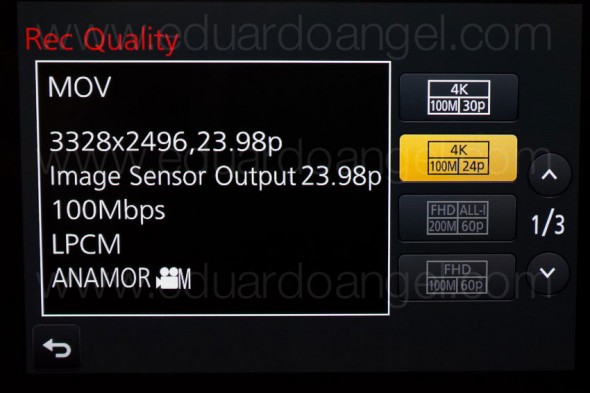
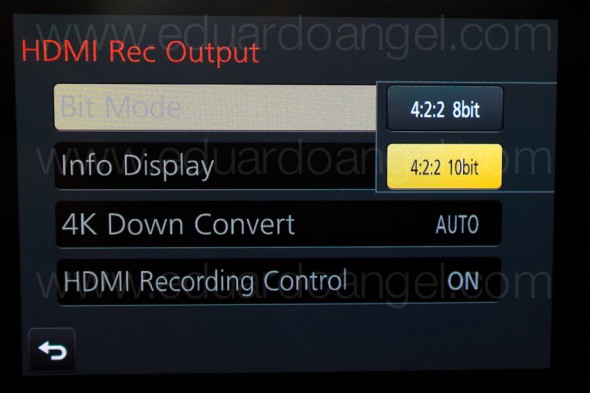
Anamorphic is enjoying a huge comeback. The reasons to go this route vary from project to project, but generally it’s the desire to achieve a different look and use as many pixels from the sensors as possible. Panasonic’s Firmware Update v.2.2 (available here) enables an Anamorphic (4:3) Mode capable of recording video in 3328 x 2496 pixel (equivalent to approx. 8.3-megapixel) resolution at a frame rate of either 23.98, 24, 25 or 29.97 fps. With an anamorphic lens such as 2x Lomo lenses (see below) we now can capture and un-squeeze a 3356×2496 image in post-production. To make things even better, 4:2:2 / 10 bit HDMI output is also available.
Just like in 2013 when we had the opportunity to field test a GH3 in the Middle East and last year when we shot with one of only three prototypes world-wide of the GH4, for the past couple of weeks I had the privilege to work with director Davis Northern, DP and tech wizard Sean Davis and many other talented people on one of the very first GH4 Anamorphic AND V-Log L projects, shot exclusively for Panasonic North America and produced by The Digital Distillery.
Panasonic 4K Anamorphic and V-Log L – Official Video from The Digital Distillery Inc. on Vimeo.
The project was exciting and very challenging, as working with hardware prototypes and beta versions of software or firmware always is. We had a lot of moving pieces and an extremely tight deadline, but I’m proud of the final results and very satisfied with the lessons learned. This article covers some of the most significant ones, and it is written from my very own personal perspective. As always, I try my best to be as objective and brand agnostic as possible. The lessons aren’t in any specific order and some links will take you to articles with additional information . Please consider using our links to help support our very time consuming articles and tutorials.
Ready? Let’s go!
1. Shooting Anamorphic
It can definitely be achieved by a very small crew on a small budget. We mostly shot with a crew of three, with very limited gear and time. I’ve always assumed you needed a 2-ton truck and a crew of 30 to pull this off. Clearly, this was not the case for us.
2. Lenses
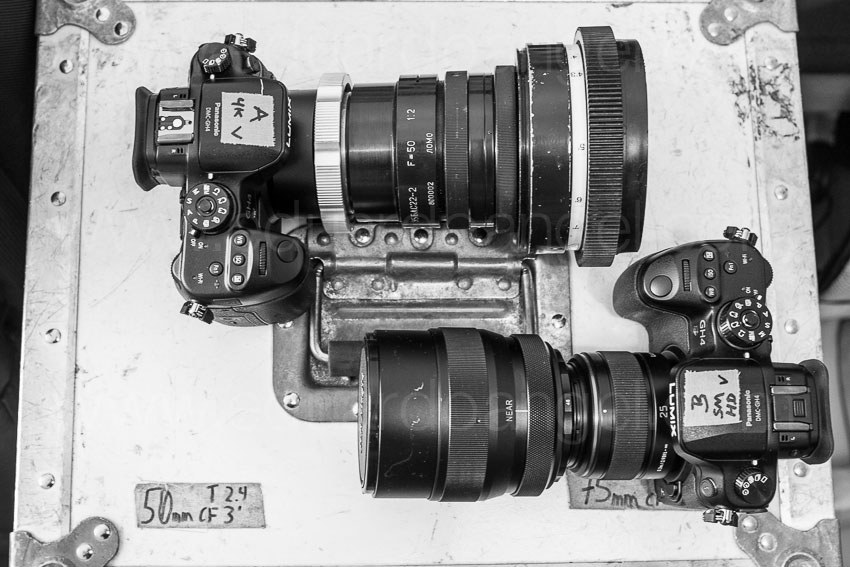
In terms of lenses, we opted to keep a “low profile” while keeping our options open. In other words, we rented a set of vintage anamorphic Lomo lenses (35, 50, and 75mm) and tested an SLR Magic as well as a Letus AnamorphX 1.8X Pro Adapter and a Veydra Mini Prime.
A. Lomo:
The lenses are huge and heavy. Lomo 50mm + 75mm with case = 25lbs. Lomo 35mm with case = 35lbs with each case weighting about 30lbs. Not ideal for the “guerilla” approach we needed for this project. They definitely have a unique look, but are very hard to focus, especially when using a very flat profile. We rented the set for $500/day or about $1,700 for a week including tax. Not cheap by any means but definitely worth the investment in terms of time and quality.

If I were to shoot this project again (or on upcoming anamorphic projects) I probably would test the Cooke Anamorphic/i Lenses (25, 32, 40, 50, 75, 100, and 135mm with a 2x squeeze). Unfortunately these lenses cost about $30,000 each, and the rental rate is about $500 per lens, per day.
B. SLR Magic:
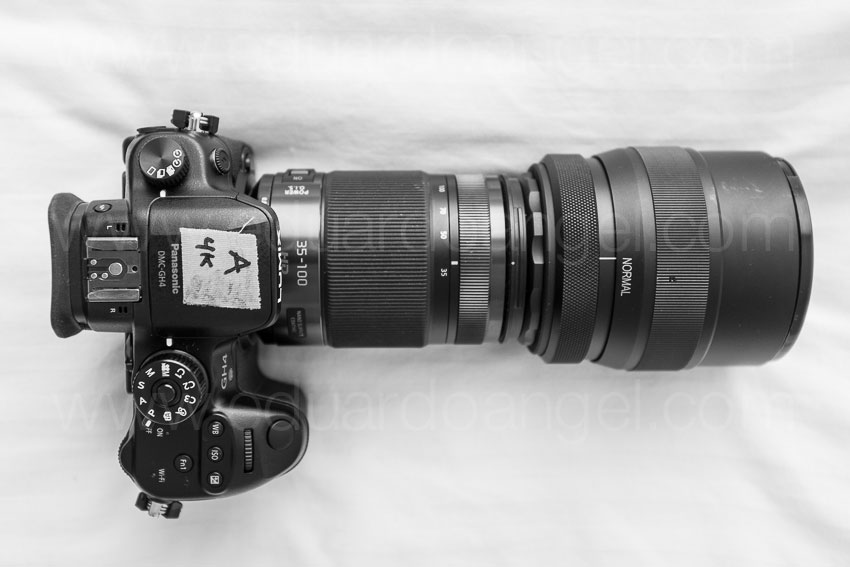
We had access to a very nice selection of Panasonic glass that we wanted to use with an SLR Magic adapter. The first challenge was that the front diameter on all the lenses has to be below 62mm in order to use the step down rings. The second limitation was (for the Panasonic lenses) that anything wider than 28mm would vignette. We could have used the Panasonic 12-35mm lens, at 28mm or longer (kind of pointless), but for some odd reason with the SLR Magic adapter it vignetted all the way even at 35mm. The Panasonic 35-100mm didn’t vignette at 35mm. Go figure. The next usable lens on our Panasonic arsenal was the beautiful 42.5mm Noticron f/1.2, but we needed a step DOWN ring (from 67mm to 62mm) that wasn’t included with the kit. The last option was the Panasonic 35-100mm f/2.8 lens, which worked well but focusing was a MAJOR issue (not Panasonic’s fault). I found the SLR Magic system very finicky and unreliable and unfortunately I can’t recommend using it.
C. Letus Anamorphx:
The Letus Adapter worked much better than SLR Magic but it was also cumbersome. A matte box is pretty much required and there was an issue with one of our widest lenses. The lesson here is, if you are shooting anamorphic, use the real thing.

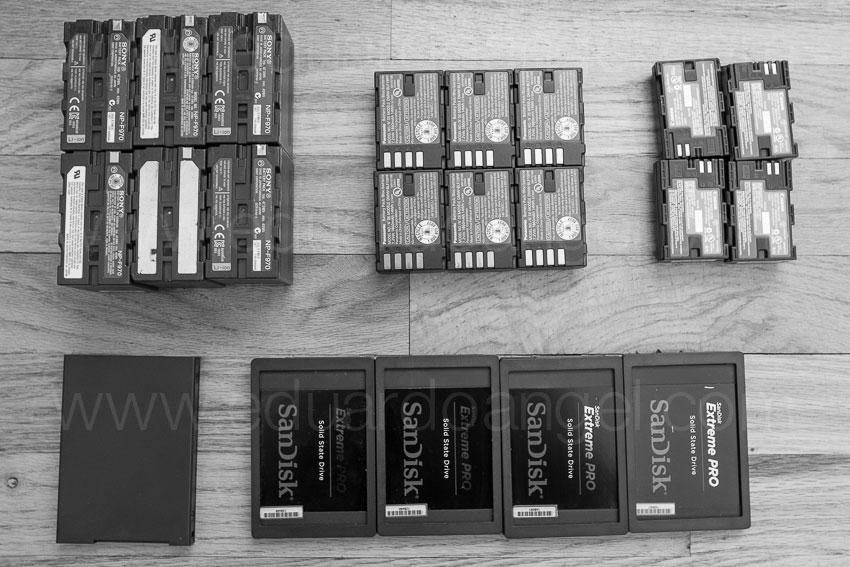
3. Storage
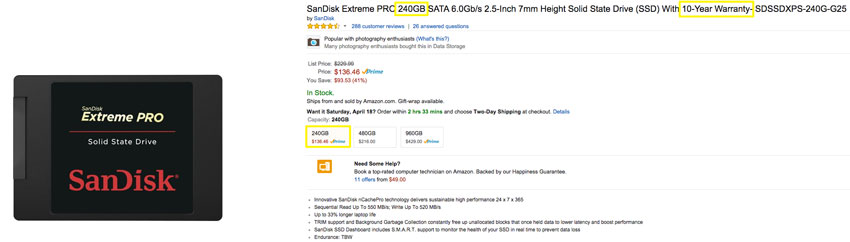
There’s some heavy math involved when shooting Anamorphic. An anamorphic lens produces roughly a 2X horizontal squeeze of the image onto film. Traditional anamorphic lenses were designed to work on a 4:3 standard. The anamorphic footage captured with the GH4 on the Atomos Shogun is 3840×2160, so not technically 4K but pretty close. Shooting internally (to an SD card) the footage is 3328×2496, so greater vertical resolution than the 4K standard, but not full 4K horizontal resolution. To keep things in perspective, the 4K footage out of the GH4 4096×2160.
As you would expect, the files are huge. Shooting ProRes 422 you need about 4GB per minute of footage. Two cameras: 8GB, after only one backup you are at 16GB per minute. So somewhere around 20GB per minute is a pretty safe storage estimate for a two-camera setup. As always, we trusted all our very valuable assets to G-Tech Hard Drives.
Regarding Solid State Drives, Atomos has a great chart with all the supported drives for the Shogun and other devices. Make sure you triple check the chart before investing in one.
One SECOND of footage takes about 50MB so even if you are shooting into seemingly endless Solid State Drives, being smart about when to start rolling and when to stop can save a lot of storage.
4. HDMI
As we were shooting, Atomos was literally finishing writing the Shogun’s firmware update (available in May or June as a free download) will enable a number of awesome features:
- Anamorphic de-squeeze for Panasonic GH4 and standard lenses
- RAW recording to ProRes, DNxHR and Cinema DNG for compatible RAW formats
- Expanded RAW compatibility to include Sony FS series, Canon, Arri and AJA
- 3D LUTs on HDMI/SDI output
- Cinema 4K DCI support
- Uncompressed V210 support
- Genlock
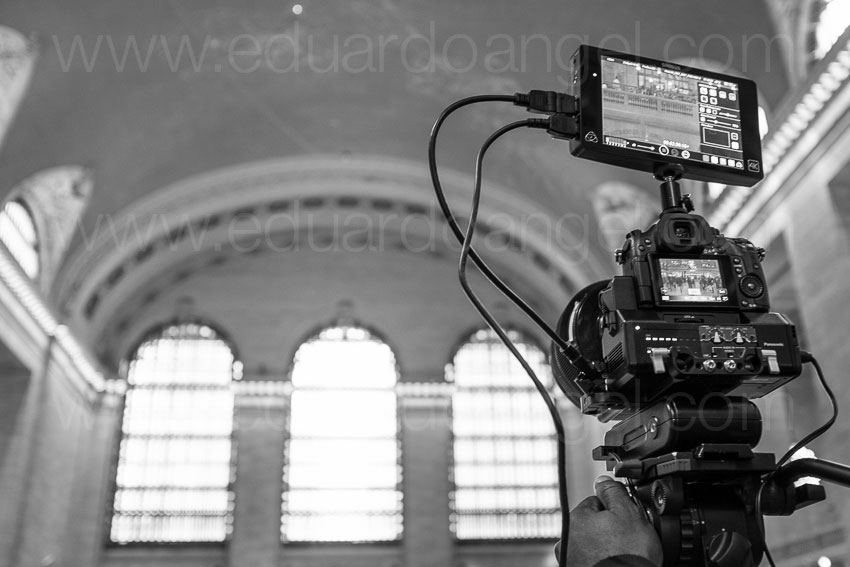
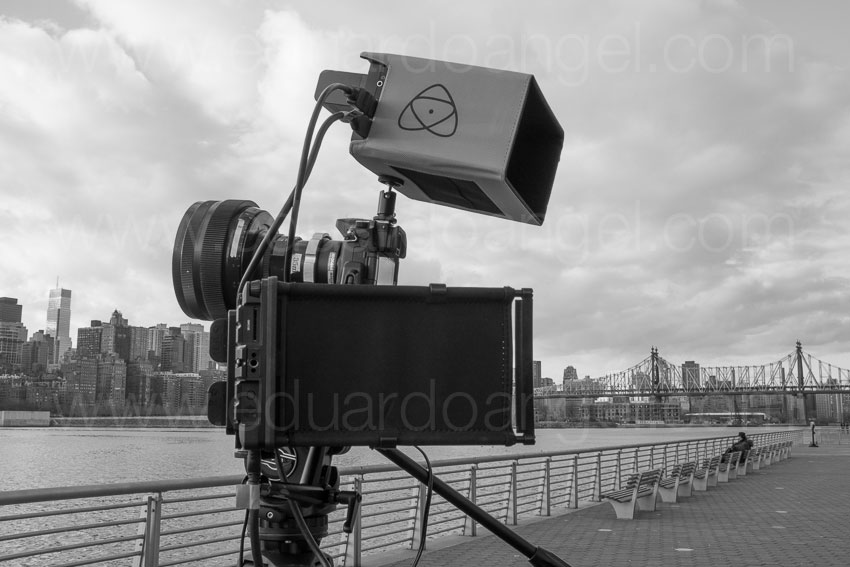
We had to use a Small HD Pro7 (to de-squeeze) and the Shogun (to record in 4K). The setup seems pretty obvious after a lot of trials but it wasn’t at first. Here’s the executive summary that will hopefully save you some time and stress:
1. Micro HDMI to Standard HDMI cable from the GH4’s HDMI OUT to the Atomos Shogun HDMI IN
2. Standard HDMI to Standard HDMI cable from the Atomos Shogun HDMI OUT to the Small HD HDMI IN
3. In the Shogun, the 4K downconvert option should be OFF while connecting the Small HD and turned ON when everything is properly connected.
Our Small HD had a nasty tendency to constantly lose signal for no apparent reason, so step #3 had to be repeated many times throughout each shoot.
5. Premiere Pro CC 2014 Workflow
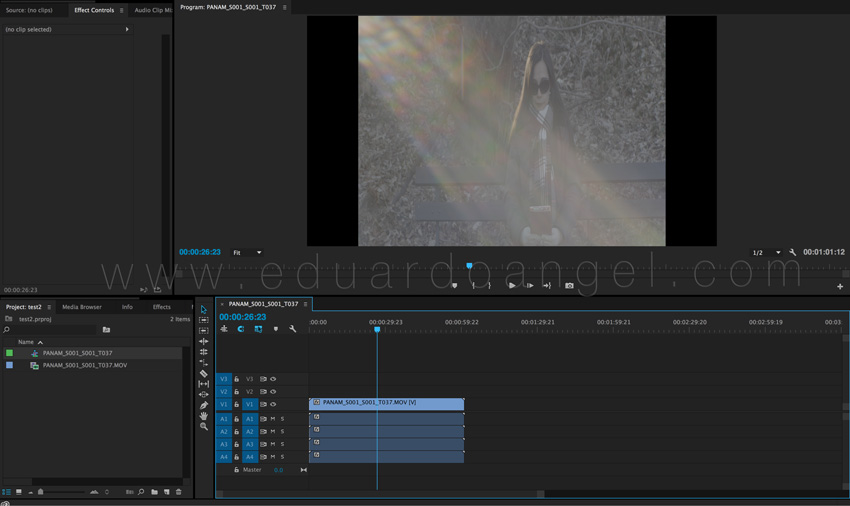
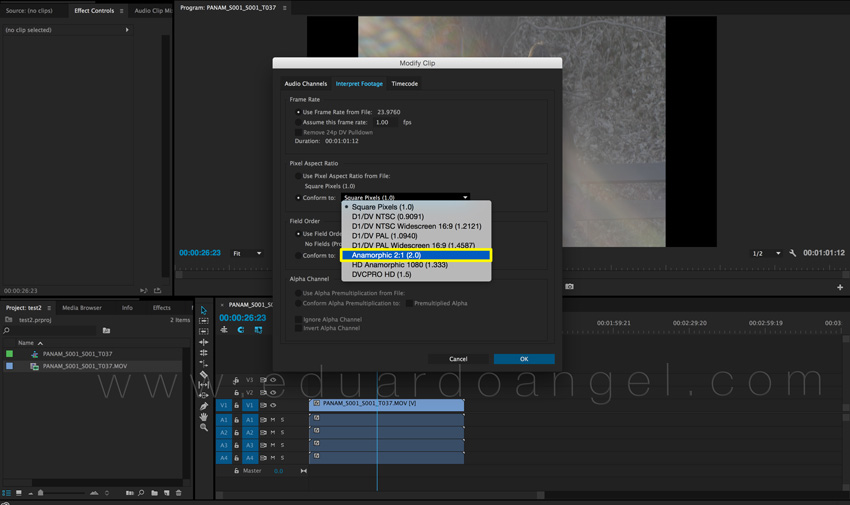
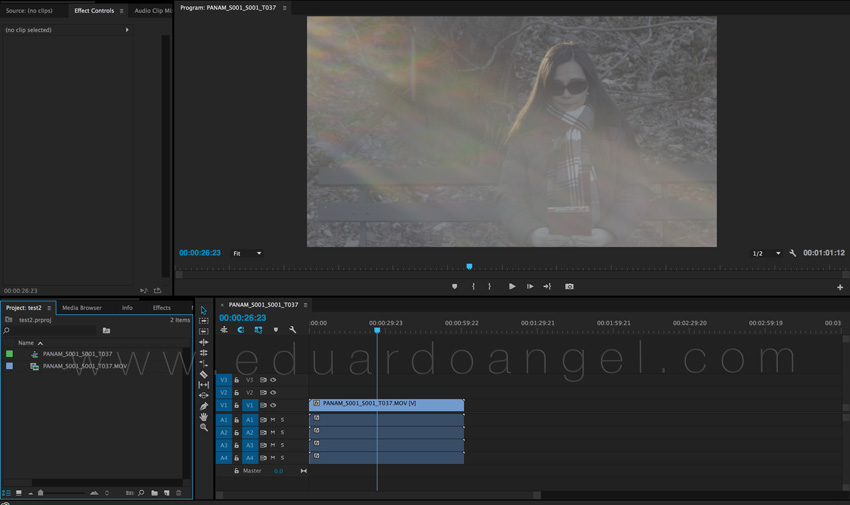
To be totally honest, I was shocked by how easy it was to conform the footage in post. Here’s what you need to do:
1. Import the footage the way you normally do.
2. Select the anamorphic clips.
3. Go to clip > Modify > Interpret Footage
4. Under “Pixel Aspect Ratio” select “Conform To” and “Anamorphic 2:1 (2.0).
5. Create a “new sequence from clip” and start cutting.
6. Done and done. Wow!

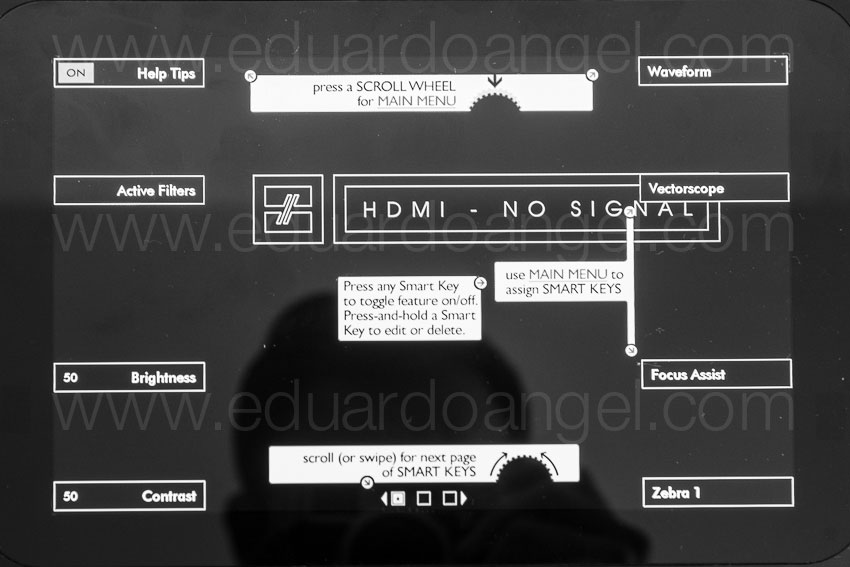
Here are some screen grabs from the camera’s LCD:

6. Focus
Focus is super, extra, hyper critical, especially when shooting with a very flat profile like the one we used. Unfortunately we couldn’t trust the SmallHD and had to rely 100% on the Shogun at a 1:2 zoom.

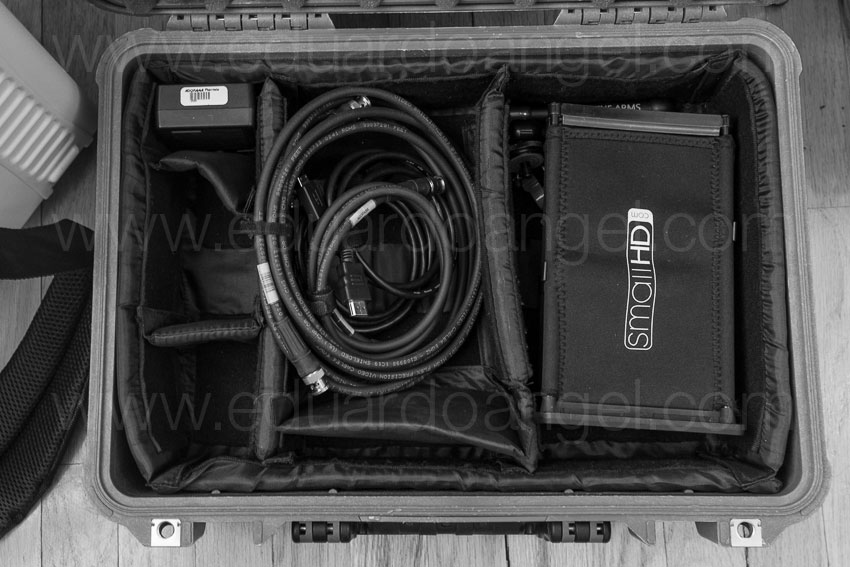
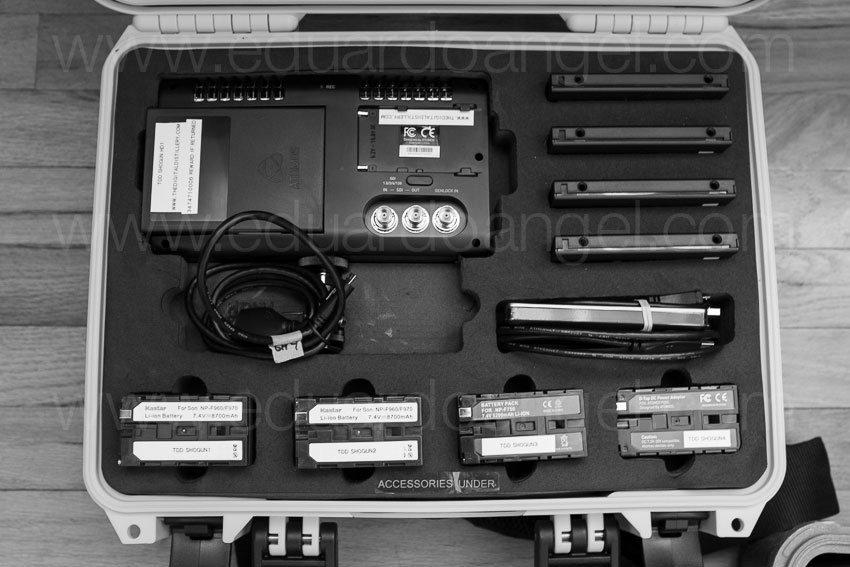
7. Accessories
• A sun hood for your external monitor is absolutely essential (if given the option get the black version).
• Obviously you will need lens adapters if you are planning to use the SLR Magic or Letus AnamorphX options.
• Make sure you get plenty of batteries, The small battery that comes with the Shogun lasts about 30 min only and we got about one hour of recording time with TWO Canon batteries on the Small HD. Instead of buying tons of batteries I’m a big fan of renting them (more here). The same goes for additional Solid State Drives.
8. Bonus lessons:
• Shooting anamorphic takes a lot practice and fine-tuning. I’d recommend scheduling at least a full day to test all the gear before a shoot.
• If we keep a small footprint and move fast, we can get a lot done.
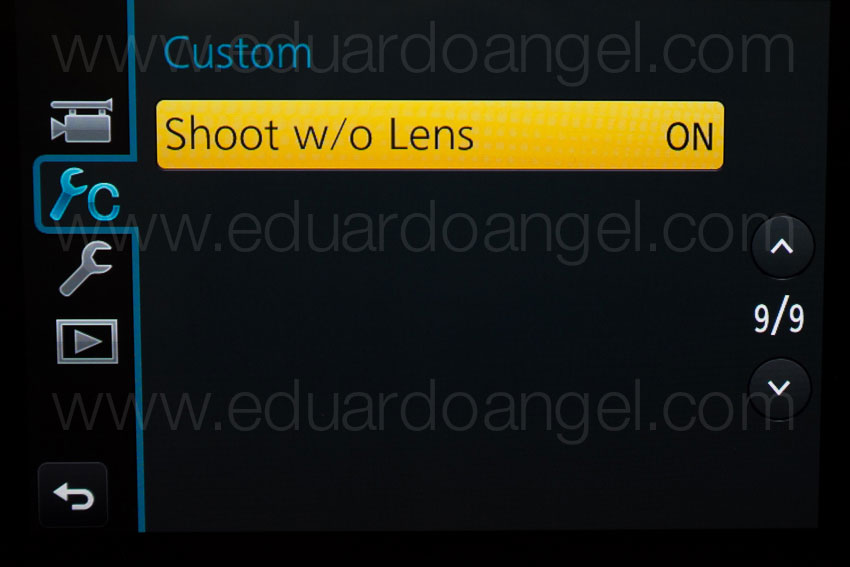
• The “shoot without lens” on the GH4 must be turned on in order to work with the Anamorphic lenses.
And…..here are two more videos (not anamorphic) shot with the Panasonic GH4. Check them out and let me know if you have any questions or comments via Twitter (@EA_Photo)
Video
Panasonic GH4 Firmware Update.
Panasonic has released a new firmware update for the GH4. The new update version 2.2 adds the following features:
- Anamorphic (4:3) Mode is available which optimizes the settings for 3328×2496 video recording with a 4:3 anamorphic lens.
To convert the footage to a cinemascope aspect for playback, corresponding software and device are required.
- 1/16000 sec shutter speed can be selected manually when using Electronic Shutter.
- Fixed the issue which video recorded in rec format AVCHD got misdated when imported to some editing software.
Here’s a video shot with the 2.2 (beta) version which unlike the public version also included V-Log L.
Panasonic 4K Anamorphic and V-Log L – Official Video from The Digital Distillery Inc. on Vimeo.
A short film by Eduardo Angel, Davis Northern and Sean Davis. Shot with Panasonic LUMIX GH4 firmware 2.2 in anamorphic format. The film starts out ungraded as shot in a new V-Log L gamma file color space, which is being evaluated for market release in 2015, then transitions to fully graded scenes. Learn more about our experience shooting this project here: http://bit.ly/1DddoB6
The previous version 2.1 – offered the following changes and fixes:
• Time code can be embedded to the HDMI output signal.
Selectable in Motion Picture menu : [Time Code] -> [HDMI Time Code Output]
This function is now available when DMC-GH4 or DMW-YAGH are connected with Atomos products.
• RSS (Recording Start/Stop) signal can be embedded to the HDMI output signal.
Selectable in Motion Picture menu : [HDMI Rec Output] -> [HDMI Recording Control]
This function is now available when DMC-GH4 or DMW-YAGH are connected with the Atomos products.
• FHD at 30p/25p native output via HDMI is available while recording video in FHD at 30p/25p.
Selectable in Motion Picture menu: [HDMI Rec Output] ->[1080/30p Set.] or [1080/25p Set.]
• Playback performance of recorded 4K video is improved.
We’ll need to test this feature and see what the improvements are. Stay tuned!
• Time Lapse Shot Program is fixed to start recording at the designated time even when [summer time] is set.
A very welcomed fix. We ran into this issue a few months ago.
Lens Firmware Update
The super tiny and awesome 35-100mm lens has also received an update! Version 1.2 of the lens firmware brings improved Optical Image Stabilization in Motion Picture recording (when using DMC-GH3/GH4) and improved AF speed with GH3 (240fps control).
Previous Body Firmware Updates
The previous firmware version 2.0 introduced 4K Photo Mode, which automatically set shooting parameters optimized for stills and allows 4K capture in a variety of aspect ratios. There was also a Rec Loop mode that constantly shoots and deletes footage from the card – retaining only the last five two-minute clips. The firmware also brought a 23.98p 4K shooting in MP4/AAC mode. Other changes included adjustable flash output and greater control over ISO.
How to update your GH4’s Firmware:
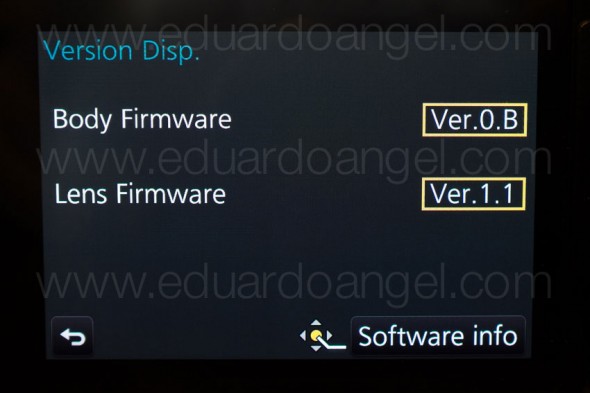
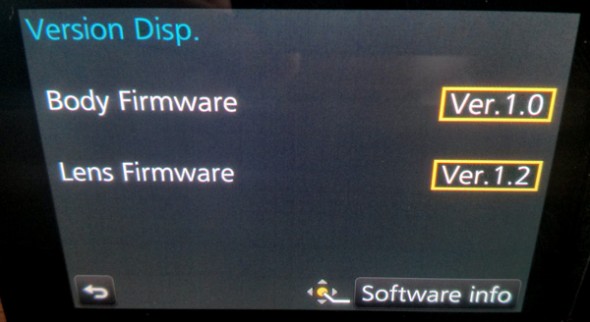
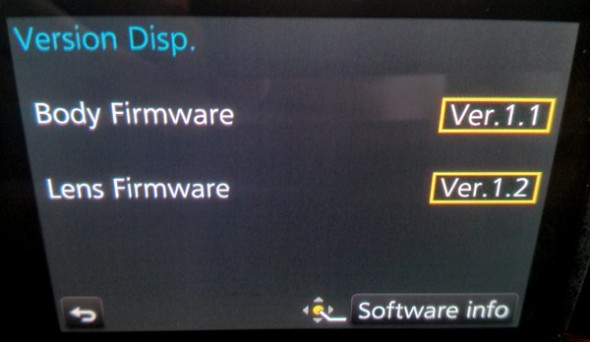
1. Check the current version of firmware of your camera and lens – Mount a lens onto the camera body. – Set the camera’s power switch to ON. – Press the MENU/SET button. – Go to the SETUP menu and select the “Version DISP.” If you already have 1.1, there’s nothing else to do. If you have a previous version, please continue:
2. Download the file for update (here’s the direct link)
3. Extract the file
4. Copy the firmware update program extracted into an SD memory card.
5. Make sure the battery is full.
6. Turn off the power switch.
7. Insert the fully charged battery to the body.
8. Insert the SD Memory Card with the firmware file.
9. Turn on the power switch.
10. Here’s the key step: Press the Play button to enter the Play mode. After the message of “PLEASE WAIT …” is displayed, the “Version Up Body” should appear. Press the Up button to select YES. The update process will start. The green bar increases the level by the process. The firmware update will take about 2 to 3 minutes. Once the firmware update process is completed, the camera body will turn off the power and turn on again then it will be initial mode automatically.
11. Go shoot something awesome. Important: While updating the firmware on ANY camera do NOT attempt the following operations before completion:
Turning the power off and on
Pressing any buttons
Opening the SD memory card compartment
Removing the SD memory card
Removing the lens
Removing the AC adaptor cord
Removing the DC cable
Related Posts
7 things we discovered after shooting 4K with the GH4. You won’t like #4. 4K video under $2K. Meet the Panasonic Lumix GH4.
I Just Got a Panasonic GH4 – Now What? Hard Drives.
I Just Got a Panasonic GH4 – Now What? Batteries.
I Just Got a Panasonic GH4 – Now What? Memory Cards.
Discussing the Panasonic GH4 Live!
Dance Behind the Scenes • Panasonic GH4 4K and SlowMo with Cine-D Profile. from The Digital Distillery Inc. on Vimeo.
Photography
Apple OS 10.9 Mavericks compatibility for X-Rite color solutions.
The recently released Apple OS 10.9 Mavericks may experience communication issues with X-Rite instruments. To resolve these issues, users need to update to the latest X-Rite Device Services (XRD v2.3.2) driver software. (more…)
Video
New Panasonic GH3 update brings Silent Mode.
We just noticed a new Panasonic GH3 firmware update. As you already know this is one of the many cameras we have been using lately for still and video productions. Our original field test review, samples images and links to previous lens and body firmware updates can be found here.
There are some interesting improvements on today’s version 1.2: (more…)
Video
7 reasons not to buy the Kindle Fire.
I bought a Tablet yesterday. I did NOT buy an Apple iPad, like most of my friends would have expected, or a Barnes and Noble Nook Color, which seems to have great features, or even a Kindle Fire, which I have been seriously considering for the past two weeks.
My new toy is a Lenovo Ideapad A1.

I have been against the “tablet” idea since the iPad was announced. I don’t want to carry more stuff, more weight, more cables. I don’t want to worry about syncing all my devices. If I want to travel light, I always have my HTC Incredible with me (when the battery doesn’t die). If I need to do real work, I take my loyal MacBook Pro. I couldn’t think of any reason to change that peaceful balance. That was until I had to fly over 230,000 miles this year alone, tried unsuccessfully to work on a red-eye flight, took my laptop to endless meetings where a notepad could have been enough, had to return countless unread books to the library because I didn’t have time for them, and got really tired of burning my legs with a MacBook Pro while trying to read in bed.
A tablet suddenly seemed like a good compromise; fast enough for most daily tasks, small, ultra light, and at last at an affordable price. My budget was $250. Both the Ideapad A1 and the Kindle Fire cost $199, and the Nook goes for $249. The iPad 2 is completely out of my price range starting at $500, but I included it on the comparison as a reference.