Video
The Pros and Cons of external recorders.
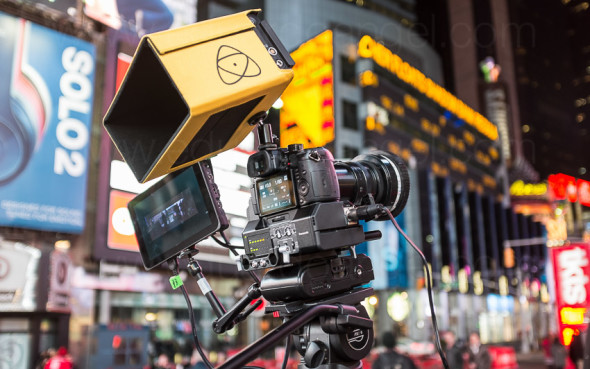
I’ve been using an Atomos external monitors/recorders for a while, and while I had very clear reasons to pick up this device, I’ve found many other very valuable and attractive features. Here I share the most interesting ones in no particular order.
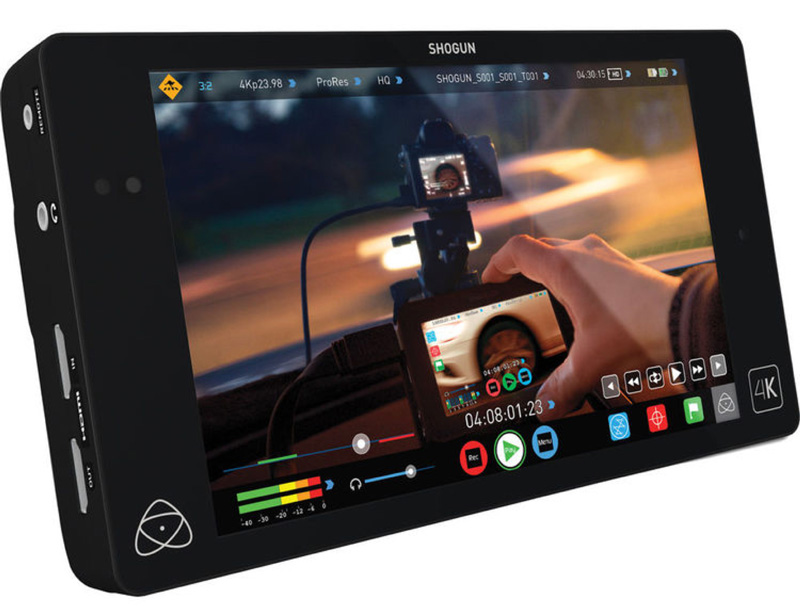
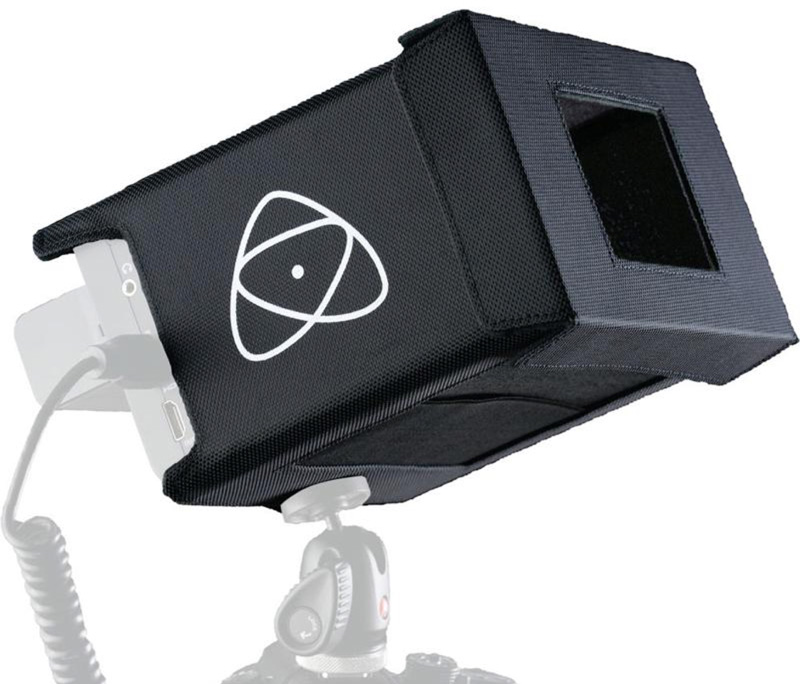
The new Atomos Ninja V
1. Longer recording times
The first and most obvious reason was to record 4K and HD for extended periods of time. The Shogun utilizes 4K HDMI and 12G-SDI inputs to record clean output signals at resolutions up to UHD 4K (3840 x 2160) at 23.98, 24, 25, 29.97, and 30p, as well as Full HD (1920 x 1080) video up to 120 fps with some cameras.
We’ve been shooting a lot of corporate interviews and live events lately and swapping 32GB or 64GB is cumbersome and very inefficient. The additional steps in post to log each and backup each card are fairly simple but time consuming. Yes, SD cards are cheap, with a 64GB costing about $30 (Amazon • B&H) and a 128GB going for about $60 (Amazon • B&H), I was expecting Solid State drives to cost an arm and leg. Wrong!
You can now get an “Atomos approved” (the complete list is available here) SanDisk Pro 240GB drive for only $120 (Amazon • B&H) and a SanDisk Pro 480GB drive for only $200 or less! (Amazon • B&H). Both drives come with an impressive 10-year warranty. And here’s a special Shogun kit that includes TWO 240GB Solid State Drive for FREE. A no brainer if you ask me.
It is worth mentioning that shooting 1080 in ProRes 422 on a 240GB drive (with the Panasonic Lumix GH5 on Amazon • B&H) gives you almost 3.5 hours of recording time. Using the same drive but recording in ProRes LT gives you almost five hours.
The Shogun also allows other systems like Sony’s a7S (Amazon • B&H)that are not capable of recording 4K internally to send the 4K signal to the external device via HDMI.
2. Adding XLR ports to your cameras. No need to sync audio in post.
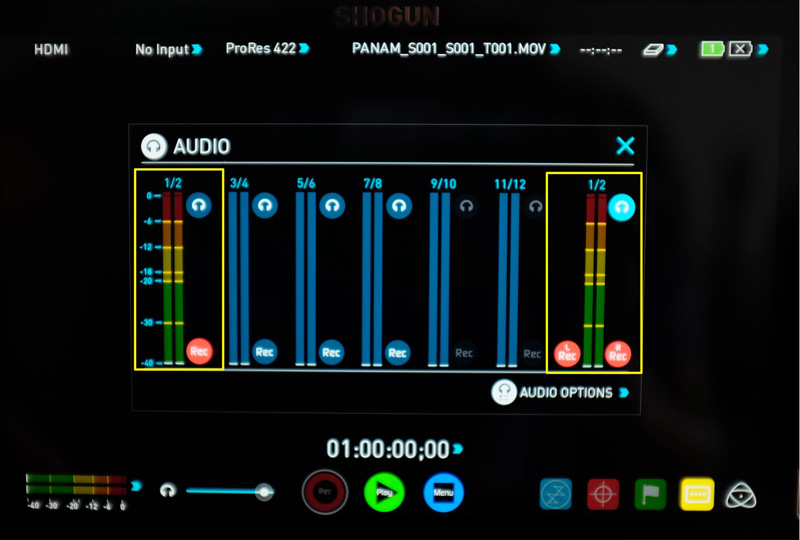
The first “ah-ha!”moment was recording audio directly into the Shogun via the provided XLR breakout cable (with two 3-pin male and two 3-pin female XLR). The Shogun provides Phantom Power which is essential when using our trusted Rode Lavalier mics (Amazon • B&H).

The Shogun can record 8 channels of digital audio embedded in the HDMI signal and 12 channels of digital audio embedded in the SDI signal. There’s also a 3.5mm output that doubles as a Line Out or Headphone jack. The headphone’s volume can be controlled separately within the menu. Pretty clever!
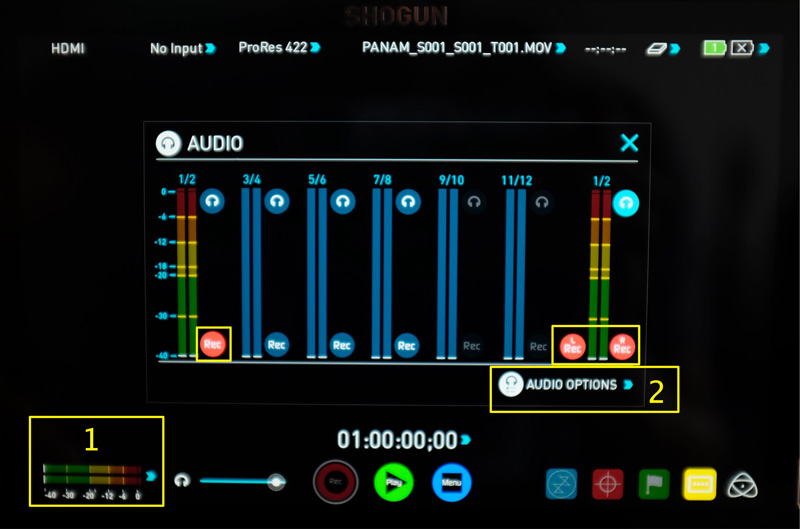
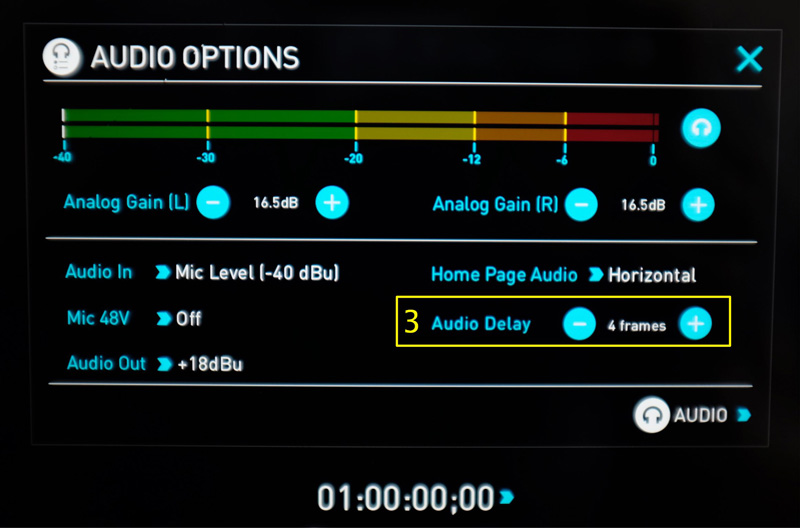
We have used the Shogun mostly with Sony and Panasonic effectively adding XLR ports to our tiny cameras. This is important: we noticed a delay or off-sync between the footage and the audio being recorded into the Shogun. After extensive tests we also noticed that the audio delay was different for Cam A and Cam B even though both were the same brand and model, and running the same exact firmware version.
Thankfully Atomos includes a very easy fix; simply go to the Audio menu and from there navigate to the “Audio Options”where you will see an “Audio Delay”preset. We finally settled on 4 frames for the Audio delay.
For our one-person interviews and the most recent Lynda.com courses we used one shotgun boom mic on XLR A and a wireless lavalier set on XLR B. This is what the correct settings on the Shogun should look like:
3. Standardizing editing codec and no need to transcode
On most projects we try to use the same camera model. So if we need three cameras we would use three identical brand/models. We try to keep it simple.
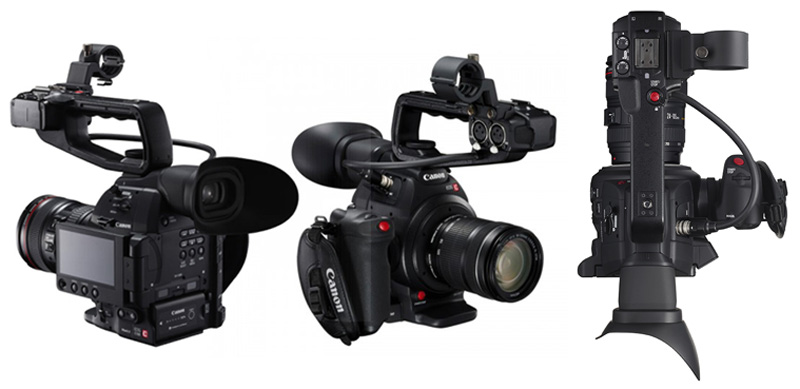
But on a recent shoot in Portland we were shooting with two Canon C200s, had a “behind the scenes”crew using two GH5s, had one Sony A7s doing time-lapses and used one Sony FS7 for some slow-motion sequences. Not the ideal “workflow” situation.
Normally this would be a post-production nightmare for our editor and/or a huge time waste for us having to transcode all that footage every night on-location. We simply attached a Shogun to each camera, shot ProRes 422 with clean audio and the only post step required on our end was backing up the Solid State Drives into our TWO G-Tech drives (Amazon • B&H). Why two? One is set as the Master and at least one as our Backup. When possible, we bring additional Solid State Drives with us so during the shoot we can leave the footage on them as a third backup.
The only disadvantage I see from this approach is the huge file size of the ProRes compared to the native on-camera files, but when taking into account the time wasted transcoding and syncing audio the investment for bigger and faster hard drives more than pays off.
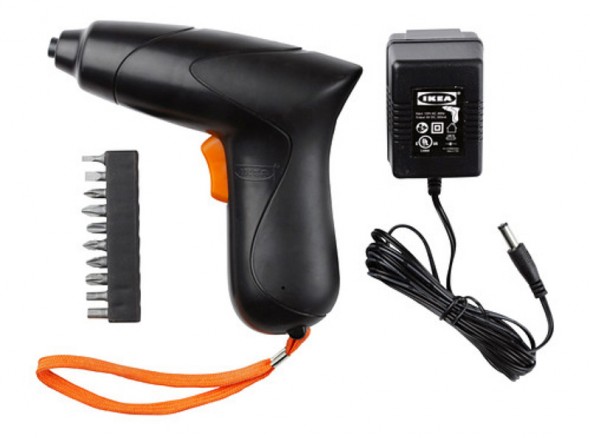
A handy tip: if you will be renting SSDs often, I suggest getting a battery-operated screwdriver to make the process of getting the drives into the Master Caddy II much faster and easier. The best bargain can be found at Ikea.
5. Camera Settings
Here’s something VERY important to consider when using the Shogun with Panasonic cameras.
1. In the camera’s “Motion Picture”Menu, navigate to the fourth screen (as of this writing).
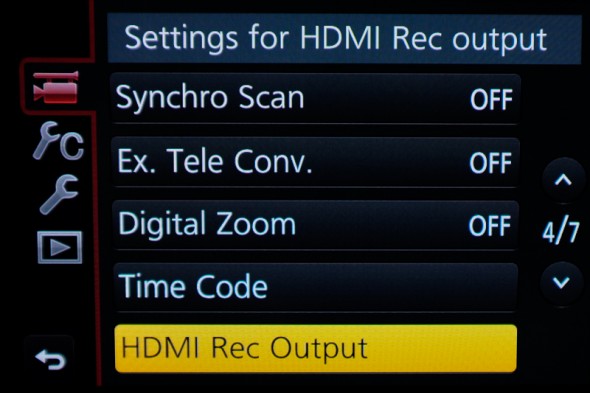
2. Go to “HDMI Rec Output.”If for any reason you are planning to record in 4:2:2 8 bit, make sure to go to “Info Display”and turn it off. Failing to do this will record the camera’s menu into the footage.
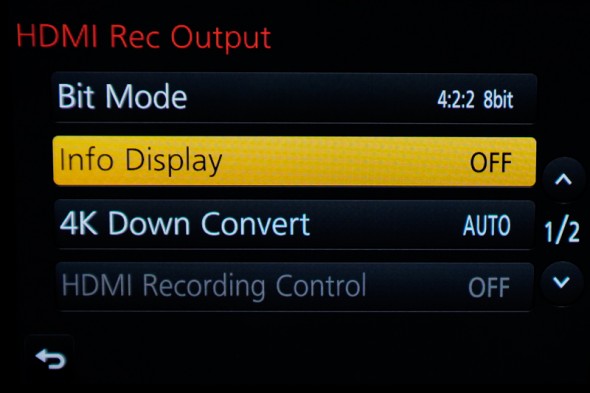
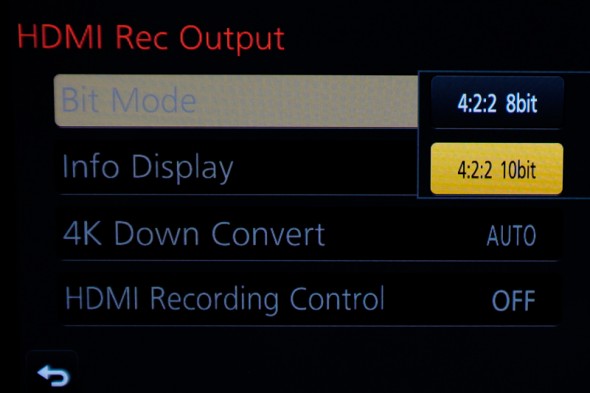
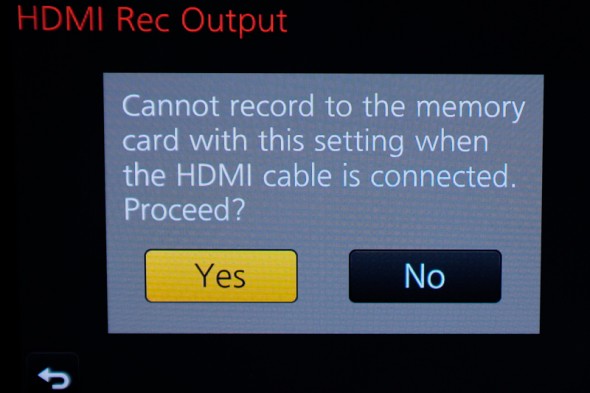
3. If instead you are planning to record in 4:2:2 10 bit, go to “HDMI Rec Output” then “Bit Mode,”select “4:2:2 10 bit”and then “yes.”
6. Focus, Exposure and LUTs
We purchased the Shogun thinking that it would be much easier to monitor focus on a 7”screen. It does work wonderfully in that regard, but we got a lot more than we bargained for. The touchscreen is very minimalist and easy to navigate, the color accuracy is extremely good. Actually, the monitor’s color standard is REC 709 and it can be calibrated with an optional Atomos Spyder.
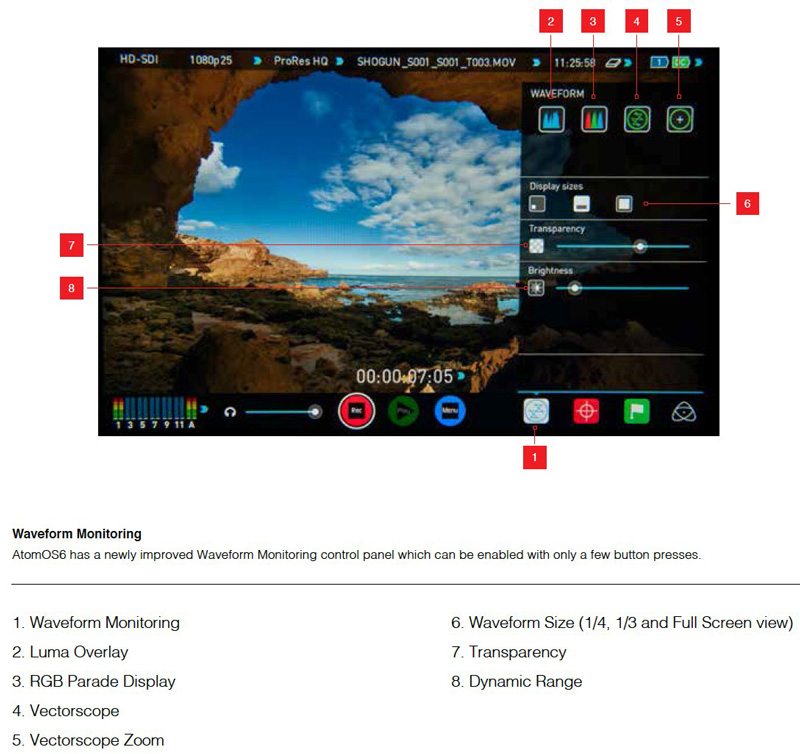
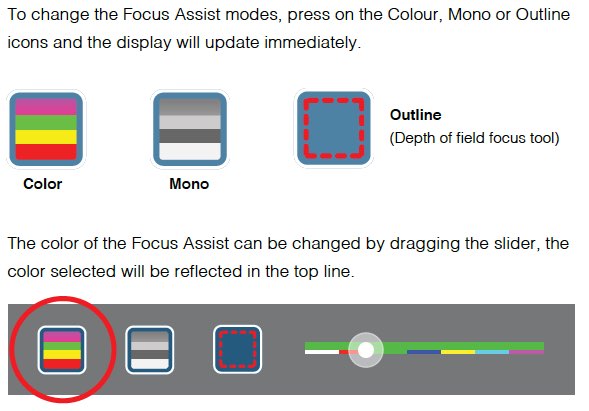
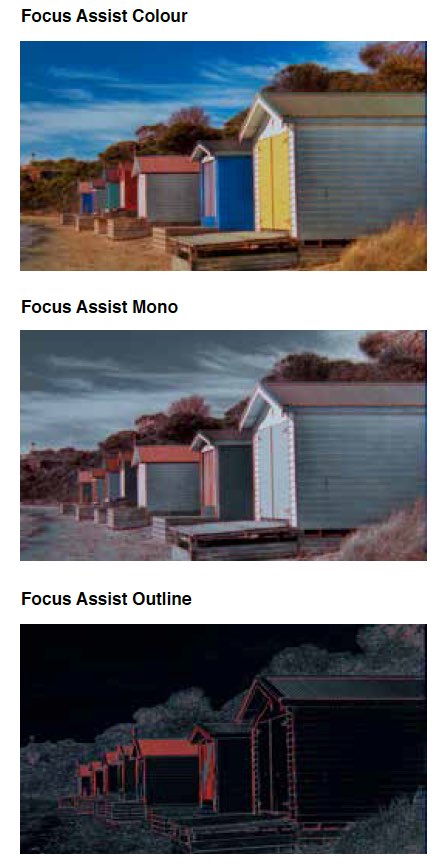
The additional benefit of having more reliable and customizable Focus Peaking is very handy. There are three flavors for peaking: Color, Monochrome, and Outline. In terms of monitoring exposure, especially when shooting outdoors, False Color is key. This feature assigns different colors to areas of different exposure in the image: overexposed areas appear as red, and underexposed appear as blue.
The ability to load LUTs and show the client what the footage will look like after grading is priceless. It is important to know that the LUTs loaded into the Shogun simply previews what the footage would look like, but the media being recorded is not affected. Here’s a short film featuring Panasonic’s recently released Anamorphic mode, and the yet to be released V-Log L gamma file color space.
7. Batteries
In a nutshell, get plenty of juice. Perhaps the biggest complaint from many users has been regarding battery life.The battery provided with the kit only lasts about 45 minutes, making it mandatory to buy additional ones. We went the “cheapo”route and purchased a too-good-to-be true Kastar kit on Amazon that included two batteries, a charger and a car charger for only $34. Unfortunately this time the “you get what you pay for”maxim held true. The batteries last about the same as an original Sony NP-F970, but the Kastar charger is completely worthless. An original Sony battery costs around $120.
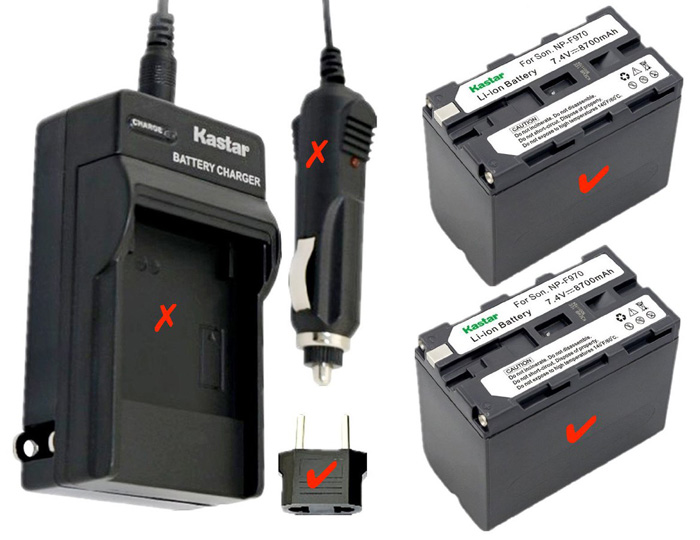
We got stuck on location with a ton of dead batteries and a bad charger. Not a pretty day. The lesson: buy at least one good charger and always bring the Shogun’s AC charger with you (it is included in the kit).
8. Conclusions:
Clearly, the Shogun is an outstanding (but not perfect) product. While it is very light (a mere 16 ounces without batteries), which is great when used on a monopod or gimbal, it is also very fragile. Our monitor broke during our second on-location shoot and we always take great care of our gear.
If you are planning to use the Shogun in broad-daylight I’d also STRONGLY recommend getting a sun hood, which was NOT included with our original kit.
There are at least a couple of additional features we haven’t tried yet: the optional Wi-Fi Remote Control to start/stop recording from an iOS or Android device, and flagging the footage on the Shogun as favorite/reject. Apparently this gets exported within the footage’s metadata and will work with Final Cut X and Adobe Premiere Pro CC. I can definitely see this as a time-saving feature, especially while working on interviews and marking sections with the best takes or sound bites.
For a couple grand, I believe one gets a LOT of value out of this device, especially if you can get the current deal that includes two FREE Solid State Drives.
Comments? Questions? Let’s chat on Twitter.
Video
OK Fuji, now you have my attention.
I have used Fuji cameras in the past (and love them), but only for stills. Today Fuji announced a very interesting camera for video and hybrid shooters. The new X-H1 shares the same 24-megapixel APS-C X-Trans III sensor from the popular X-T2, but adds a number of important improvements like five-axis in-body image stabilization and log capture.
The X-H1 records both DCI (23.98 and 24p) and UHD 4K (up to 30p) with Rec.2020 at 200Mbps, but only at 8 bits.
A cool feature is that Fuji has included specific shutter speed options for video on the X-H1. For example, instead of 1/25 or 1/50 of a second, users can select 1/24 sec or 1/48 sec.
Slow-mo fans have to stick to 1080p, but can enjoy up to 120fps.

Fujifilm X-H1 Camera Body
Key Specifications
• 24MP X-Trans APS-C sensor
• DCI and UHD 4K capture at up to 200 Mbps
• Slow motion 1080 (from 120 and 100 fps)
• 5-axis in-body image stabilization (rated at 5EV)*
• 3.69M-dot OLED viewfinder
• Touch sensitive rear LCD with two-axis tilt
• Twin UHS-II-compatible card slots
• Anti-flicker shooting mode
• Internal F-Log capture
• 24-bit audio capture
• Eterna/Cinema Film Simulation mode
• Timecode
• No-blackout continuous shooting
• Wi-Fi with Bluetooth for constant connection
Here are the complete specs on Fuji’s website.

Comparison Chart via DP Review.
First Impressions
I was told that the X-H1 is limited to 15 minutes of 4K shooting, but I haven’t test this yet. Even if this is accurate, I don’t believe it is a big issue for most people, unless you plan to shoot interviews or live events.
It is not clear if autofocus work in movie mode, and if it does, how fast and accurate it is. We’ll see.
I’m also curious to see if the new internal microphone is better than previous models. Apparently there’s no headphone jack on the body itself, so you will need the additional battery grip to monitor audio. Again, this isn’t a huge deal as the additional battery power is always welcomed when shooting video, but it’ll cost you an extra $300 USD.
Fuji also announced two new cinema lenses, the Fujinon MKX 18-55mm f/2.9 ($4,000 USD) and the Fujinon MKX 50-135mm f/2.9 ($4,300 USD).
The X-H1 (body only) costs $1,900 USD (less than the Panasonic GH4, Panasonic GH5s and Sony A7S II), and $2,200 USD as a kit with the battery grip.
I’d like to see real life examples of Fuji’s “Eterna/Cinema” Film simulation and F-Log footage. If you find a good one, please share the link.
All the items announced today should start shipping in two weeks.
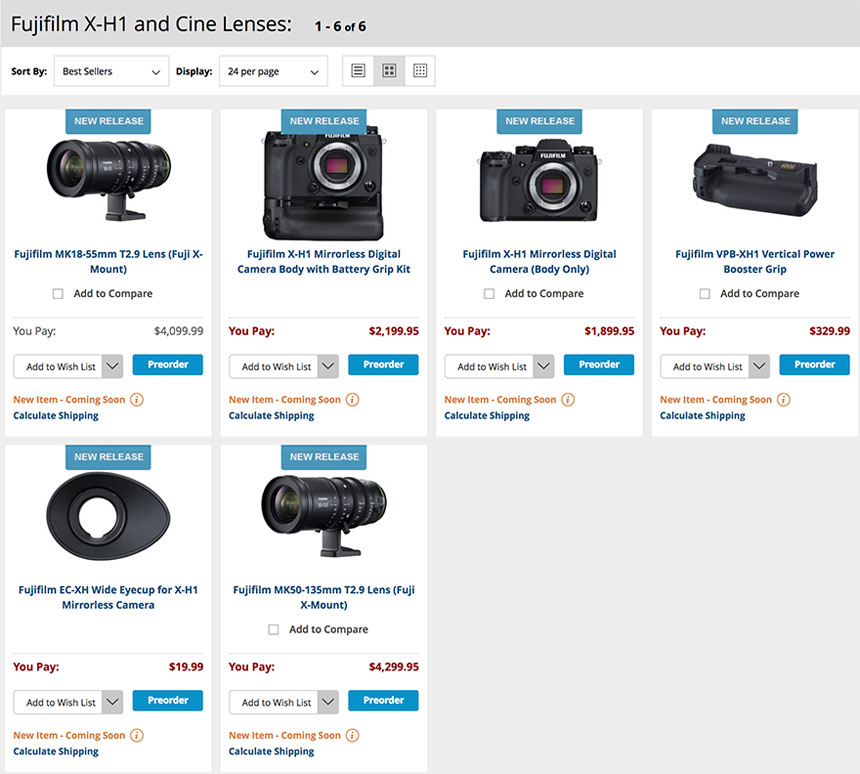
Fuji X-H1 cameras and cine lenses
If you are a stills shooter getting into video, considered watching some of our many free online tutorials.
Video

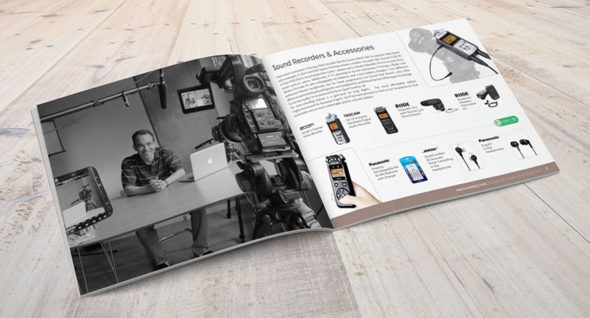
The “41 Essentials” Digital Guide.
We’ve been wanting to do something like this for a very long time, but never seemed to find the time.
Well, today’s the day.
To take the guesswork out of your next gear purchase we’ve picked the best tools for photographers and filmmakers in our “41 Essential Items” Guide. The complementary download is available HERE.
Enjoy!

Video

NAB 2016 Announcements.
I’ve been honored to speak at NAB for the past 9 years. A few days ago I was addressed as a “senior” speaker, which feels kinda good but very weird at the same time. One of the many lessons learned is that it’s close to impossible to understand what’s happening in terms of announcements while you are AT the show. There are so many people, so many widgets, and so much noise… It is actually much easier and faster to follow the news and read the reports “from the the trenches” to stay up to date on new toys.
If you are attending the show, I’d love to have you at one of my seminars or simply meet and catch up. I’ll be on Twitter (@EA_Photo) obsessively.
In collaboration with B&H, this year I’m testing two new widgets that are populated automatically; one for Announcements and a second one for B&H specials during the show. I have no idea how this is going to work, but it doesn’t hurt to try. So, here we go!
NAB 2016: Just Announced
NAB 2016: Show Specials
Video
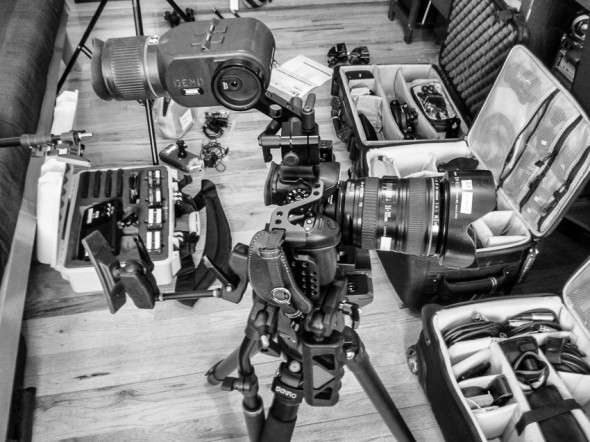
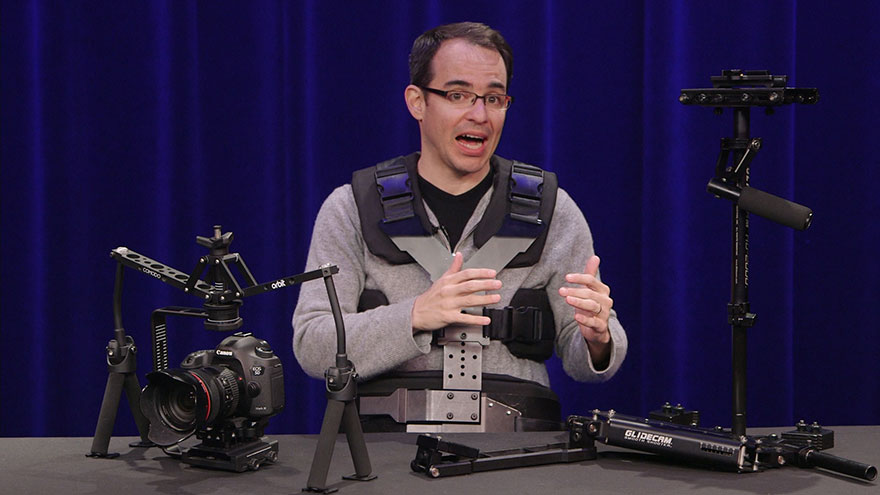
Gear, gear and more gear.
Pretty much after every single consulting session, workshop and webinar we offer, a group of people will ask: what do you recommend for _____?
My answer is always the same “it depends.” Are you shooting alone? Only video or stills also? Do you need to move from location to location? For how long? What’s your budget? Do you already have lenses? If so, what kind/brand/mount?
You get the idea. So as a solution I decided to spend several hour compiling all the gear we use very frequently into 3 short lists: a) when shooting alone, b) when changing locations often and c) when spending more time at each location.
I added a few thoughts on each and every item. I truly hope these lists serve as a guide and more importantly, save you time while researching gear, and lots of money wasted on unnecessary toys.
Simply click on the image to access all three gear lists.
If I’m missing some essential items or you have further questions don’t hesitate to shoot me a note or send me a tweet. Happy shooting!
Video
Filmmaking Essentials for Photographers. Mini Courses.
Why Filmmaking Essentials?
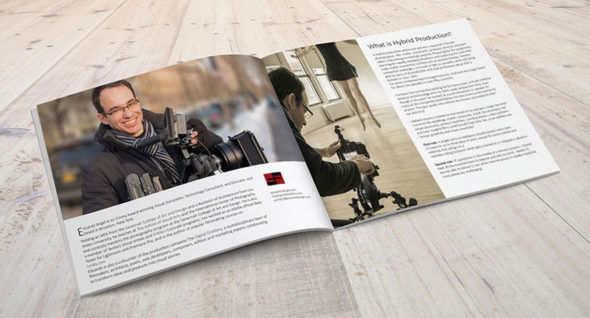
One of the main challenges photographers face when starting to shoot video is to focus too much on hardware and software, and forget about the most important part: the story. While this informative course includes some technical information, the main goal is to provide an overview of the many aspects of filmmaking, and identify potential business opportunities with motion. Click HERE.
The “Filmmaking Essentials for Photographers” course is based on a popular event we have been presenting for several years, but it has been greatly enhanced with additional visuals and examples. Some of the clients and sponsors for the live event include Adobe, Adorama Pro, B&H Photo, Cinevate, Future Media Concepts, Gulf Photo Plus (Dubai), HOW Design Conference, International Center of Photography, Lynda.com, McCann Erickson, NAB Show, Panasonic, Photo District News, PhotoPlus Expo, Photokina (Germany), Savannah College of Art and Design, School of Visual Arts, Sony, and X-Rite, among others.

Click on the Image to access FREE Tutorials.
Why these Mini Courses?
Sometimes we don’t have time for three-hour lessons; rather, we just need a quick and concrete answer for a very specific question. Because of that, in addition to longer courses we’ve released these mini courses, averaging three-to-five minutes each. Click HERE.
Click on the Image to access FREE Tutorials.
Video
Filmmaking Essentials for Photographers. Online Intro Course.
In 2011 I was invited along with National Geographic photographer David McLain to present a series of two-day workshops nationwide. The events were produced by Photo Quest Adventures and sponsored by PDN, Sony, Adobe, and other leading brands. The main goal was to help photographers transition into video by simplifying key concepts and providing shortcuts, resources, and advice on what gear to buy.
I have been honored to teach “Filmmaking Essentials” at all major industry events, from PhotoPlus to Imaging USA to NAB, from South America all the way to Dubai, Hong Kong, and Thailand, and at home in New York.
Few people know that I never use the same presentation twice. Each and every time I add things I’ve learned, plug in valuable feedback from attendees, students, and this website’s readers, and I strive to improve the educational experience with better examples and shorter explanations.
When looking at the advancements in digital technology since those first workshops it seems like decades have gone by. Today, we have access to a variety of brands and models of very compact cameras that can see in the dark, shoot 4K or higher resolutions, offer incredible frame rates, and even offer GPS and WiFi features so they can be easily controlled by smartphones and tablets. The future is definitively here.
But something quite odd has been happening to my personal and professional focus. The more gadgets we have at our disposal, the more I’ve shifted towards the craft of storytelling. Instead of getting more stuff, I’ve been increasingly interested in constructing and enhancing my stories to better engage the viewer. Naturally, this approach has been reflected in the educational content I produce.
Now, and for the first time, I’m proud to offer an awesome version of my one-hour presentation online. Click HERE.
The “Filmmaking Essentials for Photographers” course is based on a popular event we have been presenting for several years, but it has been greatly enhanced with additional visuals and examples. Some of the clients and sponsors for the live event include Adobe, Adorama Pro, B&H Photo, Cinevate, Future Media Concepts, Gulf Photo Plus (Dubai), HOW Design Conference, International Center of Photography, Lynda.com, McCann Erickson, NAB Show, Panasonic, Photo District News, PhotoPlus Expo, Photokina (Germany), Savannah College of Art and Design, School of Visual Arts, Sony, and X-Rite, among others.
Who is this course for?
Well, as the name implies, this version of “Filmmaking Essentials” covers concepts already mastered by advanced filmmakers or by experienced photographers who are very technically savvy. But I’m confident everyone else could learn a thing or two.
As often as possible we’ll be adding new courses, covering topics like pre-production and post, tips for one-man crews (like journalists) working stills and video assignments, advice on getting started with Color Grading, and many other fascinating subjects. As mentioned above, most of these courses are not and probably won’t be hardware or software driven, but would focus predominantly on answering the why’s, not the how’s, of the fascinating craft of filmmaking.
Also as a first, we are offering several mini-courses (averaging three minutes each and many of them for free) for those who need concrete answers to very specific questions.
So, if this is the kind of content and format you desire, vote with you wallet and let your voice be heard.
Thank you for your continued support. Click HERE to start learning.
Click on the Image to access FREE tutorials.
Video
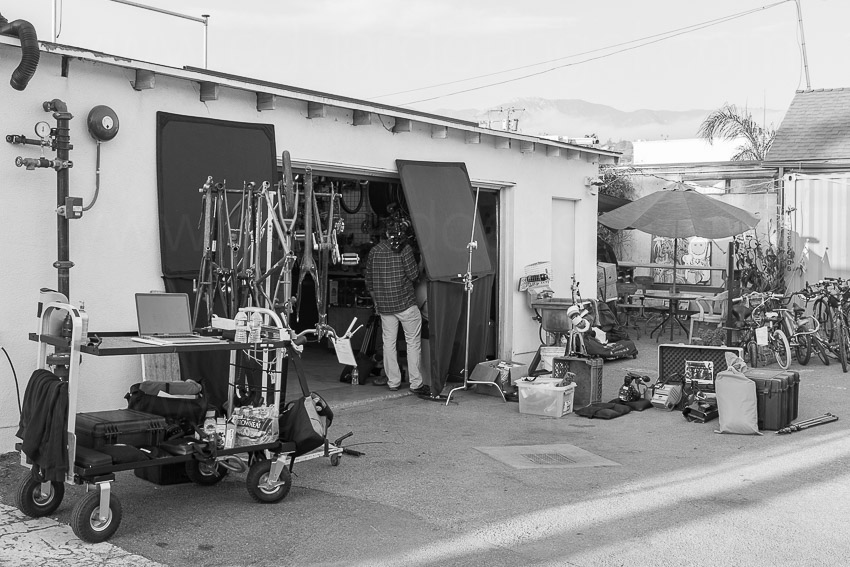
Essential Filmmaking Gear – Lean and Mean.
On our previous equipments lists (here’s #1 and here’s #2) we covered the essential gear while working with small crews constantly on the move. Today, we’ll list the equipment we usually bring on “Lean and Mean” jobs. On these jobs we usually spend more time at each location, and don’t need to carry everything on our backs, so we can add a few bigger/heavier tools.
List #3 – Lean And Mean
Hybrid or Video Only Assignments
Small Crew On Location But With Some Time To Prep
Example: Maragas Winery Commercial.
In addition to everything on List #1 and List #2 we typically would add:
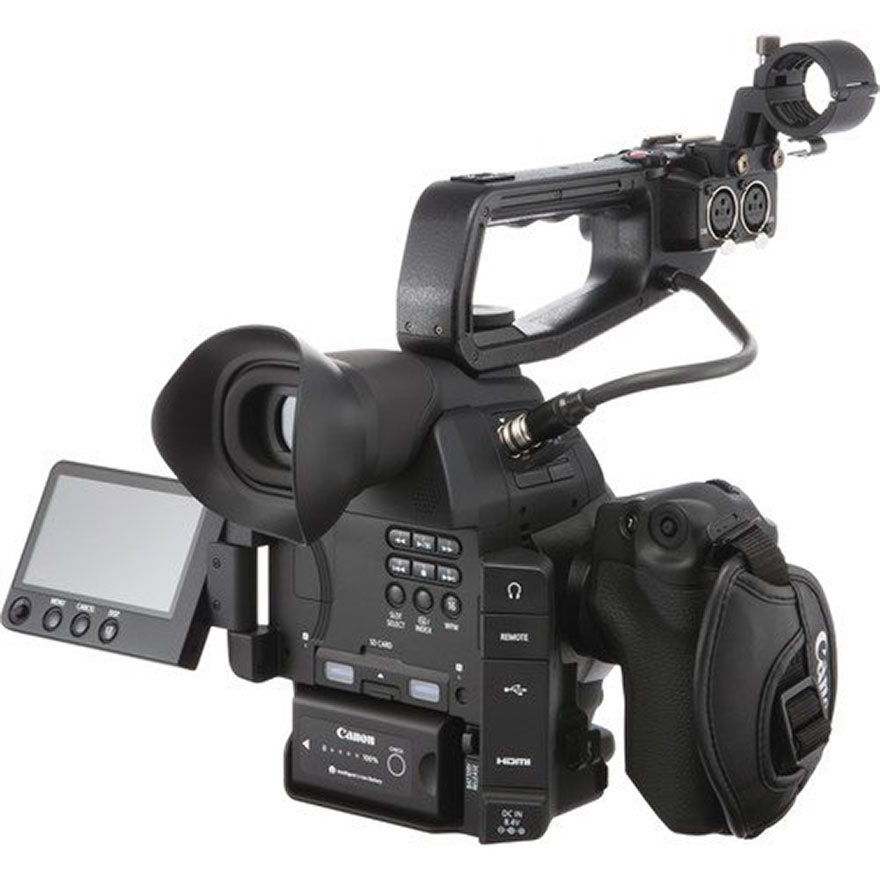
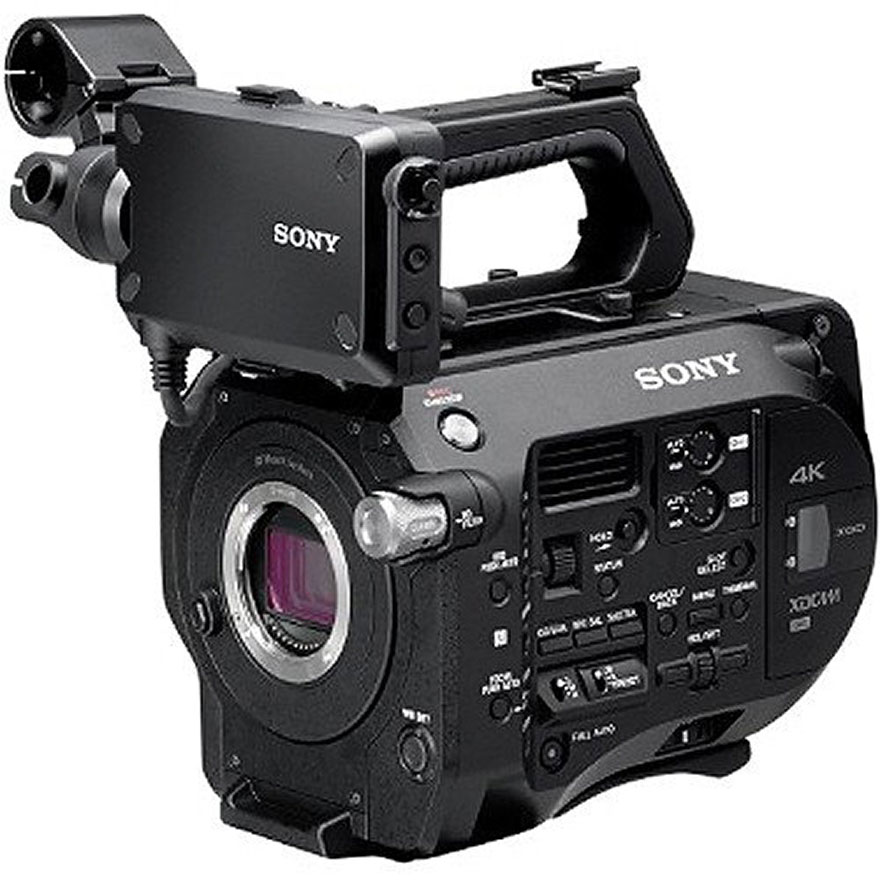
1. If the job doesn’t require stills I’d swap the GH4s or the Sony a7R IIs for a couple of Canon C100 Mark II bodies (Amazon and B&H). At this point we are seriously considering investing on a couple of Sony PXW-FS7 (Amazon and B&H), but we are waiting to test it against a Sony PXW-FS5 (Amazon and B&H) to make the call.
2. Depending on the job we would add another camera movement tool, like a Glidecam (Amazon and B&H) or a Ronin (Amazon and B&H) or even jibs and dollies. It depends on many different factors.
3. In terms of lighting I usually bring three 1×1 Bi-Color LED Panels (Amazon and B&H) with batteries (B&H) and two Chimera 1×1 Lightbanks (Amazon and B&H) with grids (B&H). That pretty much covers my basic needs. Another option is a Fiilex kit (Amazon and B&H), which I like a lot, but it is too expensive for most people.
4. A Sekonic Color Meter (Amazon and B&H) and a Sekonic Light Meter (Amazon and B&H) are pretty much mandatory.
5. Most of my grip gear is made by Impact simply because it is inexpensive, versatile and durable. I consider essential a few accessories like adjustable Gaffer Clamps, and Collapsible Reflector Holders (Amazon and B&H) which also double as mic or light stands. These very inexpensive items effectively function as additional crew members.
6. We would bring a second Tenba Transport Rolling Tripod/Grip case (2 total) (Amazon and B&H), add a second Benro S8 tripod (2 total) one more Benro S4 monopod (2 total), and a very compact and portable slider (Amazon and B&H) that would take the same fluid head from the S8 tripod and/or the S4 monopod.
Here’s the complete list of what we are currently using.

Well, there you have our essential gear. There isn’t a perfect gear list, just like there isn’t a perfect camera, but the most essential items have been working great for most assignments. Of course, there are those long and complex projects that require everything and the kitchen sink. If I forgot something essential, please let me know here!
We also have produced several Filmmaking courses on Lynda.com, two of them specifically designed for photographers transitioning into video. Check them out!
Video
Essential Filmmaking Gear – The Moving Crew.
On a previous article we covered the essential gear for solo gigs (List #1). On this article, which we call List #2, we’ll concentrate on the equipment required for longer/bigger hybrid assignments where I’ll have a few more people fulfilling different roles (gaffer/grip, second camera/editor, BTS camera/DIT). We are usually moving from place to place very quickly, so traveling light is essential. When possible, I added direct links to Amazon and/or B&H for your convenience.
List #2 – The Moving Crew.
Hybrid Assignments
Small Crew Constantly On The Move
Example: Panasonic Anamorphic.
So, in addition to everything on List #1 we’d typically add:
1. In addition to my sharpest and heaviest lens, Canon 70-200mm f/2.8 (Amazon and B&H), we’d also bring a Sigma 18-35mm f/1.8 (Amazon and B&H), and a Sigma 24-105mm f4. (Amazon and B&H). These are the same exact lenses I used last year on another one-man Hybrid project in Istanbul and Europe. To make the Canon and Sigma lenses work on the Panasonic GH4 we’ll need a Metabones Speedbooster (Amazon and B&H).
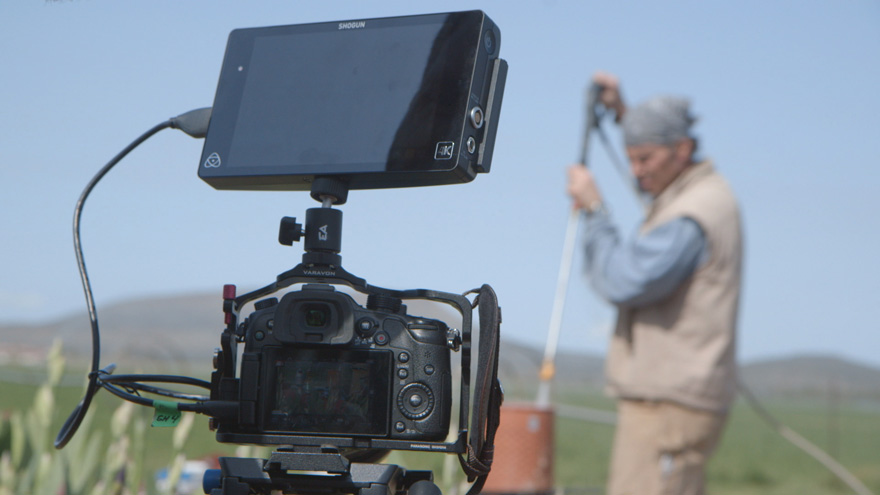
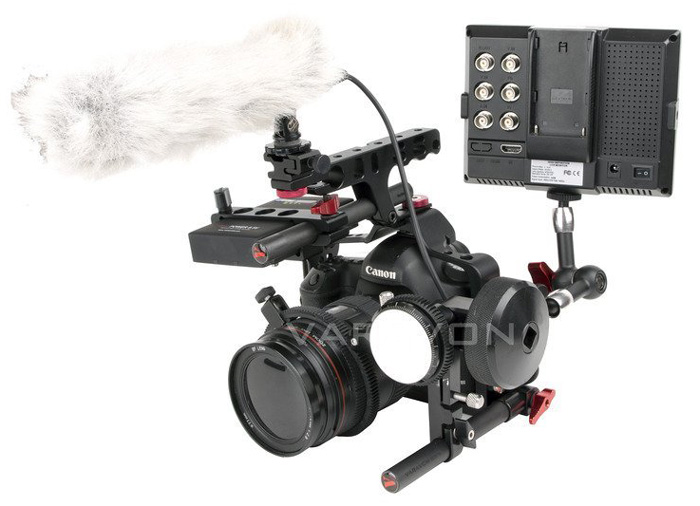
2. Having more space and more people to carry bags, I’d also add a Varavon cage (Amazon and B&H) to each camera body. I like these cages a lot!
3. An Atomos Shogun (Amazon and B&H). We previously wrote an article explaining why this is a must have item.
4. As many SanDisk Solid State Drives (Amazon and B&H) for the Atomos Shogun as possible.
5. A USB 3.0 reader for the Solid State Drives (which are generously included in the Atomos Shogun kit).
6. A second 6TB G-Tech External Hard Drive (Amazon and B&H).
7. Two RodeLink kits (Amazon and B&H). They are great for interviews and to record clean sound while doing on-camera tutorials or even getting some BTS. The RodeLinks are extremely light, small, reliable and fairly inexpensive.
8. In addition to the monopod (on List #1) I’d add one Benro S8 tripod (Amazon and B&H).
9. I’d add one more Tenba Roadie Hybrid bag (2 total) (Amazon and B&H) for the most expensive, essential and fragile items, namely cameras, lenses, Shogun and hard drives.
10. One sturdy Tenba Transport Rolling Tripod/Grip case (Amazon and B&H) for light stands, tripods, grip, cables, etc. My favorite one is Tenba’s Rolling Case 38”


What else are we using? Here’s the complete list.
As you can see, anyone involved in run-and-gun, single-operator scenarios like weddings, events, corporate shoots, documentaries, red carpet premieres, product launches, sporting events, video podcasts, and even student films could benefit from these lists, so feel free to share them.
We also have produced several Filmmaking courses on Lynda.com, two of them specifically designed for photographers transitioning into video. Check them out!
Coming next week: List #3 – Lean and Mean. Working with a small crew but having a bit more time to settle down and prep. Bring the big guns!
Video
Essential Filmmaking Gear – The Solo Gig.
In aviation, an MMEL (Master Minimum Equipment List) is a categorized list of on-board systems, instruments and equipment that must be operative in order to flight. Any additional equipment not included in the MMEL may break temporarily, but it won’t make the aircraft inoperative. For several years I’ve been attempting to create my own MMEL for “hybrid” productions. My simplest definition of “hybrid” is “productions or assignments where a skeleton crew (from one to four people) is required to produce, direct, shoot video and stills, record sound, and even edit. Most of these assignments will be happening on location, more often than not over several days.”
Like it or not, these gigs are becoming increasingly popular. It sounds crazy and indeed, being on the field trying to wear so many hats at the same time can be extremely stressful. The keys to make these projects run smoothly (and even fun) are simple: invest as much as possible in pre-production, bring only the most essential gear, know your equipment well, and be decisive.
Regarding gear, a substantial challenge is how to pack and travel as light as possible while carrying a full production and post-production setup that is literally on your back, so “essential” in my book is something you will use all the time, not “maybe, just in case, what if.”
Over time, we have created three “lists of essential items”, depending mostly on the crew’s size. When possible, I added the product’s link to Amazon and/or B&H for your convenience.
List #1 – The Solo Gig
Hybrid Assignments
One-Man Crew
Example: Japan.
When working and traveling alone, a single carry-on backpack (like a Tenba Roadie Hybrid bag) contains every item I’ll need for up to three days, except some clothes and toiletries that will go on a smaller backpack the gets checked in or shipped in advance.
Hardware & Software:
1. A small, light and versatile Camera (“Cam A”) to shoot video. In the photo I have a Panasonic GH4 (Amazon and B&H), but I also like the Sony a7R II (Amazon and B&H).
2. A second camera (“Cam B”) to capture stills and B-roll, ideally identical to Camera A. Having the same brand, model and firmware can save you a lot of time in post. Plus the batteries, chargers, media and lenses are the same.
3. I like to carry a third (even smaller) camera for location scouting and behind the scenes stills. My weapon of choice is the Fuji X100s (Amazon and B&H). A compact camera is especially handy after a very long day, when I don’t want to carry more gear but still want to capture a few night scenes of nice-looking dishes during my evening meal. Here’s my original X-100s review. Believe it or not after all these years, I’m still using (and loving) this camera.
4. Two or three lenses. In this case I’d bring a Lumix 12-35mm 2.8 lens (Amazon and B&H) and a Lumix 35-100mm 2.8 lens (Amazon and B&H). I like these lenses because they are the equivalent to a 24-70mm 2.8 and a 70-200mm 2.8, but extremely small and light, yet very sharp and fast (2.8 all the way.)
5. For sound I’d bring a field recorder like the H4n (Amazon and B&H) or a more current model and smaller version like Tascam’s DR-05 (Amazon and B&H) to capture interviews and my own production notes.
While like the versatility of the H4n, it is bulky and too slow to start up, so we are considering something newer like the Zoom H1 (Amazon and B&H). I probably would also add at least one Rode VideoMic (Amazon and B&H) to capture soundscapes and decent scratch sound for interviews. And of course, we need to add good headphones to our audio package. (Amazon and B&H).
6. Two (2) G-Tech 1TB external portable hard drives (Amazon and B&H) and one (1) compact, super fast and awesome 6TB G-Tech External Hard Drive (Amazon and B&H). And by the way, I ONLY trust G-Drives, even if they fail every 14years.
7. A 15″ MacBook Pro (Amazon and B&H) with Adobe’s Creative Suite (Amazon and B&H) and Shot Put Pro. Here’s an article on how we use this software to backup our media on location.
8. A small tripod (Amazon and B&H). This thing is worth its weight in gold. I’ve used it for time lapses, low angle shots, as a handheld rig, car mount, microphone stand, and even to attach small lights for quick interviews. Priceless.
9. Benro S4 Video Monopod (Amazon and B&H). It’s small, relatively light, and sturdy. Works great.
10. A variety of Tenba Tool Boxes (Amazon and B&H) to pack all the batteries, chargers, cables, adapters and other small accessories. At first, they might seem a bit bulky but having everything neatly organized and protected is worth it.
11. One of my favorite photo bags ever, the new Tenba Shootout (Amazon and B&H). It is small enough to meet carry-on size limitations, but large enough to fit my most fragile and essential items. Plus, it is extremely comfortable.
12. In terms of lighting, for these assignments I try to use mostly available/natural light, but I always bring a 5-in-1 collapsible reflector (Amazon and B&H)
13. Two ND filters are essential when shooting daylight exteriors. By the way, we recently found out how to save $250 per filter.
14. Media pouch with ten 64GB SD cards (Amazon and B&H).
15. X-Rite’s Color Checker Passport Video (Amazon and B&H). If you get into the habit of using for a few seconds during production, it will save you hours in post. Guaranteed.
Miscellaneous Items:
1. Obviously, the most important tool if you are crossing any borders: the passport. This website compares the “power” of passports from many different countries, and, as Americans, we are blessed to have the most powerful one.
2. My good ol’ Columbia jacket/vest has been traveling with me to more than 40 countries. It has lots of pockets, a hoodie, and because it has a self-stowing pocket, it sometimes doubles as a pillow on the road. A priceless item, to be sure.
3. Media credentials which sometimes (but not always) can give you special access, get you discounts and the most important part, allow you to travel with some heavy or oversized gear without paying a fortune. Here’s a link to Delta, American, and United Media Baggage policies.
4. A hat, sunglasses and sunscreen — truly essential items.
5. I like to dress in layers and in dark colors when shooting on the road. Black hides dust and stains very easily. A cashmere sweater is worth its weight in gold, well perhaps even more.
6. I always bring gloves unless I’m going to the Caribbean in July, comfortable shoes, and plenty of granola bars.
What else do I bring with me? Here’s the complete list.
As you can see, anyone involved in run-and-gun, single-operator scenarios like weddings, events, corporate shoots, documentaries, red carpet premieres, product launches, sporting events, video podcasts, and even student films could benefit from these lists, so feel free to share them.
We also have produced several Filmmaking courses on Lynda.com, two of them specifically designed for photographers transitioning into video. Check them out!
Are you working with a small crew constantly on the move? In that case here’s our List #2 – The Moving Crew.
Video
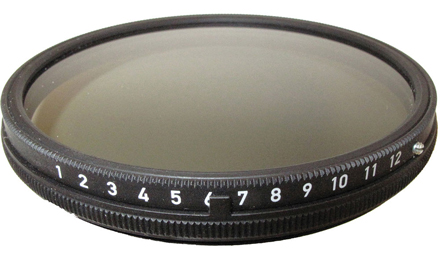
Is a $350 ND filter three (and a half) times better than a $100 one?
For a long time I’ve been using a Genus Variable Neutral Density (77 mm) filter with my Canon and Sigma lenses and a Metabones Speedbooster Adapter on a Panasonic GH4.
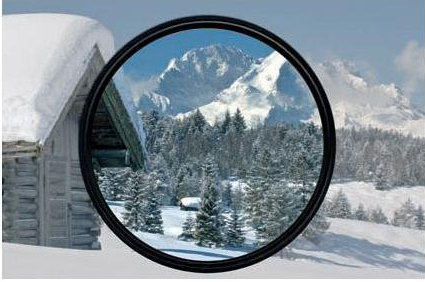
Since I recently got a couple of Panasonic Lumix lenses with a 58mm filter, it was time to buy another ND. I was originally planning to get a Genus or Tiffen filter (about $100 on Amazon), but noticed a $350 Heliopan, among many other cheaper options.
Would the Heliopan (costing three times as much as the Genus) be three times as good as the Genus? The only way to answer this would be getting one, doing a few non-scientific tests, and look at the images side-by-side. So that’s what I did.
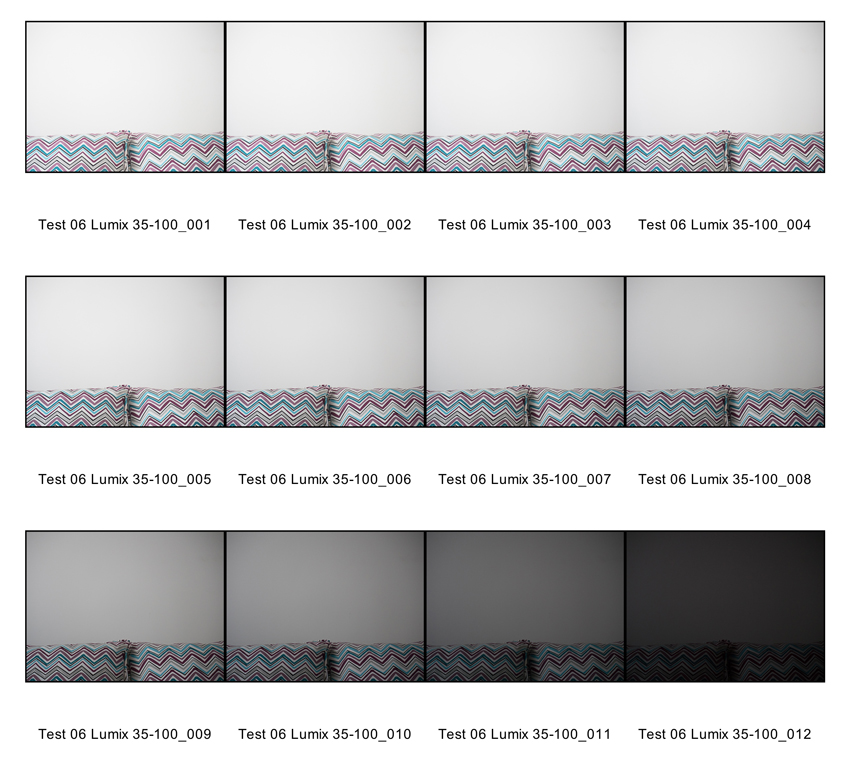
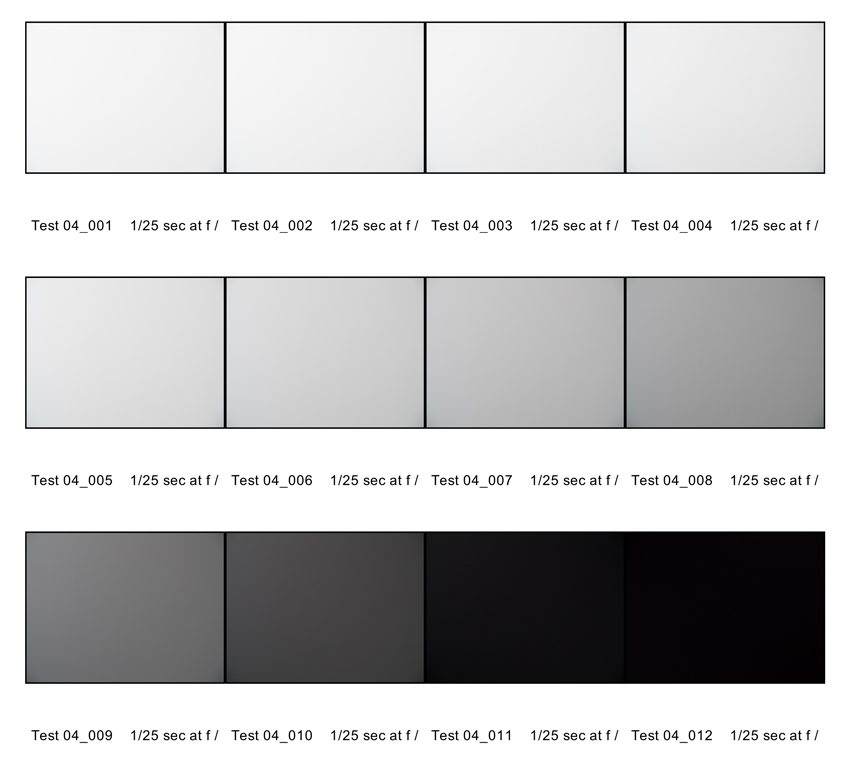
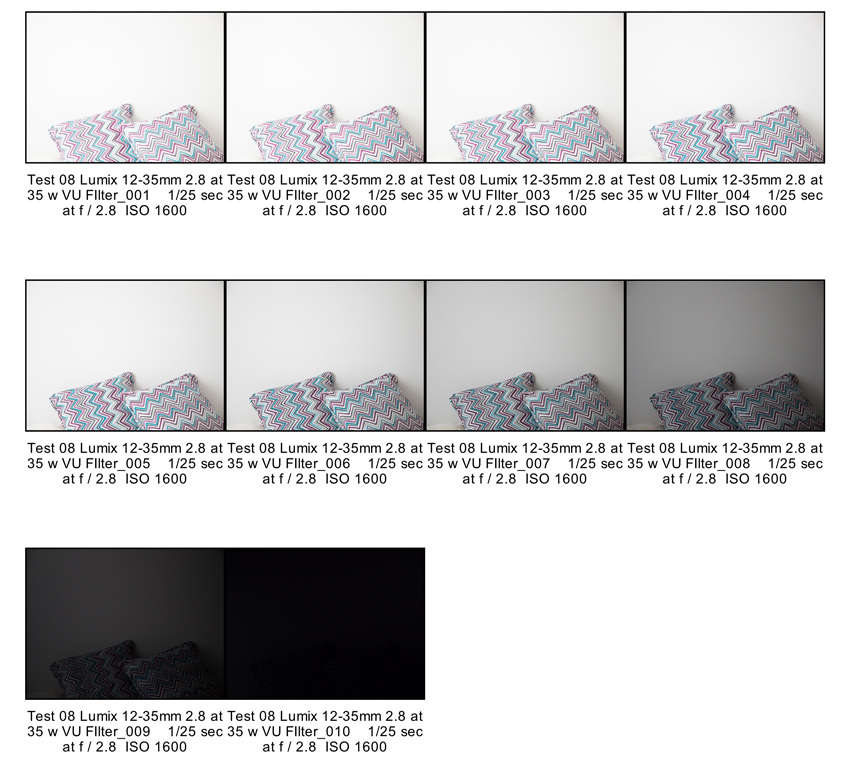
All the tests where performed with a Panasonic GH4 on a tripod, pointed to the same wall, with diffused available light, within a 30-minute period. So, even though that light might change a bit I don’t think it is a significant factor to see the drastic differences below. Here are the most meaningful tests:
Lumix 12-35mm f2.8 at 35mm (70mm equivalent) with Heliopan Variable ND

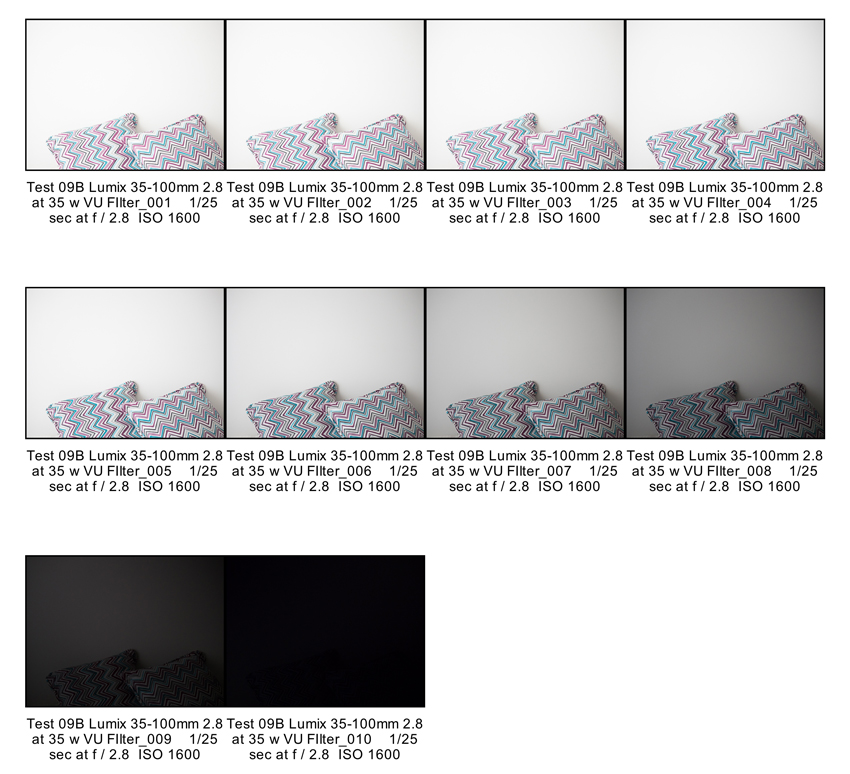
Lumix 35-100mm f2.8 at 35mm (70mm equivalent) with Heliopan Variable ND
Canon 70-200mm f2.8 at 70mm with Genus Variable ND
Wow! What a difference between the Genus and the Heliopan! The first one is not only $225 cheaper, but the vignetting wasn’t as noticeable.
At that point I started wondering how much of that nasty vignetting was created by the lens and NOT by the ND filter. So I brought the widest Canon lens I had available a 24mm f1.4, and did another test.
Canon 24mm f1.4 at f2.8 with Genus Variable ND.
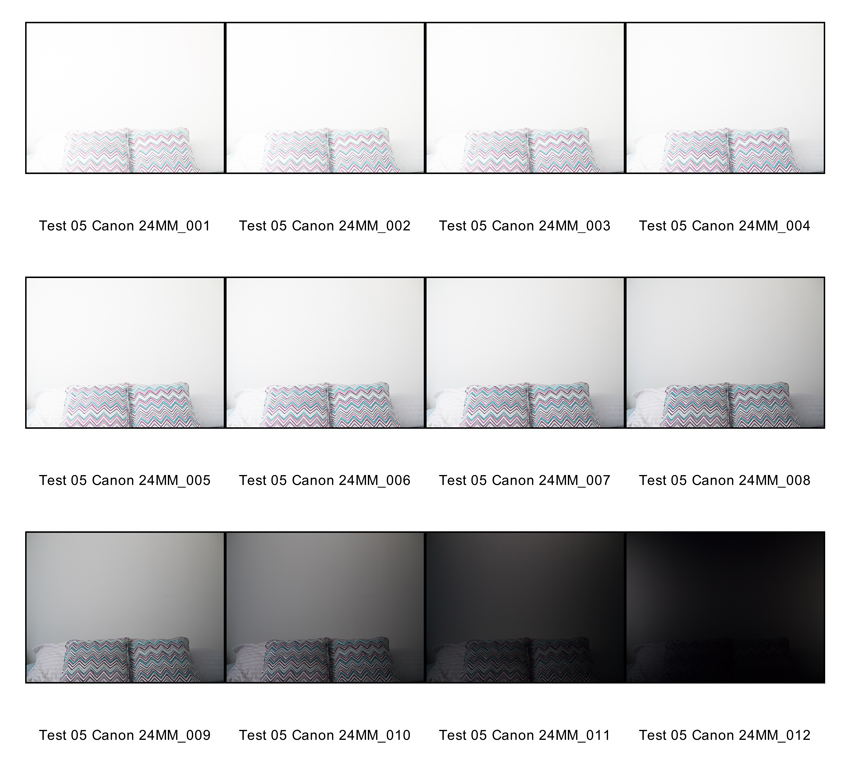
I was at a loss. There was some vignetting after drecreasing 4 stops, but never nearly as bad a the Heliopan on the Lumix lenses.
So the next step was to compare the Lumix 12-35mm f2.8 at 35mm (70mm equivalent), the Lumix 35-100mm f2.8 at 35mm (70mm equivalent), and the Canon 70-200mm f2.8 at 70mm WITHOUT any filters!
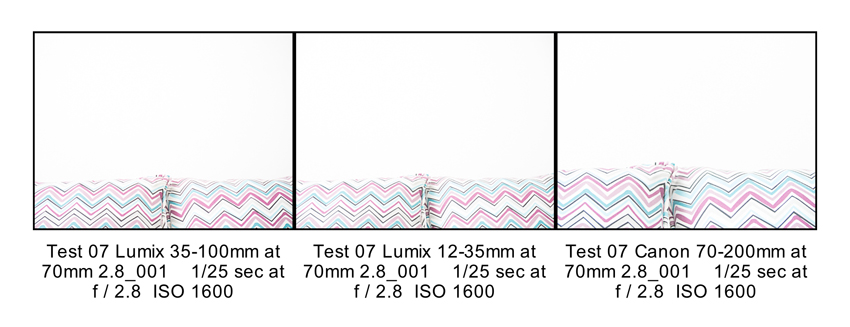
I didn’t see any issues or major differences between the Panasonic and Canon lenses, so I concluded that the Heliopan Variable ND filter was causing the vignetting issue. I returned the Heliopan and got a Vu Variable ND filter for my Panasonic lenses. Here are the results:
Lumix 12-35mm f2.8 at 35mm (70mm equivalent) with Vu Variable ND
Lumix 35-100mm f2.8 at 35mm (70mm equivalent) with Vu Variable ND
Lumix 12-35mm f2.8 Lens – Heliopan vs. Vu side-by-side

Lumix 35-100mm f2.8 Lens – Heliopan vs. Vu side-by-side

• Conclusions
None of this filter + lens combination is perfect. All the filters create some sort of vignette. After putting all the tests side by side, I picked the ones with a) the LEAST amount of vignetting and b) the smoothest transition between one stop and the next one. Based on my won non-scientific experiments, with MY lenses, camera, computer, software, firmware, etc and only with one (somewhat) constant lighting scenario, the $102 Genus and the $125 Vu seem far superior than the $350 Heliopan.
Are you planning to buy one of these filters? Support upcoming tests and articles by using these links: Genus, Heliopan, Vu.
Did you find this article helpful? Please check out these online courses where I cover other essential filmmaking tools and techniques. Enjoy!
Video
Hands-on Review: Varavon’s Armor II Cages.
There are (too) many video accessories and gadgets, so it’s becoming increasingly hard to determine where to spend our hard earned money, and what will truly make a significant impact on our video productions.
For the past few months we’ve been testing a number of new cameras and accessories. Today I’d like to highlight a company with two accessories in particular: Varavon’s Armor II Cage for the Panasonic GH4 and Varavon’s Armor for the Atomos Shogun.
You might have read my recent article titled “The eternal quest for ‘the best’ digital camera” where I posed the seemingly unanswerable question “what’s the best cinema camera (for us) right now?” Here’s the article, in case you missed it.
The article’s conclusions were somewhat vague, simply because even with all the readers’ feedback we received via Twitter (@EA_Photo), we couldn’t come up with a hard and fast answer. Most of our assignments require capturing video, stills, and sound on location, usually run and gun style, with a fast and small crew traveling as light as possible. This might or might not match your production needs, so it’s important to keep in mind that we are coming from that angle.
It is important to clarify that I am NOT being paid by anyone to write these reviews. I just want to share with others what’s working and what isn’t working for us, and hopefully save you some time. God knows I could use a few extra hours every day.
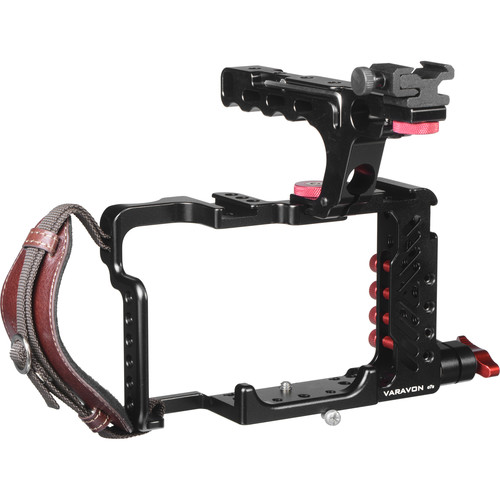
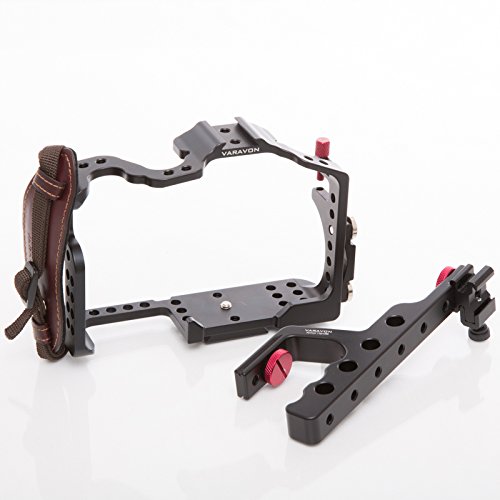
Varavon’s Armor II Cage for the Panasonic GH4
Varavon’s Armor for the Atomos Shogun
Armor II Cage – My Impressions
Varavon reminds me of the early days of Edelkrone; small, humble, and fast. Both companies share a serious commitment to true innovation through useful, high-quality products.
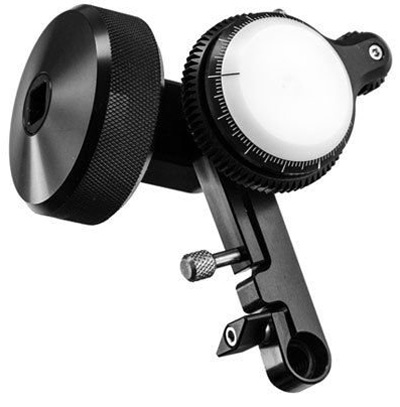
Edelkrone Follow Focus
Small details matter. A lot. For example, the Armor II Cage includes a magnetic Allen key, cleverly “hidden” on the top handle’s side. It’s one of those things that makes you wonder why no one else has thought of this before! Every product that requires an Allen key (from sliders to tripods to stabilizers, all should come up with a similar solution.
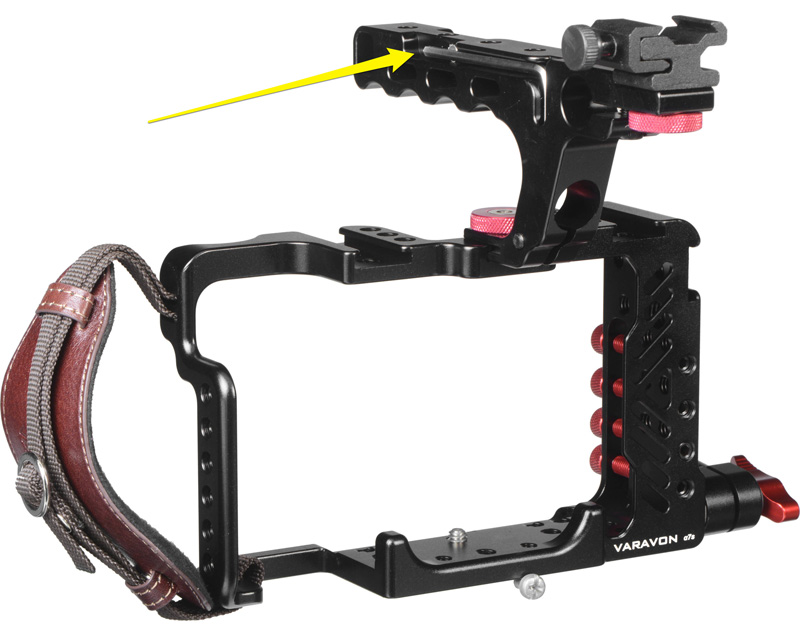
Varavon has clearly spent some serious time thinking and testing this product. With the GH4 camera mounted on the cage, one can still replace the battery and the memory card. The cage also works perfectly with a Metabones Speedbooster allowing us to use our preexisting Canon and Sigma lenses.
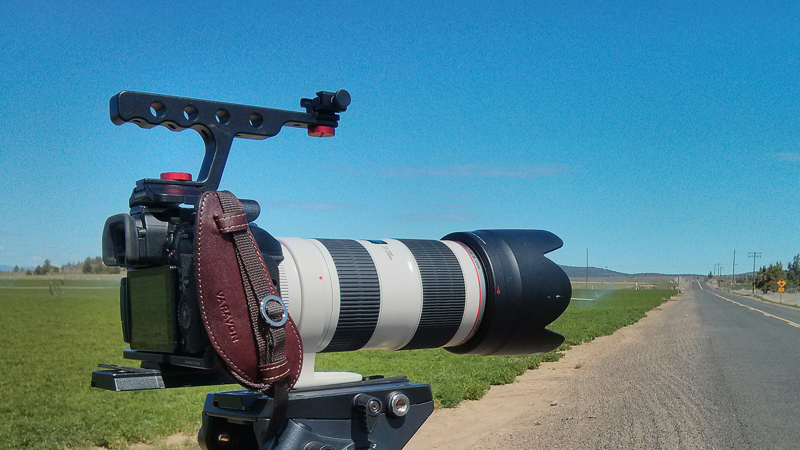
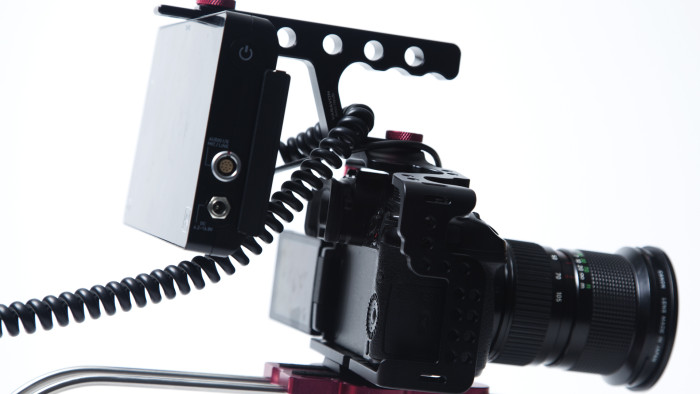
Personally, if you only need ONE reason to get this cage, it’s the top handle, as the GH4 (or 5D Mark II or a7S II) body instantly shapes into a cinema camera. In addition to the obvious ergonomical advantages (especially when doing low-angle shots or quickly mounting/removing the camera to/from a tripod) the cage provides several mounting points, a cold shoe mount and one 15 mm rod clamp, allowing us more options to attach a wide variety of accessories like focus rings, microphones, electronic viewfinders, external monitors, etc.
Around the cage there are something like 40 ¼ threaded mounting points, but in real life one can use about five or six without getting in the way of standard camera operations. The previous version of this cage (which I also own) didn’t have a “front and back rod adapter” which can be used as an additional contact point or to mount additional accessories like a follow focus.
Apparently there’s a version of the Armor II Cage with an ENG-style rotating handgrip, but mine doesn’t move. The handgrip (with beautiful leather) is fixed, yet very comfortable on most shooting situations.
If you buy the camera rig, I’d recommend adding a few 1/4″ Male to 1/4″ Male Threaded Screw adapters so you can easily attach accessories like an audio recorder or a small LED light (which, by the way, work GREAT to add some catchlight to your subjects when shooting exteriors on cloudy days). It would be even better if Varavon starts including a few of them in their kit (wink wink).
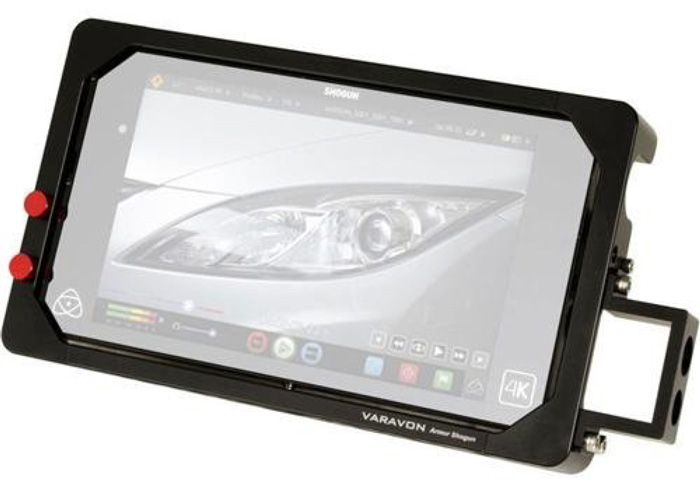
Armor for the Atomos Shogun – My Impressions
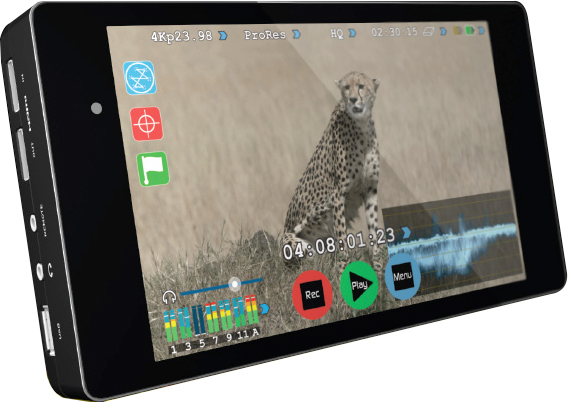
Now, let’s talk about the Armor for the Atomos Shogun. I wrote an extensive post about the Shogun, so I won’t go into a huge amount of detail here, but suffice it to say that the Shogun is a godsend.
In a nutshell, the Shogun provides an exquisite 1920 x 1080 ultra sharp (and fairly accurate) image, with many additional features (like LUTS) to record HD or 4K in ProRes with clean sound already synced into fast and reliable Solid State Drives. The not so great part is that the Shogun is VERY fragile. We take great care of our gear, and our monitor cracked on our second or third assignment.
So for additional protection, the Armor Cage is great, but it seems designed for studio situations, when heavy duty camera support is readily available as the cage alone weights almost a pound.
For the most part, Varavon’s design does not interfere with the function of the Shogun, but the Armor Cage doesn’t accommodate the much needed sunhood (which should be included on the Shogun’s kit but it is not). Not being able to attach a much-needed accessory seems like an important oversight.
The selling point for this accessory is, in my humble opinion, the many additional mounting points, the clever sliding SSD Safety Latch, an audio clamp to protect the XLR cable, and (maybe) the HDMI cable locking screws.

In our case, the optional L brackets (purchased separately) have not added significant versatility, so I probably would recommend skipping them.
Conclusion
The build quality on all Varavon products is outstanding. I like the Shogun Cage and if we are shooting for an extended period of time indoors I’d bring it along.
I love the Armor II Camera Cage for the GH4. It has changed the game for us, and as long I use the GH4 I’ll keep enjoying the added versatility and improved form factor the cage offers. I can definitely recommend this accessory for anyone who needs more versatility but is hesitant to add unnecessary weight to his/her camera package. To see the complete list of gear we bring on location, click HERE.
If you are interested in learning more about which accessories are important, why and how to use them, consider watching these courses on Lynda.com
- Video for Photographers 01: Filmmaking Essentials
- Video for Photographers 02: Filmmaking on Location
Did I miss anything? Feel free to continue the conversation here.
Video
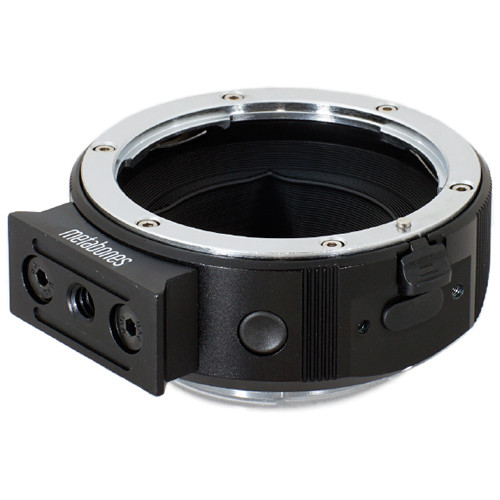
Metabones Speed Booster Firmware update.
Metabones released a new firmware update (v1.6) for the Smart Adapters and Speed Boosters Canon EF to Micro Four Thirds.
The update fixes or improves the following:
1– Iris click noise issue while zooming a variable aperture zoom lens. Fixed OM-D E-M1 depth-of-field preview button inoperative issue.
2– The connection reliability if lens is attached to adapter after camera is powered on.
3– An intermittent pincushion distortion issue on Panasonic bodies.
4– IBIS on OM-D series of Olympus cameras.
5– Lens hot swapping with passive MFT mount of BMCC.
We have constantly experienced issue #3 and sporadically #2 so this is a welcome update.
For some odd reason Metabones makes it extremely hard to find the link with the firmware update, so here’s the direct link for your convenience and some screen grabs of the process on a Mac.
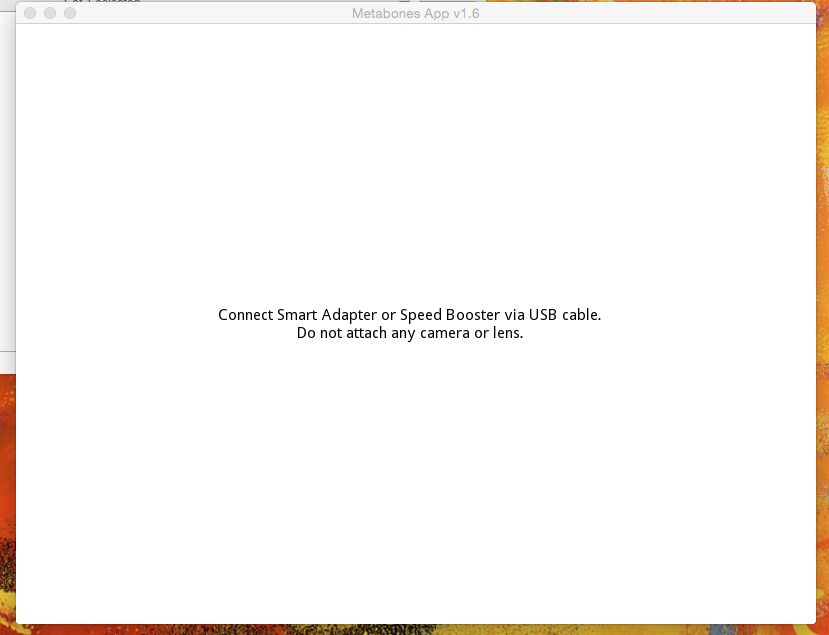
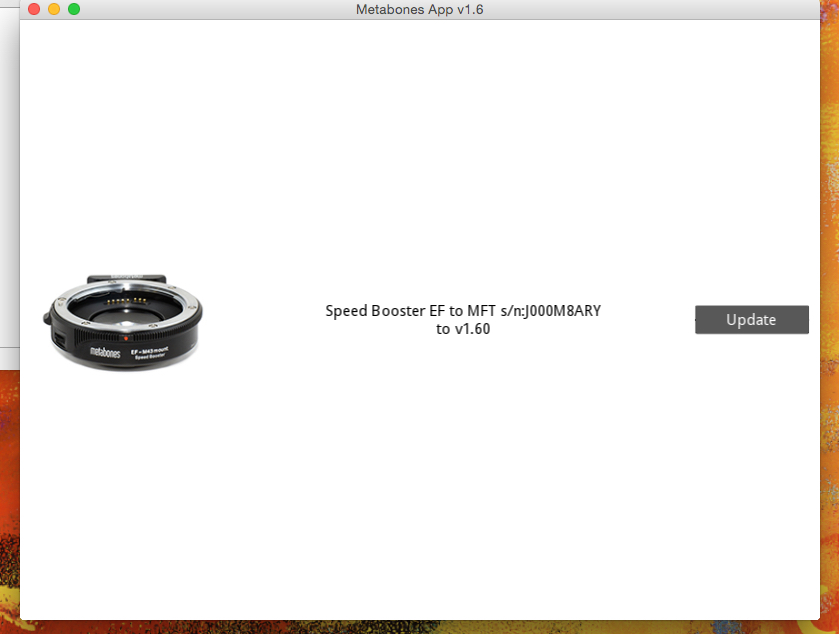
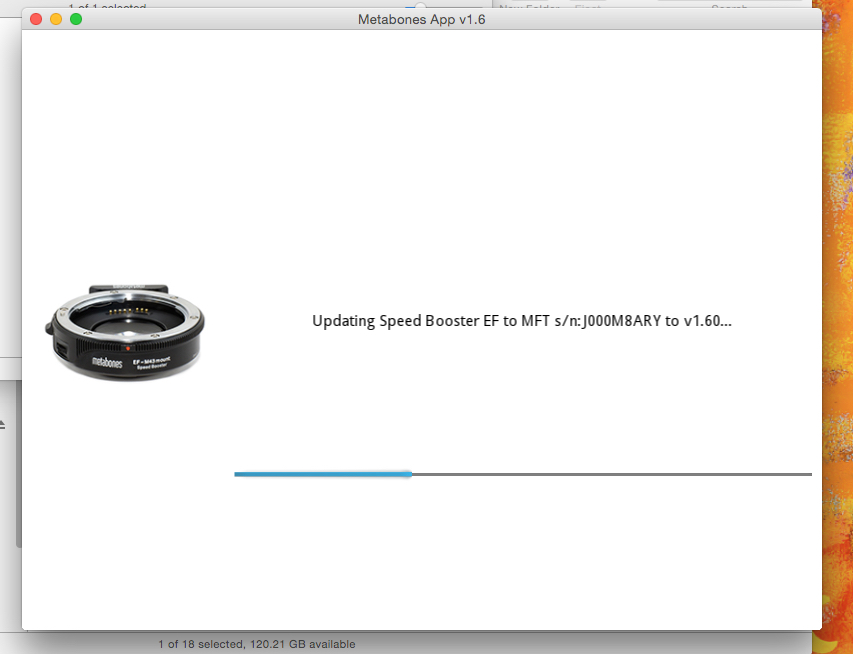
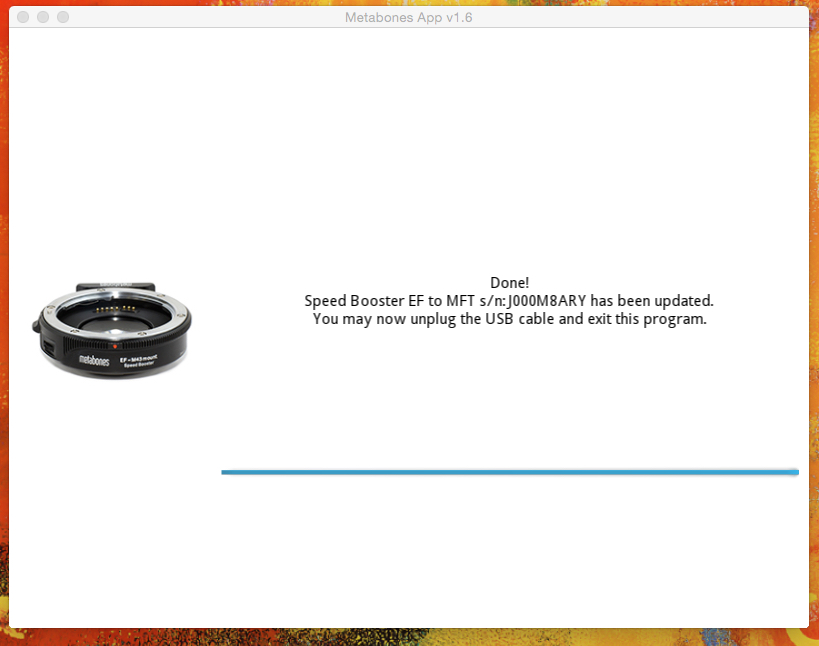
The update takes a couple of minutes.
Video
Hybrid Assignments Equipment List: The Essential 41 Items
In aviation, an MMEL (Master Minimum Equipment List) is a categorized list of on-board systems, instruments and equipment that must be operative in order to flight. Any additional equipment not included in the MMEL may break temporarily but it won’t make the aircraft inoperative. Here’s an attempt to create a hybrid MMEL for three different crew sizes.
Let’s start with the definition of “Hybrid.” What I normally mean by this term are productions or assignments where one or two people are required to be the photographer, filmmaker, sound recordist, producer, and even editor. And, these gigs are becoming increasingly popular. It sounds crazy and these sorts of shoots can be. One of the keys to making them run smoothly relies on great planning and working with less equipment that gives you more control in less time. It also helps to team up with other people who can complement our weaknesses.
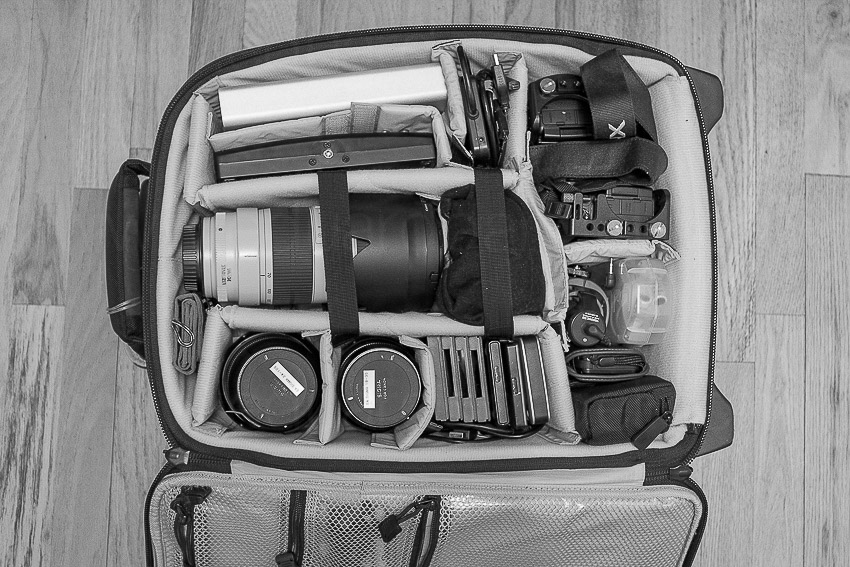
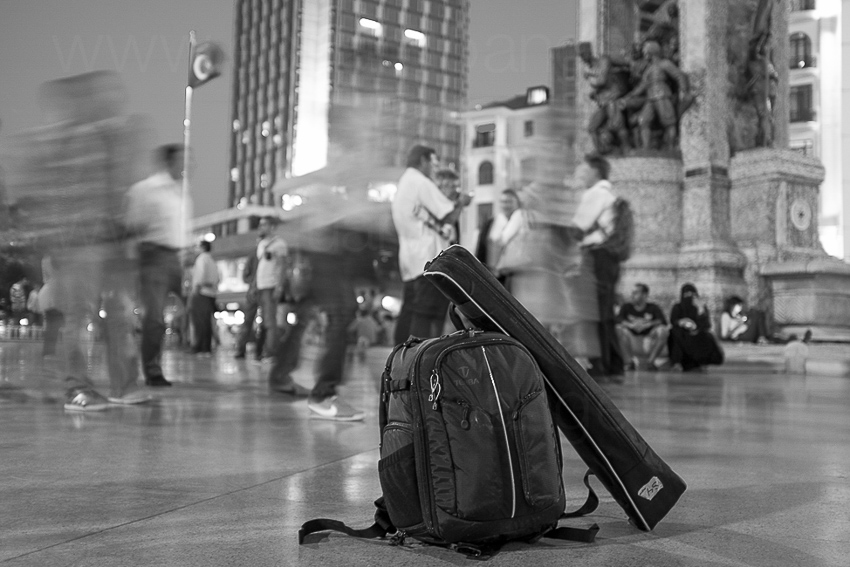
Short and one-man crew hybrid projects
One substantial challenge for photographers shooting video is how to travel as light as possible while carrying a full production and post-production setup that is literally on their back. Here’s a picture of my backpack, which contains every single piece of gear that I’d need for from one up to three days, except some clothes and toiletries that will go on a small backpack.

Bag for a 1-day or 2-day gig by myself.
1. Media Credentials which sometimes, but not always, can give you special access, get you discounts and the most important part, allow you to travel with some heavy or oversized gear without paying a fortune. Here’s a link to Delta, American, and United Media Baggage policies.
2. Two external portable hard drives. I suggest this one, or this one.
3. Audio field recorder like the H4n (or a more current model and smaller version like Tascam’s DR-05) to capture interviews and my own production notes.
4. Camera A for video, in this case a Panasonic GH4 (Amazon and B&H) with a Lumix 35-100mm 2.8 lens (Amazon and B&H). I’m in love with this lens. So small, yet so sharp!
5. Camera B for video, another Panasonic GH4 with a Lumix 12-35mm 2.8 lens (Amazon and B&H)
7. Camera for stills and location scouting; I always carry my Fuji X100s (Amazon and B&H)
8. A variety of Tenba Tool Boxes (Amazon and B&H) to pack all the batteries, chargers, cables, adapters and other small accessories.
9. A small tripod (Amazon and B&H)that sometimes serves as an improvised handheld rig. A car mount works great for time lapse and even to hold the H4n or small lights during interviews.
10. At least one Rode VideoMic (Amazon and B&H) to capture some ambient sounds or interviews.
11. A 15″ MacBook Pro (Amazon and B&H) with Adobe Creative Suite (Amazon and B&H) and Shot Put Pro.
12. One of my favorite photo bags ever, the new Tenba Shootout (Amazon and B&H)
13. In terms of lighting, for these assignments I try to use mostly available/natural light, but I bring a 5-in-1 Collapsible Reflector.
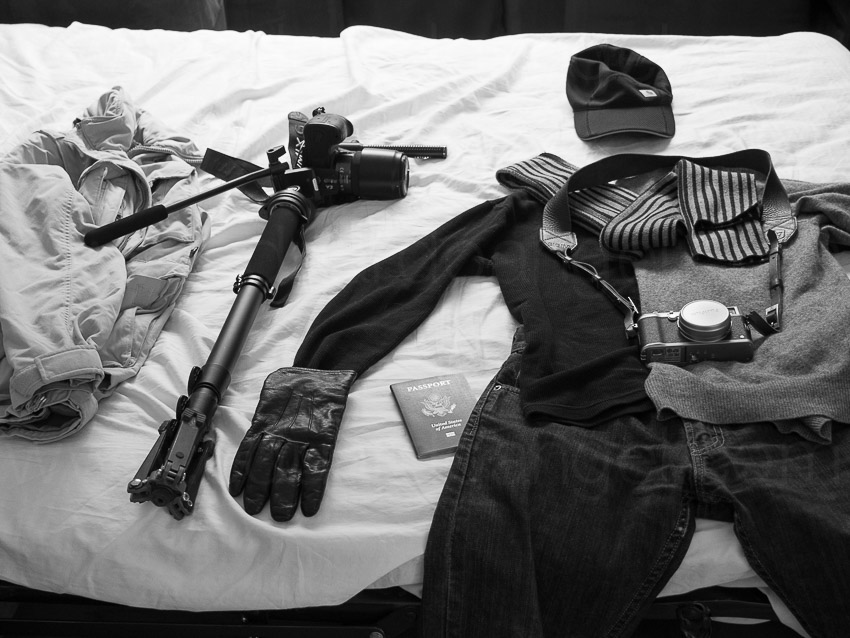
And here’s my typical outfit and setup for some of these solo hybrid gigs.
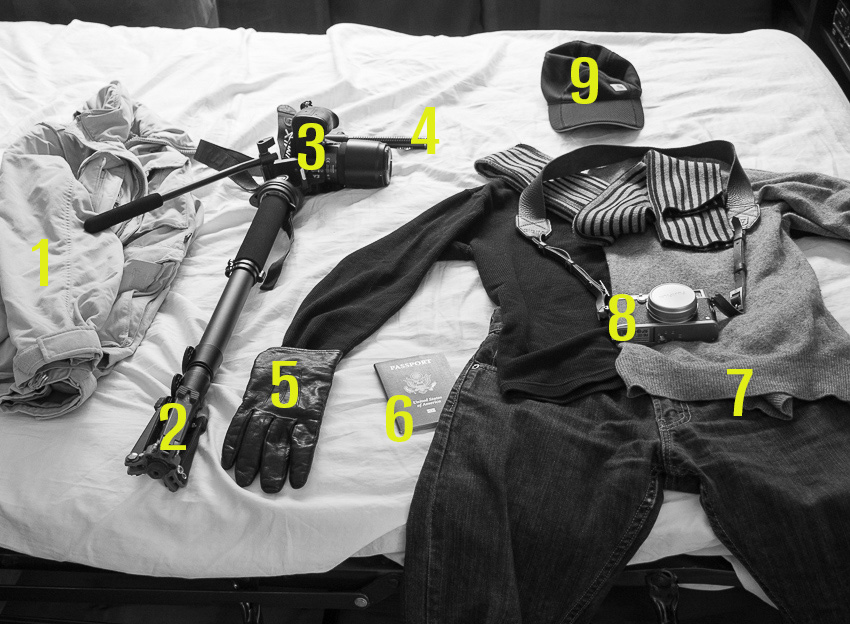
My outfit for hybrid shoots.
1. My good ol’ Columbia jacket/vest has been traveling with me to more than 40 countries. It has lots of pockets, a hoodie, and because it has a self-stowing pocket, it sometimes doubles as a pillow on the road. A priceless item, to be sure.
2. Benro S4 Video Monopod. Small, relatively light, and sturdy. Works great.
3. Panasonic GH4 with a Lumix 35-100mm 2.8 lens.
4. Rode VideoMic Shotgun
5. I always bring gloves unless I’m going to the Caribbean in July. Montreal was pretty cold and wet!
6. Obviously, the most important tool if you are crossing any borders: the passport. This website compares the “power” of passports from many different countries, and, as Americans, we are blessed to have the most powerful one.
7. I like to dress in layers and in dark colors when shooting on the road. Black hides dust and stains very easily. A cashmere sweater is worth its weight in gold.
8. Camera for stills: The Fuji X100s is especially handy after a very long day, when I don’t want to carry more gear but still want to capture a few night scenes of nice-looking dishes during my evening meal.
9. A hat—another essential item.
Longer projects and bigger crews
For a longer hybrid assignment where I’ll have one or two more people (gaffer/grip and a second camera/DIT) I’d bring a few more items. In this case we wouldn’t need to carry everything on our backs, but we definitely need to pack as little and light as possible.
We would bring a Tenba Transport Rolling Tripod/Grip case, to pack one or two Benro S8 tripods, a Benro S4 monopod, a very compact and portable slider that would take the same fluid head from the S8 tripod and/or the S4 monopod. Some grip accessories that I consider essential are at least a couple of adjustable Gaffer Clamps, and a couple Collapsible Reflector Holders which also double as boom stand. These two light and inexpensive items effectively function as one, and sometimes two, additional crew member. A no brainer if you ask me.
On the camera package I’d include an external monitor/recorder like the Atomos Shogun with plenty of Solid State Drives (you can also rent them for only $28 per day!), and all the charges and cables you can imagine, and a power strip (get one with a long cord) that becomes essential when downloading all the footage every night AND charging all the batteries for the next day. I use one Tenba Roadie Hybrid bag for the most expensive, essential and fragile items, namely cameras, lenses, Shogun and hard drives. The brilliant design of the Roadie Hybrid allowa me to treat is as a standard rolling carry-on, but I can also use it as a (very heavy) backpack on uneven terrain, subway stations, etc.
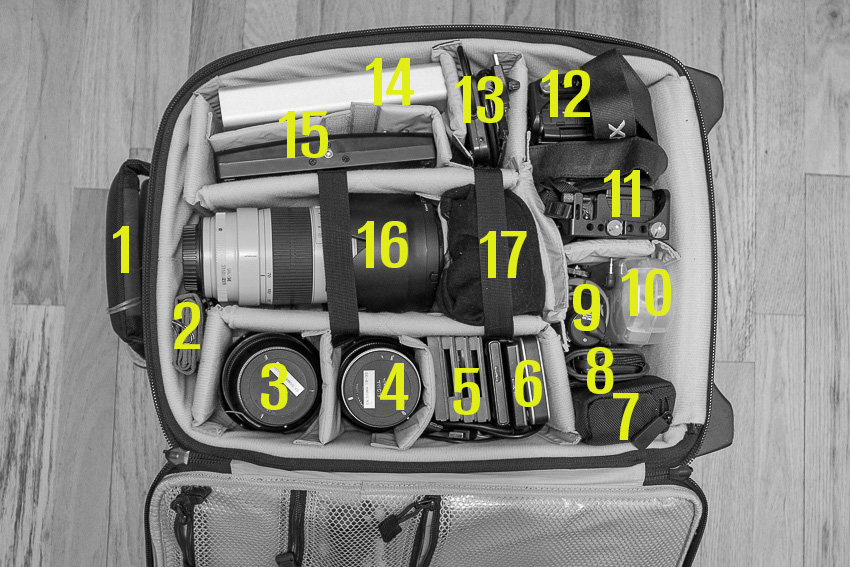
Here’s a view of my carry-on bag.
My carry-on bag for longer jobs and/or when I have a bigger crew.

1. Tenba Roadie Hybrid bag
2. Media pouch with ten 64GB SD cards
3 and 4. Sigma 18-35mm f/1.8 and Sigma 24-105mm f4. These are the same lenses I used last year on another one-man Hybrid project in Istanbul and Europe
5. SanDisk Solid State Drives for the Atomos Shogun
6. Two external portable hard drives
10. H4n Audio field recorder.
11 and 12. A couple of Panasonic GH4 bodies with Varavon cages, one with a Metabones Speedbooster (for the Sigma and Canon lenses) or a couple of Canon C100 Mark II or C300 Mark II bodies if the job doesn’t require stills.
13. USB 3 reader for Solid State Drives (included with the Atomos Shogun kit)
14. 6TB G-Tech External Hard Drive (compact, super fast and awesome)
15. Atomos Shogun
16. My sharpest and heaviest lens, Canon 70-200mm f/2.8 [
17. Panasonic Lumix 12-35mm 2.8 lens and Panasonic GH4 with a Lumix 35-100mm 2.8 lens. These lenses are the equivalent to a 24-70mm 2.8 and a 70-200mm 2.8 but super light and small
18. In terms of lighting I usually bring two or three 1×1 Bi-Color LED Panels with batteries and two Chimera 1×1 Lightbanks with grids. That pretty much covers all me needs. Another option is a Fiilex kit, which I like a lot, but find it way too expensive. I’ll need light stands and cables.
19. Depending on the job we would add another camera movement tool, like a Glidecam or a Ronin or even jibs and dollies. It depends on too many different factors.

All the bags packed. The LED lights are in the back seat.
Well, there you have my little setups for hybrid assignments. Obviously, there isn’t a perfect setup of gear list, just like there isn’t a perfect camera, but these items have been working great for us. I hope this article benefits some of you involved or interested in run and gun, single-operator scenarios like weddings, events, corporate shoots, documentaries, red carpet premieres, product launches, sporting events, video podcasts, and even student films.
If you are interested in some packing and traveling tips, especially when shooting overseas, or what to do the day before your video/shoot shoot, we have written about that too. Did I forget anything? Let me know here!
And of course, there are those crazy long, crazy hectic, crazy complex and crazy awesome projects that require everything and the kitchen sink.

Video

The eternal quest for “the best” digital camera.
I often receive emails asking for advice about “the best lens” or “the best camera” or even “the best laptop.” I believe it is simply impossible to determine a “best” of anything as there are too many random factors such as experience, budget, expected lifetime of the product, intended use, availability of accessories (like lenses or batteries), and even tech support in certain areas. That’s not even considering more subjective factors like personal preference, sense of loyalty to certain brands (or dislike for others), and even the size or weight of such tools. Interestingly, we are currently experiencing one of those “what’s the best” dilemmas ourselves, and not a minor one by any means; we are reconsidering our standard camera package for 2015–16.
Renting vs. Owning:
For many reasons, I believe renting is one of the best options for most people. When all you have is a hammer, the solution to every problem requires a hammer. That’s a very limiting factor to your creativity and a disservice to clients. Sometimes you can get the job done with a Swiss Army Knife like MacGyver, sometimes you need a nice toolbox, and sometimes the best approach is to have a professional plumber do the job.
Another huge reason to rent is to keep overhead as low as possible. Unless you are shooting several times a week with the same system, having something that is guaranteed to quickly decrease in value simply collecting dust in a drawer isn’t the best financial move. Unfortunately, renting is not an easy or affordable option in many small cities.
Lenses:
In terms of lenses I own a nice selection (from 8mm all the way to 200mm) of mostly Canon L glass, some Sigma ART lenses (with Canon mounts), as well as a couple of Panasonic Lumix lenses. I also have one Metabones Speedbooster adapter (Canon EOS to MFT).
Accessories:
We own a set of LED lights and basic accessories that I use frequently and will last a long time like monopods, tripods and a few camera movement tools. I also own a complete audio kit simply because we use it quite often. Audio tools tend to be fragile, and we have a very specific preference for brands and settings. Ultimately, because sound is such an important element of any video project, completely trusting it gives me an additional peace of mind. But I digress. The point of this article is not audio equipment, but cameras.
Cameras:
We own a Panasonic Lumix GH4 bodies and still have a couple of GH3 bodies. They have served me extremely well on hybrid assignments. I am very happy with the quality of the footage and always having the option to shoot 4K, HD, built-in slow-motion, and time lapses with the same camera and media. For video-only productions we usually rent Canon C100 Mark II or C300 Mark II bodies, which I also like very much.
The Challenge:
Several upcoming projects will require a more “complete” camera package, and we seem to have enough projects in the pipeline that it might make sense to own instead of rent, not only financially, but to save time picking up/returning and to be certain that the tool we plan on having in pre-production is the same tool we use on location weeks or months later. So, what’s the best cinema camera (for us) right now?
Technically speaking, we will need a main camera (Cam A) that ideally shoots 4K and has all the standard bells and whistles like XLR ports, HDMI, a good viewfinder, variable frame rates, peaking, ND filters, etc. Great low-light performance is key. For several projects we’ll need to shoot high-quality behind the scenes footage, so we will need a second camera (Cam B) that is either the same or very close to the quality of Cam A.
To make the riddle even more interesting, some of these projects will be “hybrid” projects that require on-location, mostly unplanned, and available light shooting with a very small crew (two or three people max). So the gear package needs to deliver great stills, great footage, and be easily operated by one person, which means light and compact.
Possible Solutions:
I will only discuss the main components of the package, so additional batteries, cables, memory cards won’t be included in the total price.
1. Canon
The first and obvious move would be to buy a couple of Canon C100 Mark II bodies. We already know and like the system, and own the lenses, so there’s no need for adapters. Unfortunately the C100 Mark II does not offer 4K, it is good but not great in low-light performance, it is small but not super light or compact, and it does not shoot stills, so I’ll need to get a Canon EOS 5D Mark III or at the very least a Canon EOS 70D. I’ll get the cinema features I need on only one of the systems.
1x Canon C100 Mark II = $5,500 (Amazon • Adorama)
1x Canon EOS 70D = $900 (Amazon • Adorama)
Total = $6,400
2. Sony
The second option would be to get a Sony FS7 AND a Sony a7S as a B Cam (and also for stills and BTS). The first one seems to be the new cool kid on the block, with raving fans and over the top reviews. It seems portable enough for a cinema camera and matches most of our technical requirements (I still need to test the low-light performance). Its little sister, the a7S shares the same outstanding reviews, it is clearly number one in low-light performance and it can even capture 4K to an external recorder. The catch, and this is a big one, is the cost. The FS7 goes for $8,000 and the a7S goes for $2,500. In order to use my existing lenses I’ll need two Metabones Speedbooster adapters (Canon EOS to NEX) at $650 each, but I will not have AF capabilities when shooting stills, which is a major issue. Also, in order to fully use the a7S as the B Camera we probably would need an Atomos Shogun adding a lot to the budget.
1x Sony FS7 $8,000 (Amazon • Adorama)
1x Sony a7S $2,500 (Amazon • Adorama)
2x Metabones adapter (Canon EOS to NEX) $800 (Amazon • Adorama)
1x Atomos Shogun $2,000 (Amazon • Adorama)
Total = 13,300
3. Panasonic
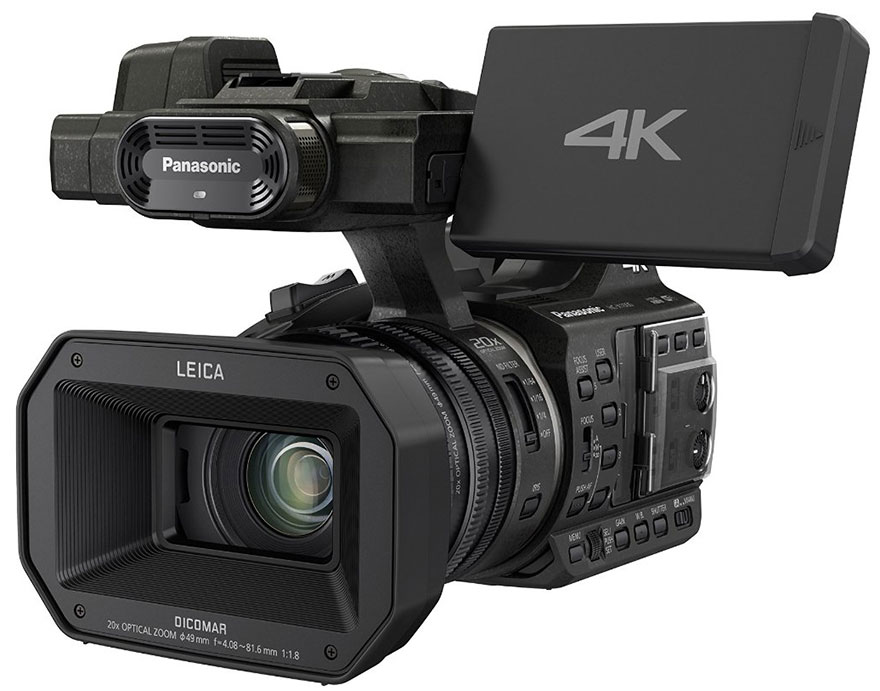
A third, and more affordable option would be to get a second Panasonic Lumix GH4 body and keep them as A Cam and B Cam (4K, HD, and stills) and something like the Panasonic HC-X1000 as a C Cam for BTS. I am still missing the “standard bells and whistles” I mentioned above, and I still have to test the X1000’s performance under low-light. Getting the YAGH (“brick”) wouldn’t make much sense in terms of money, size, weight, and additional power sources.
1x Panasonic Lumix GH4 $1,500 (Amazon • Adorama)
1x Metabones Speedbooster adapter (Canon EOS to MFT) $600 (Adorama)
1x Panasonic HC-X1000 Camcorder $3,200 (Amazon • Adorama)
Total: $5,300
4. Blackmagic
We briefly considered Blackmagic systems but found too many cons to even add them here. Another topic for another day.
Conclusions:
Honestly, there aren’t any. Not yet, anyway. We are still trying to figure out what to do. The Panasonic Package (#3) is the cheapest and easiest as we would have a very small learning curve (with the HC-X-1000) but low-light performance remains to be seen (and it is good but not great on the GH4). The price is great but we would only have the cinema features we need in one of the three cameras.
The Canon Package (#1) is right in the middle, but we would lack 4K, slow motion, a codec over 50mb/s, and only one of the two cameras offers the bells and whistles we are looking for.
Sony (#2) seems to offer the best solution, but costs twice as much as Option #1 and $8,000 more than Option #3. We would lack autofocus for stills, only one camera will have the cinema features, and the FS7 could require a significant learning curve.
An alternative, suggested by an experienced filmmaker, would be to keep using our GH3 with the Panasonic lenses as our stills camera ($0), use the GH4 with our Metabones and Canon and Sigma glass as Camera B, and simply buy one Sony FS7 ($8,000) and a second Metabones (Canon EOS to NEX) adapter $400 for a total investment of $8,400. Altogether we would get AF for stills, 4K, slow-mo, no need for new lenses, but only OK low-light performance, and only ONE system with XLR ports, ND filters, etc. I am also seriously concerned with the additional time (and expense) in post to make everything look somewhat close.
Money and lenses are obviously very important considerations, but there are many other things that have to be factored into camera choices like post workflows (software and hardware), internal codecs, etc. Color science is something else we tend to overlook, and we shouldn’t, as certain camera choices will multiply the amount of time you need to spend in post to get them to look like what you’re used to.
So, clearly, there isn’t a “perfect” camera that will meet all our requirements. So the best approach is to consider what we have (budget, lenses, software, hardware, accessories, etc.) what we need, and what we are willing to sacrifice. So, what is “the best” camera package for us, giving our existing gear, ideal requirements and upcoming needs? Now I need YOUR help to figure this one out.
UPDATE 01: Since I wrote the first draft for this article I’ve been hearing highly reliable complains about the FS7 working with lens adapters and Canon lenses. That pretty much kills the Sony package option for us.
UPDATE 02: There are strong rumors that Panasonic will be announcing an updated version of the AG-AF100 at NAB, which apparently would include 4K. That could be a great solution for our full blown cinema camera.
UPDATE 03: Another strong rumor is that Canon will replace/update the 3-year old 5D Mark III with a 4K version. Kinda cool, but it still doesn’t solve our “bells and whistles” camera dilemma.
UPDATE 04: For the past 3-4 weeks I’ve been using the Atomos Shogun (Amazon • Adorama) and I must admit I’m VERY impressed. This gadget not only provides an exquisite 1920 x 1080 ultra sharp (and fairly accurate) image, but it’s main purpose is being a 4K (or HD) recorder via Solid State Drives. The best price/quality I’ve found are these 240GB Sandisk for $146 with a 10-YEAR warranty. Not bad at all.
Something I didn’t consider when getting the Shogun is that now I have XLR options, making the GH4 a much more powerful beast. The provided batteries only last about 30 minutes of recording time. I got this off-brand ultra cheap ($36) set of 2 batteries with chargers and so far they have performed perfectly. To keep in perspective, a single Sony battery costs $199….
UPDATE 05: The Varavon cage for the GH4/GH3 works perfectly with a Metabones Speedbooster. This set up and the Atomos Shogun are making me rethink my camera strategy. Now I can have a very comfortable grip, add a shotgun for run and gun or a monitor/recorder with XLR mics on sticks. Hmmmm this is getting REALLY interesting!
More to come.
Video
The most popular cameras at Sundance.
Indiewire published recently the list of cameras used by the filmmakers included in the 2015 Sundance Festival.
The article matched each camera with the film, which was awesome. But I was also curious to see a chart that showed more precisely how many cameras where used and how often. So, I dropped the list from Indiewire into Excel and created this chart.
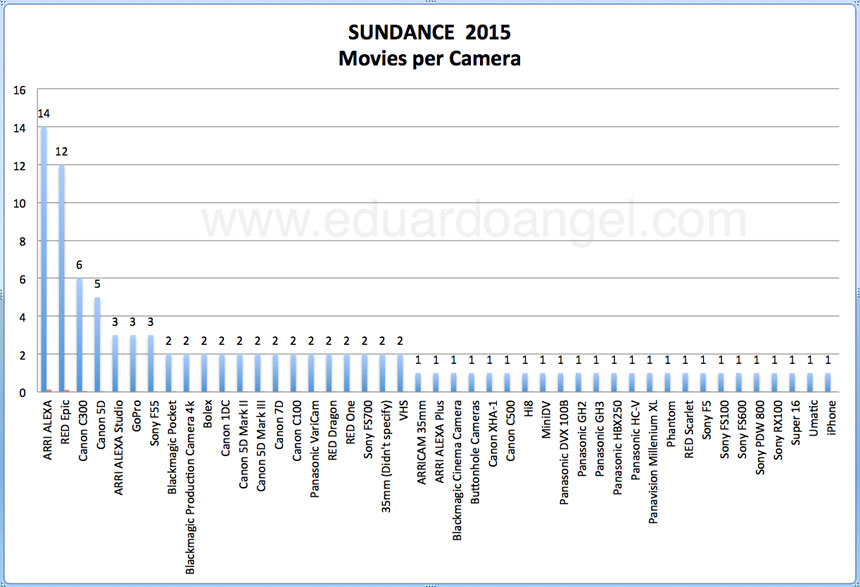
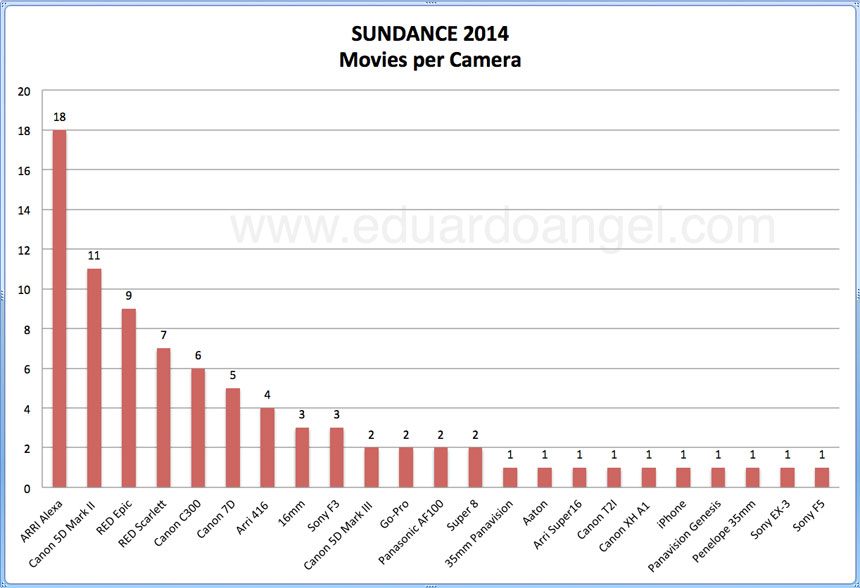
A total of 23 cameras were used in 2014 to shoot 84 movies. In 2015 almost twice the amount of cameras (44) were used to shoot 97 movies. My guess in this discrepancy is that a) Not enough filmmakers in 2014 provided enough or complete information on their cameras or b) the filmmakers in 2015 felt the need to use different cameras on the same movie.
I also wanted to compare the cameras used at the 2014 Festival, so I also created this second chart, again using Indiewire as my sole resource. From the article, it is hard sometimes to tell exactly which camera was used. For example, one of the filmmakers said, “We used Super 35mm with some Red Epic, and a little super 16mm. There is also one Canon 5D shot in the picture.” Which Super 35? And obviously it had to be a Canon 5D Mark II or Mark III as the first version didn’t shoot video. In those cases I only added the Red Epic to the tally.
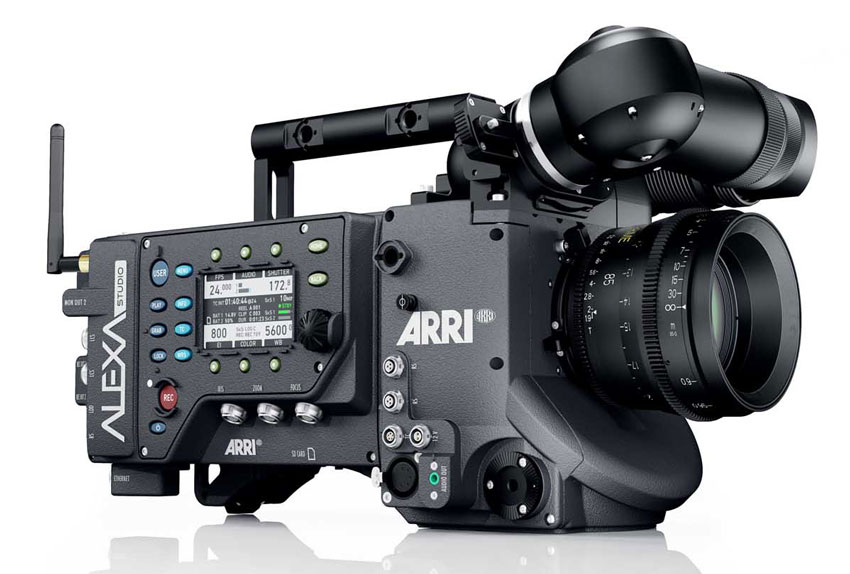
How can this information become useful? To me it’s simply curiosity, as I believe a great storyteller can be as effective with an iPhone as with any high-end $50K camera. Give ME an Alexa and a million dollars and I still wouldn’t be able to shoot a single frame better than Emmanuel “Chivo” Lubezki or Roger Deakins.
The camera is just a tool, but these charts could be used as a reference by film programs trying to determine where to spend their camera budgets this year. Or perhaps a film student wanting to work as a DIT or as an AC [insert link http://en.wikipedia.org/wiki/Film_crew ] can look at these charts and determine, “well, I better get REALLY comfortable with the Arri Alexa and Red Epic in order to get some high-end jobs.” The charts can also be used by filmmakers planning to upgrade their gear.
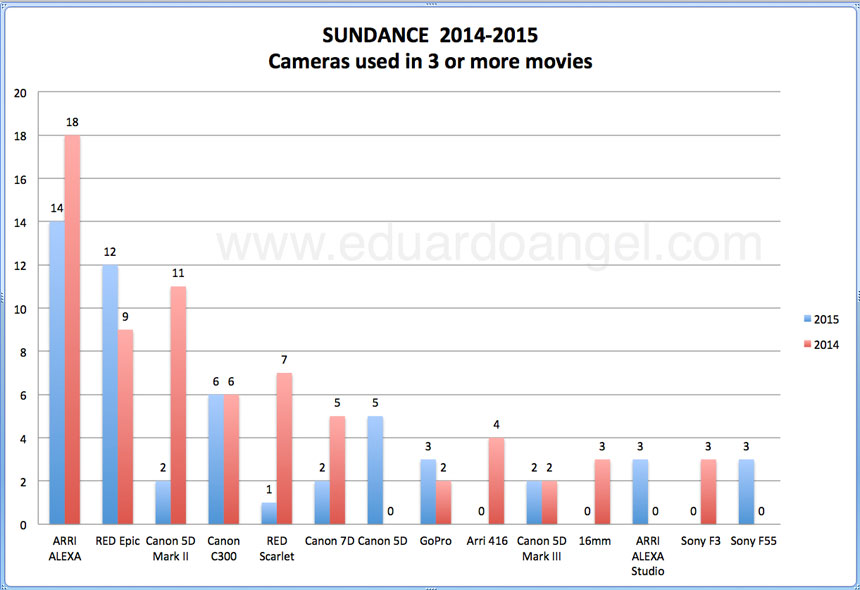
What I find most interesting about this data is how consistently some of the cameras are used, such as the Arri Alexa, and how one of my go-to cameras, the Canon EOS C100, was used only twice last year and wasn’t used at all on any of the 2015 movies. Another interesting takeaway is how much more diverse the cameras used for Sundance are compared to the cameras used on Oscar nominated movies, where the Arri Alexa also rules, RED and Blackmagic have been absent, and we don’t see a VHS or an iPhone. Or, at least not yet, I should say..
Video
Camera Movement for Video Productions on Lynda.com
Filmmaking is a medium defined by motion: not only the action that occurs within a frame, but also movement of the camera itself. It’s the ability to employ camera movement that separates new videographers from the pros. In this course, we cover the importance of camera movement and the benefits of integrating it into your video productions. The lessons are explained through a series of examples that compare static shots to their dynamic counterparts, showing exactly how camera movement contributes to each scene, whether it’s increasing drama, following action, directing viewers’ attention, revealing key details, or simply transitioning between shots in a sequence.
Topics included on this course:
- Exploring the different types of camera motion
- Panning and tilting
- Zooming
- Racking
- Tracking on sliders vs. dollies
- Stabilizing camera movement
- Working with cranes, jibs, and mounts
- Choosing the right camera for motion
The complete course is currently available on Lynda.com. If you aren’t a Lynda.com subscriber, feel free to use my link for 10 days of unlimited access.
Video
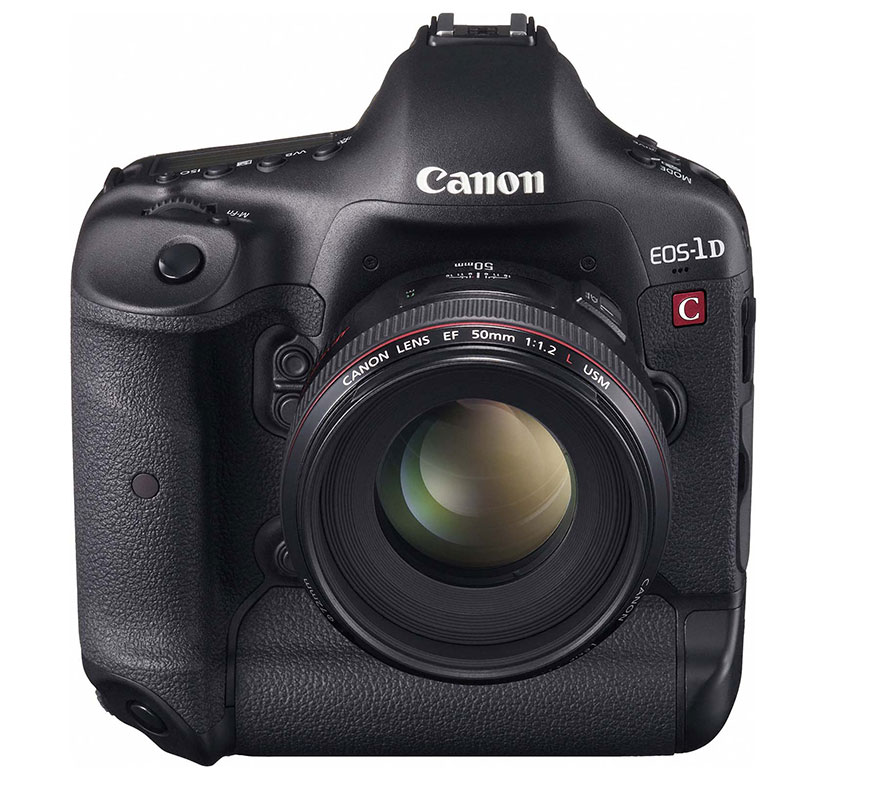
Canon EOS-1DC 4K DSLR price drops 34%.
The price for Canon’s EOS-1D C has effectively dropped 34%, from $12,000 as of yesterday to $7,999 right now.
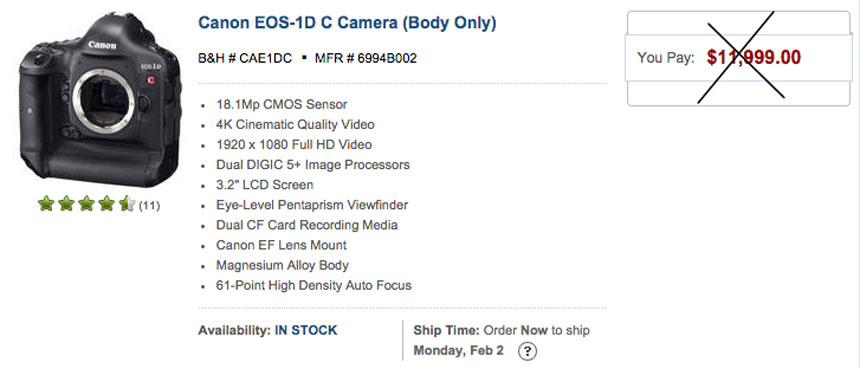
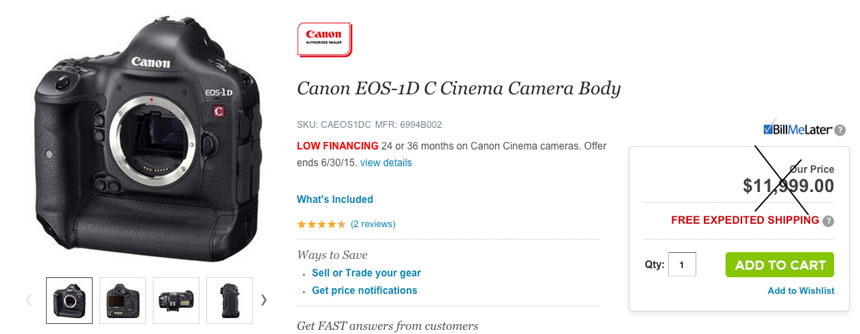
Canon EOS-1D C $7999: Adorama | B&H
The 1D C is the first Canon hybrid DSLR to offer onboard 4K motion imaging and Full HD motion imaging on CF cards and it is considered part of Canon’s Cinema EOS system, right next to the C100/300/500 models.
The main (and huge) difference between the EOS-1D C is that it features a full frame CMOS sensor that can capture 4K (4096 x 2160) as Motion JPEG and HD (1920 x 1080) as H.264 and can also shoot 18-megapixel (5184 x 3456) still images recorded as RAW or JPEG. An important (and also huge) difference between the EOS-1D C and the other C series bodies is that it lacks important features like built-in ND filters and XLR ports among others.
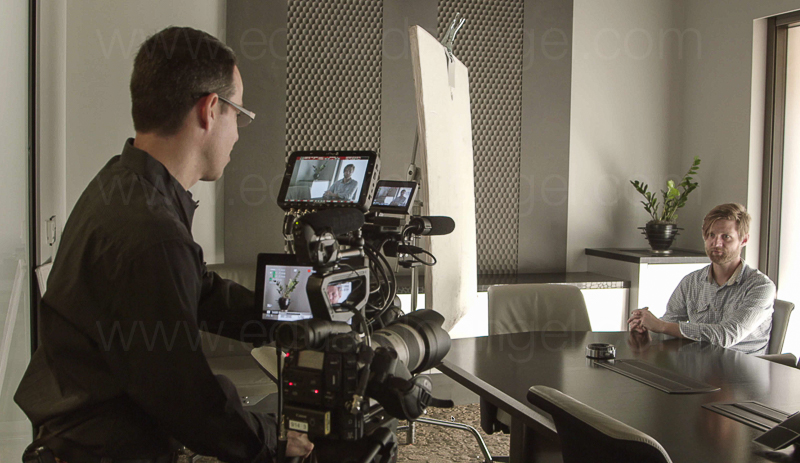
The camera’s rugged, ultra-compact form factor and huge sensor makes it an interesting option for challenging hybrid assignments when low-light performance is critical. For example, underwater or wildlife photographers capturing 4K and not needing XLR ports or other advanced video videos can find a great solution on the 1DC. Another instance is corporate assignments when the photographer is expected to shoot high-end video as well as stills. Unfortunately I believe the camera’s price have seriously challenged its market penetration. Let’s see what happens with this new price.
Now, while simultaneously shooting stills and video is certainly possible, I prefer to keep separate systems with different settings and features assigned to each task. It is hard enough to THINK about sound and movement and lighting simultaneously. the last thing I need is to be switching settings back and forth.
As of right now I’m happy with our current systems; a couple of Panasonic GH4 4K bodies with Canon and Sigma lenses (using a Metabones Speedbooster adapter), and a couple of Canon C100 Mark II bodies when stills are not necessary.
Here’s our current standard camera package:
Bodies:
• Panasonic GH4 at Adorama | Amazon | B&H
• Canon C100 Mark II at Adorama | B&H
Lenses:
Sigma:
• 35mm F1.4 DG HSM Art at Adorama | Amazon | B&H
• 50mm F1.4 DG HSM Art at Adorama | Amazon | B&H
• 18-35mm F1.8 DC HSM Art at Adorama | Amazon | B&H
• 24-105mm F4 DG OS HSM Art at Adorama | Amazon | B&H
Canon:
• Canon 24mm F1.4L II USM at Adorama | Amazon | B&H
• Canon 70-200mm F2.8L IS II USM at Adorama | Amazon | B&H
Panasonic:
• 12-35mm at Adorama | Amazon | B&H
• 35-100mm F2.8 at Adorama | Amazon | B&H
Metabones Canon EF Lens to Micro Four Thirds at Adorama | Amazon | B&H
If you are ready to buy any of these items, I’d suggest checking all three stores as the prices constantly change. Happy shooting!
Video
The 8 Best Tools of 2014.
Here are some of the tools that made a real difference for us last year. Just in case, the order in the list is completely random.
Panasonic GH4
What can I say that I haven’t already said about this gem? Tiny, inexpensive, intuitive, sharp, full of features—this is a truly remarkable feat of engineering to take our visual stories to a new level.
Fuji X100S
No, it’s not a typo! I know this is not the latest model, and that’s exactly the point. This little camera is so good that I see no need to upgrade, change, or even try something else. This is the perfect camera to take out on weekends, and when paired with a super sexy, real leather camera strap, the camera not only works well, it makes ME look good!
Sigma 35mm
In the next couple of weeks, Sigma will release a couple of videos I shot for them in Istanbul, Paris, and Belgium. All the lenses I brought with me were extremely good, but the 35mm was so extraordinary that I ended up NOT returning it.
Fiilex Lights
I rented these lights from Adorama for a Lighting Workshop I did in D.C. Among the reasons not to bring my own light kit were size, portability, and the ability to use multiple accessories with the same fixtures. For example, did you know that these lights can use all the accessories available for Profoto? Mind blowing.
The Fiilex more than delivered on all ends, and the guys at Adorama Rental provided their usual stellar job of testing, packing, and shipping the gear in time for my presentation.
Transcend 64GB UHS-3 SD Card
My tendency is to not put all my eggs in one basket, and to not keep all my day’s footage or photos on one card. I resisted switching from 8GB to 16GB for a while, while HD “forced”me into 32GB cards, and 4K made me seriously consider the 64GB Transcend, not only for the additional capacity, but for speed. The card was affordable when it was released and now it is almost half the price I paid for it just months ago. This one’s a no brainer.
DJI Ronin Camera Gimbal
Heavy. Difficult to set up. Costly. But when you make it work, it sings! We shot a lot of stuff with this toy, and the production value it added to our projects was simply outstanding.
Adobe Premiere Pro CC 2014
I was very much against Adobe’s Creative Cloud concept (and wrote about it here, here, here, and here), but after a year or so of using the apps pretty much on a daily basis, I love always having the latest version to work with. The significant efforts that Adobe has put into their video applications is totally worth the monthly payment.
13” Apple MacBook Pro Retina
This turned out to be not as fast as expected, more expensive than expected, and the latest OS X Yosemite was way worse than expected. Yet it made it into my “top tools”list. Why? Simply because the MacBook Pros are still, in my opinion, the best line of laptops available. The fact that we can edit, grade, and export 4K video on a plane or from a coffee shop still blows my mind. But Apple’s reign might be coming to an end very soon. 2015 will be a VERY exciting year for technology. I can tell you that much.
If you like what you saw in this summary and want to know more about how we actually use these tools, please check out our new online courses on Lynda.com along with some of the video projects we worked on during the year.
We look forward to keeping the conversations going this year.
News
I am a contrarian, or so it seems.
I am a contrarian…. That’s what a good friend just told me. Why? Well, according to him because:
• I use an Android phone and Tablet. LG and Samsung are good, Lenovo is garbage. I actually got a Nexus 4, a Chromecast and a Nexus 5X the day they were announced. That apparently also makes me an “early adopter.”

• I purchased a 60D the week AFTER the 5D Mark III was made available and shot for several years with a 7D. I also used (and publicly highlighted) the Panasonic Lumix GH3 WAY before the GH4 was hot (which I also added to my arsenal). I don’t have a Blackmagic camera, mostly because I love shooting with the Canon C100.
• I have been using Adobe Premiere Pro well before Apple released Final Cut X, and before David Fincher made the Creative Cloud cool.
• I dropped my monthly “all you can talk” cell plan for a “prepaid plan.” It has been saving me at least $1,200 per year. I haven’t used Skype for years, Google Hangouts is the way to go.
• I choose not to own a lot of gear. I believe renting equipment is the best way to provide clients with the best tools for each job, and it also helps to keep my overhead low.
And the cherry on top? We are seriously considering getting an HP workstation for video editing (yes, a PC computer) instead of new iMac or even a Mac Pro.
Well, perhaps my buddy is right….I am a contrarian!

But here’s the thing, as a technology consultant I spend a lot of time thinking about what will come next in terms of trends and features. I bet on Adobe Premiere Pro about a year before the flood gates opened. I also have the privilege to see many products, hardware and software, as prototypes or in their beta phases, so even though I generally can’t talk about them, I can wait until they are commercially available or I can get something cheaper temporarily.

But perhaps the main reason to be a “contrarian” is that I don’t really care about the name of the brand. What I do care about is performance, reliability, and support. The faster I work, the more time I have to build my business, and the more discretionary time I get to enjoy life offline, and out of the office.
I’m obviously not the only one, check this Fast Company article “5 Contrarian Lessons From Successful Entrepreneurs” and David Ogilvy’s (one of my heroes) “Contrarian Management Advice.”
Video
I Just Got a Panasonic GH4 – Now What? Batteries.
First, the good news. If you already own a Lumix GH3 like we do, the GH4 uses the same exact batteries. The majority of camera manufacturers and other companies like Apple could follow this strategy for a change!
The OK news is that while the DMW-BLF19 battery (one included with every body) is really good, we generally go through two or even three batteries per camera on a video shoot. The Panasonic branded battery goes for $45 on Amazon.
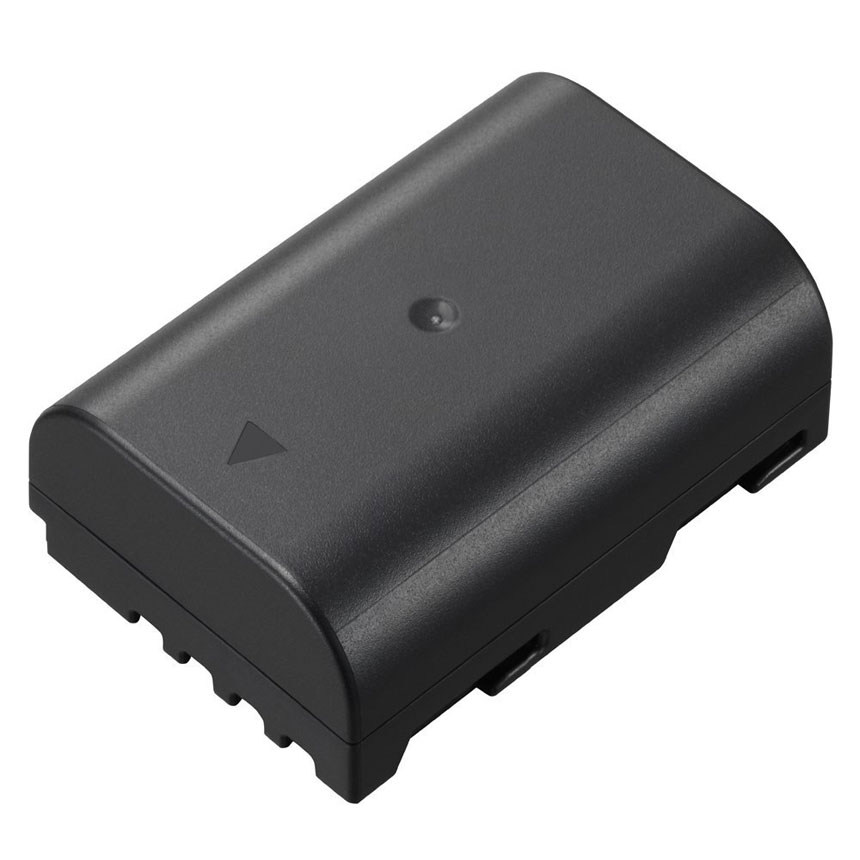
Panasonic DMW-BLF19
A cheaper option is the Wasabi branded version that costs a THIRD of the price ($14.79 on Amazon). Now, an event BETTER deal is the Wasabi kit, which includes TWO batteries and one charger with a European plug AND a car adapter. The price: a no-brainer $31 on Amazon.
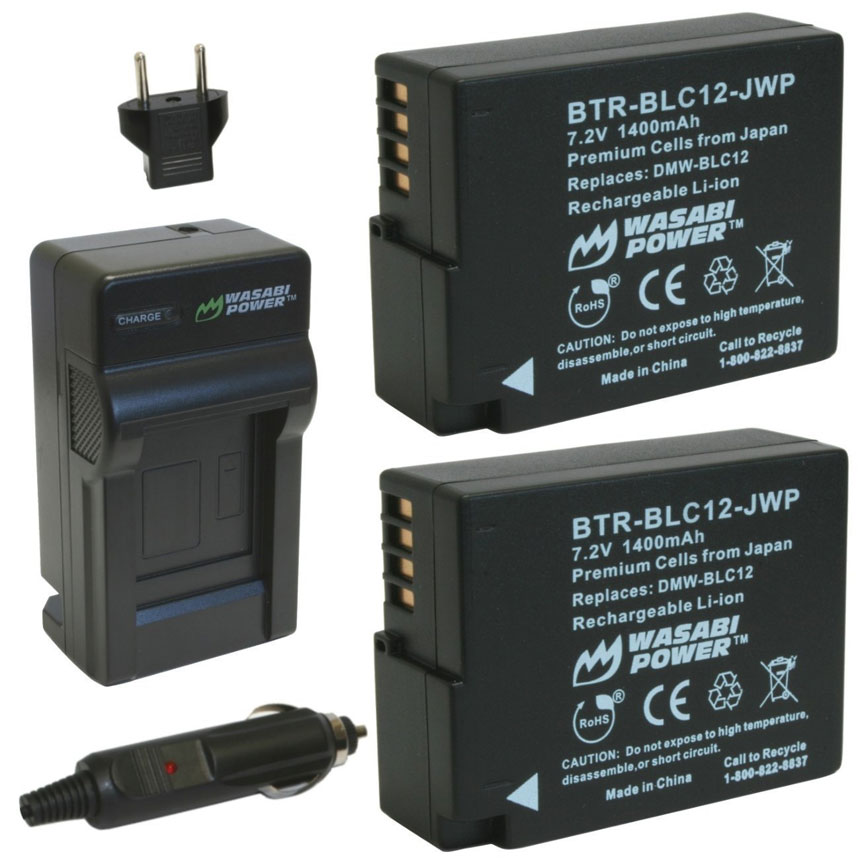
Wasabi Kit for the Panasonic Lumix GH4
I purchased a very similar kit for the Fuji X100S and so far have not seen ANY significant difference in performance between the original Fuji battery and Wasabi’s.
Related Posts
I Just Got a Panasonic GH4 – Now What? Hard Drives.
I Just Got a Panasonic GH4 – Now What? Memory Cards.
7 things we discovered after shooting 4K with the GH4. You won’t like #4.
Dance! The first of a series of videos shot for Panasonic USA to promote the new Panasonic Lumix GH4.
News
Want $70,000 worth of filmmaking gear?
This is awesome. RØDE Microphones (the company that in my humble opinion delivers the best quality at the best price in audio gear) has put $70,000 worth of filmmaking gear up for grabs for their “My Rode Reel” short film competition!
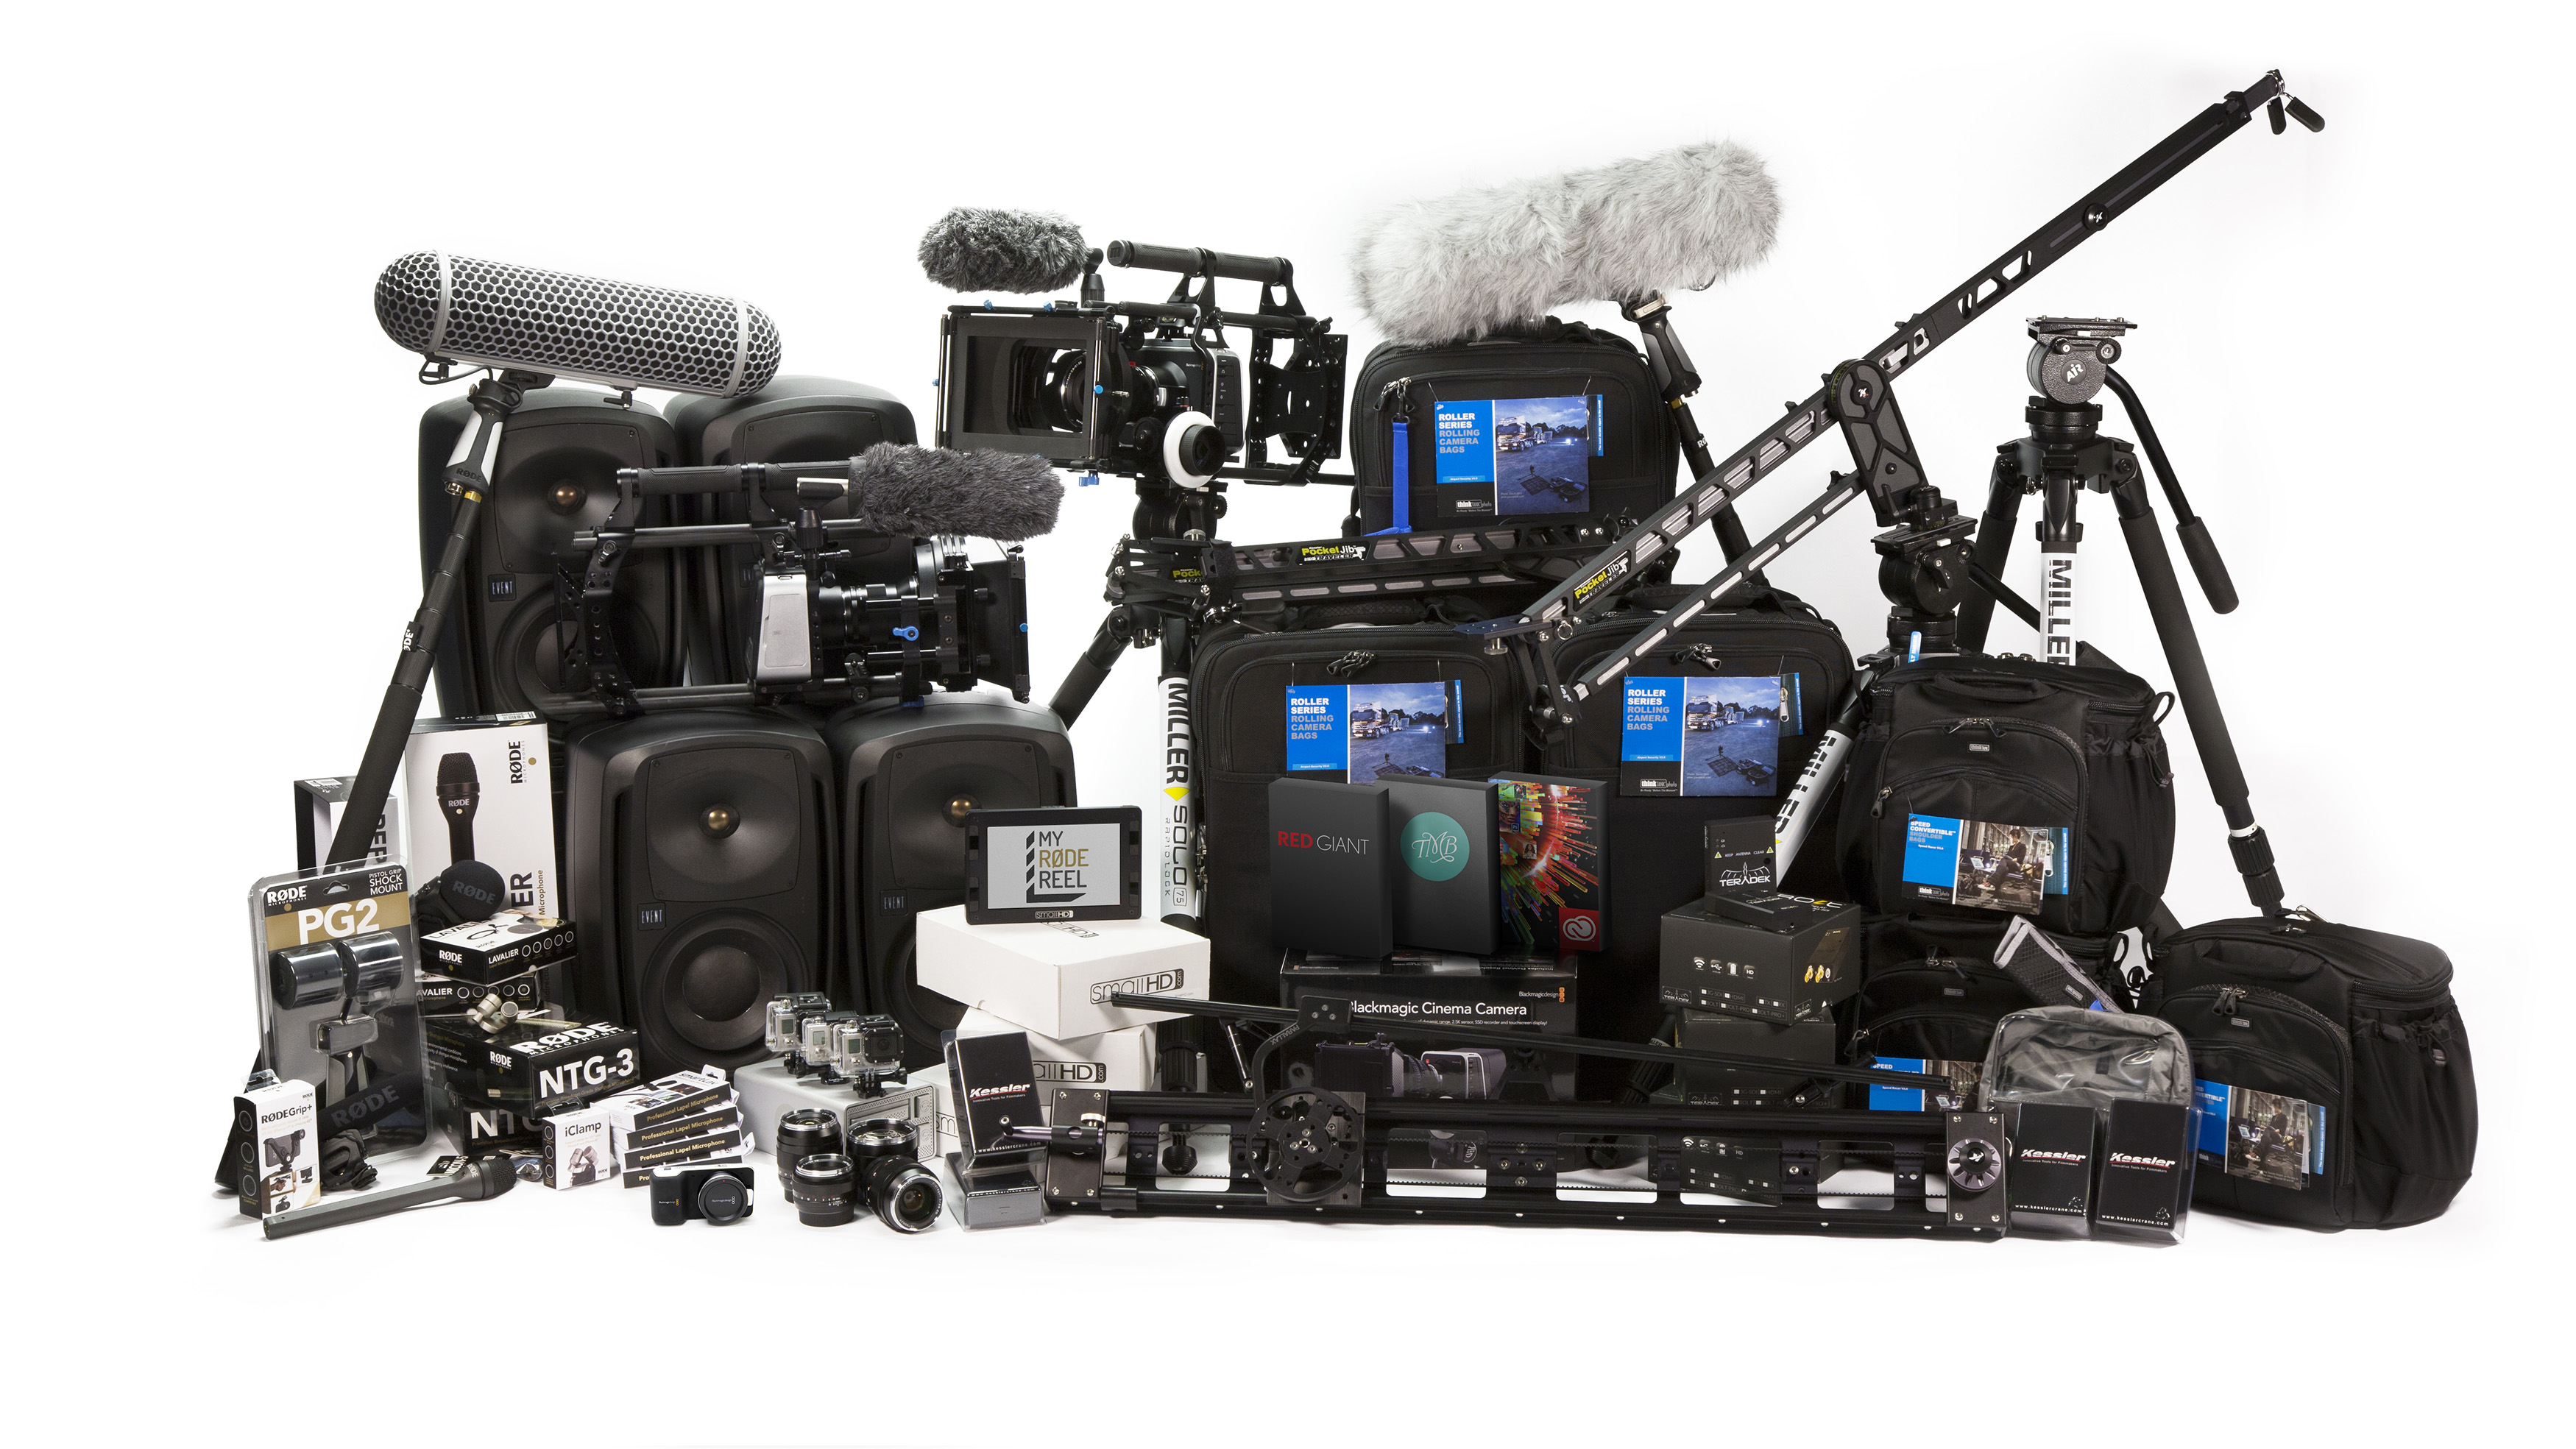
Entries are open from March 1st till May 31st. Watch the video for more info, or visit www.myrodereel.com
Video
Panasonic Lumix DMC GH4 Sample Video • Behind the Scenes Fashion Week New York.
Panasonic Lumix DMC GH4 Sample Video. Behind the Scenes shot during Fashion Week in New York. Another test was shot in Central Park and a third one at the Chelsea Piers.
We learned a lot of interesting things about this new camera. To see the specs and what this system represents to hybrid photographers check tis article.
Video
4K video under $2K. Meet the Panasonic Lumix GH4.
Panasonic just announced its latest system, the Lumix GH4. We had the honor to field test the GH4 this past weekend, and I shared some of my impressions live on Twitter.
I’ll be posting more details as well as images and sample videos later this week.
Photography
Apple OS 10.9 Mavericks compatibility for X-Rite color solutions.
The recently released Apple OS 10.9 Mavericks may experience communication issues with X-Rite instruments. To resolve these issues, users need to update to the latest X-Rite Device Services (XRD v2.3.2) driver software. (more…)
Photography
Fuji X100S Hands-on Review.
I’ve put this little thing through every imaginable shooting situation, and tried most, if not all, of its settings, shooting more than 8,200 images on four different assignments in 5 countries in less than a month’s time. And yeah, I know, I’m almost a year late to the Fuji party.
But, as I tell my students who seem to be magnetized to the flatiron building after moving to New York, it doesn’t matter if other people have photographed or written about the same subject that you are interested in. It’s exciting to see how each of us uniquely interprets our surroundings. So, here are my personal impressions of the Fuji X100S.
It is important to mention that I am not being paid by Fuji, or anyone else for that matter, to use the camera or write this review. I’m doing this just as a way to give back to the photo community, so if you are inclined to purchase this system, please consider using our Amazon link. It won’t cost you a penny more, and it would definitely allow us to spend more time working on projects like this:
Why the hype?
The Fuji X100S is a small and light, retro-looking 16MP APC-C magnesium body camera with a fixed 23mm f2.0 lens (equivalent to a 35mm focal length on a 35mm camera) that captures 14-bit RAW. It looks and feels like a Leica M8 or M9, but it comes in at about a fourth of the price.
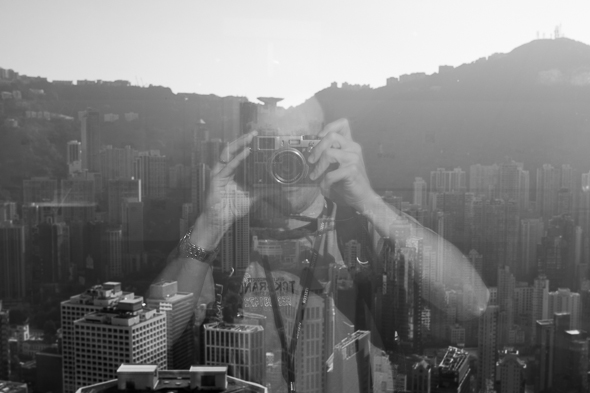
Size and weight
I was going to spend 26 days working in five Asian countries. With a limited amount of free time to explore on my own, I wanted a camera that would allow me to use any form of transportation (biking with a backpack full of lenses and accessories was not an option), that would capture RAW (a cellphone wouldn’t cut it here), and that was inconspicuous (the Canon 70–200mm f2.8 was out).
So, the main reason I chose this system was weight. Many years ago I was willing to carry two bodies with two lenses and a small daypack with water and accessories (monopod, memory cards, filters, batteries, more lenses, cable releases, etc.). Not anymore. I want to travel as light as possible and be able to fit ALL of my clothes and gear in a carry-on rolling backpack.

When I travel, I break all the rules my mom taught me: I talk to strangers, I eat all kinds of weird food (especially street food), I sleep as little as possible, and I intentionally try to get lost. I enjoy discovering cities on foot, often walking 12 hours in a single day. Deep inside myself, and for some masochistic reason, I also wanted to push the limits of my comfort zone. Not having a set of super-fast zoom lenses with me would be a major restriction—but also a liberation.

The Macro Mode focuses as close as 3.9″ (10cm). It works great and focusing is fast. Something to keep in mind when using the Macro mode is that if the Optical Viewfinder is on, the camera will switch to the Electronic Viewfinder.
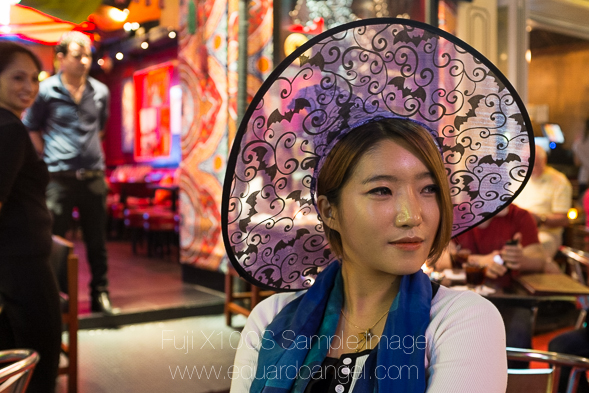
Day 1. First issue.
After years of using Canon and Nikon DSLR systems, I naively assumed that all camera companies were up to date on battery technology. I was terribly mistaken. If there’s one issue with the X100S it is the battery life. Thankfully, and with proper planning, this is something that can be worked out.
The ONE battery I brought with me lasted a couple hundred images. Assuming I had not charged it completely I went through the same issue the following day. Finding digital gear overseas is often difficult, time consuming, and expensive. Locating batteries for this system in northern Thailand was a nightmare.
If you are planning to buy this camera, I’d recommend getting at least a couple of extra batteries. The original Fuji NP-95 is $38, but you can obtain much cheaper ($10) generic batteries, too. The best deal I’ve seen is this Wasabi kit with two batteries, charger, European plug, and car adapter for $20. A no brainer investment.
Why do you need a second charger? Well, it so happens that the Fuji charger does not tell you the percentage of charge that you have. It is either charging (the light on the charger is on) or full (the light goes off). For some reason, if you take a fully charged battery and attach it to the charger, it can take 10–15 minutes to show that it is full. To add insult to injury, it takes 180 minutes (three hours!) for one NP-95 to charge from dead to full. That’s 50% of the time the battery lasts under normal use without the LCD display. Fuji’s battery charger has no folding plug so it requires a long separate cord. One more thing to pack.
The battery issues continue on the camera: the battery-level meter simply goes from normal to dead in a few images. Just like that. Unlike a DSLR, a mirrorless camera sensor is powered up all the time, even if you are just focusing or reviewing images. If you use mostly the optical finder, turn the “OVF power save mode” on. The display’s info will be dimmed a bit, and the live histogram is no longer available, but it will greatly extend the battery life. I strongly recommend reading pages 18, 36, 41, 47, and 91 from the Camera’s Instruction Manual (available here as a PDF).
On paper, the NP-95 is rated for 300 shots per charge. After all these tweaks, I’m getting an average of 450 shots if I switch from EVF to OVF when possible, if I turn the camera off instead of keeping it on standby mode, and if I don’t use the viewfinder.
That’s a lot of ifs! The battery’s design is also poor, as it allows you to insert the batteries incorrectly and still be able to close the “battery-chamber cover.” You will know if you’ve done it wrong because the camera won’t turn on.
Having the battery life improved to a maximum of 450 pictures gives me about five hours, which is about a third of my working day when traveling. The poor battery performance and long charging cycles were by far the biggest drawbacks using this system on the road.
Focus
On several occasions I could not get the AF to lock, even in bright daylight. In low light the AF does hunt and it is slow. I also had a few instances where the camera “back focused” for no apparent reason.
The AF-C Mode (continuous auto focus mode) was extremely unreliable. The camera is simply too slow to track, lock, and capture a moving subject. Additionally, on AF-C Mode you can only focus on the dead center of the sensor. In my opinion, these two issues defeat the purpose of AF-C.
The manual focus works great. I love the focus peaking feature.
I absolutely love the hybrid viewfinder. It took me a couple of days to realize that the little switch on the front of the camera almost magically changes between the optical and electronic viewfinder.
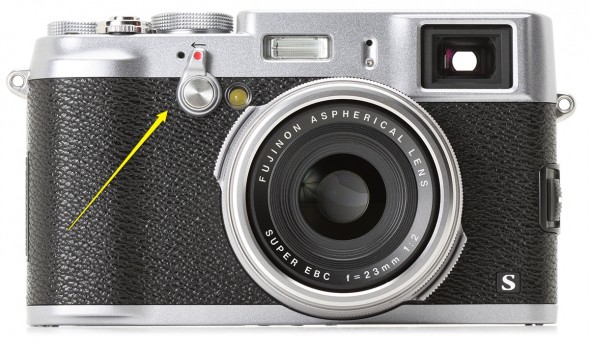
Lens
The fixed 23mm f2 lens is very sharp, and impressively corrected for distortion. In combination with the sensor’s ability to capture noise-free images up to 3,200 ISO this makes shooting under low-light conditions bliss.
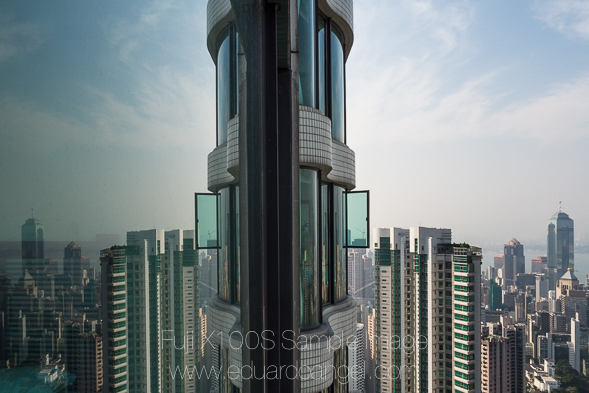
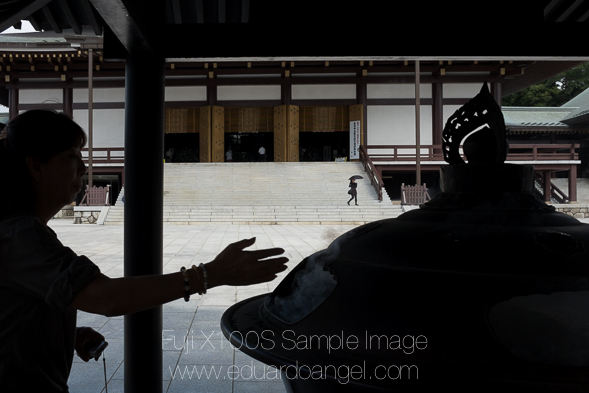
Low Light performance.
As you can see, low light performance is impressive. The sensor performs very well up to ISO 3,200 and decently up to 6,400. Relatively long exposures are not an issue.
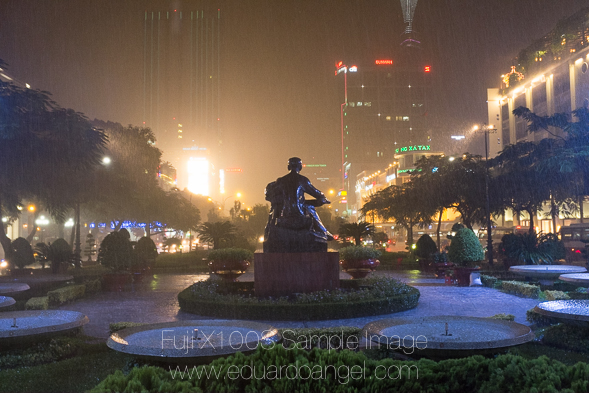
ISO 6,400
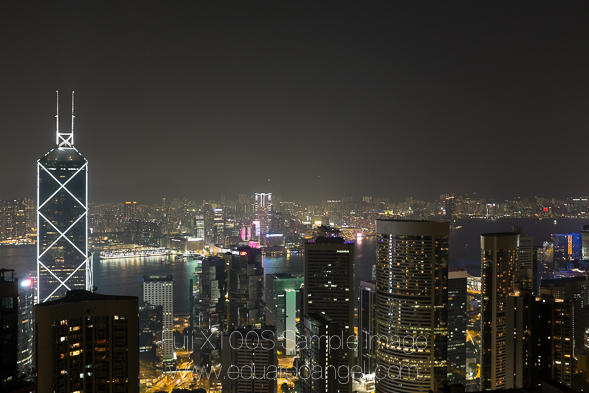
1-second exposure
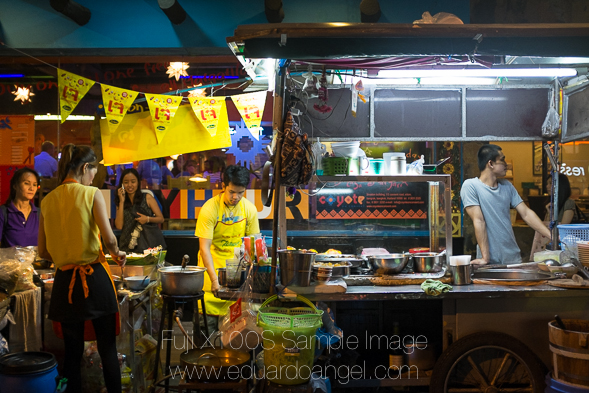
ISO 1,600 at f2

Dynamic Range – Highlights and Shadows detail.
Another excellent spec; the detail that this tiny sensor can capture is truly remarkable.

Movie Mode
If shooting video is extremely important to you, stop reading this right now and consider another camera. The camera offers Full HD (1920 x 1080) at 30fps or 60fps and a decent 36MBps bit-rate. But, to access the video mode, you have to select “Movie” in the drive mode menu. You can’t use the optical viewfinder. Manual exposure can only be modified before you start recording. The ISO and ND are inaccessible while in video mode. In terms of quality, if you have good light, perfect exposure, don’t care about sound, can pre-focus, and the camera doesn’t move, the footage is decent.
A three-stop neutral density filter is a welcomed feature. Unfortunately, it is not accessible during Movie Mode.
The built-in Panorama works well.

Workflow
I download and back up my images at the end of each day when I’m on the road. I also add key captions (locations, names, etc.) and a few general keywords. I wanted to create Smart Previews and edit them in my “down time” (doctors offices, the DMV, and long flights are ideal locations). That didn’t quite work out. On a two-year-old Mac Book Pro and a fast portable external Hard Drive, Lightroom 5 took on average two-and-a-half hours to import 450 RAW images, convert them to DNG, and build Smart Previews, which I still consider the best feature in Adobe Lightroom 5.
So, every night, after a day of working and lots of walking, I’d download the cards through Lightroom and charge the batteries, take a shower, grab something to eat, call my wife, return emails and phone calls, plan the following day, and…continue to wait because neither Lightroom nor the battery were ready.
Future enhancements
• I wish the camera had built-in GPS, which in combination with Lightroom’s Maps Module would make captioning images MUCH easier. My poor-man’s workaround is to simultaneously snap a picture with my cellphone at key locations. Since the phone adds the GPS information to the image I can later copy and paste the GPS coordinates to the relevant RAW and video files. Nothing fancy, but it works.
• It takes an annoying “long press” of the shutter button to wake up the camera from stand-by mode.
• If you’re shooting in burst mode, you can’t review individual images or zoom in/out. The images play back in a pointless slideshow. This was truly frustrating, as you can’t know if you got the desired image until you download the files.
Final thoughts
One day, many moons ago, as a student shooting for a newspaper, the photo editor asked me if I had more than one lens. I proudly answered, “Yes, I have three!” To which he replied, “Then use them! All your pictures look the same.”
That was a serious concern I had about spending a month with a single fixed wide-angle lens. I’m glad to report that the advantages in quality and weight greatly outperform this challenge.

The Auto White Balance works very well. The custom white balance is close to perfect.
Is this camera going to help me take better pictures?
Cameras are tools, no different from hammers or toasters, when you get down to it. I own very little gear because I prefer to rent the best tool for each job. That way I keep my overhead low and have access to the latest technologies.
That being said, after a few days getting used to the cluttered and somewhat illogical Camera Menu, I felt like shooting with my first Nikon FE-2, except now I had more than 36 frames and could switch the ISO as I pleased. There was, and is, an inexplicable emotional connection with the X100S—a feeling that I haven’t felt in a decade. Technically speaking, the camera is wonderful. But, there’s more to it. I can and want to take it with me everywhere I go. I have been taking more “snapshots” than ever before. I can get closer to my subjects, and shoot silently and almost invisibly.
If you have been drooling over this camera and are ready to pull the trigger, I hope this review provides that extra little push. It’s OK, go ahead and make the jump! You can tell your spouse that it was my fault. Please consider using our Amazon link. It won’t cost you a penny more, and it would definitively help support this site.
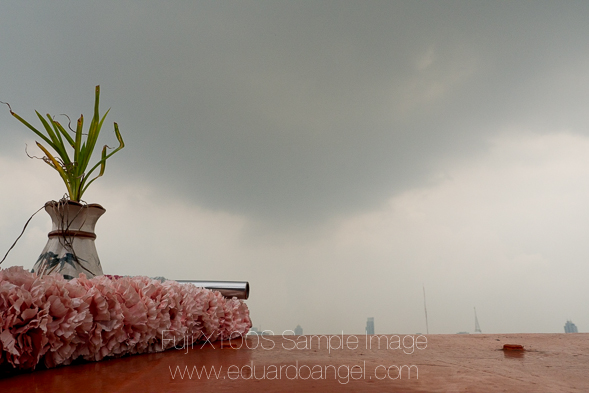
Feel free to leave your comments at the bottom of this page. Also, be sure to join me on Twitter and Facebook, and subscribe to our complementary Monthly Newsletter and our RSS feed.
Video
DSLR Video Shooter Interview; Panasonic GH3, Post NAB gadgets, backup solutions and more.
Update 20130706: Amazon just posted a crazy deal: $1,049 for the GH3. Not sure how long it will last but if you have been considering this camera, go grab it now!
Recently, we sat down for an interview with our friend Caleb Pike of DSLR Video Shooter, a blog dedicated to videographers and cinematographers that use HDSLR video for quality storytelling. It was great to chat about NAB 2013, upcoming events, gear he have been using or testing like the Panasonic Lumix GH3, and share other useful digital workflow solutions. (more…)
Video
10 (new) Cool Gadgets for Photographers and Filmmakers. Part 2
6• Convergent Design Odyssey 7.
Two super interesting monitor/recorders are the Odyssey7 and Odyssey7Q by Convergent Design. For $1295 and up you get a 7.7” 1280 x 800 OLED external monitor that also doubles as an external recorder capable of receiving 4K RAW data as well as other compressed and uncompressed formats onto two 2.5” SSDs.
Here’s the twist; out-of-the-box, these two products are monitors only, with all the usual settings (waveform, histogram, false color, vectorscope, zebras, and focus assist) but without any recording or playback capabilities. (more…)
Video
10 (new) Cool Gadgets for Photographers and Filmmakers. Part 1
1• Edelkrone SliderPLUS
Edelkrone’s SliderPLUS is a super-compact and very smooth slider that easily fits onto Tenba’s Video Backpack. Unlike other sliders, this one moves with the camera, taking full advantage of rails’ length. With a price tag of $500, this toy is at the top of my shopping list.
2• Redrock Micro’s One Man Crew Parabolic Camera Motion System
This amazing gadget consists of a motorized parabolic track slider that “guides the camera on a precision-curved track at any speed while keeping the subject stationary in frame.” The system includes speed control, automatic in and out stops, and 36” of track for camera systems under 20lbs. All for $1,500. If you are part of a small crew doing a lot of corporate interviews or a single photographer creating educational content or product demos, this is an extremely attractive option.
Video
Post-NAB 2013 wrap-up.
Our Digital Technology Resource is a monthly conversation about news, trends, and events for photographers and filmmakers. On our upcoming issue we highlight the most relevant products and trends we witnessed at NAB, including:
• Edelkrone SliderPLUS
• Redrock Micro One Man Crew
• Blackmagic Pocket and 4K Production Cameras
• Atomos Ninja 2
• Convergent Design Odyssey 7
• Tascam DR-60D and Samson Zoom H6
• G-Tech Evolution Series.
• Adobe Lightroom 5 and Premiere Pro “6.5”
• Imagine Products ShotPut Pro
It is never too late to sign up. Do it now!
Did you miss a previous issue? Don’t worry, be happy. Here are the links:
January 2013 Issue
February 2013 Issue
March 2013 Issue
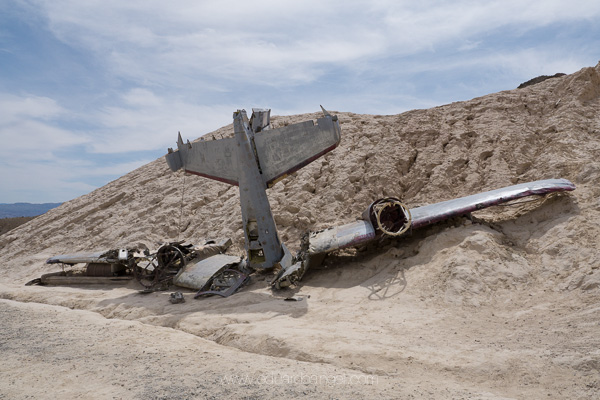
Video
Shooting with the Panasonic Lumix DMC-GH3. Field report and impressions.
The friendly waiter at the Turkish restaurant in Sohar, Oman, saw the camera on the table and asked “Nikon? Canon? Which one is better?” To which I replied, “actually, this is the Panasonic GH3.” He stared at me, his expression turned from excited to perplexed to confused to annoyed within seconds. After an uncomfortable silence he finally asked, “Are you ready to order?”
That was pretty much my reaction when, a few weeks ago, just two days before I started teaching a “Digital Cinema for Photographers” event in Dubai, I found out that Panasonic, a major sponsor of the event, REALLY wanted me and my students to use a couple of GH3s and several lenses in my hands-on workshop.
Panasonic is one of the largest consumer electronics companies, and the GH3 is the third generation of their very successful Micro Fourth Thirds DSLM (Digital Single Lens Mirrorless) system. For a while I have been aware of the low-budget-filmmaking community’s devotion to the hacked DMC-GH2 and its ALL-I codec. I saw the DMC-GH3 at Photokina last year, but I had never before shot a single frame with a Panasonic camera. The bodies that I was given were running Firmware v0.5. Add to this a nine-hour time zone difference and jet lag, and you can begin to imagine my pain.
While I’ll be using some geeky terms, this is not an in-depth technical review, nor a scientific analysis of the GH3. You can dig into tech specs and MTF charts somewhere else. My goal is simply to share my honest and independent impressions, go over the things I liked and didn’t like, and communicate my wish list for future features. I want to emphasize that all the conclusions in this article are subjective and strictly based on my own personal experience.
“I have to warn you, I’ve heard relationships based on intense experiences never work.”
-Keanu Reeves in “Speed”
I have to respectfully disagree with Keanu on this one. Much to my surprise, the camera was much more intuitive than Sony’s NEX system, and several video features got my full attention right away.
FEATURES
• Full HD 1920×1080 60p/50p (NTSC/PAL) with 30p/25p/24p options.
• Ultra-high bit rate video recorded at 72 Mbps (ALL-I) or 50 Mbps (IPB).
• Capable of recording continuously for an unlimited time for NTSC and 29 min 59 sec for PAL.
• Native support for MOV (h.264), MP4, and AVCHD formats.
• Time Code support in the MOV and AVCHD formats.
• Extremely fast and accurate contrast-detection Autofocus.
• A 3.5mm mic input AND a headphone jack AND the option to manually adjust the sound recording levels via touchscreen controls.
• Full-time AF, AF Tracking, and Face Recognition AF are available for VIDEO. The Touch AF mimics rack focusing.
THE WORKSHOP STORY
Not having enough time to field test the Panasonic systems before the Workshop, I shot dummy clips in my hotel room and made sure that the footage would work in Adobe Premiere Pro CS6. The test went surprisingly smoothly. I then set both GH3 cameras to the same video settings: MOV at 1920×1080, 24p, 72 Mbps ALL-I, Standard Photo Style, White Balance at 5500K, got ND filters for all the lenses, extra batteries, and a few Class 10 SD cards. And then I prayed.
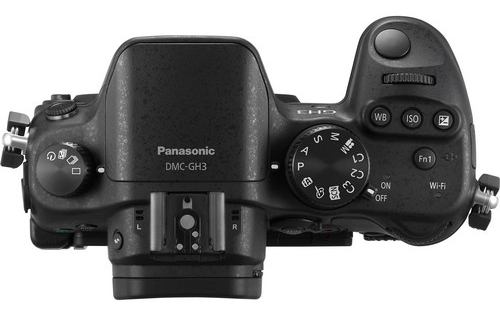
You must use a Class 10 SDHC card when recording Ultra-high bit rate video at 72 Mbps (ALL-I).
Note: It’s extremely important to point out that full HD on this camera requires memory cards with the fastest speed available. My “older” memory cards didn’t work, giving me only four seconds of recording time.
VIDEO
We spent the first day of my three-day Digital Cinema Workshop covering all the technical similarities and differences between stills and video. On the second day, we planned a location shoot with a Capoeira team and spent a couple hours shooting in the afternoon. On the third and last day we covered the different hardware and software requirements for post production and spent three hours editing the footage. I am especially proud of the short clip my students put together in such a limited amount of time and with newly acquired knowledge (and using brand new gear!).
Capoeira in Dubai. Student Project. from Eduardo Angel on Vimeo.
We could obviously use a few more days sweetening the audio, fine tuning transitions, and grading, but for a two-hour shoot and a three-hour edit, I believe this is a good example of what can be accomplished with great teamwork, interesting subjects, and the GH3’s many customizable options.
SAMPLE CLIPS
Below you will see a few additional sample clips, all shot as H.264, 1920 x 1080, 23.976 72Mbps ALL-I, using the GH3’s “Standard” profile (Contrats = 0, Sharpness = 0, Saturation = 0, Noise Reduction = 0). The Exposure and White Balance were set manually. The lens was the Lumix GX Vario 12-35mm F2.8 set on AF Tracking mode, which worked very well most of the time. Despite the lens having “environmental sealing,” as you can see the fine desert’s sand inevitably found its way to the sensor. I put the clips together on Adobe Premiere Pro CS6, and have NOT done any grading nor sharpening. These short clips are intended to show you what the GH3 is capable of, not to tell a specific story.
SOMETHING INTERESTING
So, mission accomplished, right? Not so fast. A couple of days later, as I was wrapping up my day, a friend asked “Are you busy? I wanna show you something interesting.” With only the GH3, the 12-35mm 2.8 lens, a 4GB card and a low battery I jumped into his car. The “something interesting” happened to be access to the Royal Suite at the 7-star Hotel Burj Al Arab—a notoriously difficult area to access. With limited amount of storage space and battery life I managed to capture a few keepers.

The 7-star Burj Al Arab hotel resembles a giant sail rising over the Gulf, with changing colors visible for miles at night.

The very next morning (on my “day off”), I headed out to meet an old friend for brunch at the Atlantis. Should you ever find yourself in this neck of the woods, I strongly recommend that you pay the Atlantis a visit. As we enjoyed the seemingly endless food, my friend received a call to drive to Abu Dhabi right away to pick someone up and then drive back to Dubai. Would I like to come? Guess what I had hanging on my shoulder? This time I had a full battery and a 16GB card, but nothing else to shoot the magnificent mosque and the impossibly opulent Emirates Palace. Once again, the GH3 did a fantastic job.
A nice view from a 25th floor overlooking the magnificent Emirates Palace in Abu Dhabi.
MORE FEATURES
These are some of the GH3’s features that are not obvious to the naked eye, but are interesting once you are aware of them:
• A magnesium alloy camera body that Panasonic describes as “splash proof and dust proof.”
• The Panasonic RAW files (RW2) work fine in Adobe Lightroom [add link to LR workshop] but the most current version (4.3 as of this writing) is needed. Unfortunately there are no Panasonic lens profiles available as of this writing.
• All the video formats worked seamlessly on Adobe Premiere Pro CS6. Even the video recorded at 72 Mbps was easy to preview and edit on a two-year old MacBook Pro (with 8GB of RAM and an external 7200 RPM Hard Drive as a Scratch Disk).
• HDMI monitor output can be sent with or without information overlays.
• I had a DMW-MS2 Stereo Shotgun Mic with me, but was happy to learn that the camera’s built-in internal microphones provide stereo audio.
• The GH3’s sensor has a 4:3 aspect ratio.
• Built-in Time Lapse, and HDR but unfortunately it works only for JPGs not RAW.
• Five physical function buttons, and two touch-screen function buttons, all customizable with close to 40 options to choose from.
• Virtually all the key shooting controls are within the right hand’s reach. This frees up the left hand to hold the camera or focus manually.
• Excellent battery life, lasting a full day under normal operation. For extended video sessions I’d consider getting the DMW-BGGH3 Battery Grip.
• Apparently (I have not tested this) the GH3 is also capable of real-time image output to the LVF or the rear monitor AND to an external monitor via HDMI.
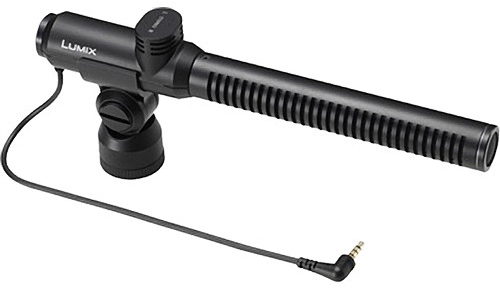
DMW-MS2 Stereo Shotgun Mic
LENSES
I shot extensively (more than 2,000 images in 18 days) with the Lumix GX Vario 12-35mm F2.8. The lens is tiny. And fast. And awesome. It has the equivalent focal length to a 24-70mm F2.8 on a 35mm system but it is a fraction of the size and weight. As you already know, this is a very good start when dealing with packing issues.
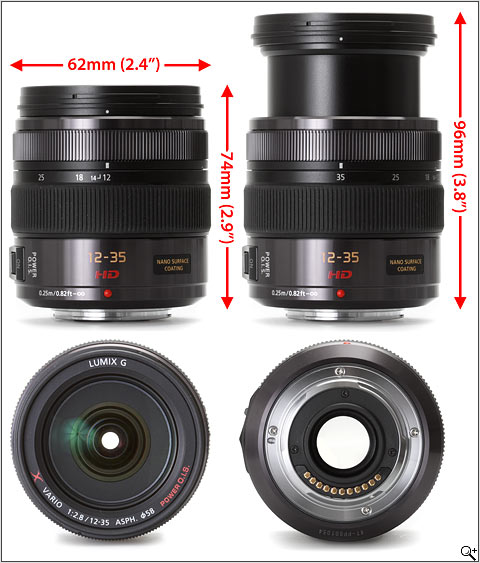
Lumix GX Vario 12-35mm F2.8
In terms of depth of field, the lens behaves like a 16-45mm F3.5 lens on an APS-C sensor, or a 24-70mm F5.6 lens on a Full Frame sensor. It is hard to get used to this, especially when shooting another system simultaneously, but it is not a disadvantage per se.
Click to keep reading (more…)
Video
Traveling with photography and video equipment. Technical and Practical Tips.
These are some travel tips I’ve learned over 20 years of traveling with photo equipment. Most of the recommendations below will be most helpful for photographers shooting video.
• Format all your memory cards on the specific system you are planning to use them with (7D vs. 60D vs. H4N).
• Change and charge all your batteries before leaving.
• Test all your devices.
• Test that the software on your laptop is working. Trying to update the OS, an Adobe application, or plugins from an airport lounge or hotel’s WiFi is NOT fun.
• Match memory cards. The 7D takes CF cards and the 60D takes SD cards. Use the same capacity (32GB cards or 16GB) for each system at the same time. It will make your asset management on location much easier.
• Bring enough additional storage. Photographers tend to underestimate the size of video files. I can easily shoot more than 100GB in a day. And you will need a backup. Twelve minutes of video take approximately 4GB of space. With two cameras we then have 8GB. With a backup we now have 16GB for the same 12 minutes of footage.
• I recommend G-Tech hard drives. The G-Technology G-DRIVE Mini 500GB is an excellent product. Make sure your external hard drive is 7200 RPM (as opposed to 5400). It will make editing video much faster.
• Buy only hard drives with multiple Interfaces (USB 2.0, FireWire 400, FireWire 800). When (not if) your one and only USB port breaks, you won’t be able to retrieve your information.
• Bring a backup of all the essential items. My list includes: reading glasses, camera, lenses, memory cards, hard drives, chargers, card readers, all cables, and quick release plates.
• Use TSA-approved locks. I preferred padlocks and use the same combination on all of them.
• Simplify. I purchased my specific Android tablet because it matched the power adapter for my phone. And both can be charged via USB using the card reader cable, which is the same as Canon’s camera cable!
• Simplify some more. Bring a multi-card reader. I can simultaneously download the 7D’s CF Card and the 60D’s SD Card using the same reader and the H4N’s SD card using the laptop’s built-in SD card slot.
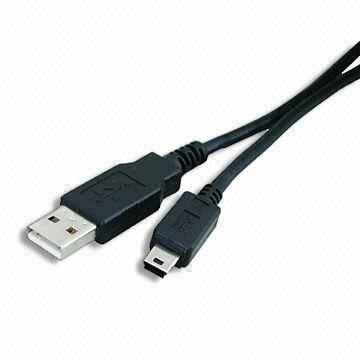
One tiny cable works for six of my devices: tablet, cell phone, 2 cameras, and 2 card readers.
• Simply even more: One of the reasons why I purchased the 60D as my B camera is because it uses the same batteries/charger as my 7D. I also liked the fact that it uses DIFFERENT memory cards, so it is much easier to keep track what was shot with what.
• Before you leave, check the electrical plug/outlet and voltage information at your destination. Oman and the United Arab Emirates seem to use three kinds.
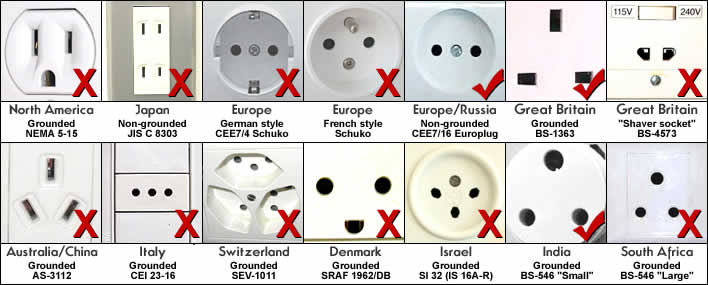
• Test your workflow. It goes without saying, but never bring new equipment to a shoot, especially overseas. Make sure your files work well with your software and that your cards work well with your cameras.
• If you are capturing Full HD video (1080p) you shouldn’t be using older/slower memory cards, otherwise you might experience dropouts and stuttering. Been there, done that. Not a good day.
• Don’t forget your business cards! The more the better.
If you’re nervous about upgrading gear or making the leap to HDSLR cinema we can help. Book a virtual one-on-one consulting session today!
Video
Blogging With Video, Hoping to Go Viral. Really?
Ay ay ay! I might have more than a few issues with this New York Times article “Blogging With Video, Hoping to Go Viral.”
“You want to have a decent camera. A hand-held video camera is nice and offers more features and flexibility, but your smartphone is fine… The only additional equipment you might consider is a separate lavaliere or lapel microphone. And if there isn’t enough ambient light to illuminate your face, spring for a clamp lamp that you can find at most hardware stores… “
Here’s the complete article.
Is “good enough,” good enough? What’s your take?
Video
Our 10 hidden gems of 2012.
Earlier this week we shared with you our “Crème de la Crème” of 2012, the 10 most visited articles on this site. Today, we would like to share 10 more articles that we feel should have made our top ten list. As a team of educators, technology consultants, and visual storytellers, we are very proud of these posts as we feel that they are extremely relevant and worth your time. We encourage you to read them, share them with those who might be interested, and respond by starting a conversation below.
Without further ado here they are:
1) How to fix a broken education system. My thoughts.
We believe young students should be learning flexibility, teamwork, accounting, time management, project management, and languages (especially Spanish and Chinese), to be prepared for the future job markets.
Fixing a broken education system.

2) Notes from the Field.
Check out my personal notes and pre-production techniques for photographers and filmmakers.

3) Same, but different: An Intro to Digital Cinema.
We explained the 5 main similarities, and 5 main differences between shooting stills and shooting motion.

Click here to keep reading (more…)
Video
The Crème de la Crème: The best articles of 2012.
Wow! What a year! We completed 200 Consulting projects, over 30 Photography and Video Workshops, 50 videos, 50 tutorials and close to 200 blogs posts….all in one year.
How was this even possible? One, this is a team effort, where everybody does what they love and excel at. Second, great time and project management, which is paramount in an industry that keeps changing (and sometime evolving) every single day.
We want to sincerely thank our subscribers (if you are not one, it is not too late. Join here) and followers for all of their continued support and feedback.
Today we would like to highlight our 10 most popular articles of the year. Later this week we will publish the 10 articles that for whatever reason didn’t get much attention but we feel are very relevant and worth your time.
Here we go!
1) Upgrading to Adobe Lightroom 4 in 7 simple steps.
No matter what previous version of Adobe Lightroom you use, it is very easy to install and upgrade to the latest Lightroom 4 platform. Find out how easy this is below.

2) Canon EOS M Hands-on Review and Canon EOS M Images.
After several tests, we discussed the best and not so great features of Canon’s EOS M. Also, we shot some sample images with this mirrorless gem.
Canon EOS M Review & Canon EOS M Images

3) Canon EOS Mark III, 5D3, 5D Mk III has arrived!
An in-depth technical analysis on the latest, newest, meanest Canon EOS system. Our overview included the most important and newest features.

(more…)
Photography
Inkonomics.
Think a $5 gallon of gas is crazy? Drivers in Norway are currently paying $9 a gallon, and Germans pay just over $8.
That’s cheap compared with gold, which right now is at $1,700 per ounce.
Think gold is expensive? Consider this: If cars ran on printers’ ink instead of gasoline, each trip to the gas station would cost $100,000. According to PetaPixel, to fill an Olympic-sized swimming pool with ink would cost billions of dollars.
My tiny office printer uses HP21 black ink cartridges. The best deal (often on Amazon) goes for $12. Each cartridge is 1.4 ounces. Now, if you can remember your high school conversions, 1 US gal = 128 US oz. That means at $12 per cartridge, a gallon of the cheapest ink in our office costs about $1,536 per gallon, and the cheapest color cartridge is about $3,364 per gallon. Yikes!


From PetaPixel.
What about my fancy photo printer? A long time ago I learned a valuable lesson: the cheaper the printer, the more expensive the inks. I have also learned that over time, the market leaders tend to be more stable in their pricing of consumables, because they are better equipped to react during rough economic times.
Keep this in mind during the holiday season when you see some “impossibly good printer deals.”

Video
Cloud Storage Solutions and Adobe Lightroom.
In the past couple of weeks, we have done several One-on-One Consulting sessions where the “Cloud Storage” question came up. This is a very quick overview of the most popular online storage options with pricing and direct links to each.
My own situation:
• My Lightroom Catalog has 70,000 RAW Images. I shoot a lot, but I am merciless editing.
• The entire catalog (NOT the RAW files) takes about 26GB of space.
• The RAW files take about 860GB of space.
This means I need about 900GB of storage space if I wanted to move my Lightroom Catalog, including all RAW files, to the Cloud.
 Dropbox customers are provided with 2 GB for free.
100 GB
Monthly $9.99
Yearly $99.00
200 GB
Monthly $19.99
Yearly $199.00
500 GB
Monthly $49.99
Yearly $499.00
IMPORTANT: If you don’t have a Dropbox account, use this link to get started. You get 2GB for free, and we both get an additional 500MB as a bonus. Hurry up!
Click to keep reading (more…)
Video
How NOT to announce new products. Google Nexus.
UPDATE: 20121123 Google’s Nexus 4 Smartphone and Nexus 10 Tablet sold out 20 minutes after the Google Play store opened. http://ow.ly/fg1mo
By now it is pretty clear that we love Google (most of the time). But the company can learn a thing or two from Apple, especially when it comes to important product announcements. On Monday, while Hurricane Sandy was hitting the East Coast ,and 7.5 million people in 16 states have lost power, Apple announced that the company’s senior vice president of iOS was getting fired for (apparently) refusing to apologize publicly for the Apple Maps mess. The timing was impeccable, since nobody noticed nor cared. Well, at the very same time, Google was announcing three new Nexus devices; a smartphone, a 7-inch tablet, and a 10-inch tablet. Guess what happened? Nobody noticed nor cared. They sold out.
All three devices run Android 4.2, which Google describes as “a new flavor of Jelly Bean.” The Nexus 4 is Google’s latest 4.7-inch, quad-core Nexus smartphone, developed with LG, and priced well below analysts expectations. It will be available for $299 (8GB) and $349 (16GB) for unlocked, contract-free units. However, the best deal seems to be the 16GB unit on T-Mobile for $199. We can’t really predict how sales will perform, but what is certain is that the Nexus 4 will make a strong impact on the smartphone market.
Based on the promo video, it seems that Google is focusing the tablets on education. We have written extensively about technology and education here, here, and here.
Although we are more excited with Samsung’s Galaxy Camera, one of our favorite features of the new Nexus smartphone is Photo Sphere, a camera app/Google Maps hybrid that allows users to create and share 360-degree panoramas.
Click to keep reading (more…)
Video
The Dawn of the Innovated Dead.
Photokina started a few hours ago, and Sony is banging its drums. And loud!
Kazuo Hirai, the brand new CEO (since April), seems to finally come to the realization that in order to compete with Canon and Nikon in the HDSLR arena the company needs to provide products that photographers and filmmakers need, and understand.
The most impressive announcement is the Cyber-shot RX1, which is basically a point-and-shoot with a full-frame sensor.

 • The Specs:
35mm full-frame 24.3MP Exmor CMOS sensor, ISO 100-25600, 14-bit RAW image capture, f/2.0 Carl Zeiss Sonnar T lens with 9 aperture blades, P/A/S/M modes, Full HD 24p/60i/60p video with manual control. Check all the features here.
• The Good:
1080p video recording at 60fps or 24fps.
Manual exposure controls for both stills and video.
RAW shooting.
Automated modes for HDR photography.
• The Bad:
35mm fixed lens, even if it is an F2.0.
For $2,800 it is pretty hard to consider this camera over a full-featured HDSLR. If you are still interested, Amazon is taking pre orders now.
Video
2012: A Communique of technology trends.
Recently, we have been thinking about the most popular technology trends seen worldwide. Here is our top-ten list of tech trends we have witnessed in the last year in no particular order:
1. Tablets and Touch-Screen Mania
Android Tablets and iPads are dominating 2012. People are now using these devices more than laptops and desktop computers in some cases. Are they making our lives easier? Yes and no. But, we think that this is the future for all computing. Just as CD’s replaced records and cassette tapes, we believe that eventually, touch computing will replace desktop and laptop computers altogether!
There are already a lot of signs that convince us of this already. For instance, Mac OS X Lion and Windows 8, the latest desktop operating systems borrow a lot from Android Tablets and the iPad, their mobile counterparts. These new operating systems essentially introduce a touchscreen-inspired interface. Most new cars are now even integrating touch screens to operate multiple functions in a vehicle.

Over time, mice will be obsolete, and mobile/touch operating systems will dominate.
2. Automatic Social Actions
People now expect to be able to share media effortlessly on their computers, smart phones, and tablets. This is now being innovated in 2012, not only through cloud computing, but through social media. Social gestures appear to be one of the leading trends of 2012. For those of you who may not know what I am referring to, you may recognize this on your Facebook news feed, with apps such as Spotify. Social gestures, or the “frictionless sharing” functionality, replaces the need to click a button to share media with your friends. Instead, applications are installed and allowed to share the media you listen to, watch, or read automatically with your social networks. Most apps are even allowed to share your location on a map automatically. Scary? Yes, Indeed.
If sharing becomes fully automatic, the volume of content on social networks will grow at an exponential rate. Our guess is that people will become more suspicious and conscious of the apps they use on social networking sites.
3. Cloud Computing
The technologies we use are increasingly cloud-based and delivered over many different networks. Photos, Videos, documents and other rich media are rapidly uploaded to different cloud-based storage such as Google Drive and Dropbox. Eventually, we believe that all cloud-based computing will have infinite capacity and be nearly free of charge.