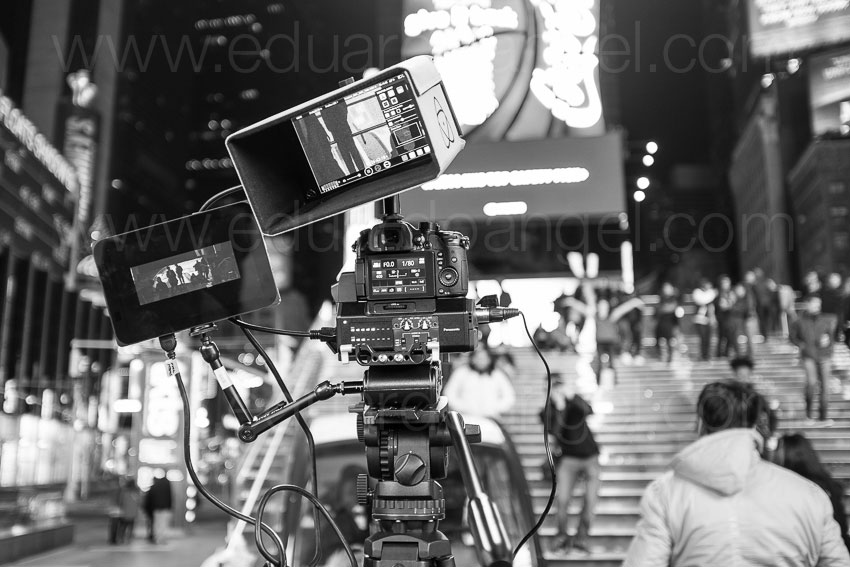
Video
NAB 2019 Handouts
As I mentioned on a previous article, I’ll be presenting several workshops at the upcoming NAB Show in Las Vegas.
The handouts for the main three sessions are out of the oven, and we are making them available for free to anyone interested.

We also added two new onlines courses, and updated our two most popular courses:
- Filmmaking Essentials for Photographers (here’s the online course, and here’s the book)
- The 41 Essential Items for Hybrid Productions


There are several mini tutorials (under 90 seconds in length), and ALL are available for free.


Take a look, I’m sure there’s something that will fulfill your needs.
Video
Cool Podcast Interview.
Street photographer Valérie Jardin has a Podcast called “Hit The Streets.”
We had a really nice conversation about the skills necessary to go from still to motion, and why photographers should add filmmaking skills to their arsenal. The conversation is now available as the latest episode of “Hit The Streets.”
Video

Understanding Steven Soderbergh. Part 2.
On my previous post I wrote about Steven Soderbergh’s professional life. The goal was to give some context on why I consider him a leading force in the future of filmmaking, regardless the quality or financial success of his most recent movies.
I started paying close attention to how Steven Soderbergh works around 2014 when he released the Cinemax show The Knick.

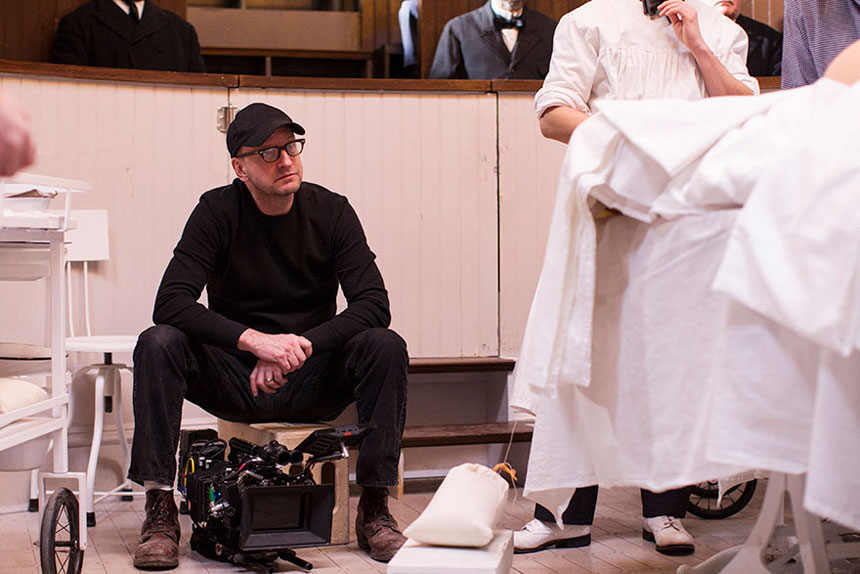
On this post (and the next one) I’ll share everything I know on Soderbergh’s production schedule, using the iPhone to shoot Unsane and High Flying Bird, his approach to scriptwriting, and why he prefers working with skeleton crews.
The huge advantages of small crews.
Let’s start with that last part. By now you know I prefer to shoot with the smallest possible crew and the least amount of gear. So much so that I recently started a new website called the 1 Person Crew. There I shared why Robert Rodriguez is also one of my heroes. But here’s Steven Soderbergh’s take on the advantages of working lean and mean:
“One of my favorite shooting days on High Flying Bird was when we did the opening scene at The Standard hotel. We took a break, and then we started walking downtown New York with a crew of four or five people, and André. I’m walking and I’ll go, “Okay, stop, we’ll put the camera here.” Shoot that, walk, walk, walk, okay, we’re stopping here. It was really fun. It took us two hours to walk and shoot our way down to the World Trade Center.”
Steven Soderbergh
Steven Soderbergh’s iPhone
“‘I don’t want to wait on the tool, the tool should wait on me.”
Steven Soderbergh quoting Orson Welles.
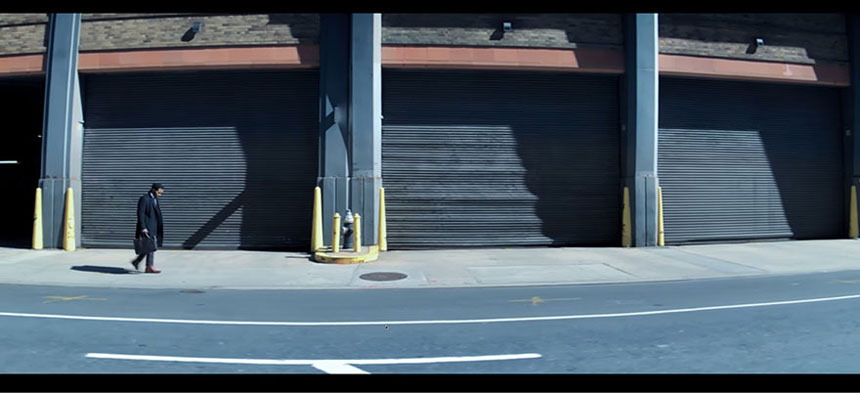
High Flying Bird and Soderbergh’s previous movie Unsane were shot on an Apple iPhone. It’s all about size, and the ability to get the shot he wants in tight quarters. In Unsane when space got particularly tight, Soderbergh would just tape the iPhone to the wall to get the frame he wanted.
The visuals are harsh and uncompromising, but Soderbergh sees that as part of the appeal. Unsane is a great worst-nightmare movie, a tense piece of low-budget auteurship that plops the viewer into an absurd scenario and then ratchets up the tension for the next 90 minutes.”
The Atlantic
For “High Flying Bird” Soderbergh originally wanted to shoot anamorphic, and have a much cleaner, slicker look. But the challenge was gaining access to real-life locations that embodied an affluent world. For a small, nimble production, the advantages of the iPhone outweighed the image fidelity of an ARRI or RED cameras that cost a hundred times more.
“The iPhone seemed to me a pretty natural fit for that approach. It still is, in my mind, in terms of the scale of it, the speed that was necessary to execute it, in the time we had allotted.”
Steven Soderbergh
On High Flying Bird there’s a shot where three actors are walking down an office corridor. As all three break in different directions the camera follows one actor into an office, and then retreats.

A 350-pounds dolly? Screw that! Instead, Soderbergh sat in a wheelchair, holding the iPhone on this tiny Gimbal mimicking a mini crane movement.
“Using a more traditional approach with normal-size cameras would have been extremely difficult, if not impossible. To get the lens where I wanted, to be moving in certain way or have the camera reach multiple destinations without either somebody getting hurt, or the shot being compromised because of the size of the equipment. A normal size dolly, weighs 350 pounds. Moving quickly can be dangerous and somebody could get hurt. And we could have been there for hours.”
Steven Soderbergh
“I get very frustrated when it takes a long time to execute it. Like, as soon as I feel it, I want to shoot it. And so, that’s one of the biggest benefits of this method — the time from the idea to seeing an iteration of it is incredibly short, like, a minute, like, maybe less. For me, the energy that that creates on set, and I think on screen, is huge.”
Steven Soderbergh
Soderbergh’s lighting package (shooting with the iPhone or proper cinema cameras) has been stripped down to a 12-inch by 12-inch LED panel (like this) in recent years. The look can be more evocative of a filmmaking student than an Oscar-winning director with 30 features under his belt. But this is as much an aesthetic as a practical decision, especially since 2000 when Soderbergh took over the cinematographer’s role on his films.
From Script to Screen.
The Knick’s original script called for 10 episodes. Instead of working on complete episodes one at a time Soderbergh turned the script into a “10-hour movie” shooting the first season in 73 days. In other words, Soderbergh shoot eight to nine script pages a day, double the typical rate for a TV drama. This wasn’t a new approach for him. Back in 2003 each episode for K Street was plotted, scripted, shot, cut, and broadcast in five days. Same exact story for the 2017 Netflix series Godless.
“The original script for Godless was 175 pages. Instead of chopping one of its limbs off, we thought “why don’t we turn this into a series?” So we approached Netflix with the idea and they said “Go. You’re starting tomorrow. Netflix ability to move that quickly and that definitively is their biggest advantage.”
Steven Soderbergh
On my next post I’ll share the gear, schedule and workflow Soderbergh used the the Cinemax series The Knick, and why I believe his production approach will be the way how many TV shows and features will be produced from now on.
Video
Understanding Steven Soderbergh. Part 1.
Today I’d like to share a bit about Steven Soderbergh’s professional life, and why have I’ve been following him for years. On two upcoming posts I’ll share everything I know about his working methods, including his shooting schedule and preferred workflow and gear. Cool? Let’s go!
Thirty years ago Steven Soderbergh became the pioneer of independent cinema with his first movie Sex, Lies and Videotape. Today he leads the future of filmmaking and might be even shaping the future of the NBA.

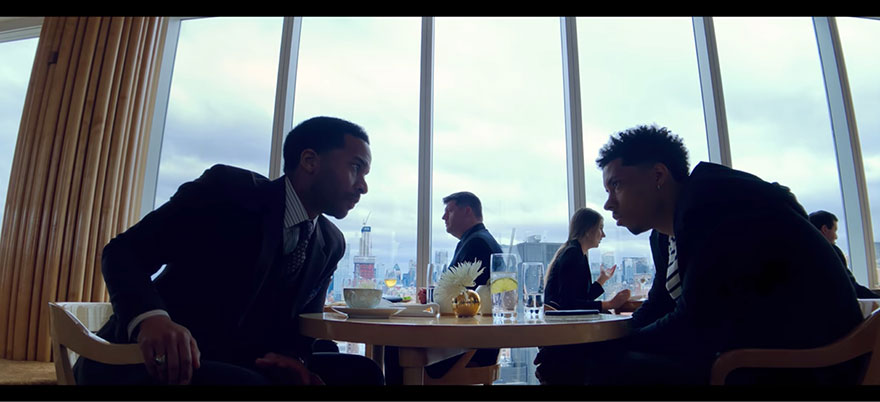
Last week, Steven Soderbergh’s latest film “High Flying Bird” launched globally on Netflix. I waited for weeks to watch it and… let’s say it wasn’t exactly what I was expecting.
To be fair, I don’t follow professional sports, and the film is about an NBA agent and a rising basketball star who try to change the business of professional basketball. With only 72 hours to pull off a daring plan, they try to outmaneuver the other players with a strategy that could change the game forever. The outcome raises questions of who owns , and who should own, the game.
Interestingly, the characters in “High Flying Bird” imagine what could happen if pro players took their careers into their own hands using the power of the internet. Well, that is EXACTLY what Steven Soderbergh has been doing with the Hollywood studio system for a very long time.
For example, back in 2005 (before anyone thought is was possible) Soderbergh released Bubble simultaneously in theaters and as a home release. In 2009 he tried the same approach with The Girlfriend Experience with adult film star Sasha Grey.
In 2017 with Logan Lucky, Soderbergh
“crafted a project that bypassed traditional Hollywood production and marketing formulas, targeted his advertising to find the right audience, edited trailers himself, and ignored the usual branding paradigms.”
The Atlantic
Who is Steven Soderbergh?
He is the guy who once directed Out of Sight, The Limey, Erin Brockovich, Traffic, and Ocean’s Eleven, all within a three-year period.
Many people forget (or don’t know) that in 2000, Soderbergh received two Oscar nominations for Best Picture, and won Best Director for Traffic.

As of right this second, Soderbergh has 42 credits as director, 49 as producer, 28 as cinematographer and 23 as editor. He has 28 features and over 30 hours of TV series. His directorial work alone have grossed over US$2.2 billion worldwide.
“Soderbergh has worked in every genre and at all levels of the studio system. He directed glossy franchise entertainment (Ocean’s Eleven), Oscar-winning successes (Traffic and Erin Brockovich), hard-boiled noirs (Out of Sight and The Limey), and low-budget experiments (Full Frontal, Schizopolis, and The Girlfriend Experience).”
The Atlantic
In other words, Steven Soderbergh is not a human from planet earth.
Steven Soderbergh’s Oscars Acceptance Speech.
“There are a lot of people to thank. Rather than thank some of them publicly, I think I’ll thank all of them privately. What I want to say is — I want to thank anyone who spends part of their day creating. I don’t care if it’s a book, a film, a painting, a dance, a piece of theater, a piece of music… Anybody who spends part of their day sharing their experience with us. I think this world would be unlivable without art, and I thank you. That includes the Academy. That includes my fellow nominees here tonight. Thank you for inspiring me. Thank you for this.”
Steven Soderbergh
That’s a powerful message. So powerful that the Academy Awards recently held it as “the ideal of an Oscar speech” probably because it is short and to the point.
The real-life story behind the speech is fascinating:
“I had nothing prepared because I knew I wasn’t going to win. I figured Ridley Scott, Ang Lee, or Stephen Daldry would win. So I was hitting the bar pretty hard, having a great night, feeling super relaxed because I didn’t have to get up there.”
Steven Soderbergh
So the combination of lots of alcohol and lack of preparation worked well that night. Going back to Soderbergh’s professional life,
On Marketing Logan Lucky.
“Logan Lucky was released on August because historically, it has been a good time to release something of quality. There’s typically a dead zone before Labor Day. The big summer movies have played out, and there are three weeks with some breathing room. You just need a lot of marketing money, more than we had. I was aware it might not work. I learned a lot, and it was absolutely a worthwhile thing to do, to try and create an avenue for projects that don’t fall in any of these tiers or to want to have creative control over everything, with more financial transparency.”
Steven Soderbergh
On my next two post the plan is to share everything I know on Soderbergh’s production schedule, his approach to scriptwriting, and why he prefers working with skeleton crews.
Video
The Sound of Roma.
I started thinking about a “Roma” blog post a few minutes into the movie.
Why Black and White? What do those almost endless pans mean? How similar or different is the composition compared to “Gravity“? What’s the meaning of “water” for Cuaron?

But as I started reading more about the movie, which by the way was written, directed, produced, shot, and co-edited by Alfonso Cuarón, my attention quickly drifted to the film’s sound design.
First things first.
I am assuming you know about Roma. If you don’t, here’s the executive version. Roma is a semi-autobiographical take on Cuarón’s childhood in Mexico City in the early 70’s.
So far Roma has won the Golden Lion in Venice, received 10 nominations at the 91st Academy Awards—including Best Picture, Best Foreign Language Film, Best Director, Best Actress and Best Supporting Actress. It is tied with The Favourite as the most-nominated film, and with Crouching Tiger, Hidden Dragon (2000) for the most Oscar nominations ever received by a film not in the English language.
It also won Best Director and Best Foreign Language Film at the 76th Golden Globe Awards, Best Director and Best Picture at the 24th Critics’ Choice Awards, and at the 72nd British Academy Film Awards won Best Film, Best Film Not in the English Language, Best Direction and Best Cinematography.
UPDATE 20190225: Roma delivered Netflix its highest Oscars prestige yet, contending in 10 Academy Award categories, and wining three: Best Director, Foreign Language Film and Best Cinematography. Alfonso Cuaron gave Mexico its first foreign language film Oscar.

Sound Design.
Now, back to sound design. So it happens, the sound supervisor and re-recording mixer was the Academy Award-winning Skip Lievsay, who also worked on “Gravity“, “Children of Men“, “Y Tu Mama Tambien” and all 18 movies by the Cohen Brothers.
The most informative resource was this interview with Skip Lievsay on YouTube. Here are 3 of my favorite sections:
The full interview.
I highly recommend listening to the complete interview to learn:
- How not having a musical score keeps the audience guessing what will happen next
- Why it was important to Cuarón to have the dialog emanate not just from the screen channels but from all around the audience
- The stunning five-day loop group recording session with 350 actors
- How the final mix of the film took 10 weeks, 7 days a week, 12 hours a day.… wow…..
The technical stuff.
Filmmaker Magazine has another great article on Roma’s sound design. It’s a bit technical but enjoyable.
“In Atmos, we were able to use the x-axis and the y-axis as well as the z-axis. That’s the trick — using the z-axis in terms of extra reverbs or spatial ability.”
Filmmaker Magazine
A (much) deeper interpretation.
If you are interested in a more esoteric approach to Roma, pay close attention to these comments by another maestro, Guillermo del Toro.
Get 60 days FREE of the best music for filmmakers.
Get 30 days FREE of the best collaboration software.
Video
More Must-Read Books for Filmmakers.
Yesterday I shared my 20 favorite books on filmmaking and I received numerous emails saying “how come you didn’t include A” or “you can’t leave B out of the list!” So, by popular demand (literally) I’m adding a few more.
Let’s start the list with a non-technical book: “Werner Herzog: A Guide for the Perplexed” by Paul Cronin. I highlighted almost every page. Herzog provides SO much practical wisdom that I have gifted this book to at least 10 people so far, and I’m just getting started.

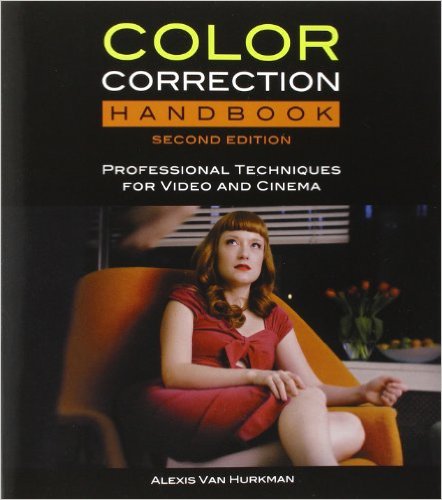
One of my goals this year is to get much better at grading. With current tools like the Lumetri Panel on Adobe Premiere Pro, or Davinci Resolve the excuses are over. The “Color Correction Handbook: Professional Techniques for Video and Cinema” by Alexis Van Hurkman is a dense, sometimes difficult book to follow, but it has all the information you might need to improve your color correction and grading skills. At almost 700 pages, I strongly suggest getting the digital version.
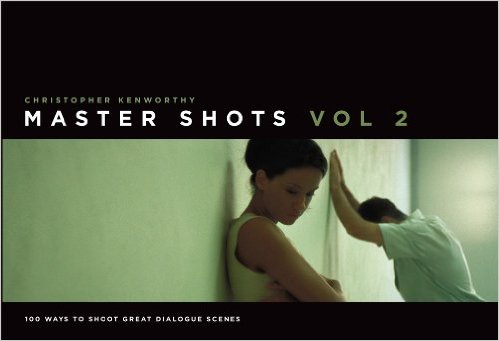
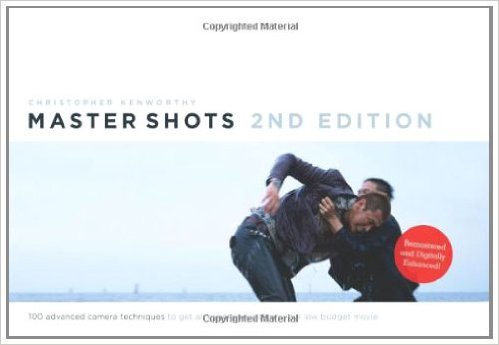
Christopher Kenworthy has authored not only one but TWO books I consider outstanding. I’d start with “100 Ways to Shoot Great Dialogue Scenes” and then get “Master Shots: 100 Advanced Camera Techniques to Get An Expensive Look on your Low Budget Movie.” Both are truly inspiring.
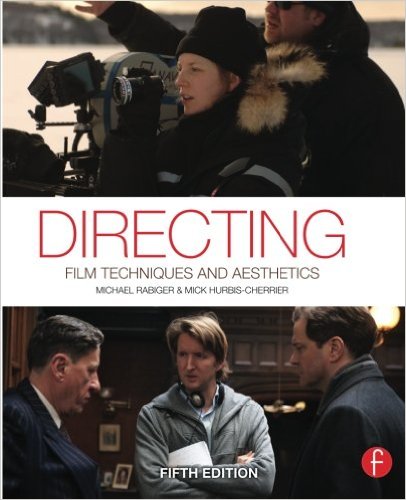
If you are interested in directing, Michael Rabiger’s “Directing: Film Techniques and Aesthetics” is very comprehensive. The book “explores how to discover your artistic identity, develop credible and compelling stories with your cast and crew, and become a storyteller with a distinctive voice and style.” I also like that there’s a companion website with additional teaching notes and practical hands-on projects.
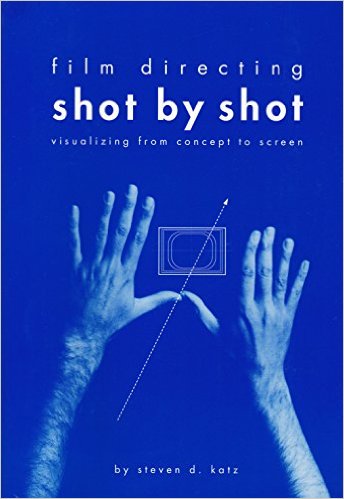
Another good book for aspiring directors is “Shot by Shot: Visualizing from Concept to Screen” by Steven D. Katz. There’s a lot of good info, but the book is somewhat outdated.
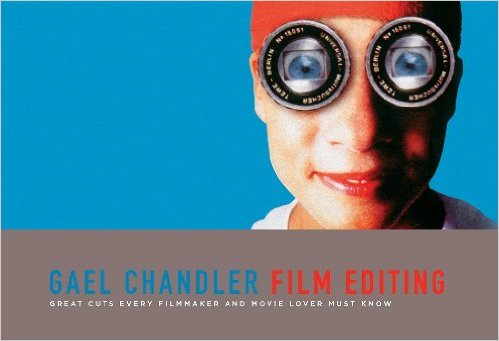
I’m also very interested in editing, not necessarily to do it on every project but to have a better understanding of what my editor will, and will not, need. The more I learn about editing, the more efficient I am as a director of photography. There are three books I’d highly recommend on this topic (in order of preference): “Great Cuts Every Filmmaker and Movie Lover Must Know by Gael Chandler. Spend a few weeks mimicking every cut provided and you’d greatly enhance your understanding of the craft of editing.
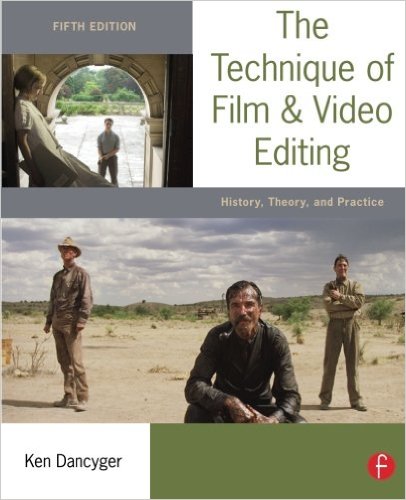
My second pick would be “The Technique of Film and Video Editing: History, Theory, and Practice” by Ken Dancyger. Simply put “this isn’t a quick read but definitely worthwhile if you want to gain an understanding of what it takes to be an excellent director and editor.” Enough said.
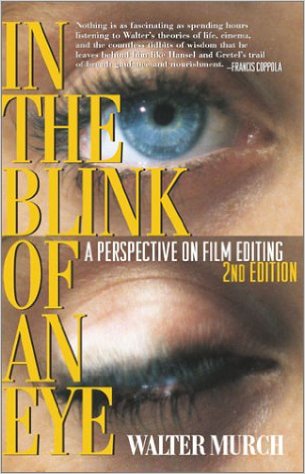
My third pick would be “In the Blink of an Eye: A Perspective on Film Editing” by Walter Murch. This books seems to be on everyone’s favorite list.I always enjoy reading anything Murch, and this book is fun, but in all honesty I didn’t get much practical knowledge from it.
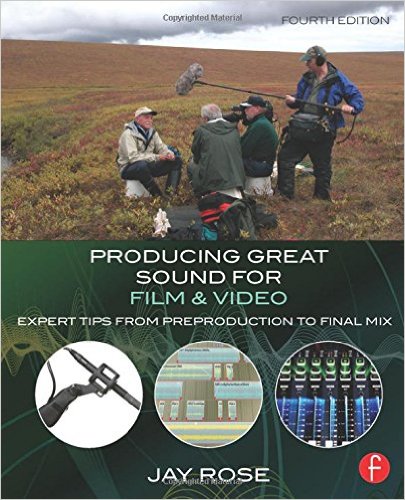
And last, but by no means least, a book about Sound: “Producing Great Sound for Film and Video” by Jay Rose. I just got this one for Christmas, but looking at the index, it promises a LOT of fun and exciting challenges.
What about you? Any favorite books?
Video
Adobe Creative Cloud updated with powerful features.
Adobe has released several powerful updates to the Creative Cloud. The new version is called 2015.3.
The are several interesting and powerful updates, including:
• Import video and audio files in the background, and switch between native and proxy formats freely when using multiple devices. With initial support for Apple Metal and H.264 hardware decoding (Windows Intel Iris only), you get maximum performance.
• Powerful proxy workflows in Premiere Pro CC and Adobe Media Encoder CC while working with 8K, HDR and HFR media even on lightweight machines like laptops.
Note: Adobe is essentially creating a new workflow with lightweight proxies during import. This is HUGE and very, very needed. One of the few disadvantages of systems like the Sony FS5 is the post workflow, especially when working on the road off a laptop (here’s why). The new feature might solve a big challenge for many shooters.
Another important update is support to VR workflows. We are very curious to test (and purchase) cameras like the (on paper) amazing Orah 4i, but have been hesitant to do it because of the post-production nightmares we hear from fellow filmmakers.
The upcoming version of Adobe’s Creative Cloud will feature powerful support for VR Video workflows.
• Editors can import equi-rectangular stitched video media and – with a click of a button in the monitors – enter VR Video mode, which allows you to use pan and tilt controls to preview the experience inside the sphere. Click-drag directly on the video clip and freely pan around so you know what viewers would see when looking in any given direction.
• Easily add a metadata flag to ensure you’ll get the full panoramic experience on supported sites like YouTube and Facebook.
Adobe Media encoder also received VERY needed updates, including video previews.Finally!
Last but not least, important improvements to the Lumetri Panel will make our lives SO much better and easier.
• Enhanced Lumetri Color tools with added HSL Secondaries to expand the editor’s toolkit for making color correction and adjustment easier for all filmmakers.
Similarly a new Essential Sound panel modeled after the Lumetri Color panel in Premiere Pro will provide simple controls to unify volume levels, repair sound, improve clarity, and help your video projects sound like they were mixed by an audio engineer.
And there are several other minor but also welcomed updates, like being able to transcode and upload from Adobe Premiere to Twitter with one click.
 Here’s the list with the key new features and improvements:
Video
Filmmaking Essentials for Photographers. Mini Courses.
Why Filmmaking Essentials?
One of the main challenges photographers face when starting to shoot video is to focus too much on hardware and software, and forget about the most important part: the story. While this informative course includes some technical information, the main goal is to provide an overview of the many aspects of filmmaking, and identify potential business opportunities with motion. Click HERE.
The “Filmmaking Essentials for Photographers” course is based on a popular event we have been presenting for several years, but it has been greatly enhanced with additional visuals and examples. Some of the clients and sponsors for the live event include Adobe, Adorama Pro, B&H Photo, Cinevate, Future Media Concepts, Gulf Photo Plus (Dubai), HOW Design Conference, International Center of Photography, Lynda.com, McCann Erickson, NAB Show, Panasonic, Photo District News, PhotoPlus Expo, Photokina (Germany), Savannah College of Art and Design, School of Visual Arts, Sony, and X-Rite, among others.

Click on the Image to access FREE Tutorials.
Why these Mini Courses?
Sometimes we don’t have time for three-hour lessons; rather, we just need a quick and concrete answer for a very specific question. Because of that, in addition to longer courses we’ve released these mini courses, averaging three-to-five minutes each. Click HERE.
Click on the Image to access FREE Tutorials.
Video
Filmmaking Essentials for Photographers. Online Intro Course.
In 2011 I was invited along with National Geographic photographer David McLain to present a series of two-day workshops nationwide. The events were produced by Photo Quest Adventures and sponsored by PDN, Sony, Adobe, and other leading brands. The main goal was to help photographers transition into video by simplifying key concepts and providing shortcuts, resources, and advice on what gear to buy.
I have been honored to teach “Filmmaking Essentials” at all major industry events, from PhotoPlus to Imaging USA to NAB, from South America all the way to Dubai, Hong Kong, and Thailand, and at home in New York.
Few people know that I never use the same presentation twice. Each and every time I add things I’ve learned, plug in valuable feedback from attendees, students, and this website’s readers, and I strive to improve the educational experience with better examples and shorter explanations.
When looking at the advancements in digital technology since those first workshops it seems like decades have gone by. Today, we have access to a variety of brands and models of very compact cameras that can see in the dark, shoot 4K or higher resolutions, offer incredible frame rates, and even offer GPS and WiFi features so they can be easily controlled by smartphones and tablets. The future is definitively here.
But something quite odd has been happening to my personal and professional focus. The more gadgets we have at our disposal, the more I’ve shifted towards the craft of storytelling. Instead of getting more stuff, I’ve been increasingly interested in constructing and enhancing my stories to better engage the viewer. Naturally, this approach has been reflected in the educational content I produce.
Now, and for the first time, I’m proud to offer an awesome version of my one-hour presentation online. Click HERE.
The “Filmmaking Essentials for Photographers” course is based on a popular event we have been presenting for several years, but it has been greatly enhanced with additional visuals and examples. Some of the clients and sponsors for the live event include Adobe, Adorama Pro, B&H Photo, Cinevate, Future Media Concepts, Gulf Photo Plus (Dubai), HOW Design Conference, International Center of Photography, Lynda.com, McCann Erickson, NAB Show, Panasonic, Photo District News, PhotoPlus Expo, Photokina (Germany), Savannah College of Art and Design, School of Visual Arts, Sony, and X-Rite, among others.
Who is this course for?
Well, as the name implies, this version of “Filmmaking Essentials” covers concepts already mastered by advanced filmmakers or by experienced photographers who are very technically savvy. But I’m confident everyone else could learn a thing or two.
As often as possible we’ll be adding new courses, covering topics like pre-production and post, tips for one-man crews (like journalists) working stills and video assignments, advice on getting started with Color Grading, and many other fascinating subjects. As mentioned above, most of these courses are not and probably won’t be hardware or software driven, but would focus predominantly on answering the why’s, not the how’s, of the fascinating craft of filmmaking.
Also as a first, we are offering several mini-courses (averaging three minutes each and many of them for free) for those who need concrete answers to very specific questions.
So, if this is the kind of content and format you desire, vote with you wallet and let your voice be heard.
Thank you for your continued support. Click HERE to start learning.
Click on the Image to access FREE tutorials.
Video
Creating the habit of backups.
Creating a new habit isn’t easy. We all know that. And I’m not talking about major changes like exercising more, eating better, or working less, but simple things like backing up our projects, especially when working on locations. The “I’ll do it later” or “this is not a good time” will always be there so by incorporating simple and efficient practices into our standard workflows can make things much easier and eventually save a project or even a client.
ShotPutPro, currently on its fifth version is an application known to many in the film industry. What I find interesting is that even some of those who know about the app and totally get its importance skip the critical backup step. This article covers how we use ShotPutPro on location.
First, we label each and every card, not only with a label (which could fall off) but also by giving each card a unique name. Since we are almost always using two cameras, we name a 64GB card as A1 and a second card with the same exact capacity (64GB) as B1. The same goes for A2 and B2, and so on. When we are replacing a card during a shoot, say C1, we also replace C2, even if there’s space left. This might seem wasteful but it keeps the data wrangling much smoother. After 10 hours, two or three cameras, and several cards, it is very easy to forget what has been dumped and what hasn’t.
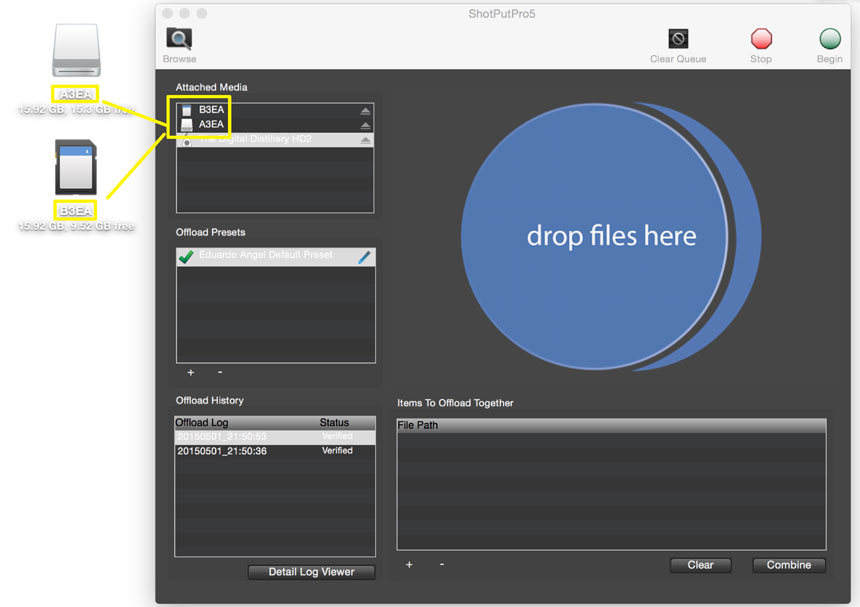
As you can see the cards have a unique name that shows on the computer’s desktop/finder as well as in ShotPutPro
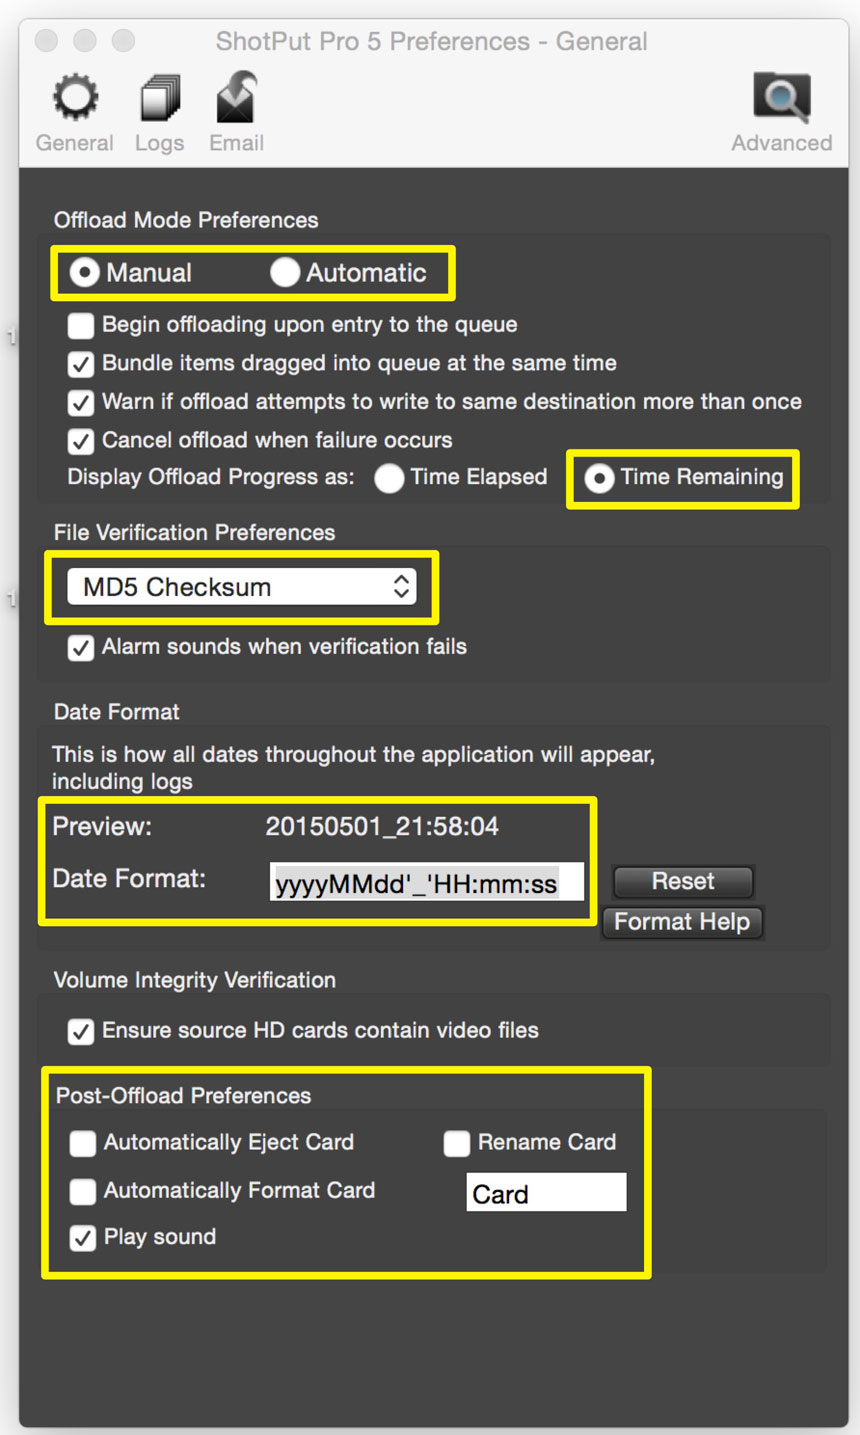
Under Preferences, there are several options but the most important ones for us are:
Manual vs Automatic. I prefer Manual, which means I have the option to choose when to start the data transfer. If Automatic is selected, as soon as the application detects a Hard Drive or Memory Card it will start the process.
Under Display Offload Progress I prefer to see how much time will it take to be done. That way I know if I can grab something to eat or do something else or simply sit next to the computer and wait a little longer.
Under File Verification Preferences MD5 Checksum is the most current standard.
I like to use the following format for dates: year/month/day/time in the 24 hour format. So, for example, it would read 20150520_211037.
Under Post-Offload Preferences we have everything disabled except “Play Sound.” I’ve been doing this for years and I still don’t feel comfortable formatting the card right away. You might feel differently.
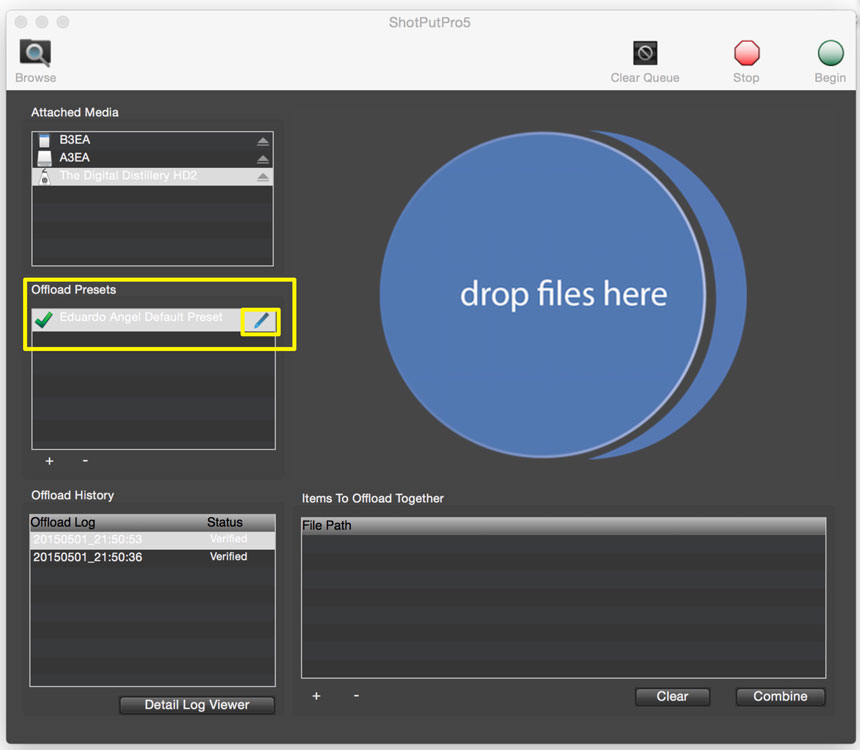
Back to the main window. Under “Offload Preset” click the little pencil to edit the preset.
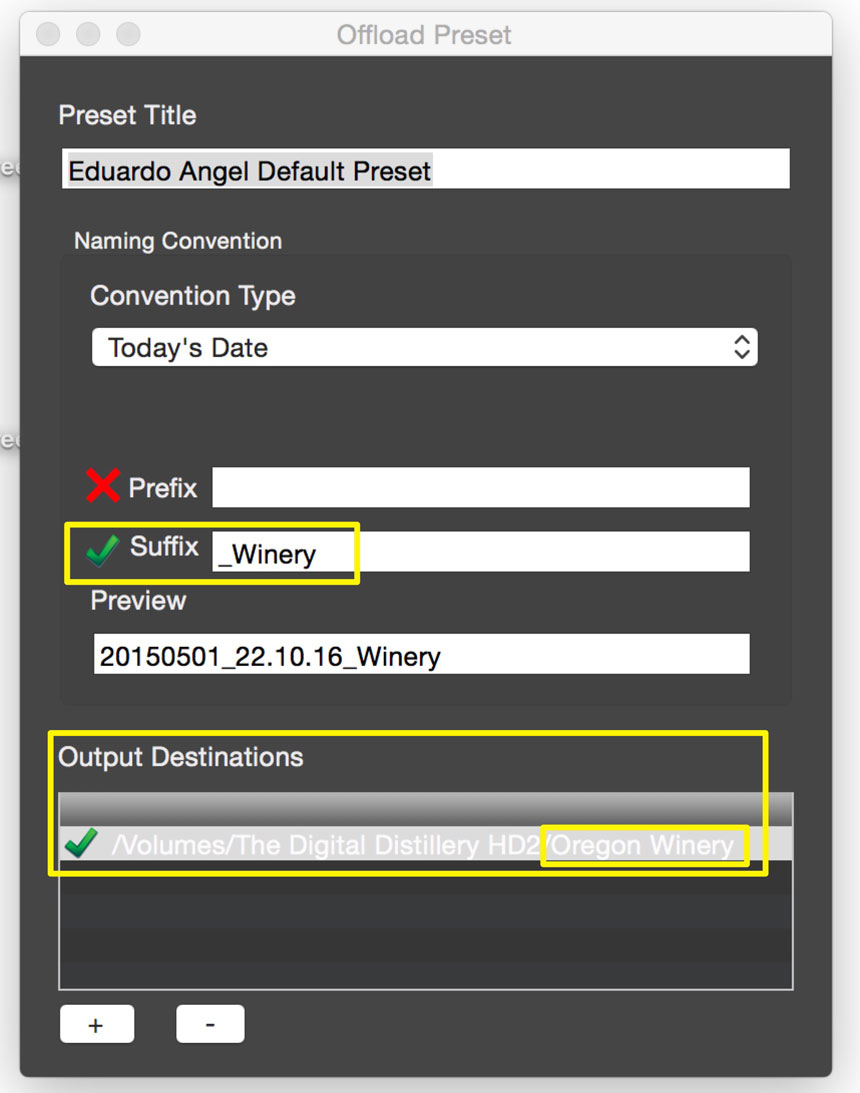
This is how our Main Preset looks.
We change the “Suffix” based on each project.
The Output Destination also changes from project to project, simply click the + sign to select an external hard drive / folder /subfolder for your backup.
ShotPutPro can back up to (apparently) endless destinations so you can select two or three hard drives to have multiple copies with a single click.
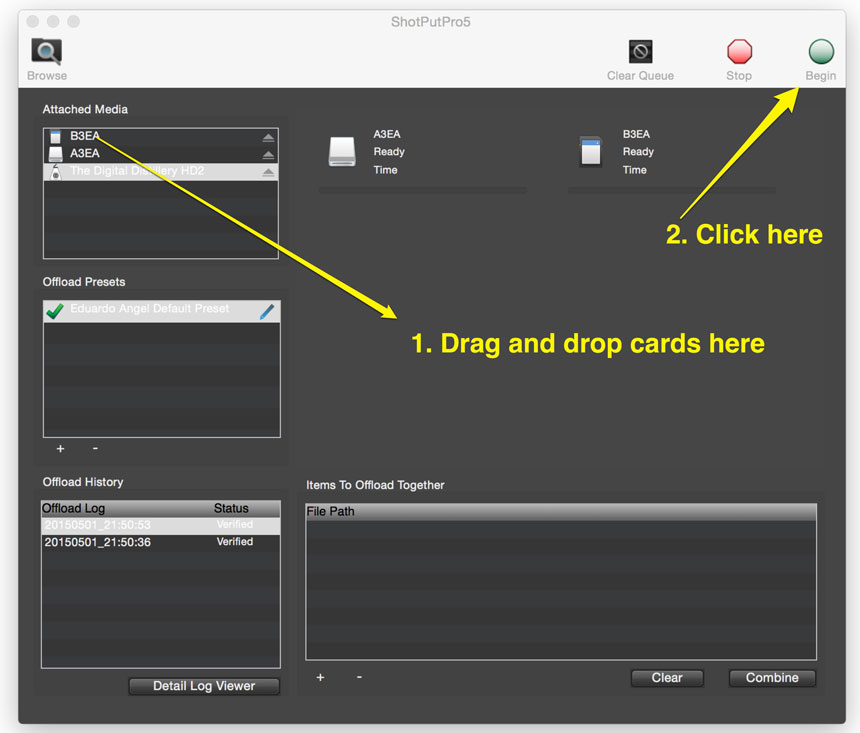
Now, this is the magical moment. Simply drag and drop your Hard Drive or Memory Cards into the “Drop Files Here” circle. Then click the “Begin” button on the top right of the menu.
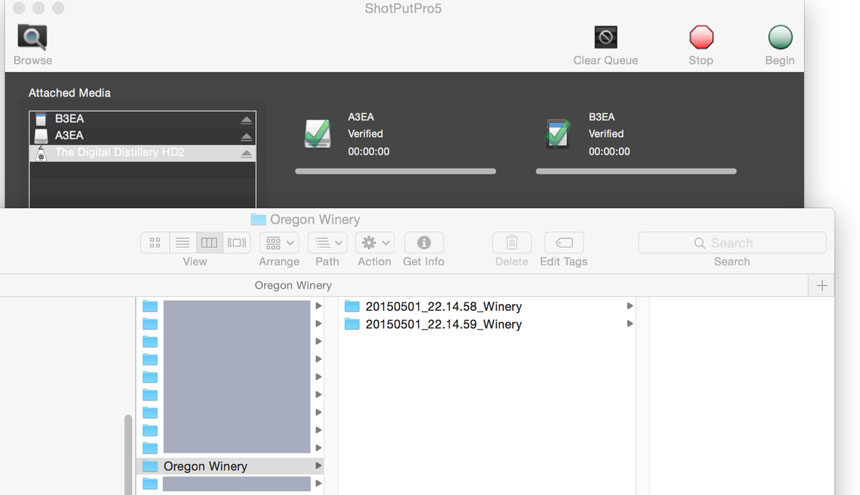
Done and done. ShotPutPro created a folder per memory card with the date and exact time of the backup.
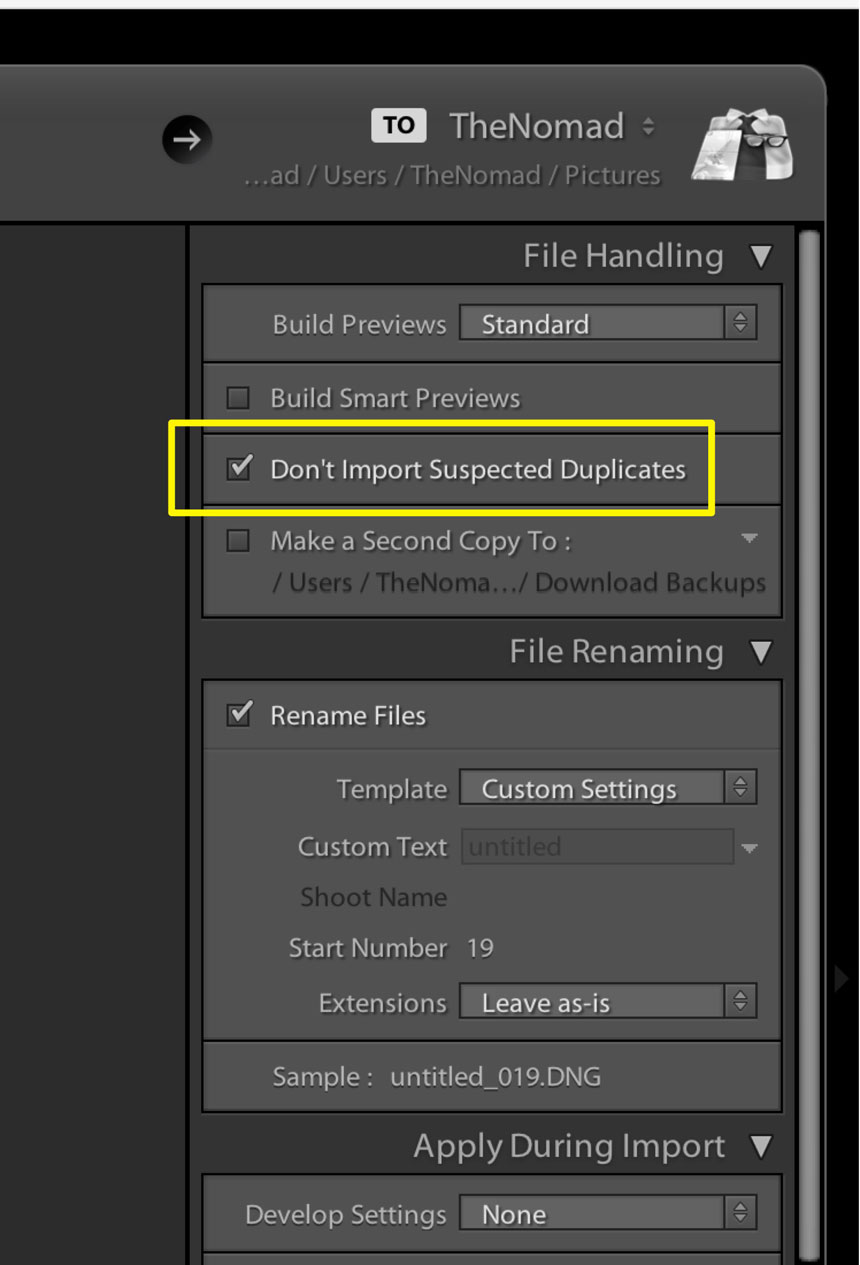
A weakness in this app is that if we try to backup the same card again, even to the same destination, it will let us. I’d prefer if it had a similar feature as Adobe Lightroom to “prevent importing suspected duplicates,” but it doesn’t, so once you backup a card I strongly suggest you put it away, grab a fresh one, and keep shooting.
That’s all for now. I hope this helps you. If you have questions or suggestion for similar upcoming articles, feel free to contact me here or here.
Video

Shooting 4K Anamorphic and V-Log with Panasonic’s GH4. Ten Valuable Lessons.
UPDATED: I just added two video tutorials: one comparing “Panasonic’s V-Log L vs. Cinelike D” and the second one “Conforming 4K Anamorphic Footage in Adobe Premiere Pro.”
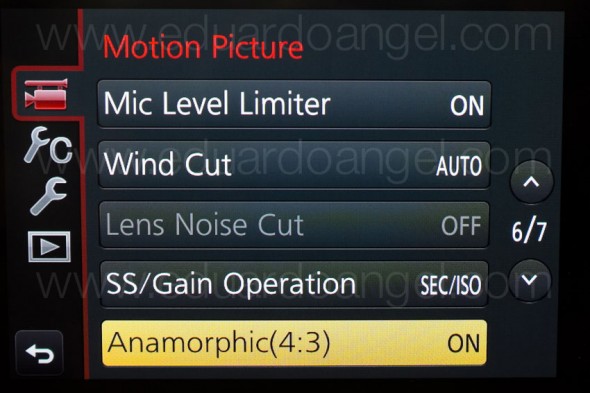
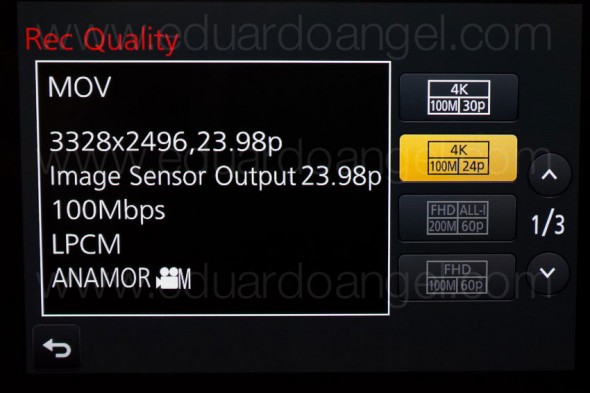
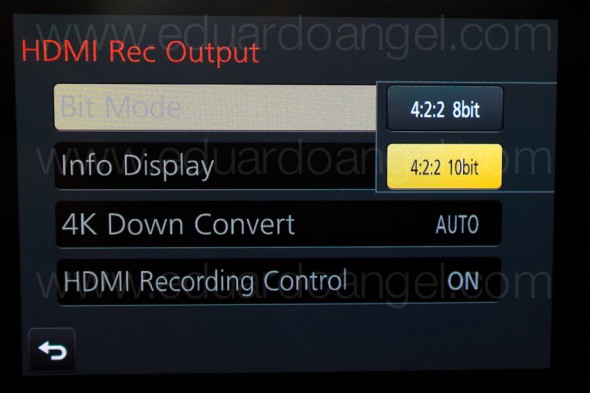
Anamorphic is enjoying a huge comeback. The reasons to go this route vary from project to project, but generally it’s the desire to achieve a different look and use as many pixels from the sensors as possible. Panasonic’s Firmware Update v.2.2 (available here) enables an Anamorphic (4:3) Mode capable of recording video in 3328 x 2496 pixel (equivalent to approx. 8.3-megapixel) resolution at a frame rate of either 23.98, 24, 25 or 29.97 fps. With an anamorphic lens such as 2x Lomo lenses (see below) we now can capture and un-squeeze a 3356×2496 image in post-production. To make things even better, 4:2:2 / 10 bit HDMI output is also available.
Just like in 2013 when we had the opportunity to field test a GH3 in the Middle East and last year when we shot with one of only three prototypes world-wide of the GH4, for the past couple of weeks I had the privilege to work with director Davis Northern, DP and tech wizard Sean Davis and many other talented people on one of the very first GH4 Anamorphic AND V-Log L projects, shot exclusively for Panasonic North America and produced by The Digital Distillery.
Panasonic 4K Anamorphic and V-Log L – Official Video from The Digital Distillery Inc. on Vimeo.
The project was exciting and very challenging, as working with hardware prototypes and beta versions of software or firmware always is. We had a lot of moving pieces and an extremely tight deadline, but I’m proud of the final results and very satisfied with the lessons learned. This article covers some of the most significant ones, and it is written from my very own personal perspective. As always, I try my best to be as objective and brand agnostic as possible. The lessons aren’t in any specific order and some links will take you to articles with additional information . Please consider using our links to help support our very time consuming articles and tutorials.
Ready? Let’s go!
1. Shooting Anamorphic
It can definitely be achieved by a very small crew on a small budget. We mostly shot with a crew of three, with very limited gear and time. I’ve always assumed you needed a 2-ton truck and a crew of 30 to pull this off. Clearly, this was not the case for us.
2. Lenses
In terms of lenses, we opted to keep a “low profile” while keeping our options open. In other words, we rented a set of vintage anamorphic Lomo lenses (35, 50, and 75mm) and tested an SLR Magic as well as a Letus AnamorphX 1.8X Pro Adapter and a Veydra Mini Prime.
A. Lomo:
The lenses are huge and heavy. Lomo 50mm + 75mm with case = 25lbs. Lomo 35mm with case = 35lbs with each case weighting about 30lbs. Not ideal for the “guerilla” approach we needed for this project. They definitely have a unique look, but are very hard to focus, especially when using a very flat profile. We rented the set for $500/day or about $1,700 for a week including tax. Not cheap by any means but definitely worth the investment in terms of time and quality.


If I were to shoot this project again (or on upcoming anamorphic projects) I probably would test the Cooke Anamorphic/i Lenses (25, 32, 40, 50, 75, 100, and 135mm with a 2x squeeze). Unfortunately these lenses cost about $30,000 each, and the rental rate is about $500 per lens, per day.
B. SLR Magic:
We had access to a very nice selection of Panasonic glass that we wanted to use with an SLR Magic adapter. The first challenge was that the front diameter on all the lenses has to be below 62mm in order to use the step down rings. The second limitation was (for the Panasonic lenses) that anything wider than 28mm would vignette. We could have used the Panasonic 12-35mm lens, at 28mm or longer (kind of pointless), but for some odd reason with the SLR Magic adapter it vignetted all the way even at 35mm. The Panasonic 35-100mm didn’t vignette at 35mm. Go figure. The next usable lens on our Panasonic arsenal was the beautiful 42.5mm Noticron f/1.2, but we needed a step DOWN ring (from 67mm to 62mm) that wasn’t included with the kit. The last option was the Panasonic 35-100mm f/2.8 lens, which worked well but focusing was a MAJOR issue (not Panasonic’s fault). I found the SLR Magic system very finicky and unreliable and unfortunately I can’t recommend using it.
C. Letus Anamorphx:
The Letus Adapter worked much better than SLR Magic but it was also cumbersome. A matte box is pretty much required and there was an issue with one of our widest lenses. The lesson here is, if you are shooting anamorphic, use the real thing.

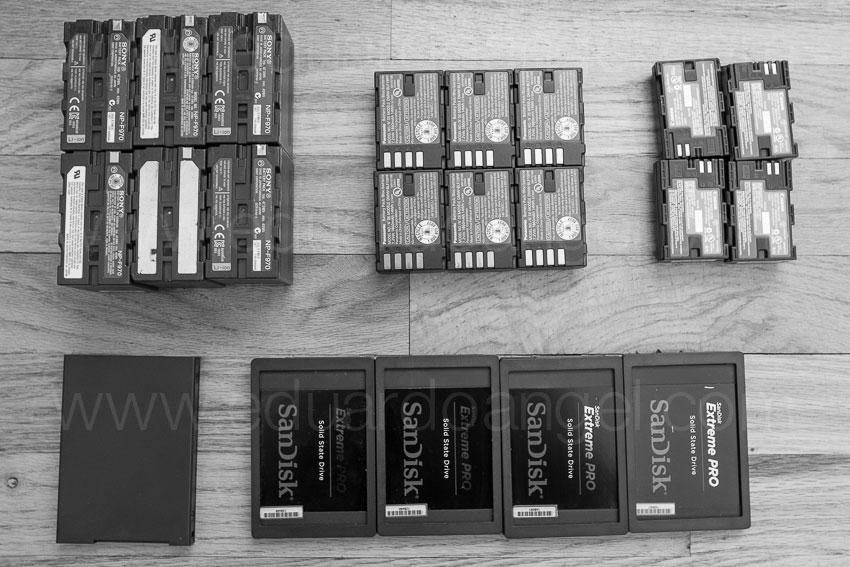
3. Storage
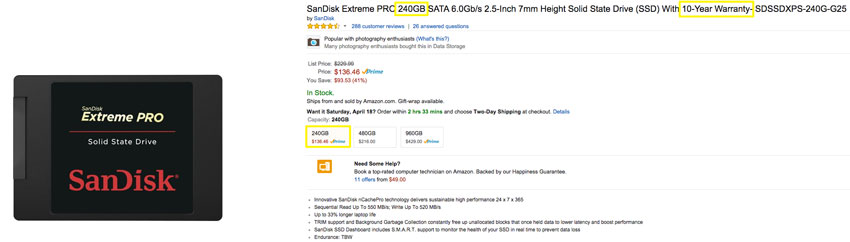
There’s some heavy math involved when shooting Anamorphic. An anamorphic lens produces roughly a 2X horizontal squeeze of the image onto film. Traditional anamorphic lenses were designed to work on a 4:3 standard. The anamorphic footage captured with the GH4 on the Atomos Shogun is 3840×2160, so not technically 4K but pretty close. Shooting internally (to an SD card) the footage is 3328×2496, so greater vertical resolution than the 4K standard, but not full 4K horizontal resolution. To keep things in perspective, the 4K footage out of the GH4 4096×2160.
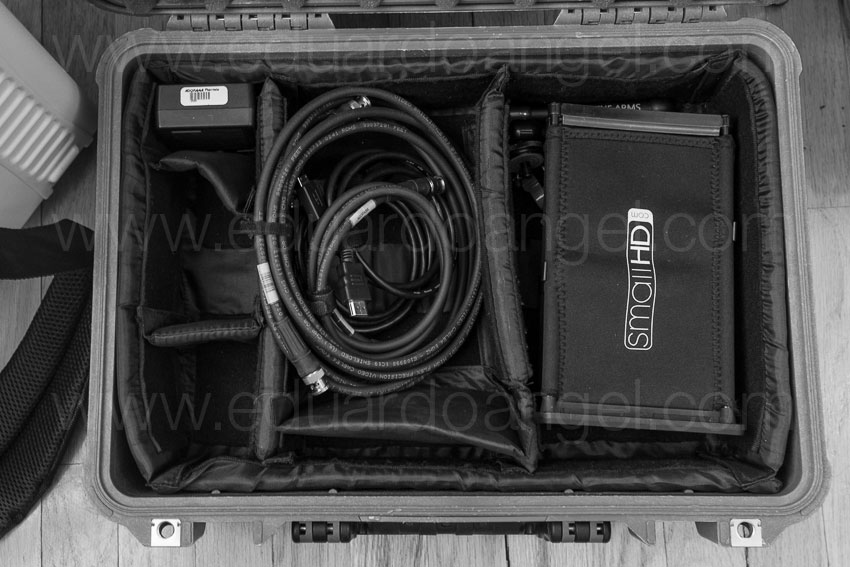
As you would expect, the files are huge. Shooting ProRes 422 you need about 4GB per minute of footage. Two cameras: 8GB, after only one backup you are at 16GB per minute. So somewhere around 20GB per minute is a pretty safe storage estimate for a two-camera setup. As always, we trusted all our very valuable assets to G-Tech Hard Drives.
Regarding Solid State Drives, Atomos has a great chart with all the supported drives for the Shogun and other devices. Make sure you triple check the chart before investing in one.
One SECOND of footage takes about 50MB so even if you are shooting into seemingly endless Solid State Drives, being smart about when to start rolling and when to stop can save a lot of storage.
4. HDMI
As we were shooting, Atomos was literally finishing writing the Shogun’s firmware update (available in May or June as a free download) will enable a number of awesome features:
- Anamorphic de-squeeze for Panasonic GH4 and standard lenses
- RAW recording to ProRes, DNxHR and Cinema DNG for compatible RAW formats
- Expanded RAW compatibility to include Sony FS series, Canon, Arri and AJA
- 3D LUTs on HDMI/SDI output
- Cinema 4K DCI support
- Uncompressed V210 support
- Genlock
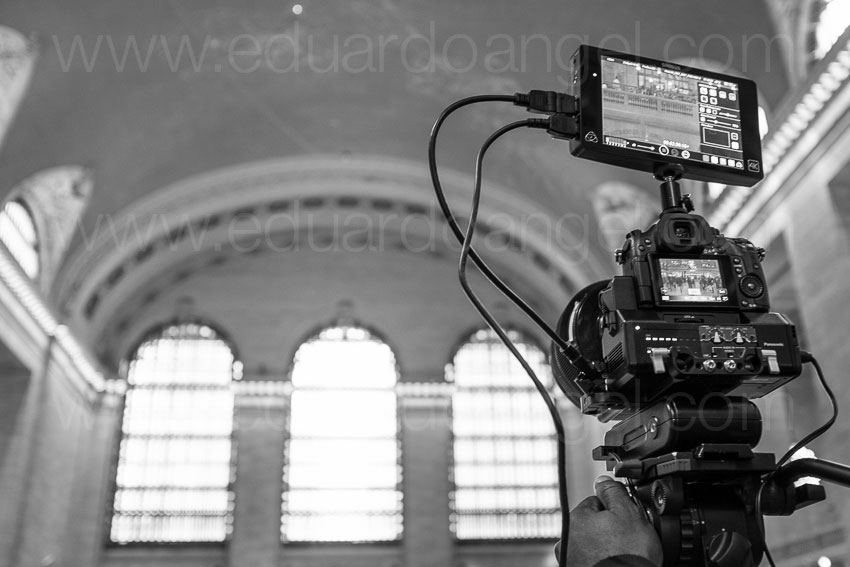
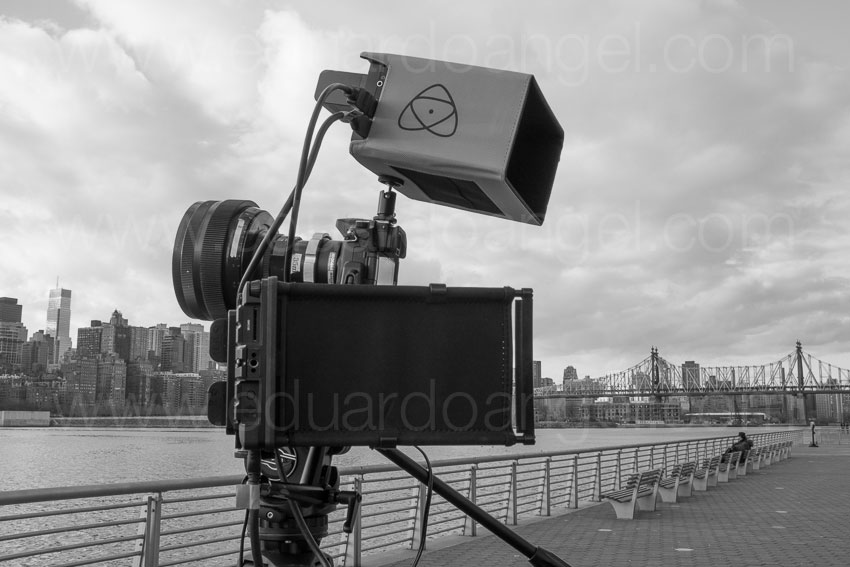
We had to use a Small HD Pro7 (to de-squeeze) and the Shogun (to record in 4K). The setup seems pretty obvious after a lot of trials but it wasn’t at first. Here’s the executive summary that will hopefully save you some time and stress:
1. Micro HDMI to Standard HDMI cable from the GH4’s HDMI OUT to the Atomos Shogun HDMI IN
2. Standard HDMI to Standard HDMI cable from the Atomos Shogun HDMI OUT to the Small HD HDMI IN
3. In the Shogun, the 4K downconvert option should be OFF while connecting the Small HD and turned ON when everything is properly connected.
Our Small HD had a nasty tendency to constantly lose signal for no apparent reason, so step #3 had to be repeated many times throughout each shoot.
5. Premiere Pro CC 2014 Workflow
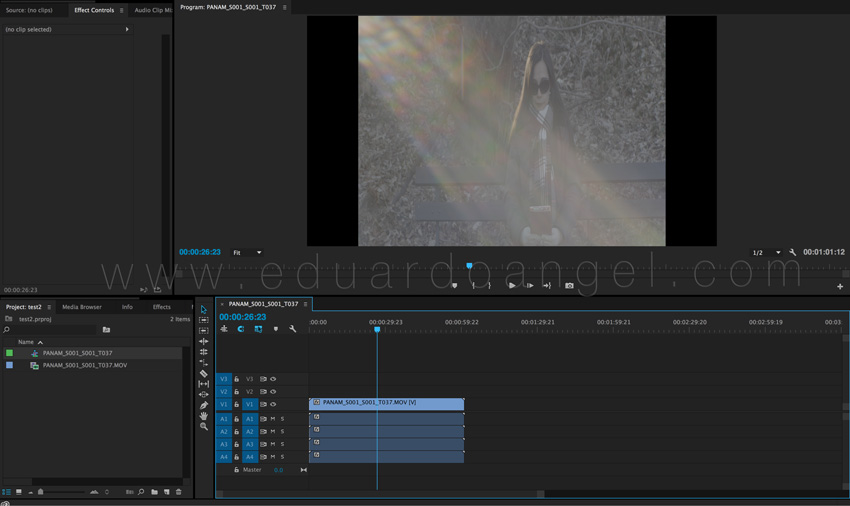
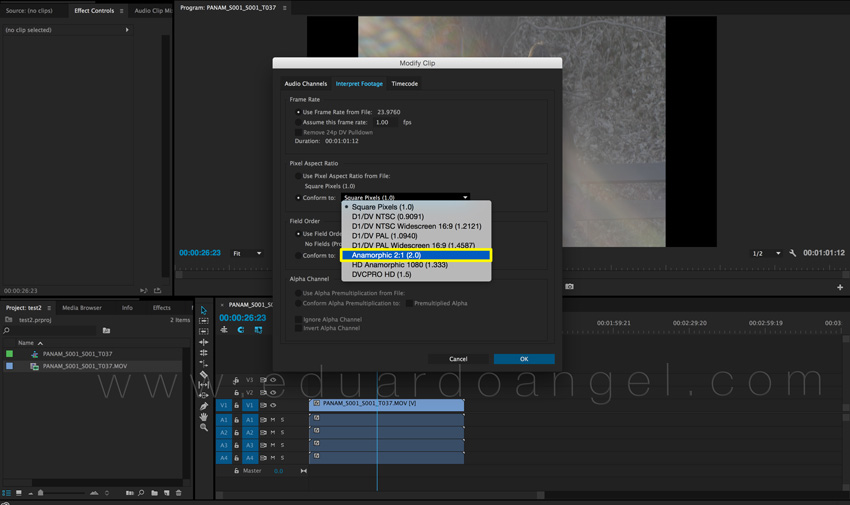
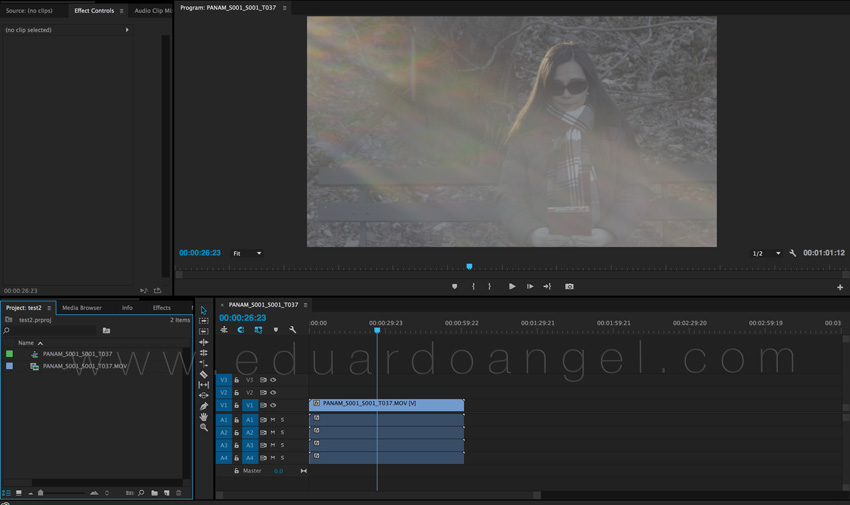
To be totally honest, I was shocked by how easy it was to conform the footage in post. Here’s what you need to do:
1. Import the footage the way you normally do.
2. Select the anamorphic clips.
3. Go to clip > Modify > Interpret Footage
4. Under “Pixel Aspect Ratio” select “Conform To” and “Anamorphic 2:1 (2.0).
5. Create a “new sequence from clip” and start cutting.
6. Done and done. Wow!


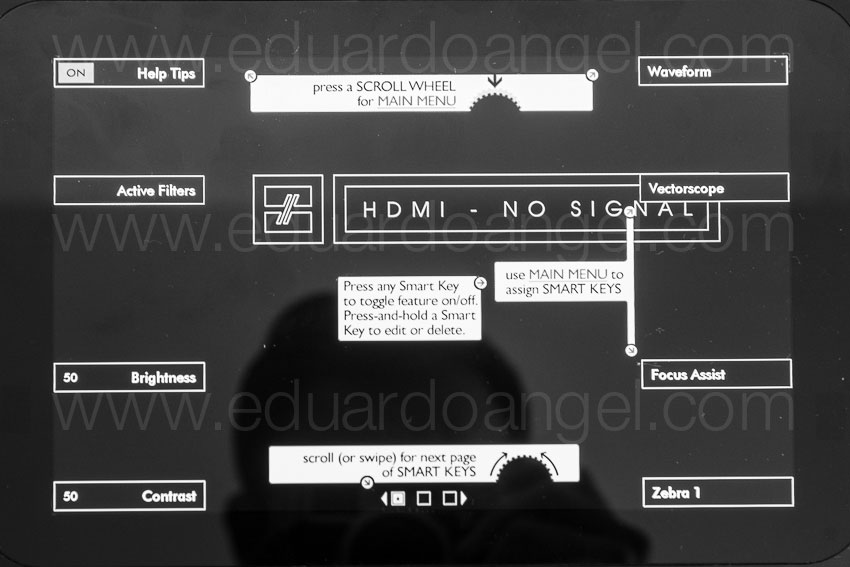
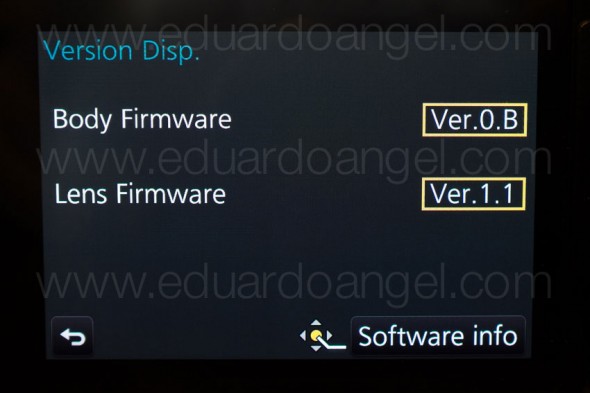
Here are some screen grabs from the camera’s LCD:

6. Focus
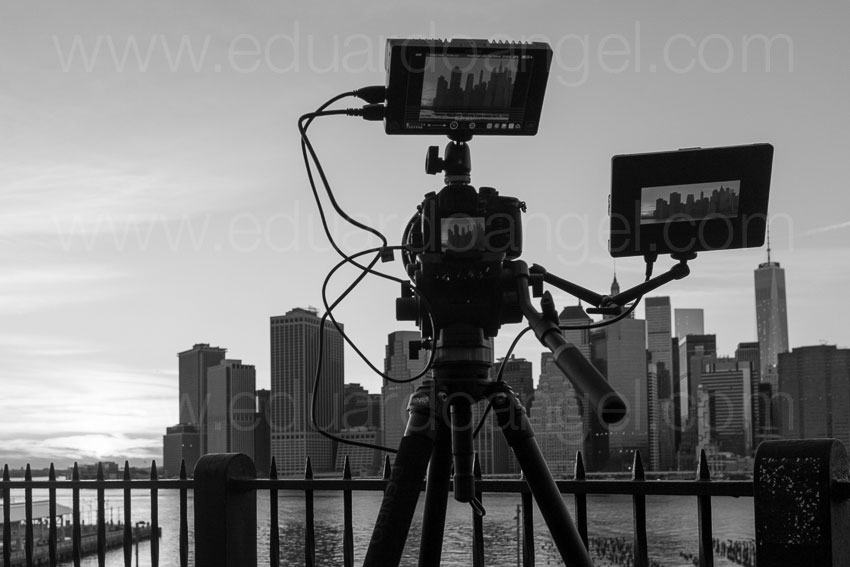
Focus is super, extra, hyper critical, especially when shooting with a very flat profile like the one we used. Unfortunately we couldn’t trust the SmallHD and had to rely 100% on the Shogun at a 1:2 zoom.

7. Accessories
• A sun hood for your external monitor is absolutely essential (if given the option get the black version).
• Obviously you will need lens adapters if you are planning to use the SLR Magic or Letus AnamorphX options.
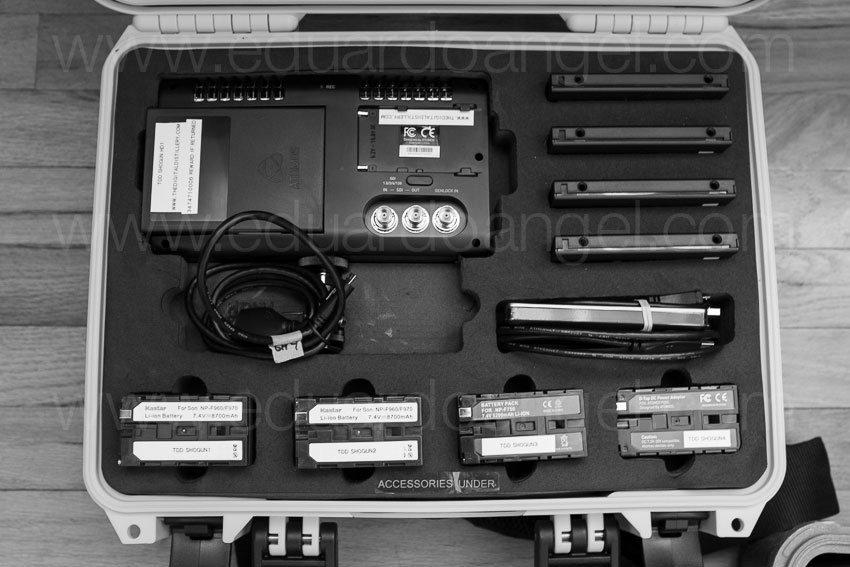
• Make sure you get plenty of batteries, The small battery that comes with the Shogun lasts about 30 min only and we got about one hour of recording time with TWO Canon batteries on the Small HD. Instead of buying tons of batteries I’m a big fan of renting them (more here). The same goes for additional Solid State Drives.
8. Bonus lessons:
• Shooting anamorphic takes a lot practice and fine-tuning. I’d recommend scheduling at least a full day to test all the gear before a shoot.
• If we keep a small footprint and move fast, we can get a lot done.
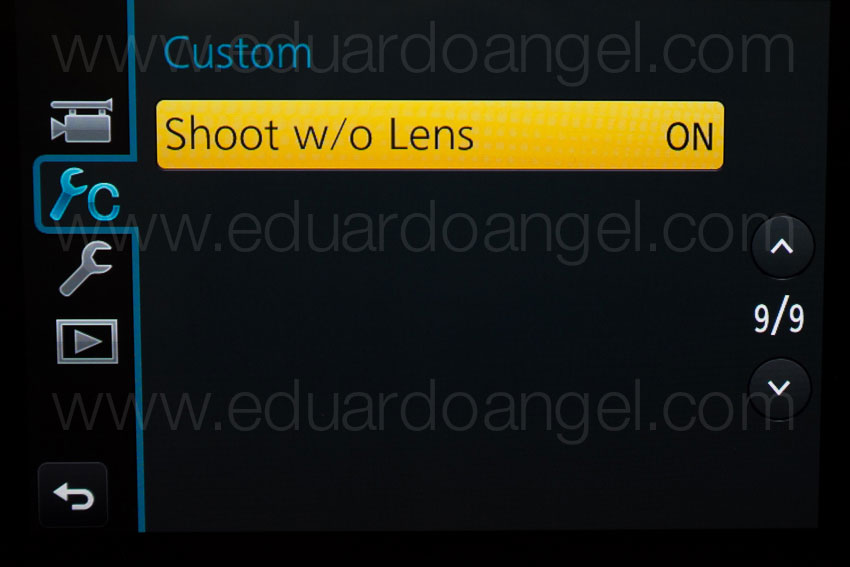
• The “shoot without lens” on the GH4 must be turned on in order to work with the Anamorphic lenses.
And…..here are two more videos (not anamorphic) shot with the Panasonic GH4. Check them out and let me know if you have any questions or comments via Twitter (@EA_Photo)
Video

Documenting Istanbul, Paris and Brussels as a one-man crew.
Except for a couple of days where I had the priceless guidance of my friend Levent, I worked alone for three weeks between Istanbul, Paris and Brussels. The assignments required to capture stills, shoot video, record soundscapes, write, and edit everything together as I was moving alone. No problem!
The single operator/producer/editor assignment is becoming increasingly common for several reasons, among them lower production costs, as well as easier access to difficult locations.
I see a lot of opportunities for shooters currently doing weddings, corporate and sporting events, product launches, trade shows, video podcasts, student films or as in this specific project, travel and documentaries.
The main challenge is that on these hybrid productions getting the shot is paramount. There are no second chances, so preparing the shoot and planning for different situations is key. Another big challenge is how to travel as light as possible, but still carry a full production and post-production setup literally on your back.
After Istanbul I went to Brussels with its ancient roots, unique architecture, and bilingual arrangement. From there I went to Paris, the legendary City of Light, which always offers up myriad imaging possibilities. As you can imagine, all these cities were a playground ripe with incredible photo opportunities, and amazing food.
I recently wrote about my experience, lessons learned, and a few tips for Sigma, as I used their lenses for this assignment. The complete articles are available here and here.
If you enjoy my work, please consider sharing it with others. In today’s world, every click, share, and like counts. =)
Video
The 8 Best Tools of 2014.
Here are some of the tools that made a real difference for us last year. Just in case, the order in the list is completely random.
Panasonic GH4
What can I say that I haven’t already said about this gem? Tiny, inexpensive, intuitive, sharp, full of features—this is a truly remarkable feat of engineering to take our visual stories to a new level.
Fuji X100S
No, it’s not a typo! I know this is not the latest model, and that’s exactly the point. This little camera is so good that I see no need to upgrade, change, or even try something else. This is the perfect camera to take out on weekends, and when paired with a super sexy, real leather camera strap, the camera not only works well, it makes ME look good!
Sigma 35mm
In the next couple of weeks, Sigma will release a couple of videos I shot for them in Istanbul, Paris, and Belgium. All the lenses I brought with me were extremely good, but the 35mm was so extraordinary that I ended up NOT returning it.
Fiilex Lights
I rented these lights from Adorama for a Lighting Workshop I did in D.C. Among the reasons not to bring my own light kit were size, portability, and the ability to use multiple accessories with the same fixtures. For example, did you know that these lights can use all the accessories available for Profoto? Mind blowing.
The Fiilex more than delivered on all ends, and the guys at Adorama Rental provided their usual stellar job of testing, packing, and shipping the gear in time for my presentation.
Transcend 64GB UHS-3 SD Card
My tendency is to not put all my eggs in one basket, and to not keep all my day’s footage or photos on one card. I resisted switching from 8GB to 16GB for a while, while HD “forced”me into 32GB cards, and 4K made me seriously consider the 64GB Transcend, not only for the additional capacity, but for speed. The card was affordable when it was released and now it is almost half the price I paid for it just months ago. This one’s a no brainer.
DJI Ronin Camera Gimbal
Heavy. Difficult to set up. Costly. But when you make it work, it sings! We shot a lot of stuff with this toy, and the production value it added to our projects was simply outstanding.
Adobe Premiere Pro CC 2014
I was very much against Adobe’s Creative Cloud concept (and wrote about it here, here, here, and here), but after a year or so of using the apps pretty much on a daily basis, I love always having the latest version to work with. The significant efforts that Adobe has put into their video applications is totally worth the monthly payment.
13” Apple MacBook Pro Retina
This turned out to be not as fast as expected, more expensive than expected, and the latest OS X Yosemite was way worse than expected. Yet it made it into my “top tools”list. Why? Simply because the MacBook Pros are still, in my opinion, the best line of laptops available. The fact that we can edit, grade, and export 4K video on a plane or from a coffee shop still blows my mind. But Apple’s reign might be coming to an end very soon. 2015 will be a VERY exciting year for technology. I can tell you that much.
If you like what you saw in this summary and want to know more about how we actually use these tools, please check out our new online courses on Lynda.com along with some of the video projects we worked on during the year.
We look forward to keeping the conversations going this year.
Video
Amazon adds storytelling tools to its arsenal.
updated 20140114
Amazon Studios was launched 3 years ago to develop feature films and episodic series. In a new effort to pack another punch to its arch enemy Netflix, as well as increasing its original content catalog, the company has rolled out the beta for “Storyteller,” a free online storytelling tool that (more…)
Video
Upgrading PluralEyes 2 to version 3. Worth it?

When shooting with a DSLR camera, and recording dual-system sound, Red Giant’s PluralEyes has been a godsend. Period. We couldn’t even consider working without this awesome plugin. Version 3 has been out for a while. Will upgrading to PluralEyes 3 make us more efficient? Or should we just stick with our trusted friend a bit longer? (more…)
Video
10 (new) Cool Gadgets for Photographers and Filmmakers. Part 1
1• Edelkrone SliderPLUS
Edelkrone’s SliderPLUS is a super-compact and very smooth slider that easily fits onto Tenba’s Video Backpack. Unlike other sliders, this one moves with the camera, taking full advantage of rails’ length. With a price tag of $500, this toy is at the top of my shopping list.
2• Redrock Micro’s One Man Crew Parabolic Camera Motion System
This amazing gadget consists of a motorized parabolic track slider that “guides the camera on a precision-curved track at any speed while keeping the subject stationary in frame.” The system includes speed control, automatic in and out stops, and 36” of track for camera systems under 20lbs. All for $1,500. If you are part of a small crew doing a lot of corporate interviews or a single photographer creating educational content or product demos, this is an extremely attractive option.
Video
NAB 2013 is here. Ghost Town goes wild with DSLR Shooters.
This coming weekend I’ll be working with Jem Schofield and a very talented crew on a unique DSLR Video Field Workshop in Nelson, Nevada. The event, hosted at an awesome Ghost Town and surrounded by incredible landscapes, focuses on the craft of filmmaking, camera movement and lighting controls.
Attendees will have four production stations to shoot:
• Tripod, Slider & Dolly Station (with actors)
We will learn how to properly balance a tripod system, operate a camera on a slider and how to use a proper dolly system (including being a dolly grip).
• Rigs Station (with actors)
How and when to use handheld and shoulder mounted rigs from a number of manufacturers to get different looks in camera. Students will focus on tracking shot and other set ups while filming live actors.
• Jib Station
Learn how to operate small to medium sized jib systems, to get “money” shots of the town for establishing shots, reveals, etc.
• Filters & Exterior Light Station
Controlling natural light for exterior shots using a selection of filters, reflectors and silks is paramount.
We’ll have great equipment from sponsors such as Genus, Ikan, Indie Dolly, Induro, Kessler, Lastolite, Manfrotto, Marshall, Nice Industries, Redrock Micro, Tiffen and Zacuto.
Check the video below, and I hope to see you there!
Registration includes round-trip transportation from Las Vegas Convention Center to Nelson Nevada Ghost Town, lunch and on-site instruction.
Video
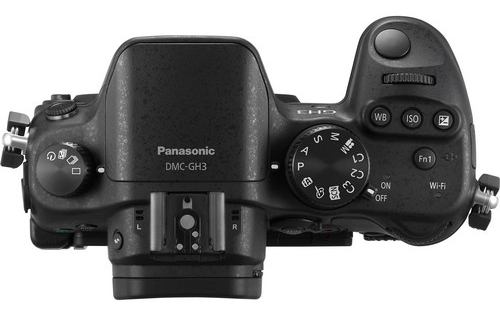
Shooting with the Panasonic Lumix DMC-GH3. Field report and impressions.
The friendly waiter at the Turkish restaurant in Sohar, Oman, saw the camera on the table and asked “Nikon? Canon? Which one is better?” To which I replied, “actually, this is the Panasonic GH3.” He stared at me, his expression turned from excited to perplexed to confused to annoyed within seconds. After an uncomfortable silence he finally asked, “Are you ready to order?”
That was pretty much my reaction when, a few weeks ago, just two days before I started teaching a “Digital Cinema for Photographers” event in Dubai, I found out that Panasonic, a major sponsor of the event, REALLY wanted me and my students to use a couple of GH3s and several lenses in my hands-on workshop.
Panasonic is one of the largest consumer electronics companies, and the GH3 is the third generation of their very successful Micro Fourth Thirds DSLM (Digital Single Lens Mirrorless) system. For a while I have been aware of the low-budget-filmmaking community’s devotion to the hacked DMC-GH2 and its ALL-I codec. I saw the DMC-GH3 at Photokina last year, but I had never before shot a single frame with a Panasonic camera. The bodies that I was given were running Firmware v0.5. Add to this a nine-hour time zone difference and jet lag, and you can begin to imagine my pain.
While I’ll be using some geeky terms, this is not an in-depth technical review, nor a scientific analysis of the GH3. You can dig into tech specs and MTF charts somewhere else. My goal is simply to share my honest and independent impressions, go over the things I liked and didn’t like, and communicate my wish list for future features. I want to emphasize that all the conclusions in this article are subjective and strictly based on my own personal experience.
“I have to warn you, I’ve heard relationships based on intense experiences never work.”
-Keanu Reeves in “Speed”
I have to respectfully disagree with Keanu on this one. Much to my surprise, the camera was much more intuitive than Sony’s NEX system, and several video features got my full attention right away.
FEATURES
• Full HD 1920×1080 60p/50p (NTSC/PAL) with 30p/25p/24p options.
• Ultra-high bit rate video recorded at 72 Mbps (ALL-I) or 50 Mbps (IPB).
• Capable of recording continuously for an unlimited time for NTSC and 29 min 59 sec for PAL.
• Native support for MOV (h.264), MP4, and AVCHD formats.
• Time Code support in the MOV and AVCHD formats.
• Extremely fast and accurate contrast-detection Autofocus.
• A 3.5mm mic input AND a headphone jack AND the option to manually adjust the sound recording levels via touchscreen controls.
• Full-time AF, AF Tracking, and Face Recognition AF are available for VIDEO. The Touch AF mimics rack focusing.
THE WORKSHOP STORY
Not having enough time to field test the Panasonic systems before the Workshop, I shot dummy clips in my hotel room and made sure that the footage would work in Adobe Premiere Pro CS6. The test went surprisingly smoothly. I then set both GH3 cameras to the same video settings: MOV at 1920×1080, 24p, 72 Mbps ALL-I, Standard Photo Style, White Balance at 5500K, got ND filters for all the lenses, extra batteries, and a few Class 10 SD cards. And then I prayed.
You must use a Class 10 SDHC card when recording Ultra-high bit rate video at 72 Mbps (ALL-I).
Note: It’s extremely important to point out that full HD on this camera requires memory cards with the fastest speed available. My “older” memory cards didn’t work, giving me only four seconds of recording time.
VIDEO
We spent the first day of my three-day Digital Cinema Workshop covering all the technical similarities and differences between stills and video. On the second day, we planned a location shoot with a Capoeira team and spent a couple hours shooting in the afternoon. On the third and last day we covered the different hardware and software requirements for post production and spent three hours editing the footage. I am especially proud of the short clip my students put together in such a limited amount of time and with newly acquired knowledge (and using brand new gear!).
Capoeira in Dubai. Student Project. from Eduardo Angel on Vimeo.
We could obviously use a few more days sweetening the audio, fine tuning transitions, and grading, but for a two-hour shoot and a three-hour edit, I believe this is a good example of what can be accomplished with great teamwork, interesting subjects, and the GH3’s many customizable options.
SAMPLE CLIPS
Below you will see a few additional sample clips, all shot as H.264, 1920 x 1080, 23.976 72Mbps ALL-I, using the GH3’s “Standard” profile (Contrats = 0, Sharpness = 0, Saturation = 0, Noise Reduction = 0). The Exposure and White Balance were set manually. The lens was the Lumix GX Vario 12-35mm F2.8 set on AF Tracking mode, which worked very well most of the time. Despite the lens having “environmental sealing,” as you can see the fine desert’s sand inevitably found its way to the sensor. I put the clips together on Adobe Premiere Pro CS6, and have NOT done any grading nor sharpening. These short clips are intended to show you what the GH3 is capable of, not to tell a specific story.
SOMETHING INTERESTING
So, mission accomplished, right? Not so fast. A couple of days later, as I was wrapping up my day, a friend asked “Are you busy? I wanna show you something interesting.” With only the GH3, the 12-35mm 2.8 lens, a 4GB card and a low battery I jumped into his car. The “something interesting” happened to be access to the Royal Suite at the 7-star Hotel Burj Al Arab—a notoriously difficult area to access. With limited amount of storage space and battery life I managed to capture a few keepers.

The 7-star Burj Al Arab hotel resembles a giant sail rising over the Gulf, with changing colors visible for miles at night.

The very next morning (on my “day off”), I headed out to meet an old friend for brunch at the Atlantis. Should you ever find yourself in this neck of the woods, I strongly recommend that you pay the Atlantis a visit. As we enjoyed the seemingly endless food, my friend received a call to drive to Abu Dhabi right away to pick someone up and then drive back to Dubai. Would I like to come? Guess what I had hanging on my shoulder? This time I had a full battery and a 16GB card, but nothing else to shoot the magnificent mosque and the impossibly opulent Emirates Palace. Once again, the GH3 did a fantastic job.
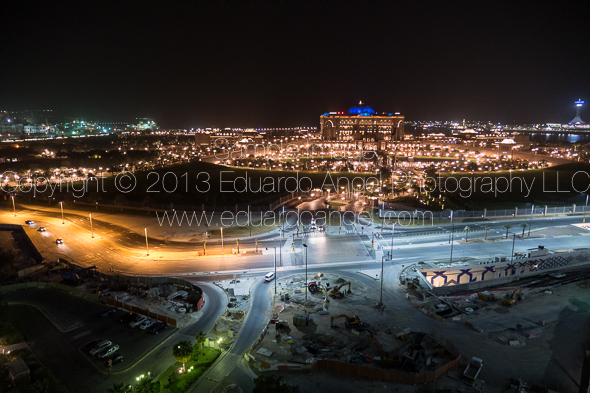
A nice view from a 25th floor overlooking the magnificent Emirates Palace in Abu Dhabi.
MORE FEATURES
These are some of the GH3’s features that are not obvious to the naked eye, but are interesting once you are aware of them:
• A magnesium alloy camera body that Panasonic describes as “splash proof and dust proof.”
• The Panasonic RAW files (RW2) work fine in Adobe Lightroom [add link to LR workshop] but the most current version (4.3 as of this writing) is needed. Unfortunately there are no Panasonic lens profiles available as of this writing.
• All the video formats worked seamlessly on Adobe Premiere Pro CS6. Even the video recorded at 72 Mbps was easy to preview and edit on a two-year old MacBook Pro (with 8GB of RAM and an external 7200 RPM Hard Drive as a Scratch Disk).
• HDMI monitor output can be sent with or without information overlays.
• I had a DMW-MS2 Stereo Shotgun Mic with me, but was happy to learn that the camera’s built-in internal microphones provide stereo audio.
• The GH3’s sensor has a 4:3 aspect ratio.
• Built-in Time Lapse, and HDR but unfortunately it works only for JPGs not RAW.
• Five physical function buttons, and two touch-screen function buttons, all customizable with close to 40 options to choose from.
• Virtually all the key shooting controls are within the right hand’s reach. This frees up the left hand to hold the camera or focus manually.
• Excellent battery life, lasting a full day under normal operation. For extended video sessions I’d consider getting the DMW-BGGH3 Battery Grip.
• Apparently (I have not tested this) the GH3 is also capable of real-time image output to the LVF or the rear monitor AND to an external monitor via HDMI.
DMW-MS2 Stereo Shotgun Mic
LENSES
I shot extensively (more than 2,000 images in 18 days) with the Lumix GX Vario 12-35mm F2.8. The lens is tiny. And fast. And awesome. It has the equivalent focal length to a 24-70mm F2.8 on a 35mm system but it is a fraction of the size and weight. As you already know, this is a very good start when dealing with packing issues.
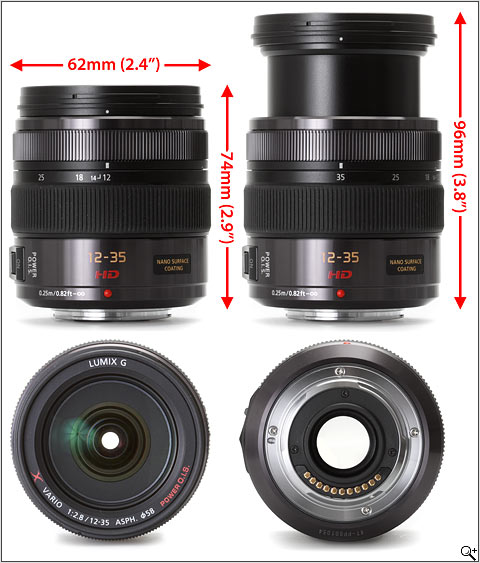
Lumix GX Vario 12-35mm F2.8
In terms of depth of field, the lens behaves like a 16-45mm F3.5 lens on an APS-C sensor, or a 24-70mm F5.6 lens on a Full Frame sensor. It is hard to get used to this, especially when shooting another system simultaneously, but it is not a disadvantage per se.
Click to keep reading (more…)
Video
Schindler’s List Cut by Cut: Part 3.
After taking a deep look (check the first and second part of this post) into a famous and very important sequence from the film Schindler’s List, we begin to understand not only the relationship between Oskar Schindler (Liam Neeson) and Itzhak Stern (Ben Kingsley), but also the cinema ingeniousness of Steven Spielberg (director), Janusz Kaminiski (director of photography) and Michael Kahn (editor).
Here’s a poster we created that sums up all the cuts in the sequence altogether.
And here’s the complete sequence.
For those of you missed our Schindler’s List cut by cut analysis, here are Part 1 and Part 2.
Are there any other sequences that you would like us to review or break down cut by cut? Let us know by giving your thoughts and feedback in the dialog box below and we might just make it a future post!
Video
Schindler’s List Cut by Cut: Part 2.
Last week, we analyzed one of the most important scene’s from Schindler’s List and the amazing editing work by Michael Kahn. We suggest you read Schindler’s List Cut by Cut: Part 1 first.
Great editing can only be accomplished if there is great footage to begin with. Look closely at Kaminski’s compositions; whether handheld or locked down he constantly plays with all the corners of the frame, showing dynamic blocking and camera movement to work in conjunction with the pace set by Kahn’s editing. This is what making a good picture is all about.
Michael Kahn’s editing is just phenomenal. His transitions are abrupt, but we never lose sight of the story. Let’s continue dissecting Schindler’s and Stern’s dialog while they create THE list of “essential” people.
Cut 15 Two-shot: Stern and Schindler trying to remember a name.

Cut 16 Typing a name.

Cut 17 Low-angle close shot of Stern trying to recall a name. Schindler seconding him off screen.
Cut 18 Typing a name.


Click here to continue reading (more…)
Video
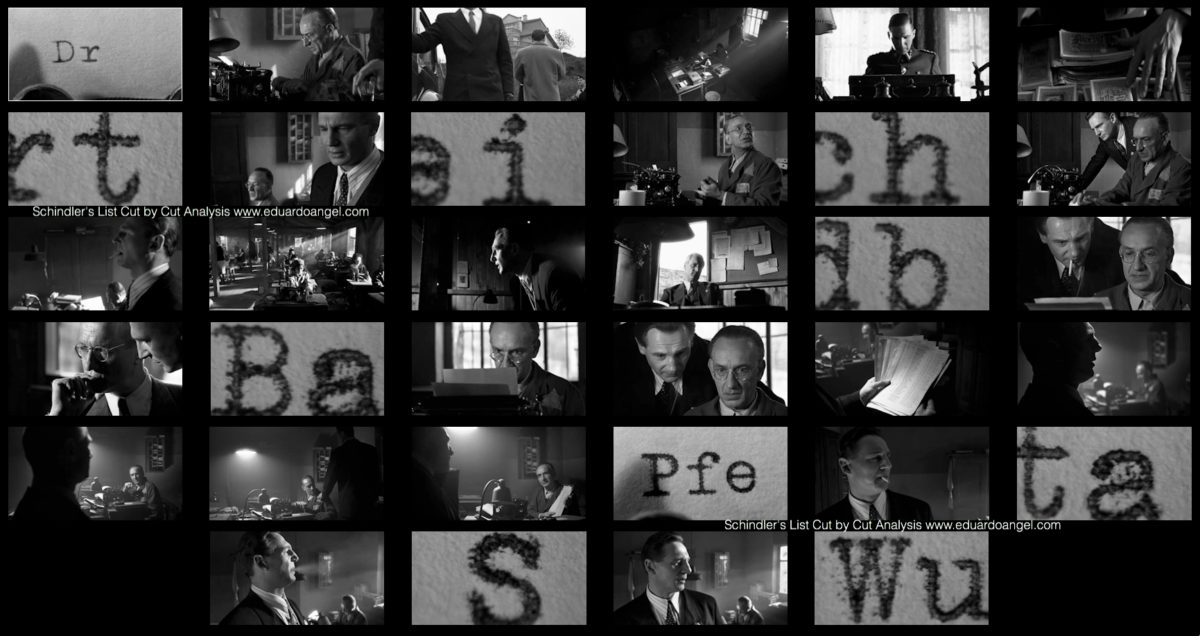
Schindler’s List Cut by Cut: Part 1
Steven Spielberg’s Schindler’s List, tells the story of a German businessman who devises a plan to save over a thousand Polish Jews from annihilation by the Nazis. The picture’s narrative, acting, music and emotional impact are all outstanding. For obvious reasons, one of our favorite aspects of this movie is the beautifully composed and lit black-and-white cinematography by Janusz Kaminski. But the editing…..wow! Michael Kahn who happens to be the most-nominated editor in Academy Awards history (eight nominations) received the the Best Editing top recognition for this movie (and also for Raiders of the Lost Ark and Saving Private Ryan).
Throughout Schindler’s List, the story is pieced together with the use of “parallel editing“, or “cross-cutting”, a cinematic convention in which “two or more concurrent scenes are interwoven with each other.” Kahn and Spielberg successfully illuminate the hardships of the Jews and the opposing comfort and optimism of Schindler and the Nazis in Poland through this convention.
Why this blog post? In 2012 the Cinema Editor Magazine published a great article where the author dissected, cut-by-cut, one of the most important scenes of “Schindler’s List.” Last week we rented the DVD, went back to the article, and created screen grabs of each of the cuts in order to better understand Kahn’s editing. There are so many cuts (28) that we will split this post in two. We wanted to post the entire sequence but due to copyright issues, we can’t.
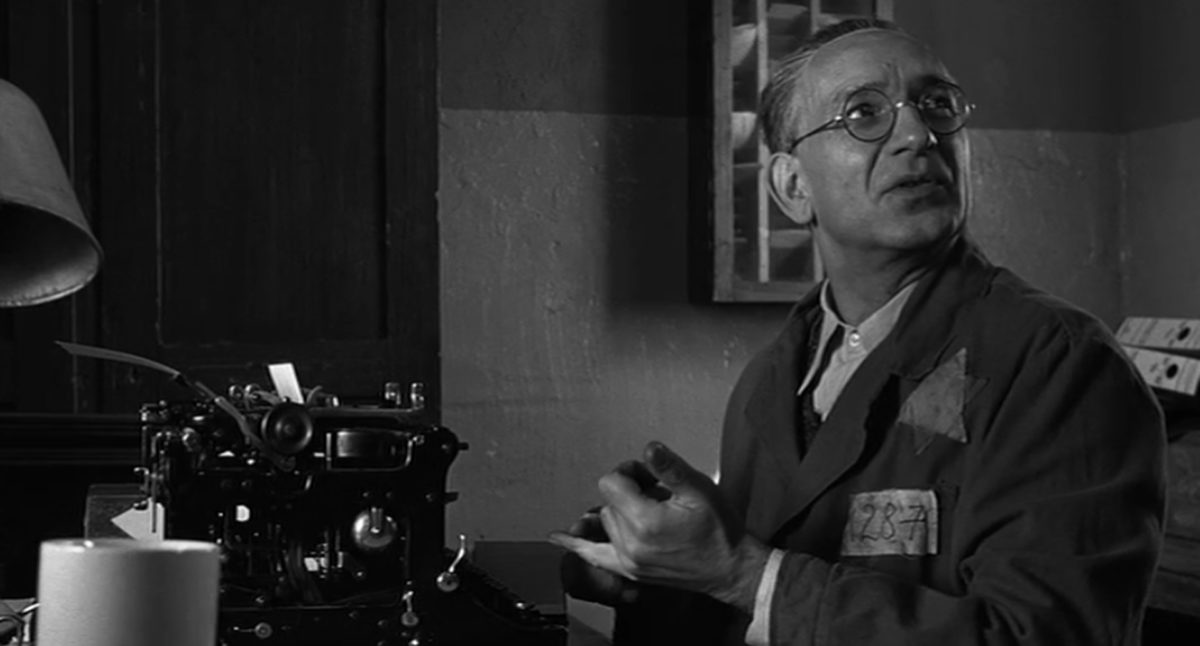
Schindler (Liam Neeson) and Itzhak Stern (Ben Kingsley) falsify documents and create a list of names to ensure that as many people as possible are deemed “essential” by the Nazi bureaucracy.
Cut 1 Extreme close-up of typewriter keys pounding out three names: as the screenplay puts it, “the letters the size of buildings, the sound as loud as gunshots.”

Cut 2 Medium shot of Stern typing; camera tracks with Schindler pacing past him, reciting the names of Poldek Pfefferberg, his close crony among the Jews, and Poldek’s wife, Mila.

Cut 3 Extreme close-up: “Pfefferberg” being typed.

Cut 4 Medium shot: Schindler giving another name. Pan right to include Stern at typewriter.

Cut 5 Extreme close-up of the name “Stagel” being typed.

Click to keep reading (more…)
Video
Adobe Premiere Elements 11. Worth it?
Back in May, Adobe announced Photoshop CS6 and Premiere Pro CS6 with a new user interface. Now, the company has added that new look to Photoshop Elements 11 and Premiere Elements 11. Both applications are less intimidating for newcomers, allowing quick and easy organization, editing and sharing of media, and targeted for new photographers or video editors.

Both apps include an image organizer that closely resembles Adobe Bridge, making the most commonly used functions easily accessible, while other tools are hidden away in the menus. The new organizer is laid out as a 3 column panel in Photoshop Elements 11 and integrates with Google Maps, just like the Map Module in Adobe Lightroom 4. Additionally, tagging photos and videos with people or events (mimicking Facebook) is now possible.

Since Premiere Elements includes “Expert” workspaces with interesting transitions and effects, this might be a good product for photographers transitioning into video. The goal is not to become an expert video editor, but understand NLE apps and more importantly, the required assets to put together a video project.
click to keep reading (more…)
Video
Photokina TV Interview.
Earlier today we sat down for an interview for Photokina TV in Cologne, Germany. Here’s a segment that is available online:
Video
A movie about the most inspiring Brazilian artist you’ve never heard of.
UPDATE 0905: Mission Accomplished!!!!!

My extremely talented friend Andre Constantini has been working on a feature film called “Bel Borba Aqui.” The movie is about the most inspiring Brazilian artist you’ve never heard of.
While chatting with Andre about the film and his current Kickstarter campaign, I was schocked to know that they have well over 600 hours of footage. Andre shares here snippets of our conversation.
It’s Exponential
I just recently completed my first feature documentary film. With over 600 hours of footage and 3 years in the making, there has been a lot of time invested into the project. I had made short films before but increasing the scope of any project of this magnitude seems to exponentially increase the time it takes to complete it. But I digress, before you start a documentary it helps if you know the story you want to tell or the topic you want to explore.
Put It Out There
One year before I even knew that the subject of my film, a Brazilian artist living in Salvador, Brazil existed, I had a conversation with a colleague of mine expressing my desire to make a feature documentary on a living artist. A year later, I received a phone call from the same colleague stating that he found him and he was in Brazil and that I should come and meet him to see if it would work out.
Always Be Ready to Go
Even though we were just supposed to discuss the possibilities, on the first trip, I brought all of my equipment to shoot and after meeting the first day, we started shooting the second day. When I returned from my week long trip, I had already filmed for three days. This was enough to start cutting a short piece together to excite the subject and support.
The Edit Room
The editing process went along simultaneously with the shooting to some extent, coming up with rough sequences or themes. The key is not the is not where you start, it’s THAT you start. I find that as you have an idea for one scene or footage that you know worked out or you like, start there and find other footage that supports it visually or thematically (maybe even both). This part always takes the longest. But plan to have plenty of time to do this. Personally, I am best when I have large chunks of time where I can focus without distractions.
Here’s the Trailer:
The film is scheduled to release theatrically on October 3rd for a two week run at Film Forum in NYC. Let’s support Andre with his Kickstarter campaign. It could be you needing financing in a few years…
Video
Great interview with X-Rite Coloratti on Color Management.
Last month, I was invited to join the prestigious X-Rite Coloratti team, which includes the world’s top professional photographers. I was interviewed by X-Rite about my work, as well as my thoughts on color management for digital photographers, and specifically for those shooting video. We also chatted a bit about my views on how video has changed the playing field for all professional photographers. Please take a few minutes to listen to this short clip of our conversation.
We recently shot a series of video tutorials, focusing on the importance of color management and monitor calibration for video editing. Here’s the most recent episode.
If anyone is interested, there are a few spaces left at my upcoming workshop: Inkjet Printing: Color Management and Calibration at the International Center of Photography in New York City, Aug 4th, 2012.
Please feel welcome to leave any feedback, questions or comments below.
Video
Apple announces 2012 products – News Summary for busy people.
UPDATE July 9: HP unveils four new business and consumer all-in-ones with Ivy Bridge processors, will Apple react with an updated iMac?
Our summary of the most relevant news at Apple’s annual Worldwide Developers Conference keynote today:
MacBook Pro

• The MacBook Pro 17″ is dead.
• The (13″ and 15″) MacBook Pro line has been updated. Some models include a 2880 x 1800 pixels retina display (220 pixels per inch), Ivy Bridge processor and thinner designs (some models are as thin as the MacBook Air). The best “new” feature in my opinion is the USB 3.0, which is TEN times faster than USB 2.0.
• The 13″ MacBook Pro gets a dual-core processor.
• The 15″ gets a quad-core processor, and a GeForce GT 650M graphics card. It will take up to 16GB of RAM, has HDMI, two USB 3.0 ports (compatible with USB 2.0), two Thunderbolt ports, and the same SD card reader as before.
MacBook Air

• The MacBook Air has a USB 3.0 and bigger SSD drive (up to 512GB) which is not big enough for many professionals on the road.
Mac Pro
 • After two years waiting digital retouchers, video editors, motion graphic artists, and anyone using a MacBook got a minor update; a speed bump and increases in RAM. The storage and video specs as well as USB 2.0 ports instead of USB 3.0, or Thunderbolt remain the same. Interestingly, the Mac Pro wasn’t even mentioned during the WWDC event, which makes me believe that this will be the last Mac Pro we see.
iMac

Nothing new, unfortunately. I am in the market for a new video editing station, and the lack of a new iMac is pushing me strongly towards an HP Z1. One of the HUGE advantages of Adobe Premiere Pro CS6 is that it works with Mac and PC, and you won’t even see the difference. After talking to several Adobe gurus, I am considering the HP option very seriously.
OS X Mountain Lion

• OS X Mountain Lion is shipping next month, and will cost $19.99. Upgrades are free for those that buy a Mac today.
• OS X Lion already integrates with Apple’s iCloud service. Another army enters the Cloud War.
• Several new apps including Messages, Reminders, and Notes.
• There’s a new Safari which now syncs all your Apple devices. I need a lot more than this to switch from Chrome and/or Firefox.
iOS 6

I can take a nap now.
Video
H.265: A New Standard for Digital Cinema?
A new video codec is expected to replace H.264 as early as next year. H.264 is one of the most common formats for recording, compressing, and distributing high-definition video, not in small part because it is the codec found on several HDSLR systems such as Canon’s EOS 5D Mark III. Another big advantage is that it is currently supported by for most video sharing websites like YouTube and Vimeo. Additionally, runs natively in both Lightroom 4 and Adobe Premiere Pro CS6, which dramatically decreases the time wasted transcoding and rendering files.
But, apparently there is (or technically, will be) a new kid on the block. The Moving Picture Experts Group (MPEG) and the Video Coding Experts Group (VCEG) are teaming up and plan to release H.264’s successor as early as January 2013. The new kid’s name will likely be H.265 or MPEG-H Part 2.
Just how much more efficient will H.265 be? Well, H.265 is expected to provide a significant improvement in data transmission and streaming efficiency compared to H.264. It will have almost twice the amount of compression ratio from for a similar quality level. This means that I’ll need to buy less memory cards, and less external hard drives. Both will make my accountant really happy. Below is the only video test comparing H.264 and H.265 we were able to find. It was performed on an Android tablet by Qualcomm, a San Diego-based chip-maker that is listed as a member of the international standards group developing H.265.
H.265 will be designed to support all new and current streaming technologies including devices working at 4K and Ultra HDTV (also known as 8K or 4320p) resolutions. Did you know that Ultra HDTV definition contains about 16 times the amount of pixels that are present in a 1080p video stream? That’s kinda insane! Check out the chart below to see things in perspective.

The H.265 codec sounds promising, but (there’s always a but) it will have to fight for widespread implementation with another codec called VP8. This format was purchased by Google two years ago and was released it as a royalty-free alternative under the Creative Commons license. Nvidia (Qualcomm’s main competitor) has built VP8 decoding support into its newer Tegra 3 chips alongside H.264 support, and several companies including Skype have adopted VP8 as their preferred format. Adobe also announced that the Flash Player will support VP8 playback in a future release. Who will win? Let’s wait and see.
Video
The Sounds of Aronofsky.
The sounds of Darren Aronofsky, including fantastic movies like Black Swan (2010), Requiem for a Dream (2000), Pi (1998), and The Fountain (2006). Simply brilliant.

Video
NAB 2012 wrap-up.
• Blackmagic announced a hard-to-believe camera featuring a 2.5K image sensor, 13 stops of dynamic range, built-in SSD recorder, popular open standard uncompressed RAW and compressed file formats, compatibility with quality EF and ZF mount lenses, and LCD touchscreen monitoring.
• Adobe Premiere Pro CS6 is out with and enhanced 64-bit playback engine that can handle 5K resolutions, and higher, new trimming options, compatibility with Mac touchpad gestures, a Warp Stabilizer that was previously confined to After Effects, and expanded multicam editing for more than four cameras. Taking a page from its sister app, “the audio oriented Audition, Premiere Pro CS6 offers a redesigned and more functional audio mixer. Adobe also introduced SpeedGrade, a film finishing and color grading app, and Prelude, for ingesting, logging, and transcoding.
• Autodesk announced Smoke 2013 for the Mac, a new version of what the company is now calling video editing software and at users of Apple’s Final Cut Pro or Avid Media Composer who want high-end editing and finishing tools in one app. The new price is “only” $3495, down from $14,995 for the 2012 version.
• Panasonic announced a bittersweet firmware update for the AG-AF100 that provides 1080 50p and 60p modes. That’s the sweet part. The bitter? They want users to pay $300 for the upgrade.

Panasonic AF0100
• Canon announced the 1D C ($15,000), which has the same chassis and still shooting features of the EOS-1D X ($6,800), and captures 4096 x 2160 8-bit 4:2:2 video to a CF card at 24 fps. Unlike the X, the C swaps a headphone jack for the X’s PC sync.
• The higher-end Canon EOS C500 ($30,000) offers the same ISO range as the C300 (320-20,000) and requires a dedicated external recorder, but captures in two full-RAW flavors: 4096 x 2960 (for motion picture), and 3840 x 2160 (for 4K TV). Both of these modes offer 10-bit 4:4:4 at 60 frames-per-second. There are two additional RAW option, 4096 x 1080 or 3840 x 1080 resolutions, which are also 10-bit 4:4:4, but at 120 fps. The camera also offers
Video
Testing Canon’s C300 in jail.
A beautiful test video shot on the Canon EOS C300 at the Eastern State Penitentiary, in Philadelphia, PA. The video shows the ungraded Canon Log version and includes the ISO data for each shoot. The quality is amazing.
Also check the Penitentiary’s “360 degree tour.” It was shot by someone else using QuickTime VR technology. Historic photos accompany each of the 20 views, to illustrate how the place has changed over the last 170 years.
Video
How to upgrade a Video Card for free.
If you are into video editing or video games, you know well that fast is never fast enough.
Surprisingly, most MacBook Pro users are unaware of a very simple trick to switch Graphic Cards, and dramatically improve performance on demand. Apple MacBook Pro laptops have two graphic cards; in my case a slower NVIDIA GeForce 9400M, selected by default to help extend battery life, and a faster NVIDIA GeForce 9600M GT.
First, follow these simple steps to see your Graphic Cards:
1. Click on the Apple Logo (very top left)
2. Click on “About This MAC”
3. Click on “More Info”
4. Scroll down to “Graphics/Displays”

As you can see, I have a NVIDIA GeForce 9400M, and a faster NVIDIA GeForce 9600M GT. The highlighted Graphic Card is the one your system is currently using.
Now, let’s switch to the faster card.
Important: Make sure you save any documents, projects or websites you are working on. You will need to log out to complete this step.
1. Go back to the Apple Logo (very top left).
2. Click on “System Preferences” and the “Energy Saver”
3. Under “Graphics” select the “Higher Performance” option
4. Click “OK” to log out.


Done. The laptop will do a quick reboot and switch to the faster Graphics Cards, which obviously will need more power and generate more heat, so I strongly suggest you only switch to the faster card when using a Power Adapter.
To go back to the slower, more battery friendly NVIDIA GeForce 9400M follow the same steps and under “Graphics” select “Better Battery Life.”
Cool uh? You’re welcome.
Video
Why Hard Drive prices are going (way) up.
Approximately 65% off all hard drives are made in Thailand; another 20% have components made there as well. A single facility in Bang Pa-In owned by Western Digital produces one-quarter of the world’s supply of “sliders,” an integral part of hard-disk drives.

A goal partially submerged on a flooded football field in Bangkok's suburbs. Reuters/Damir Sagolj
Since July’s flood, I have received notifications that prices have an immediate price increase for external hard drives but it will be less noticeable for laptops and desktop computers due weakened demand. According to the New York Times, those companies whose facilities were not damaged, such as Seagate, might see an increase in profit margin to about 30 percent from about 20 percent before the floods. Actually, Seagate’s share price has increased 60% in one month!

If you have been planning on getting a new hard drive, buy it now. If you are shooting HDSLR video or are planning to start anytime soon, you will need a faster, bigger hard drive, buy it now.