Video
Filmmaking Essentials for Photographers. Mini Courses.
Why Filmmaking Essentials?
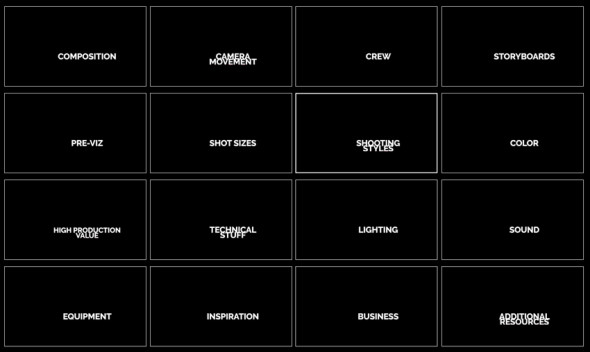
One of the main challenges photographers face when starting to shoot video is to focus too much on hardware and software, and forget about the most important part: the story. While this informative course includes some technical information, the main goal is to provide an overview of the many aspects of filmmaking, and identify potential business opportunities with motion. Click HERE.
The “Filmmaking Essentials for Photographers” course is based on a popular event we have been presenting for several years, but it has been greatly enhanced with additional visuals and examples. Some of the clients and sponsors for the live event include Adobe, Adorama Pro, B&H Photo, Cinevate, Future Media Concepts, Gulf Photo Plus (Dubai), HOW Design Conference, International Center of Photography, Lynda.com, McCann Erickson, NAB Show, Panasonic, Photo District News, PhotoPlus Expo, Photokina (Germany), Savannah College of Art and Design, School of Visual Arts, Sony, and X-Rite, among others.

Click on the Image to access FREE Tutorials.
Why these Mini Courses?
Sometimes we don’t have time for three-hour lessons; rather, we just need a quick and concrete answer for a very specific question. Because of that, in addition to longer courses we’ve released these mini courses, averaging three-to-five minutes each. Click HERE.
Click on the Image to access FREE Tutorials.
Video
Filmmaking Essentials for Photographers. Online Intro Course.
In 2011 I was invited along with National Geographic photographer David McLain to present a series of two-day workshops nationwide. The events were produced by Photo Quest Adventures and sponsored by PDN, Sony, Adobe, and other leading brands. The main goal was to help photographers transition into video by simplifying key concepts and providing shortcuts, resources, and advice on what gear to buy.
I have been honored to teach “Filmmaking Essentials” at all major industry events, from PhotoPlus to Imaging USA to NAB, from South America all the way to Dubai, Hong Kong, and Thailand, and at home in New York.
Few people know that I never use the same presentation twice. Each and every time I add things I’ve learned, plug in valuable feedback from attendees, students, and this website’s readers, and I strive to improve the educational experience with better examples and shorter explanations.
When looking at the advancements in digital technology since those first workshops it seems like decades have gone by. Today, we have access to a variety of brands and models of very compact cameras that can see in the dark, shoot 4K or higher resolutions, offer incredible frame rates, and even offer GPS and WiFi features so they can be easily controlled by smartphones and tablets. The future is definitively here.
But something quite odd has been happening to my personal and professional focus. The more gadgets we have at our disposal, the more I’ve shifted towards the craft of storytelling. Instead of getting more stuff, I’ve been increasingly interested in constructing and enhancing my stories to better engage the viewer. Naturally, this approach has been reflected in the educational content I produce.
Now, and for the first time, I’m proud to offer an awesome version of my one-hour presentation online. Click HERE.
The “Filmmaking Essentials for Photographers” course is based on a popular event we have been presenting for several years, but it has been greatly enhanced with additional visuals and examples. Some of the clients and sponsors for the live event include Adobe, Adorama Pro, B&H Photo, Cinevate, Future Media Concepts, Gulf Photo Plus (Dubai), HOW Design Conference, International Center of Photography, Lynda.com, McCann Erickson, NAB Show, Panasonic, Photo District News, PhotoPlus Expo, Photokina (Germany), Savannah College of Art and Design, School of Visual Arts, Sony, and X-Rite, among others.
Who is this course for?
Well, as the name implies, this version of “Filmmaking Essentials” covers concepts already mastered by advanced filmmakers or by experienced photographers who are very technically savvy. But I’m confident everyone else could learn a thing or two.
As often as possible we’ll be adding new courses, covering topics like pre-production and post, tips for one-man crews (like journalists) working stills and video assignments, advice on getting started with Color Grading, and many other fascinating subjects. As mentioned above, most of these courses are not and probably won’t be hardware or software driven, but would focus predominantly on answering the why’s, not the how’s, of the fascinating craft of filmmaking.
Also as a first, we are offering several mini-courses (averaging three minutes each and many of them for free) for those who need concrete answers to very specific questions.
So, if this is the kind of content and format you desire, vote with you wallet and let your voice be heard.
Thank you for your continued support. Click HERE to start learning.
Click on the Image to access FREE tutorials.
Video
Filmmaking Essentials for Photographers at PhotoPlus Expo.
PhotoPlus Expo is around the corner, and it will be my 10th consecutive year speaking at this awesome show.
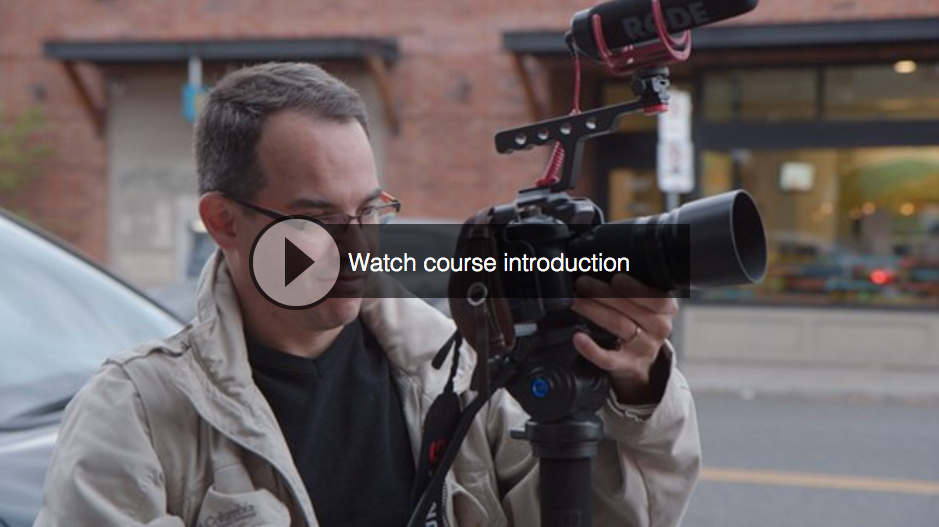
On Saturday, October 24th I’ll be presenting “Filmmaking Essentials for Photographers.”
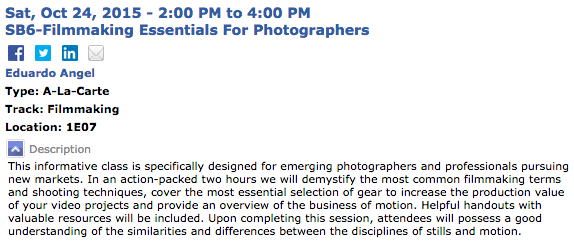
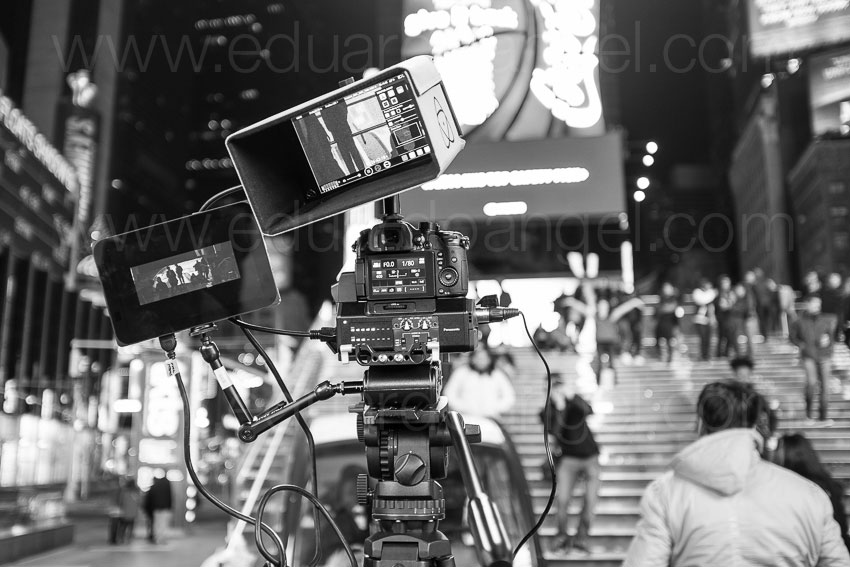
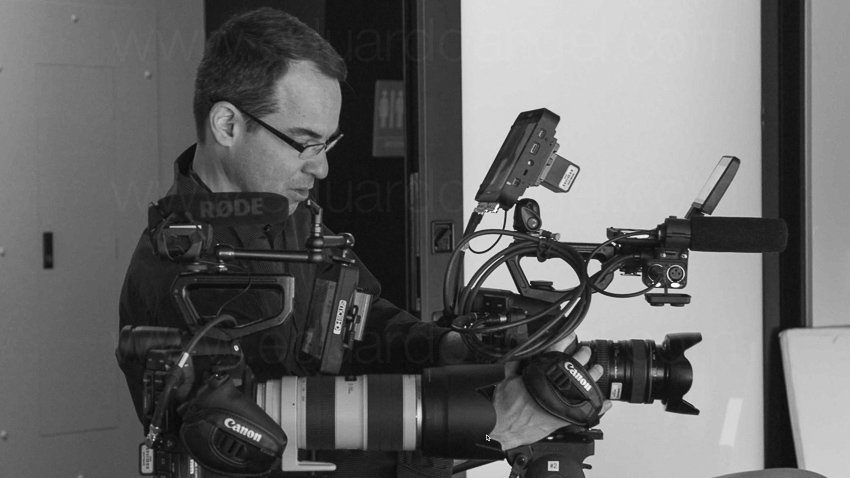
Perhaps the biggest challenge photographers and filmmakers face is to focus too much on new gadgets and forget that it is all about the story. This seminar includes essential technical information, but my main goal is to help improve the storytelling aspect of our craft, while demystifying the most common filmmaking terms. Attendees will leave the session possessing a good understanding of the similarities and differences between shooting stills and motion. I hope to see you there. In the meantime, click on the images below to see some of my work.
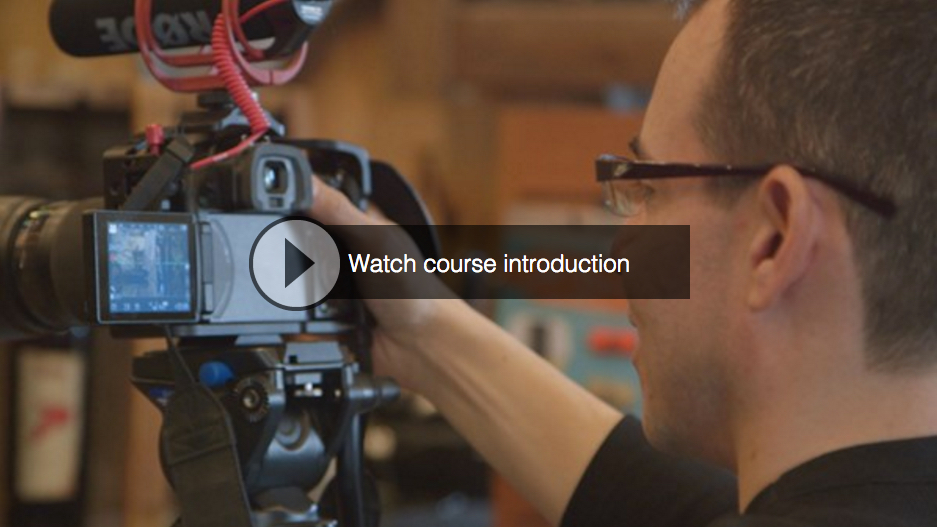
Our last two courses on Lynda.com are totally related to this event: Video for Photographers Part 1: Filmmaking Essentials and Video for Photographers Part 2: Filmmaking on Location.
Click on the images below so watch the intro to each course.
News

How to fix our broken education system. Some thoughts.
For several weeks we’ve been seriously talking about our education system, and we’d like to share some of our ideas on the subject.
The current education system is broken, outdated, and, dare I say it—dangerous. How did we arrive at this point, and what can we do to remedy the situation? (more…)
Photography
How to Color Correct for Skin Tones.
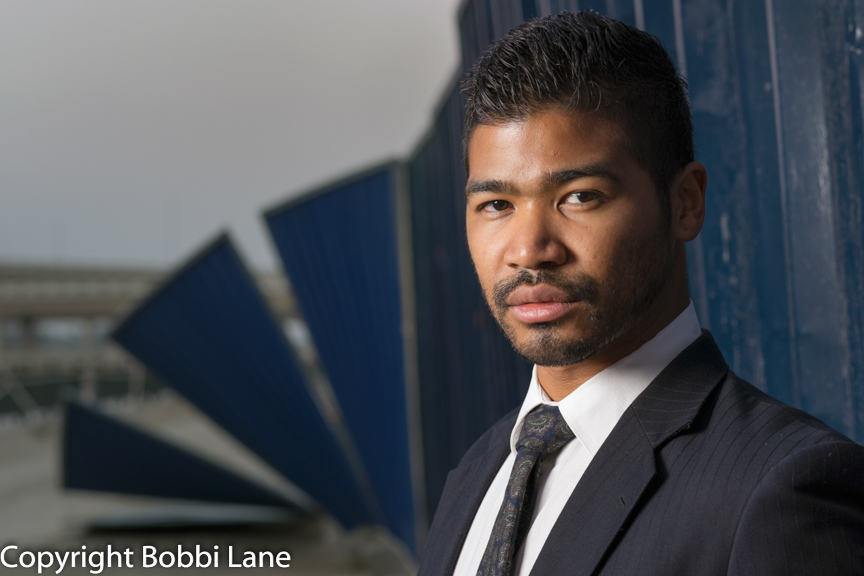
I have found that careful attention to basic color correction principles can help re-calibrate our subjective evaluation of an image to a point where effective adjustment choices can be made. I also find it extremely helpful to get as much practice as possible working on other people’s images, as this helps us become more objective about our own work! I have the good personal fortune of benefiting from the work of my fiancé, the amazing Bobbi Lane, who happens to be a really extraordinary portrait photographer! I will examine my decision making process in a recent color correction of one of her images in this post.
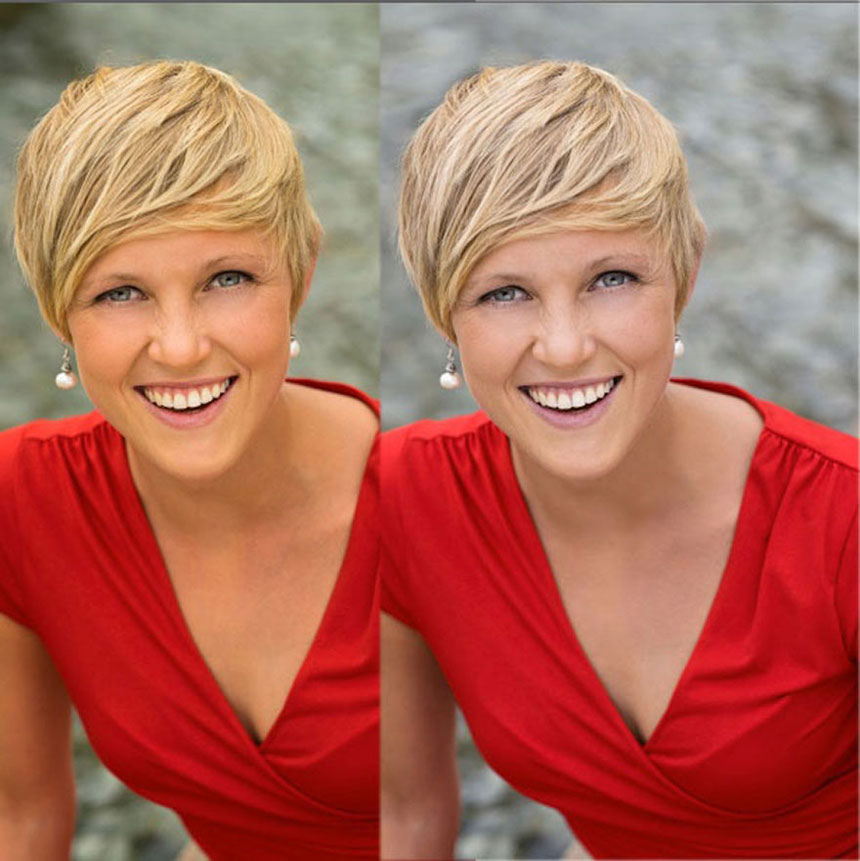
The original image is on the left with the final corrected version on the right. The original isn’t horrible, but it suffers from what I call “pumpkin skin” – just a bit too saturated an orange color. I always use the info panel numbers in Photoshop to help me decide how to approach color correction. The key to evaluating a skin tone is to look at the CMYK numbers at the upper right of the info panel. A good skin tone is all about the ratios of CMY in the secondary color readout. Ideally, yellow and magenta should be closer to each other than either is to cyan – cyan should be between 1/3 and 1/4 of the average value between yellow and magenta, and yellow should be a little higher than magenta – for a fair skinned blond, about 10% higher!
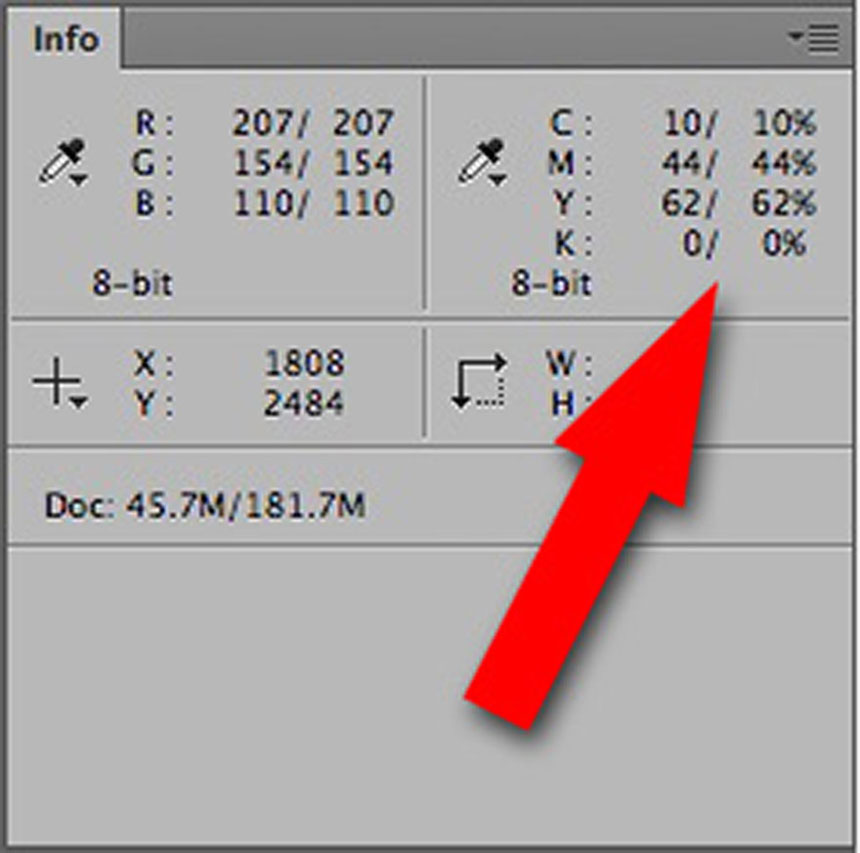
The screenshot above shows a reading from the skin color at the chin – there are two columns of numbers here because I had already added a Curves layer when I did the screenshot, normally there is only one for RGB and CMYK. The two columns are identical at the moment because no adjustment is being made, this allows you to compare adjusted with non-adjusted numbers. As I said, the cyan should not be much lower than 1/4 of the average between magenta and yellow. In the numbers above, that average would be 53 – cyan at 10 is just a little low, not horribly low, but that combined with the slightly elevated yellow (relative to the magenta) confirms my suspicion that the skin is just too colorful. In fact, this skin color is very reminiscent of an artificial tan, spray-on type of color that is sometimes used by body builders in competitions!
In order to correct the skin I want to affect the RGB numbers to get the ratios in CMY to change. If we look straight across from the top row of numbers we can see that R lines up with C – if I want the cyan value to go up, I need to do the opposite to red, the red value has to go down! In this image the red channel is very pale (a higher number in the info panel) if I want the red value to go down, I need the red channel to be darker in the area of the skin)a lower number). I could potentially use a Curves adjustment, targeting a point on the skin, but this point is very high up on the Curve so it will be harder to lower it without adversely affecting other tones.
The trick is to blend in the darker skin tone from the green channel using a Channel Mixer adjustment…
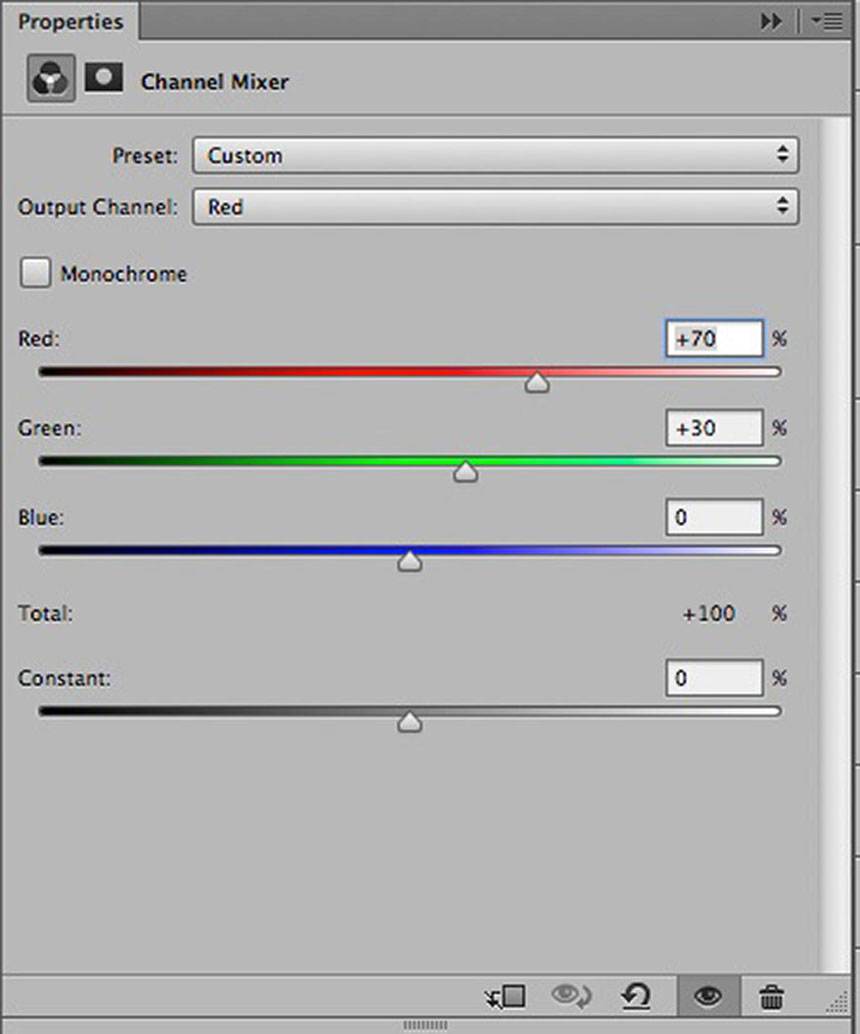
Here 30% of the green channel is blended into the red, replacing part of the red channel to darken, or lower the red value. This sets up the image for the final adjustment, a Curve adjustment raising a point in the blue channel to lower the yellow value just a little bit, resulting in a pinker look to the skin, and a better CMY ration in the color. To see a more detailed step-by-step tutorial on this process go to my original blog post on the subject.
I am teaching all about color correcting for skin tones as part of my Portrait Retouching Intensive at Santa Fe Photo Workshops June 21 & 22nd – sign up here!
Photography
Portraits: Natural and Flash.
The photographer’s best tool is light. It is used to mold, define, describe and set the mood of a portrait, so knowing how to recognize the light or control it, is of ultimate importance to the artist. I’m both a natural light, or Portraits Unplugged, kind of photographer, and also have a lot of experience with using studio strobes or portable flash, which gives me huge control. Knowing how and when to use artificial vs natural can be a challenge. I just recently photographed Ceasar deSilva in Dubai, a young, smart executive originally from Chicago, for his modeling portfolio. I scouted several locations in the afternoon with the help of my good friend, Issa Al Kindy, and we found a construction site across the river from downtown Dubai. In other images we utilized the Burj Khalifa in the background, but for this set of images I was intrigued by the construction fence that was falling down at one end. By the time Ceasar arrived, the late afternoon light had already faded in the haze. Nothing wrong with it, the light is still beautiful, and I posed him and shot with the Fuji XT 1 with the 56mm f 1.2 lens wide open for the smallest depth of field. Only his eye is sharp and the bokeh of the fence just rocks.

The whole scene and Ceasar in his power suit seems to me to require more drama. If the late orange sun was still illuminating his face, I might have stopped there. But I wanted to make it more edgy and define the mood more with directional light and darker shadows. I pulled out my Nikon SB 900 and put it in a 20” Lastolite soft box. Issa did the great honor of being my “voice activated light stand”, and with my direction, fine tuned the direction of the light.
This now required balancing the background ambient light and the flash. I still wanted to keep the background mostly out of focus, but now I wanted his entire face in focus, not just his eye, so I decided to use f 4. The true background reading was about 1/20 or 1/30, but I chose 1/60 so that the background would go darker, both the sky and the fence. This helped his face to really pop out from the fence. I did a test at 1/125 as well, but then the background was too dark. The shadows on his face are dark, no fill, which adds to the drama. This is a more powerful portrait, as if he is the man in charge, ready to take over kick some butt!
The point? Fine tune your light to match the story of your subject, and don’t settle until you find it!
If you want to learn more about lighting, I’m teaching a workshop next week at the Los Angeles Center of Photography, formerly the Julia Dean Workshop, May 5-9. It’s five days of lighting: two days of studio strobes, one day of portable flash, one day natural light and the last day combining them all. A great experience with studio, models, equipment and plenty of shooting time and feedback.
All my upcoming workshops are listed under “Education” on my website.
Photography
The original Hall of Fame is in the Bronx.
The Hall of Fame for Great Americans at Bronx Community College, the original “Hall of Fame” in this country, was designed as part of the construction of an undergraduate college of that university.
Built in a “sweeping semicircular Neo-Classical arc with wings at either end, it provides a panorama across the Harlem River to the Cloisters in Fort Tryon Park and beyond to the Palisades. It is a unique and patriotic reminder that this country’s phenomenal growth has been due to the vitality, ingenuity, and intellect of these individuals.”
Video
A shelter for the wealthy, a mansion for artists.
The Andrew Freedman Mansion, a wonderful building in the Bronx, was designed specifically as a retirement home for wealthy people who had lost their fortunes. “For many years this landmark has existed in a kind of open-but-closed limbo. Its ground floor is almost always full of children, in day care and in a Head Start program. Two elegant ballrooms and a book-filled library above have been maintained for weddings and other events, and for several years the Bronx Museum of the Arts, has offered outdoor film screenings and other cultural programs.”
The clip above is part of a series of 1-minute video vignettes we shot in the Bronx sponsored by a grant from the New York City Mayor’s Office of Media and Entertainment (MOME) and produced by students and faculty at Lehman College.
Video
The unknown, yet famous, City Island.
Numerous films, television shows, and commercials have been filmed on City Island. Films include Butterfield 8 starring Elizabeth Taylor; Long Day’s Journey (more…)
Video
Best of the Bronx.
“Best of the Bronx” is a series of 1-minute video vignettes to help promote New York City’s northernmost borough. The Bronx is well known for landmarks like the Yankee Stadium, the New York Botanical Garden or the Zoo, but the project’s goal was to highlight lesser-known gems.
The first video on the series profiled City Island, a place known for its rich maritime history, museums, and seafood restaurants. The remainder of the series includes the Andrew Friedman House, Bronx Community College’s Hall of Fame, Wave Hill, Little Italy (video below), and the Grand Concourse, among other exciting locations. (more…)
Video
Expanding our International Workshops.
We are hoping to expand our Photography and Filmmaking workshops to Hawaii, Thailand, Nigeria, Kuwait and South America. But first, we would love to hear your feedback.
Please click here if you have time to answer a few simple questions that will help us a LOT.
Thank you in advance.

Video
NAB 2013 is here. Ghost Town goes wild with DSLR Shooters.
This coming weekend I’ll be working with Jem Schofield and a very talented crew on a unique DSLR Video Field Workshop in Nelson, Nevada. The event, hosted at an awesome Ghost Town and surrounded by incredible landscapes, focuses on the craft of filmmaking, camera movement and lighting controls.
Attendees will have four production stations to shoot:
• Tripod, Slider & Dolly Station (with actors)
We will learn how to properly balance a tripod system, operate a camera on a slider and how to use a proper dolly system (including being a dolly grip).
• Rigs Station (with actors)
How and when to use handheld and shoulder mounted rigs from a number of manufacturers to get different looks in camera. Students will focus on tracking shot and other set ups while filming live actors.
• Jib Station
Learn how to operate small to medium sized jib systems, to get “money” shots of the town for establishing shots, reveals, etc.
• Filters & Exterior Light Station
Controlling natural light for exterior shots using a selection of filters, reflectors and silks is paramount.
We’ll have great equipment from sponsors such as Genus, Ikan, Indie Dolly, Induro, Kessler, Lastolite, Manfrotto, Marshall, Nice Industries, Redrock Micro, Tiffen and Zacuto.
Check the video below, and I hope to see you there!
Registration includes round-trip transportation from Las Vegas Convention Center to Nelson Nevada Ghost Town, lunch and on-site instruction.
Video
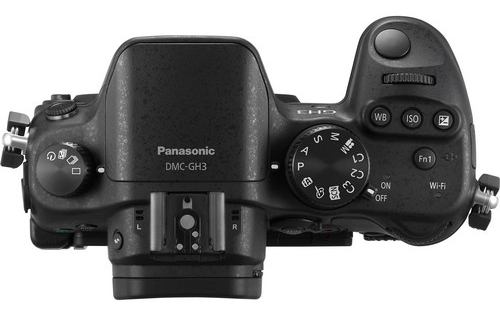
Shooting with the Panasonic Lumix DMC-GH3. Field report and impressions.
The friendly waiter at the Turkish restaurant in Sohar, Oman, saw the camera on the table and asked “Nikon? Canon? Which one is better?” To which I replied, “actually, this is the Panasonic GH3.” He stared at me, his expression turned from excited to perplexed to confused to annoyed within seconds. After an uncomfortable silence he finally asked, “Are you ready to order?”
That was pretty much my reaction when, a few weeks ago, just two days before I started teaching a “Digital Cinema for Photographers” event in Dubai, I found out that Panasonic, a major sponsor of the event, REALLY wanted me and my students to use a couple of GH3s and several lenses in my hands-on workshop.
Panasonic is one of the largest consumer electronics companies, and the GH3 is the third generation of their very successful Micro Fourth Thirds DSLM (Digital Single Lens Mirrorless) system. For a while I have been aware of the low-budget-filmmaking community’s devotion to the hacked DMC-GH2 and its ALL-I codec. I saw the DMC-GH3 at Photokina last year, but I had never before shot a single frame with a Panasonic camera. The bodies that I was given were running Firmware v0.5. Add to this a nine-hour time zone difference and jet lag, and you can begin to imagine my pain.
While I’ll be using some geeky terms, this is not an in-depth technical review, nor a scientific analysis of the GH3. You can dig into tech specs and MTF charts somewhere else. My goal is simply to share my honest and independent impressions, go over the things I liked and didn’t like, and communicate my wish list for future features. I want to emphasize that all the conclusions in this article are subjective and strictly based on my own personal experience.
“I have to warn you, I’ve heard relationships based on intense experiences never work.”
-Keanu Reeves in “Speed”
I have to respectfully disagree with Keanu on this one. Much to my surprise, the camera was much more intuitive than Sony’s NEX system, and several video features got my full attention right away.
FEATURES
• Full HD 1920×1080 60p/50p (NTSC/PAL) with 30p/25p/24p options.
• Ultra-high bit rate video recorded at 72 Mbps (ALL-I) or 50 Mbps (IPB).
• Capable of recording continuously for an unlimited time for NTSC and 29 min 59 sec for PAL.
• Native support for MOV (h.264), MP4, and AVCHD formats.
• Time Code support in the MOV and AVCHD formats.
• Extremely fast and accurate contrast-detection Autofocus.
• A 3.5mm mic input AND a headphone jack AND the option to manually adjust the sound recording levels via touchscreen controls.
• Full-time AF, AF Tracking, and Face Recognition AF are available for VIDEO. The Touch AF mimics rack focusing.
THE WORKSHOP STORY
Not having enough time to field test the Panasonic systems before the Workshop, I shot dummy clips in my hotel room and made sure that the footage would work in Adobe Premiere Pro CS6. The test went surprisingly smoothly. I then set both GH3 cameras to the same video settings: MOV at 1920×1080, 24p, 72 Mbps ALL-I, Standard Photo Style, White Balance at 5500K, got ND filters for all the lenses, extra batteries, and a few Class 10 SD cards. And then I prayed.
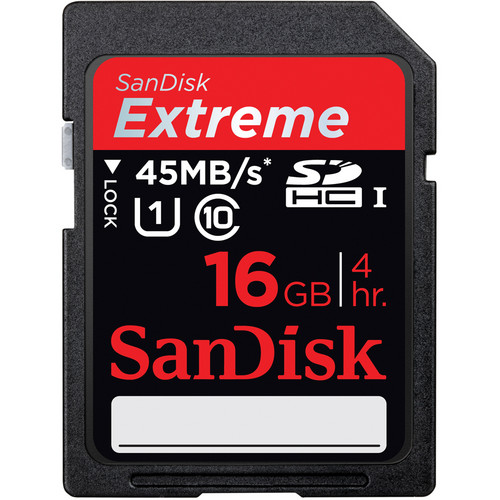
You must use a Class 10 SDHC card when recording Ultra-high bit rate video at 72 Mbps (ALL-I).
Note: It’s extremely important to point out that full HD on this camera requires memory cards with the fastest speed available. My “older” memory cards didn’t work, giving me only four seconds of recording time.
VIDEO
We spent the first day of my three-day Digital Cinema Workshop covering all the technical similarities and differences between stills and video. On the second day, we planned a location shoot with a Capoeira team and spent a couple hours shooting in the afternoon. On the third and last day we covered the different hardware and software requirements for post production and spent three hours editing the footage. I am especially proud of the short clip my students put together in such a limited amount of time and with newly acquired knowledge (and using brand new gear!).
Capoeira in Dubai. Student Project. from Eduardo Angel on Vimeo.
We could obviously use a few more days sweetening the audio, fine tuning transitions, and grading, but for a two-hour shoot and a three-hour edit, I believe this is a good example of what can be accomplished with great teamwork, interesting subjects, and the GH3’s many customizable options.
SAMPLE CLIPS
Below you will see a few additional sample clips, all shot as H.264, 1920 x 1080, 23.976 72Mbps ALL-I, using the GH3’s “Standard” profile (Contrats = 0, Sharpness = 0, Saturation = 0, Noise Reduction = 0). The Exposure and White Balance were set manually. The lens was the Lumix GX Vario 12-35mm F2.8 set on AF Tracking mode, which worked very well most of the time. Despite the lens having “environmental sealing,” as you can see the fine desert’s sand inevitably found its way to the sensor. I put the clips together on Adobe Premiere Pro CS6, and have NOT done any grading nor sharpening. These short clips are intended to show you what the GH3 is capable of, not to tell a specific story.
SOMETHING INTERESTING
So, mission accomplished, right? Not so fast. A couple of days later, as I was wrapping up my day, a friend asked “Are you busy? I wanna show you something interesting.” With only the GH3, the 12-35mm 2.8 lens, a 4GB card and a low battery I jumped into his car. The “something interesting” happened to be access to the Royal Suite at the 7-star Hotel Burj Al Arab—a notoriously difficult area to access. With limited amount of storage space and battery life I managed to capture a few keepers.

The 7-star Burj Al Arab hotel resembles a giant sail rising over the Gulf, with changing colors visible for miles at night.

The very next morning (on my “day off”), I headed out to meet an old friend for brunch at the Atlantis. Should you ever find yourself in this neck of the woods, I strongly recommend that you pay the Atlantis a visit. As we enjoyed the seemingly endless food, my friend received a call to drive to Abu Dhabi right away to pick someone up and then drive back to Dubai. Would I like to come? Guess what I had hanging on my shoulder? This time I had a full battery and a 16GB card, but nothing else to shoot the magnificent mosque and the impossibly opulent Emirates Palace. Once again, the GH3 did a fantastic job.
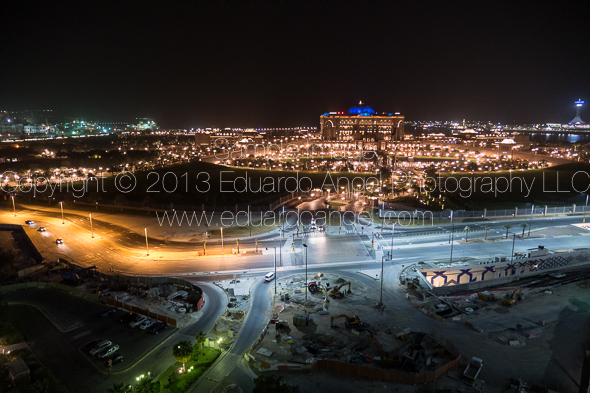
A nice view from a 25th floor overlooking the magnificent Emirates Palace in Abu Dhabi.
MORE FEATURES
These are some of the GH3’s features that are not obvious to the naked eye, but are interesting once you are aware of them:
• A magnesium alloy camera body that Panasonic describes as “splash proof and dust proof.”
• The Panasonic RAW files (RW2) work fine in Adobe Lightroom [add link to LR workshop] but the most current version (4.3 as of this writing) is needed. Unfortunately there are no Panasonic lens profiles available as of this writing.
• All the video formats worked seamlessly on Adobe Premiere Pro CS6. Even the video recorded at 72 Mbps was easy to preview and edit on a two-year old MacBook Pro (with 8GB of RAM and an external 7200 RPM Hard Drive as a Scratch Disk).
• HDMI monitor output can be sent with or without information overlays.
• I had a DMW-MS2 Stereo Shotgun Mic with me, but was happy to learn that the camera’s built-in internal microphones provide stereo audio.
• The GH3’s sensor has a 4:3 aspect ratio.
• Built-in Time Lapse, and HDR but unfortunately it works only for JPGs not RAW.
• Five physical function buttons, and two touch-screen function buttons, all customizable with close to 40 options to choose from.
• Virtually all the key shooting controls are within the right hand’s reach. This frees up the left hand to hold the camera or focus manually.
• Excellent battery life, lasting a full day under normal operation. For extended video sessions I’d consider getting the DMW-BGGH3 Battery Grip.
• Apparently (I have not tested this) the GH3 is also capable of real-time image output to the LVF or the rear monitor AND to an external monitor via HDMI.
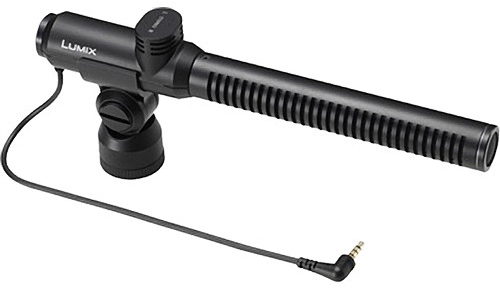
DMW-MS2 Stereo Shotgun Mic
LENSES
I shot extensively (more than 2,000 images in 18 days) with the Lumix GX Vario 12-35mm F2.8. The lens is tiny. And fast. And awesome. It has the equivalent focal length to a 24-70mm F2.8 on a 35mm system but it is a fraction of the size and weight. As you already know, this is a very good start when dealing with packing issues.
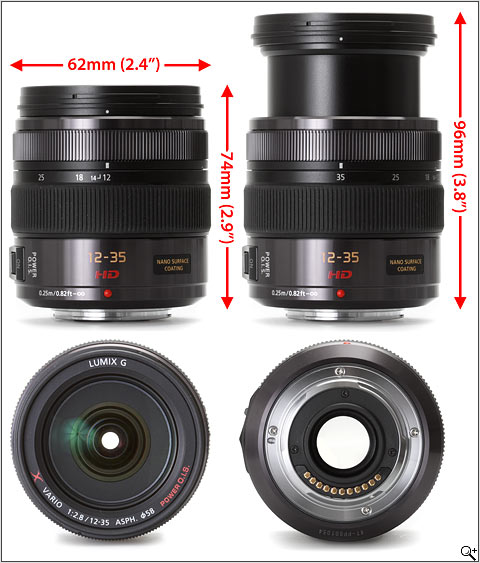
Lumix GX Vario 12-35mm F2.8
In terms of depth of field, the lens behaves like a 16-45mm F3.5 lens on an APS-C sensor, or a 24-70mm F5.6 lens on a Full Frame sensor. It is hard to get used to this, especially when shooting another system simultaneously, but it is not a disadvantage per se.
Click to keep reading (more…)
Video
Gulf Photo Plus 2013 Workshops in Dubai.
We are truly honored to be a part of the upcoming Gulf Photo Plus (GPP) Workshops in Dubai. From March 1-8 2013, we will be teaming up with industry leading professionals Joe McNally, Gregory Heisler, David Hobby, Zack Arias, Peter Hurley, Bobbi Lane, and other great photo instructors for an unforgettable event. We will have a jam-packed week with workshops and activities aimed to help improve skills, inspire, and educate photographers at every level of expertise. Taking place at the core of the Middle East’s photo community, this is going to be one incredible week!
We are thrilled to present two “Photo Friday” seminars AND two 3-day Workshops introducing the craft of Digital Filmmaking to photographers. As we all know, the emergence of HD Video in current cameras has opened up a new world to photographers and cinematographers, widening the creative palette for visual expression. Our workshop’s emphasis will be on reinforcing the theory behind the technique; understanding the equipment and processes rather than concentrating on a finished product. Here are some of the many topics we will cover, all while working as a small film crew: Digital cinema workflow, new terms and techniques, Adobe Premier Pro, script writing, production considerations, budgeting, and the most essential gear.
Check out below what our workshop is about:
David Hobby, the famous and respected “Strobist” recently said “I happen to think this is the best photo week of its kind on the planet. If you are anywhere near that part of the world, GPP is a no-brainer. But even if you are far away, it’s worth the trip.”
That’s what I call a statement.
Below is an AWESOME shoot-out during last year’s GPP between Hobby, Martin Prihoda and Gregory Heisler. Simply brilliant.
Shoot-Out, GPP 2012 from gulf photo plus on Vimeo.
For a look at what GPP 2013 has to offer, check out their complete list of workshops. This can be the trip of a lifetime.
Photography
The New York Public Library designs the future.
The New York Public Library is doing an outstanding job incorporating education, technology and design into their present and future plans. If you share a hope for a better education system and a love for digital learning solutions as we do, then this should strike your interest.
• A new plan, designed by the great British architect Norman Foster, will create a state-of-the-art circulating library within the main branch (which is called the Stephen A. Schwarzman Building), a 101-year old landmark in New York City. Foster’s design will open spaces currently closed to the public, creating a four-level atrium, with bookshelves, sitting areas and desks, and will incorporate the books, programs, and services now found at the “heavily used but seriously deteriorating” Mid-Manhattan Library across Fifth Avenue. The project, expected to be completed in 2018 will cost $300 million. Half of that will come from the city and the rest from donations and the sale of properties. Long term, the project will save $12 to 15 million from the library’s tight yearly budget according to Anthony W. Marx, the library’s president.
After the renovation, which has been somewhat controversial, the building is expected to receive 4 million visitors per year. It will be open seven days a week, most days until 11 p.m. Incredibly enough, the branches will remain open throughout construction! Check out the 3D renderings and benefits for project below (it does not have sound, your speakers are fine!):
Benefits after the renovation:
- More public library space than is currently available in all three locations combined
- Open 7 days a week, 12+ hours most days
- Books and DVDs to browse and check out
- Natural light and beautiful views onto Bryant Park
- New spaces for children and teens
- Classrooms, computer labs, expanded research areas
- Business Research Center and Job Search resources
- Expanded spaces for scholars and writers
- Research materials properly preserved beneath Bryant Park
- Savings that can be spent on new librarians and curators and more books
Click here to keep reading (more…)
Photography
Fresh Images. Europe.
These are some of my favorite images from a trip to Europe a few weeks ago. Even though I was overseas for almost three weeks, I only had about four days (or 96 hours) to shoot for fun. I’m working on a more elaborate project for these images. For now, check this PhotoShelter slideshow.
Video
PhotoPlus 2012 Workshops
The 2012 PDN PhotoPlus Expo is the largest photography and imaging show in North America, attended by over 24,000 professional photographers and enthusiasts. This year we are presenting two awesome seminars: The Power of Lightroom 4 and Digital Cinema Essentials for Photographers.
If you have any questions don’t hesitate to contact us!
Video
Photokina 2012 focuses on HDSLR Video.
Every two years there is one focal point in the Photo industry: Photokina, the world’s leading imaging fair. Photokina covers the entire spectrum of imaging, from image capture to image processing and storage to image output. This is where new trends and major innovations are presented to the world, and where the spotlight is on groundbreaking technological developments including mobile imaging, connectivity, and moving images. The show always delivers an impressive program of workshops, symposiums, photography exhibitions and many special events at the exhibition centre and at sites all over Cologne.
As you might know every Photokina show focuses on one single topic. Because filming withHDSLR systems is increasingly becoming a necessity for professionals, this year’s topic is HDSLR Video.
The show has created a “Shoot Movie Park” in Hall 4.1, offering a unique area where suppliers have an optimal location to present themselves to the attendees. The Movie Park will be supplemented by a series of lectures, workshops and exhibitions. Canon will present Richard Walch, sailor, snowboarder and photographer. Zeiss will have Sebastian Wiegärtner, one of the first users in the German-speaking region to understand and make use of the capabilities of the new HDSLR systems. We are very excited to be representing X-Rite, and show our most recent Color Management Video Tutorials (Video 1, Video 2 and Video 3).
Representatives of ADF — Arbeitskreis Digitale Fotografie (digital photography working group) will also be sharing their expertise as they answer visitors’ questions about digital photography and film. More information about the “Shoot Movie” program can be found here.
Stay tuned! We will be sharing the most exciting news and products live from Photokina via Twitter and Facebook. If you are not yet following us, do so today!
Video
Interview with WPPI en Español.
For over 30 years, Wedding & Portrait Photographers International (WPPI) has been a main source of events and education for professional photographers. We are thrilled to be part of their ongoing interview series with photographers and filmmakers. I shared some insights about our work, the transition from architect to photographer, and our passion for everything visual. We briefly discussed how we successfully built a business that is able to maintain an equal balance between technology consulting, education and training, and visual storytelling.
Please take a few minutes to check out the interview, and as always, post your comments and questions below.

Video
Adobe Lightroom 4.1 is (finally) available.
The Adobe Lightroom 4.1 update brings support for several new cameras including:
- Canon EOS 1D X
- Canon EOS 5D Mark III
- Canon EOS 60Da
- Canon PowerShot G1 X
- Fuji X-Pro1
- Leaf Credo 80
- Nikon D4
- Nikon D800
- Nikon D800E
- Olympus OM-D E-M5.
Other additional features and enhancements are:
• The ability to process HDR TIFF files. (16, 24 or 32-bit TIFF files)
• Additional Color Fringing corrections to help address chromatic aberration.
• Save photobooks created in the Book Module to JPEG
• Publishing photos to Adobe Revel is now accessible via a Publish plugin
• Corrections for issues introduced in previous versions of Lightroom.
To see all the original features see this article and to understand the new VIDEO features check this one.
How to install the new version? Easy.
1. Open your Lightroom 4 and when the software update dialog pops up click “download.” This will take you to Adobe’s download page.

2. Click on “proceed to download” and “download now.”

3. Save the file to the desktop (so it is easier to find it). The download should take about 3 minutes or less.

4. Double click on the installer, follow the step-by-step instructions.
5. Enjoy.
In two weeks we will be presenting an awesome 2-day Lightroom 4 Workshop at the School of Visual Arts (SVA). We hope to see you there.
Video
And this is why photographers need to learn video right now.
Last week I attended the Silver & Ink event at the Savannah College of Art and Design. I was invited to see the graduate students’ work, teach a video class, speak at a “business of photography” panel discussion, review undergraduate and graduate portfolios, discuss technology trends with faculty, exchange my views about the future of photography with career advisors, and attend a stunning art opening. Among the many questions I received, there were two particular questions that were asked many times over—and I could sense a mix of fear and excitement in those who asked these questions.
Question #1: As a photographer, why should I learn video?
The answer is really simple: access to more future opportunities. According to careerinfonet.org there is a better than average annual growth in job openings for photographers, yet video editors, as well as audio and video technicians make significantly more money—either through an hourly wage (freelance) or yearly salary (part- and full-time employment).
I compared national averages with New York state averages, and the results are pretty clear.


In New York, video editors can make from $35,000 to $102,000 per year. Photographers make from $18,000 up to $81,000. As you can see, salaries for audio and video equipment technicians fall right in between the salaries of photographers and video editors
I personally know very few photographers at the high-end of the spectrum, but I know of several video editors who make a lot more than $100K.
What about employment growth?
Video
The Business of Photography. Upcoming SCAD’s Silver & Ink events.
The Savannah School of Art and Design (SCAD) recently held a Photo Exhibition open to all undergraduate and graduate photography majors or minors who are/were enrolled as full-time or part-time students during the 2011-12 academic year at any SCAD location (Savannah, Atlanta, Hong Kong or eLearning). Each student submitted up to three entries from all different genres: fine art, commercial, product, editorial, documentary, alternative processes, new media/experimental, and 2D/3D mixed media. Over 750 entries were received!

Later this month, we have been invited to join the reviewer’s panel at the opening reception, and be part of the photographic review taking place April 26th through the 28th. Lauren Wendle, VP and Publisher of PDN Photo District News will also be there to share her always relevant views on the photo industry. Other speakers include Chicago artist photographer Terry Evans, Michael Itkoff, founding editor of Daylight Magazine, and Finnish-American photographer Arno Rafael Minkkinen.
On Friday April 27th, we will be talking about “The Business of Photography” covering topics like marketing and self-promotion, building a client base, and working on assignment. The panelists featured in PDN’s 30th issue, will share how they got to where they are today, what they learned in school, what they wish they had been taught, and will provide advice for students who are heading into the professional photographic industry.
I am always excited to see such a variety of new student work. We see so many different trends in photography whether in commercial advertisements, editorial magazines, fine art, or documentary work. Students are aware of those trends, but they are still experimenting and finding out who they truly are as photographers. Their body of work shows a progression and gives us a brief view of where contemporary photographic imagery is heading. This panel discussion will help the students answer questions about their future career as artists and professional photographers. Creativity and technical skills are always required, but business skills are paramount in order to be successful in our extremely competitive industry.
More information is provided on Scad’s Photo Blog.
Video
Adobe Lightroom 4 is shipping. Price cut in half.
The full version of Lightroom 4 is available now and Adobe cut the price in half: The full version (which used to cost $299) will now be $149. The upgrade version will only cost $79. The beta version (which was downloaded more than 250,000 times) will expire on March 31, 2012.
For an in-depth review of Lightroom’s newest features check our previous post. Also, if you live near New York or plan to visit during the Summer, check one of our upcoming events “What’s New in Adobe Lightroom 4,” and a 2-day hands-on Workshop “Creating Custom Photo Books with Adobe Lightroom 4.”

Adobe Lightroom 4 Geotagging
Video
Meet Canon’s C300, in person.
This week (January 25th) Abel Cine New York is showing Canon’s brand new EOS C300. Abel is also hosting a similar event next month (February 16th) in Los Angeles. More than just another cool camera, the C300 systems confirms Canon’s commitment to the filmmaking industry. The systems comes in two flavors, one with EF mount (EOS C300) which takes your good ol’ Canon still lenses, and another one (C300 PL) with a PL mount. To learn more about this system and what it means for photographers shooting video read my previous post.
Also this week, Canon is showing in Chicago a series of short films shot with the C300, as well as “Behind the Scenes” interviews with the directors and crew members.

Video
Can’t miss seminars at PDN’s PhotoPlus Expo 2011.
Last week, my great friends Ted Kawalerski, Matt Stanton, and Justin Katz helped me shoot this 45-second video to promote my upcoming seminars at PhotoPlus Expo in New York City.
On Friday, October 28, from 8:45 to 11:45 a.m., I’ll be co-teaching “Portrait Lighting Techniques & Lightroom Workflow” with Bobbi Lane. Expect a very energetic and intense seminar.
The same day, from 3:45 to 5:45 p.m., I’ll be presenting “Intro to Digital Cinema.” This 2-hour class is specifically designed for photographers transitioning into HDSLR video, and my goal is to provide enough tips and resources so that attendees will be able to start shooting video by 6 p.m. that same day. I guess I love challenges. As the title says, this is an introductory class.
To truly understand all the technical concepts, filmmaking techniques, and upcoming trends of this amazing digital revolution, I suggest you attend one of my upcoming 2-day PDN HDSLR Video Workshops in New York (Oct. 30-31), Washington D.C. (Nov. 5-6), and Los Angeles (Nov. 11-12).
Let me know if you have any questions!