Video
Creating the habit of backups.
Creating a new habit isn’t easy. We all know that. And I’m not talking about major changes like exercising more, eating better, or working less, but simple things like backing up our projects, especially when working on locations. The “I’ll do it later” or “this is not a good time” will always be there so by incorporating simple and efficient practices into our standard workflows can make things much easier and eventually save a project or even a client.
ShotPutPro, currently on its fifth version is an application known to many in the film industry. What I find interesting is that even some of those who know about the app and totally get its importance skip the critical backup step. This article covers how we use ShotPutPro on location.
First, we label each and every card, not only with a label (which could fall off) but also by giving each card a unique name. Since we are almost always using two cameras, we name a 64GB card as A1 and a second card with the same exact capacity (64GB) as B1. The same goes for A2 and B2, and so on. When we are replacing a card during a shoot, say C1, we also replace C2, even if there’s space left. This might seem wasteful but it keeps the data wrangling much smoother. After 10 hours, two or three cameras, and several cards, it is very easy to forget what has been dumped and what hasn’t.
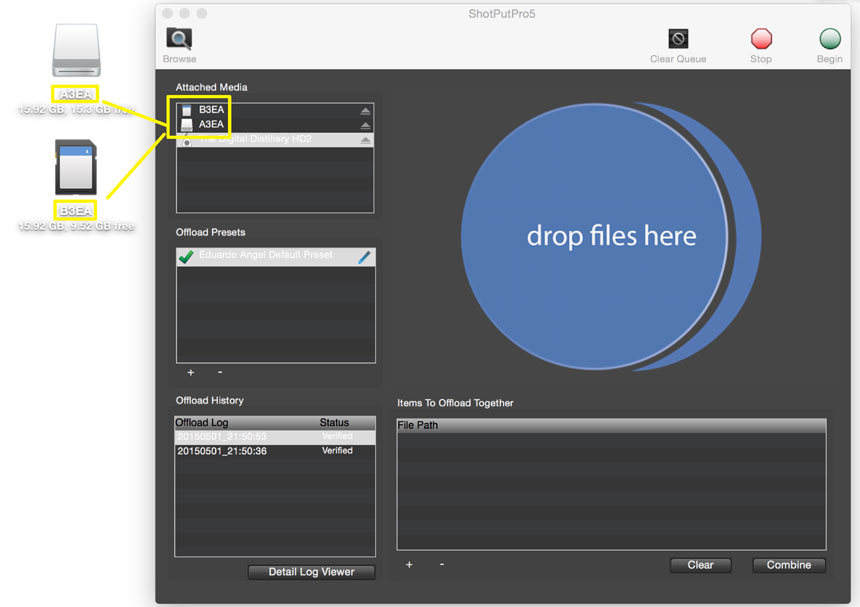
As you can see the cards have a unique name that shows on the computer’s desktop/finder as well as in ShotPutPro
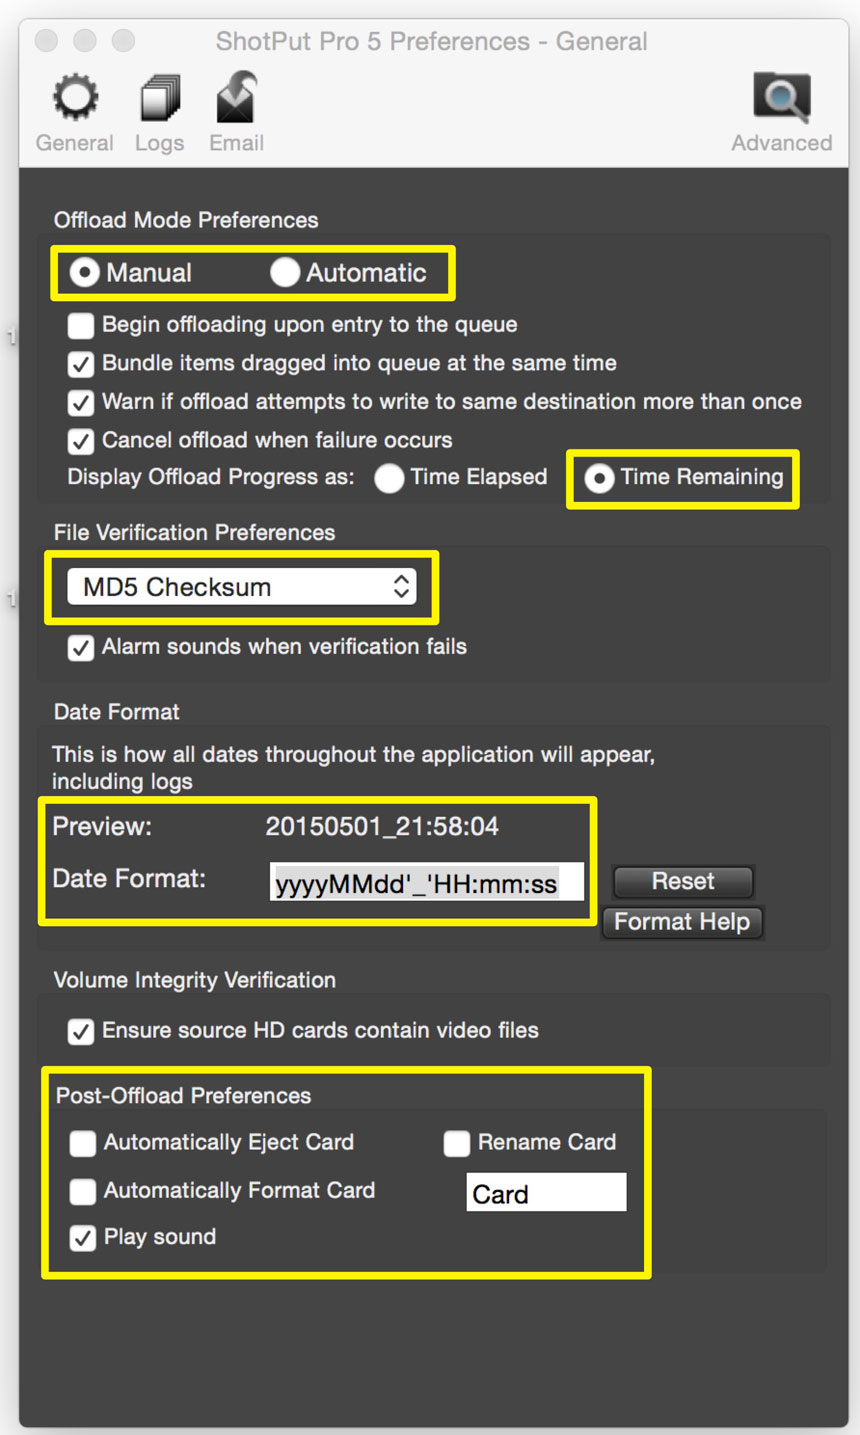
Under Preferences, there are several options but the most important ones for us are:
Manual vs Automatic. I prefer Manual, which means I have the option to choose when to start the data transfer. If Automatic is selected, as soon as the application detects a Hard Drive or Memory Card it will start the process.
Under Display Offload Progress I prefer to see how much time will it take to be done. That way I know if I can grab something to eat or do something else or simply sit next to the computer and wait a little longer.
Under File Verification Preferences MD5 Checksum is the most current standard.
I like to use the following format for dates: year/month/day/time in the 24 hour format. So, for example, it would read 20150520_211037.
Under Post-Offload Preferences we have everything disabled except “Play Sound.” I’ve been doing this for years and I still don’t feel comfortable formatting the card right away. You might feel differently.
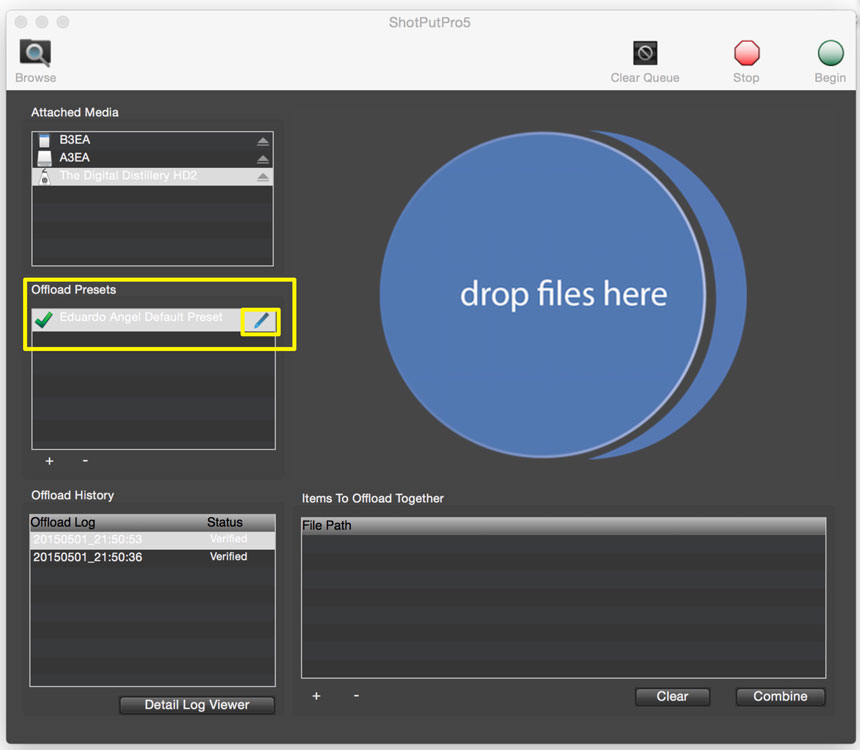
Back to the main window. Under “Offload Preset” click the little pencil to edit the preset.
This is how our Main Preset looks.
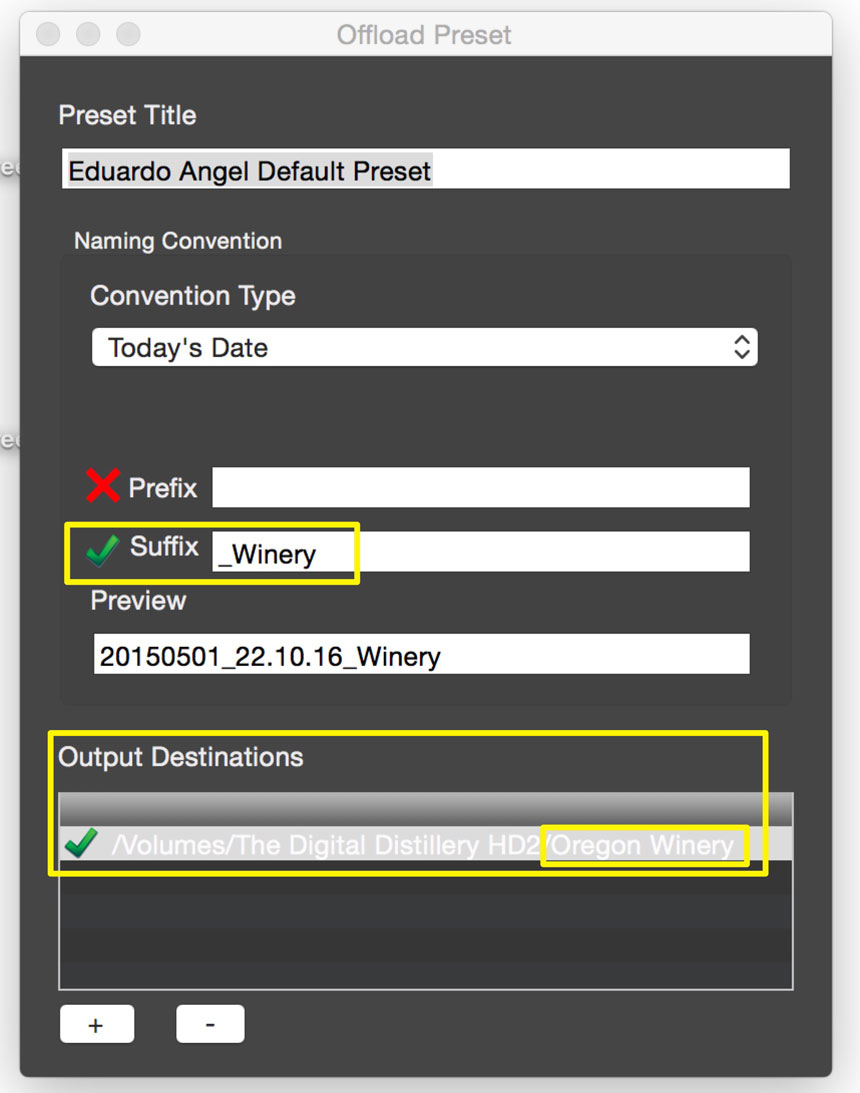
We change the “Suffix” based on each project.
The Output Destination also changes from project to project, simply click the + sign to select an external hard drive / folder /subfolder for your backup.
ShotPutPro can back up to (apparently) endless destinations so you can select two or three hard drives to have multiple copies with a single click.
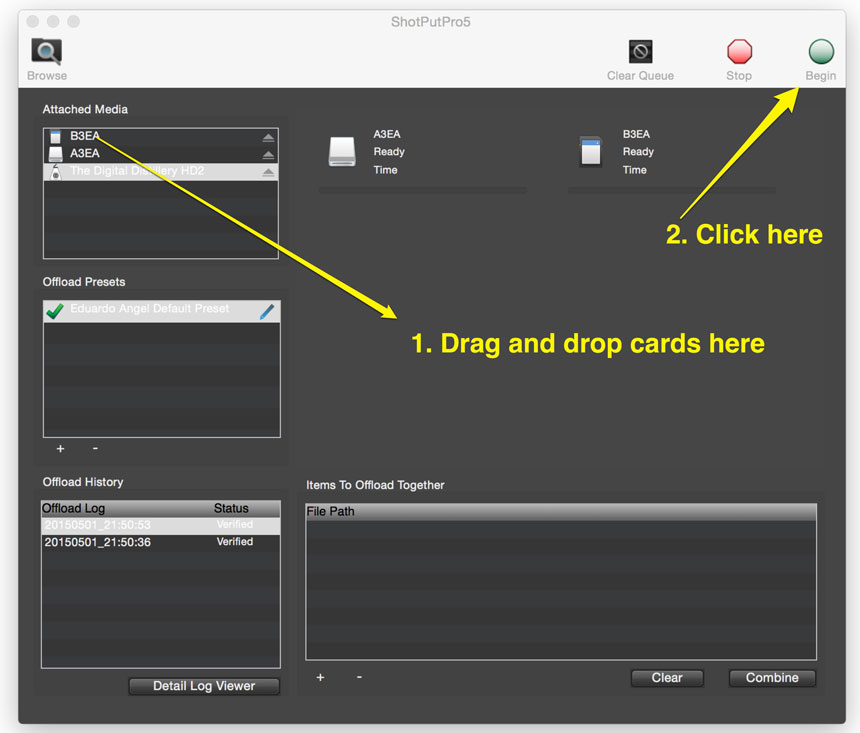
Now, this is the magical moment. Simply drag and drop your Hard Drive or Memory Cards into the “Drop Files Here” circle. Then click the “Begin” button on the top right of the menu.
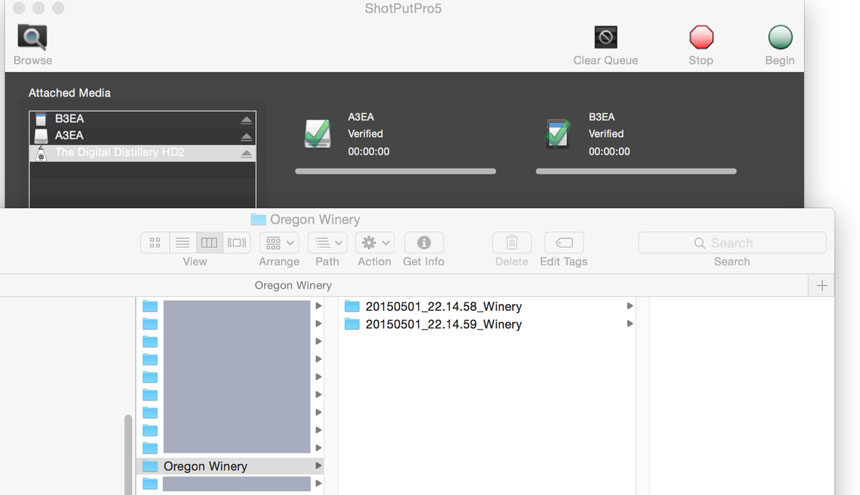
Done and done. ShotPutPro created a folder per memory card with the date and exact time of the backup.
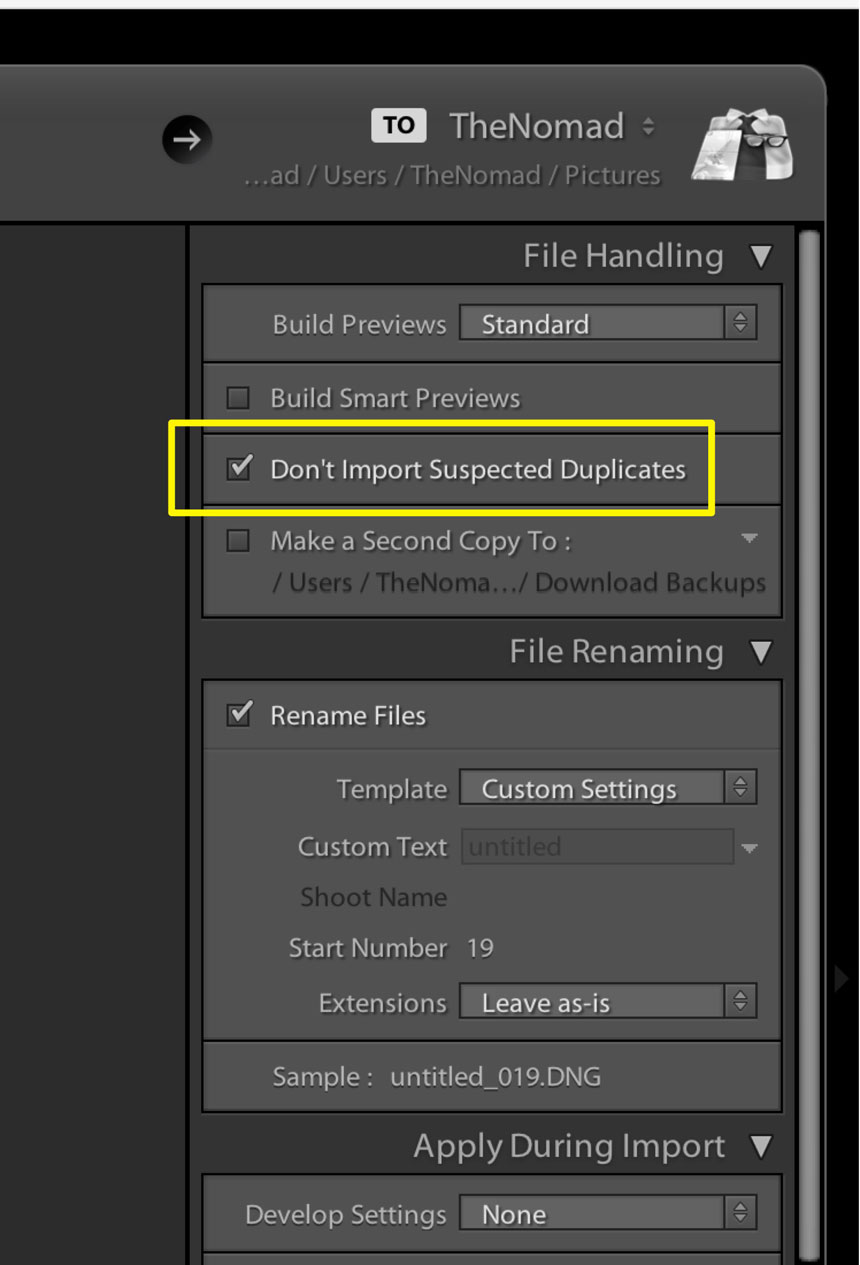
A weakness in this app is that if we try to backup the same card again, even to the same destination, it will let us. I’d prefer if it had a similar feature as Adobe Lightroom to “prevent importing suspected duplicates,” but it doesn’t, so once you backup a card I strongly suggest you put it away, grab a fresh one, and keep shooting.
That’s all for now. I hope this helps you. If you have questions or suggestion for similar upcoming articles, feel free to contact me here or here.