Video
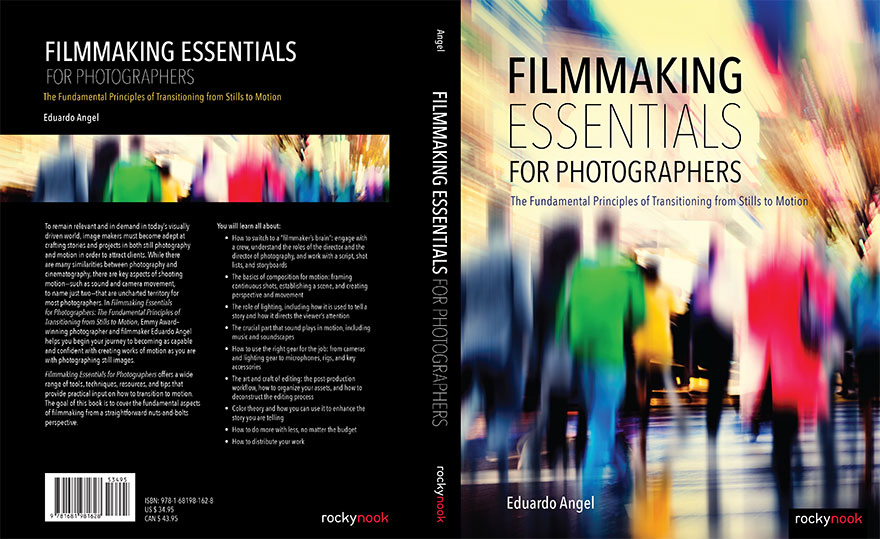
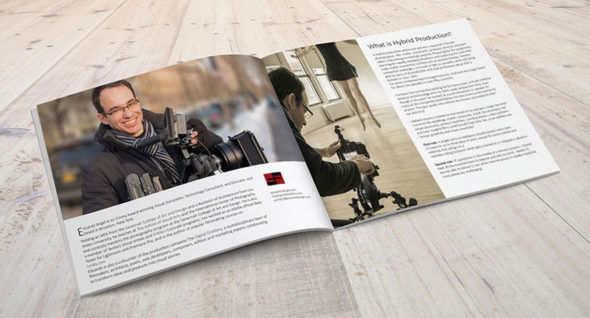
Filmmaking Essentials for Photographers (PDF Edition)
To remain relevant in today’s visually driven world, image makers must master photography and video.
While there are many similarities between photography and video, there are key aspects of shooting motion—such as sound and camera movement, to name just two—that are uncharted territory for most photographers. In Filmmaking Essentials for Photographers: The Fundamental Principles of Transitioning from Stills to Motion, Emmy Award–winning photographer and filmmaker Eduardo Angel helps you begin your journey into as confidently as you are with shooting stills.
Filmmaking Essentials for Photographers covers a wide range of tools, techniques, resources, and practical tips on how to transition to video.
Even though this is not an in-depth book on editing, directing, or even lighting, we cover the fundamental aspects of filmmaking from a straightforward nuts-and-bolts perspective. You will learn all about:
- How to switch to a “filmmaker’s brain”
- Truly understand the director’s and director of photography’s roles
- How to work with scripts, shot lists, and storyboards
- The basics of composition for motion: establishing a scene, creating perspective and moving the camera
- The role of lighting to enhance stories and direct the viewer’s attention
- The crucial role of sound in motion
- How to use the right gear from cameras and lighting gear to mics, rigs, and key accessories
- The art and craft of editing
- Post-production workflows and how to organize your assets
- Color theory and how you can use it to enhance the story you are telling
- Lastly, how to do more with less—no matter the budget
Increasingly, opportunities come to those who can create multimedia content.
The book covers some of the new business opportunities that will open up to you. With your newfound skills in motion you will tackle educational content, interviews, short films, stock footage, and commercials.
Filmmaking Essentials is now ranked among Amazon’s top 50 books for photographers and filmmakers!
Video
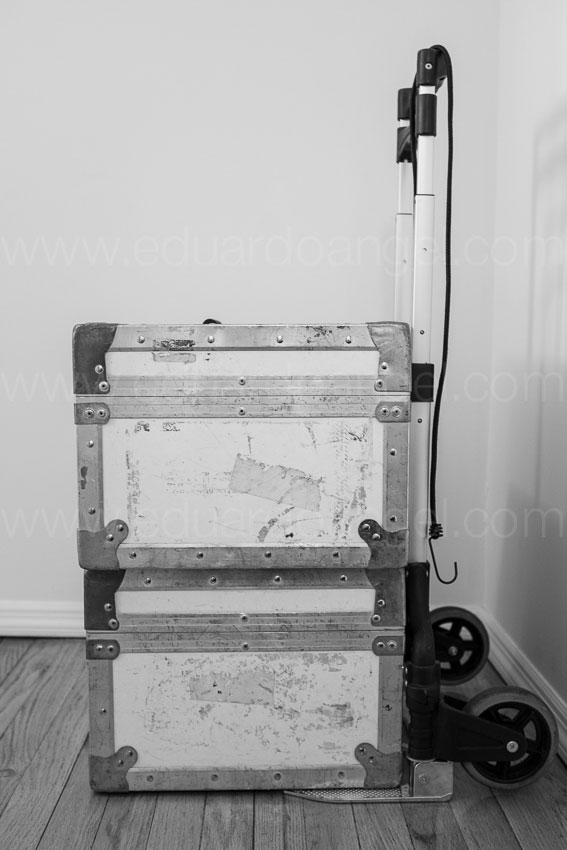
How to Pack Light.
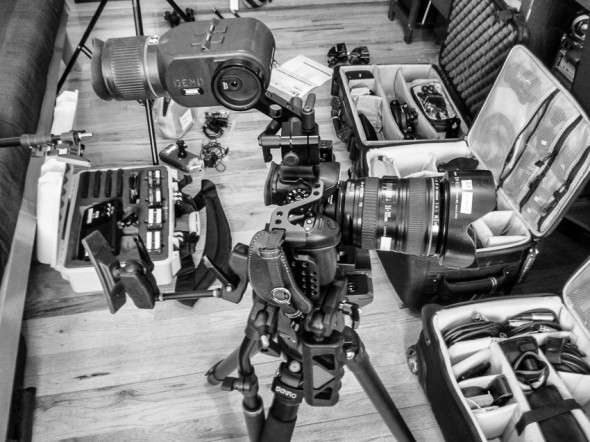
A substantial challenge within small-crew, low-budget productions is how to travel as light as possible, but still carry a full production and post-production setup that is literally on your back.
In this FREE half-hour lecture I share my most valuable packing tips, the gear you can not leave behind, and even how to approach subjects in foreign countries.
This presentation was recorded live at NAB 2016 Post|Production World, the leading training event for content creators and designers.
Duration: 23 minutes
A complementary companion PDF with valuable information is also included.
Video
Understanding and Breaking Composition Rules.
Cinematic composition is one of the least understood yet most important aspects of video. Like good storytelling, in order to achieve good compositions you have to make every detail count and keep the audience engaged in your story.
Beginning with basics such as shot size, depth of field, and the rule of thirds, in this seminar we explore how to establish a scene, play with perspective and movement, and incorporate some of the most common shot types, including close-ups and group shots.
“Understanding and Breaking Composition Rules” was recorded live at NAB 2016 Post|Production World, the leading training event for content creators and designers.
Duration: 56 minutes
A complementary companion PDF with valuable information is also included.
Video
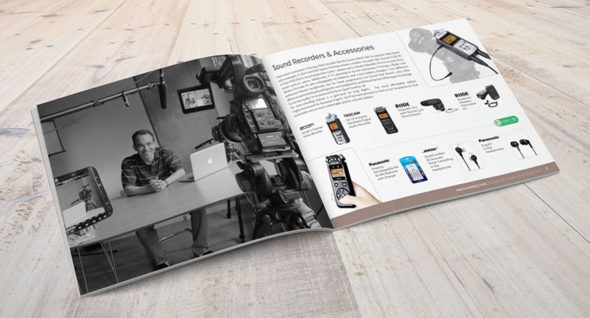
The 41 Essential Items for Hybrid Productions.
Hybrid productions where one person is required to be the photographer, filmmaker, sound engineer, producer, and even editor are increasingly popular. Getting stellar content and capturing the shots that really matter is essential, as there are no second chances.
This presentation was recorded live at NAB 2016 Post|Production World, the leading training event for content creators and designers.
Duration: 68 minutes
Two companion PDFs with valuable information are also included.
Video
Essential Pre-Production for One-Person Crews.
Not spending enough time and resources in pre-production usually translates into more mistakes, delays and over costs during production and post.
In this hour-long seminar we cover how to work on a shoestring budget without compromising the integrity of the story and I shares insights on the most essential steps required even before arriving at each location. From pre-shooting and rough editing, to the mobile apps that stand out from the pack, and even backup strategies, there’s a lot of useful info packed on these seminars.
I truly believe anyone involved in run and gun scenarios like weddings, events, corporate, documentary, red carpet premieres, product launches, sporting events, and even video podcasts will benefit from the topics covered.
This presentation was recorded live at NAB 2016 Post|Production World, the leading training event for content creators and designers.
Duration: 68 minutes
A companion PDF is included
Video
Essential Production and Post-Production for One-Person Crews.
These presentations were recorded live at NAB 2016 Post|Production World, the leading training event for content creators and designers.
Duration: 58 minutes
Two companion PDFs with valuable information are also included.
Video
The “41 Essentials” Digital Guide.
We’ve been wanting to do something like this for a very long time, but never seemed to find the time.
Well, today’s the day.
To take the guesswork out of your next gear purchase we’ve picked the best tools for photographers and filmmakers in our “41 Essential Items” Guide. The complementary download is available HERE.
Enjoy!

Video
Filmmaking Essentials for Photographers. Mini Courses.
Why Filmmaking Essentials?
One of the main challenges photographers face when starting to shoot video is to focus too much on hardware and software, and forget about the most important part: the story. While this informative course includes some technical information, the main goal is to provide an overview of the many aspects of filmmaking, and identify potential business opportunities with motion. Click HERE.
The “Filmmaking Essentials for Photographers” course is based on a popular event we have been presenting for several years, but it has been greatly enhanced with additional visuals and examples. Some of the clients and sponsors for the live event include Adobe, Adorama Pro, B&H Photo, Cinevate, Future Media Concepts, Gulf Photo Plus (Dubai), HOW Design Conference, International Center of Photography, Lynda.com, McCann Erickson, NAB Show, Panasonic, Photo District News, PhotoPlus Expo, Photokina (Germany), Savannah College of Art and Design, School of Visual Arts, Sony, and X-Rite, among others.

Click on the Image to access FREE Tutorials.
Why these Mini Courses?
Sometimes we don’t have time for three-hour lessons; rather, we just need a quick and concrete answer for a very specific question. Because of that, in addition to longer courses we’ve released these mini courses, averaging three-to-five minutes each. Click HERE.
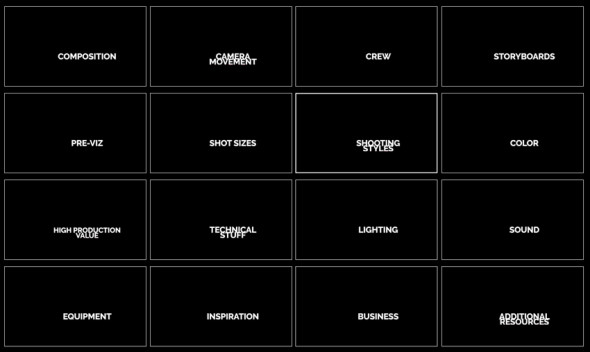
Click on the Image to access FREE Tutorials.
Video
Filmmaking Essentials for Photographers. Online Intro Course.
In 2011 I was invited along with National Geographic photographer David McLain to present a series of two-day workshops nationwide. The events were produced by Photo Quest Adventures and sponsored by PDN, Sony, Adobe, and other leading brands. The main goal was to help photographers transition into video by simplifying key concepts and providing shortcuts, resources, and advice on what gear to buy.
I have been honored to teach “Filmmaking Essentials” at all major industry events, from PhotoPlus to Imaging USA to NAB, from South America all the way to Dubai, Hong Kong, and Thailand, and at home in New York.
Few people know that I never use the same presentation twice. Each and every time I add things I’ve learned, plug in valuable feedback from attendees, students, and this website’s readers, and I strive to improve the educational experience with better examples and shorter explanations.
When looking at the advancements in digital technology since those first workshops it seems like decades have gone by. Today, we have access to a variety of brands and models of very compact cameras that can see in the dark, shoot 4K or higher resolutions, offer incredible frame rates, and even offer GPS and WiFi features so they can be easily controlled by smartphones and tablets. The future is definitively here.
But something quite odd has been happening to my personal and professional focus. The more gadgets we have at our disposal, the more I’ve shifted towards the craft of storytelling. Instead of getting more stuff, I’ve been increasingly interested in constructing and enhancing my stories to better engage the viewer. Naturally, this approach has been reflected in the educational content I produce.
Now, and for the first time, I’m proud to offer an awesome version of my one-hour presentation online. Click HERE.
The “Filmmaking Essentials for Photographers” course is based on a popular event we have been presenting for several years, but it has been greatly enhanced with additional visuals and examples. Some of the clients and sponsors for the live event include Adobe, Adorama Pro, B&H Photo, Cinevate, Future Media Concepts, Gulf Photo Plus (Dubai), HOW Design Conference, International Center of Photography, Lynda.com, McCann Erickson, NAB Show, Panasonic, Photo District News, PhotoPlus Expo, Photokina (Germany), Savannah College of Art and Design, School of Visual Arts, Sony, and X-Rite, among others.
Who is this course for?
Well, as the name implies, this version of “Filmmaking Essentials” covers concepts already mastered by advanced filmmakers or by experienced photographers who are very technically savvy. But I’m confident everyone else could learn a thing or two.
As often as possible we’ll be adding new courses, covering topics like pre-production and post, tips for one-man crews (like journalists) working stills and video assignments, advice on getting started with Color Grading, and many other fascinating subjects. As mentioned above, most of these courses are not and probably won’t be hardware or software driven, but would focus predominantly on answering the why’s, not the how’s, of the fascinating craft of filmmaking.
Also as a first, we are offering several mini-courses (averaging three minutes each and many of them for free) for those who need concrete answers to very specific questions.
So, if this is the kind of content and format you desire, vote with you wallet and let your voice be heard.
Thank you for your continued support. Click HERE to start learning.
Click on the Image to access FREE tutorials.
Video
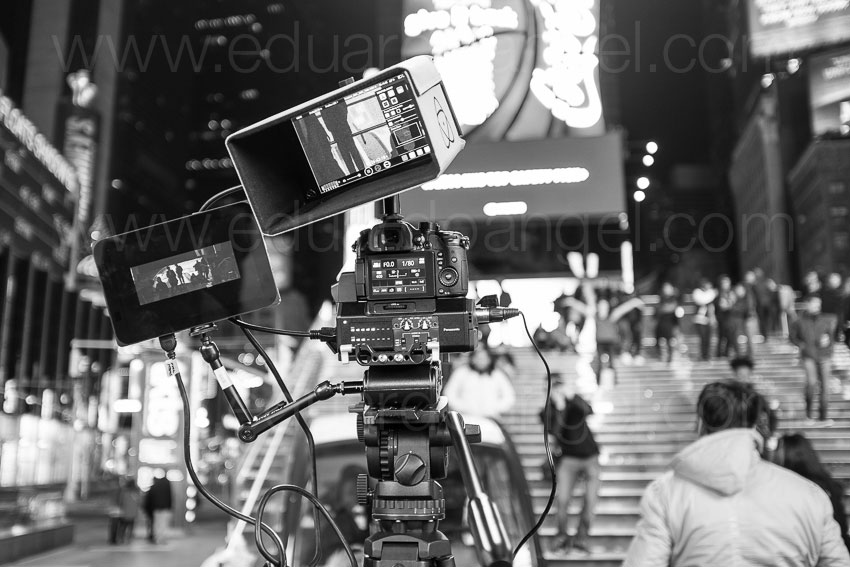
Shooting 4K Anamorphic and V-Log with Panasonic’s GH4. Ten Valuable Lessons.
UPDATED: I just added two video tutorials: one comparing “Panasonic’s V-Log L vs. Cinelike D” and the second one “Conforming 4K Anamorphic Footage in Adobe Premiere Pro.”
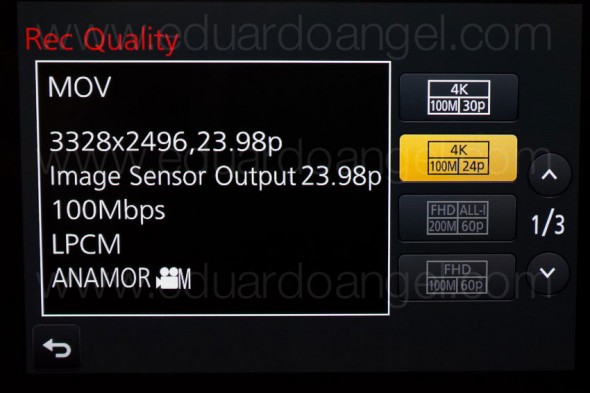
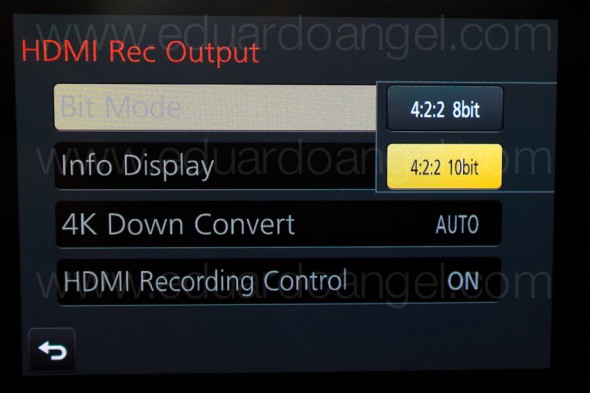
Anamorphic is enjoying a huge comeback. The reasons to go this route vary from project to project, but generally it’s the desire to achieve a different look and use as many pixels from the sensors as possible. Panasonic’s Firmware Update v.2.2 (available here) enables an Anamorphic (4:3) Mode capable of recording video in 3328 x 2496 pixel (equivalent to approx. 8.3-megapixel) resolution at a frame rate of either 23.98, 24, 25 or 29.97 fps. With an anamorphic lens such as 2x Lomo lenses (see below) we now can capture and un-squeeze a 3356×2496 image in post-production. To make things even better, 4:2:2 / 10 bit HDMI output is also available.
Just like in 2013 when we had the opportunity to field test a GH3 in the Middle East and last year when we shot with one of only three prototypes world-wide of the GH4, for the past couple of weeks I had the privilege to work with director Davis Northern, DP and tech wizard Sean Davis and many other talented people on one of the very first GH4 Anamorphic AND V-Log L projects, shot exclusively for Panasonic North America and produced by The Digital Distillery.
Panasonic 4K Anamorphic and V-Log L – Official Video from The Digital Distillery Inc. on Vimeo.
The project was exciting and very challenging, as working with hardware prototypes and beta versions of software or firmware always is. We had a lot of moving pieces and an extremely tight deadline, but I’m proud of the final results and very satisfied with the lessons learned. This article covers some of the most significant ones, and it is written from my very own personal perspective. As always, I try my best to be as objective and brand agnostic as possible. The lessons aren’t in any specific order and some links will take you to articles with additional information . Please consider using our links to help support our very time consuming articles and tutorials.
Ready? Let’s go!
1. Shooting Anamorphic
It can definitely be achieved by a very small crew on a small budget. We mostly shot with a crew of three, with very limited gear and time. I’ve always assumed you needed a 2-ton truck and a crew of 30 to pull this off. Clearly, this was not the case for us.
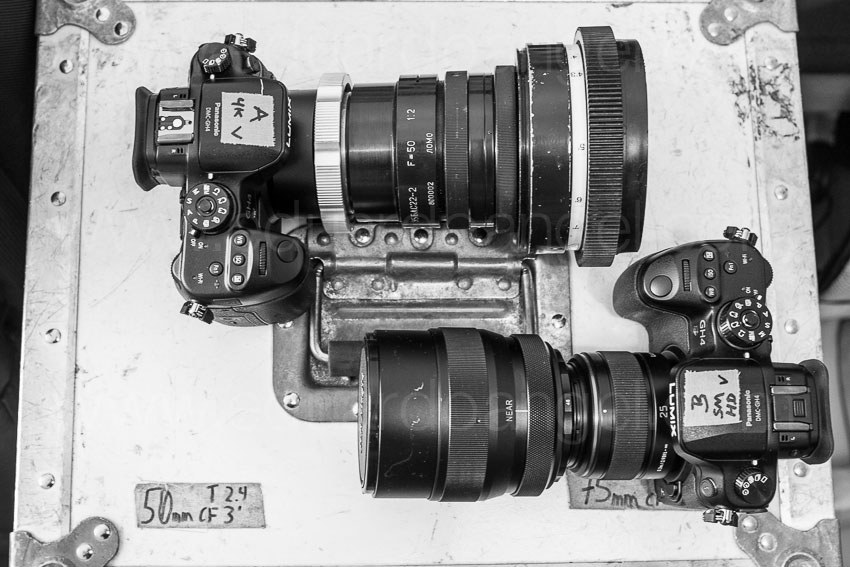
2. Lenses
In terms of lenses, we opted to keep a “low profile” while keeping our options open. In other words, we rented a set of vintage anamorphic Lomo lenses (35, 50, and 75mm) and tested an SLR Magic as well as a Letus AnamorphX 1.8X Pro Adapter and a Veydra Mini Prime.
A. Lomo:
The lenses are huge and heavy. Lomo 50mm + 75mm with case = 25lbs. Lomo 35mm with case = 35lbs with each case weighting about 30lbs. Not ideal for the “guerilla” approach we needed for this project. They definitely have a unique look, but are very hard to focus, especially when using a very flat profile. We rented the set for $500/day or about $1,700 for a week including tax. Not cheap by any means but definitely worth the investment in terms of time and quality.

If I were to shoot this project again (or on upcoming anamorphic projects) I probably would test the Cooke Anamorphic/i Lenses (25, 32, 40, 50, 75, 100, and 135mm with a 2x squeeze). Unfortunately these lenses cost about $30,000 each, and the rental rate is about $500 per lens, per day.
B. SLR Magic:
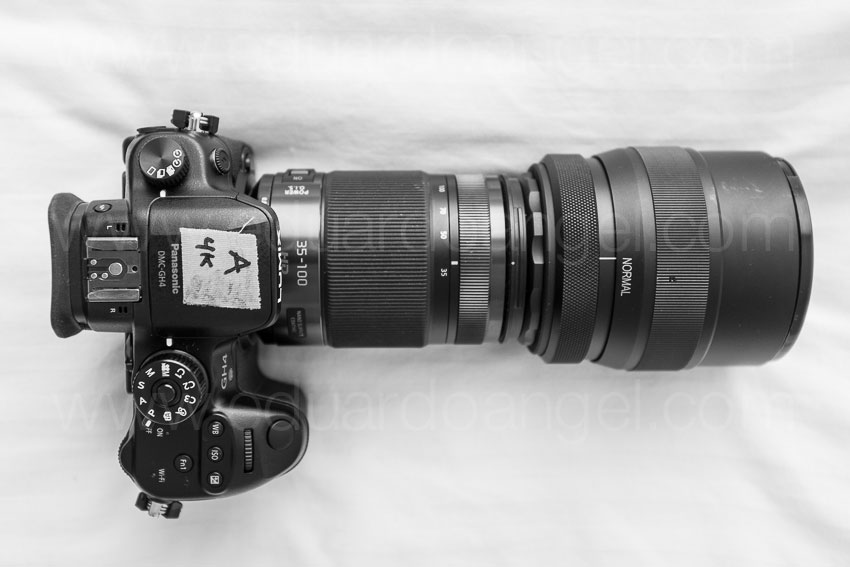
We had access to a very nice selection of Panasonic glass that we wanted to use with an SLR Magic adapter. The first challenge was that the front diameter on all the lenses has to be below 62mm in order to use the step down rings. The second limitation was (for the Panasonic lenses) that anything wider than 28mm would vignette. We could have used the Panasonic 12-35mm lens, at 28mm or longer (kind of pointless), but for some odd reason with the SLR Magic adapter it vignetted all the way even at 35mm. The Panasonic 35-100mm didn’t vignette at 35mm. Go figure. The next usable lens on our Panasonic arsenal was the beautiful 42.5mm Noticron f/1.2, but we needed a step DOWN ring (from 67mm to 62mm) that wasn’t included with the kit. The last option was the Panasonic 35-100mm f/2.8 lens, which worked well but focusing was a MAJOR issue (not Panasonic’s fault). I found the SLR Magic system very finicky and unreliable and unfortunately I can’t recommend using it.
C. Letus Anamorphx:
The Letus Adapter worked much better than SLR Magic but it was also cumbersome. A matte box is pretty much required and there was an issue with one of our widest lenses. The lesson here is, if you are shooting anamorphic, use the real thing.

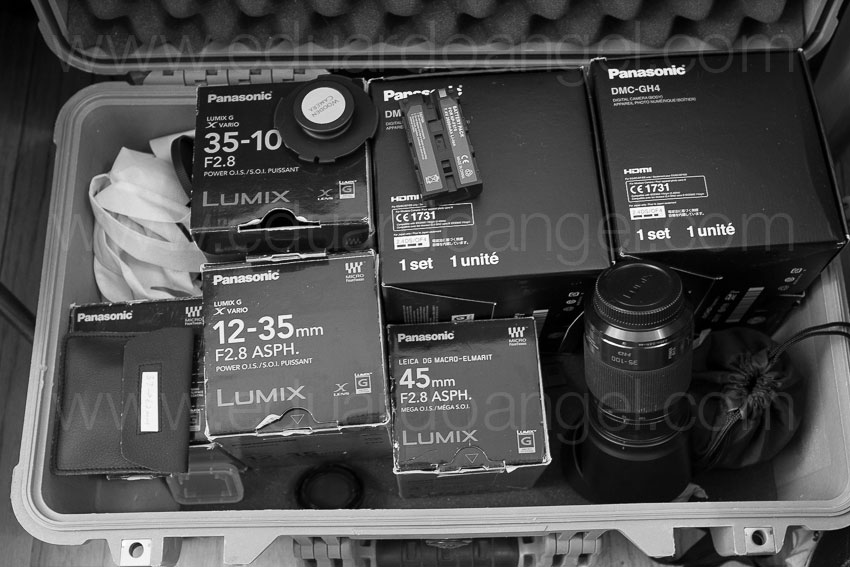
3. Storage
There’s some heavy math involved when shooting Anamorphic. An anamorphic lens produces roughly a 2X horizontal squeeze of the image onto film. Traditional anamorphic lenses were designed to work on a 4:3 standard. The anamorphic footage captured with the GH4 on the Atomos Shogun is 3840×2160, so not technically 4K but pretty close. Shooting internally (to an SD card) the footage is 3328×2496, so greater vertical resolution than the 4K standard, but not full 4K horizontal resolution. To keep things in perspective, the 4K footage out of the GH4 4096×2160.
As you would expect, the files are huge. Shooting ProRes 422 you need about 4GB per minute of footage. Two cameras: 8GB, after only one backup you are at 16GB per minute. So somewhere around 20GB per minute is a pretty safe storage estimate for a two-camera setup. As always, we trusted all our very valuable assets to G-Tech Hard Drives.
Regarding Solid State Drives, Atomos has a great chart with all the supported drives for the Shogun and other devices. Make sure you triple check the chart before investing in one.
One SECOND of footage takes about 50MB so even if you are shooting into seemingly endless Solid State Drives, being smart about when to start rolling and when to stop can save a lot of storage.
4. HDMI
As we were shooting, Atomos was literally finishing writing the Shogun’s firmware update (available in May or June as a free download) will enable a number of awesome features:
- Anamorphic de-squeeze for Panasonic GH4 and standard lenses
- RAW recording to ProRes, DNxHR and Cinema DNG for compatible RAW formats
- Expanded RAW compatibility to include Sony FS series, Canon, Arri and AJA
- 3D LUTs on HDMI/SDI output
- Cinema 4K DCI support
- Uncompressed V210 support
- Genlock
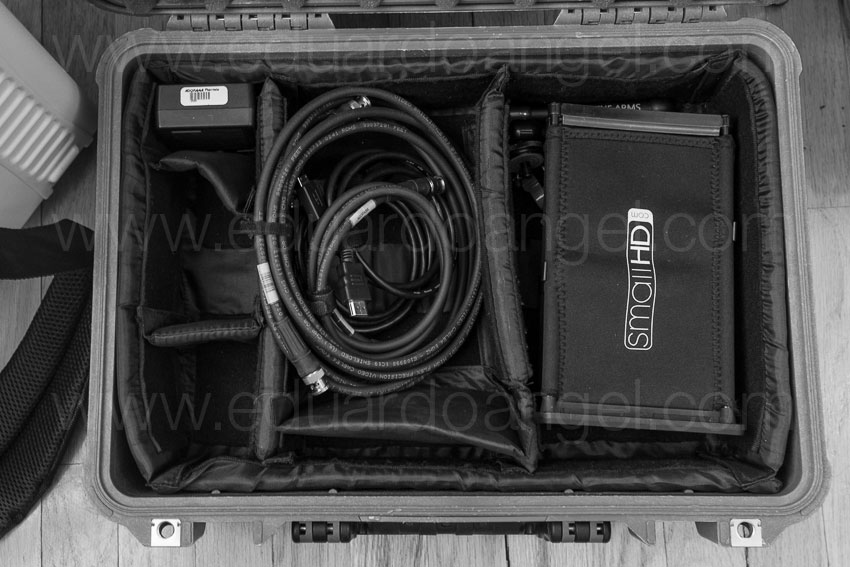
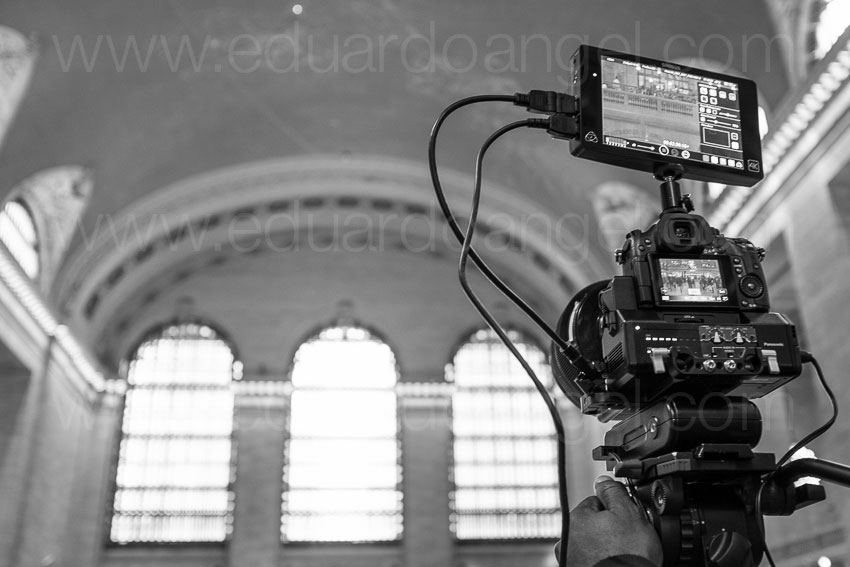
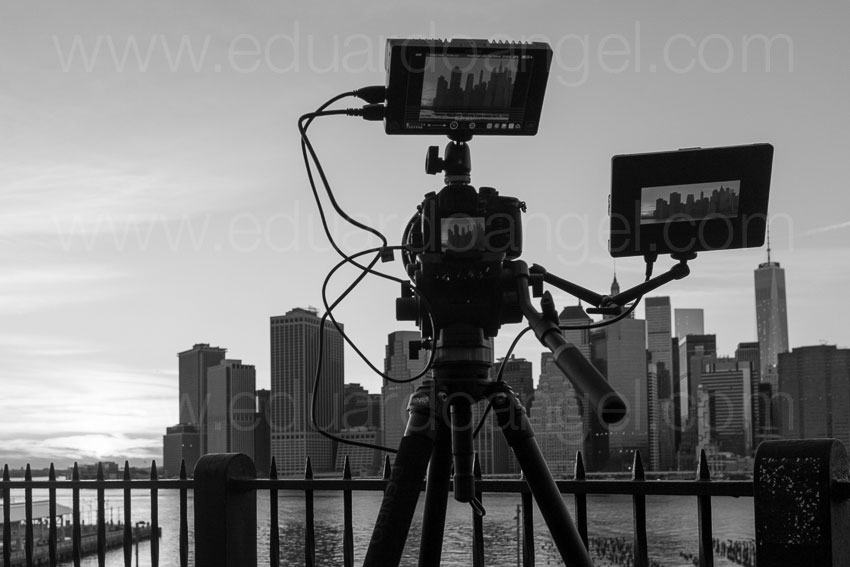
We had to use a Small HD Pro7 (to de-squeeze) and the Shogun (to record in 4K). The setup seems pretty obvious after a lot of trials but it wasn’t at first. Here’s the executive summary that will hopefully save you some time and stress:
1. Micro HDMI to Standard HDMI cable from the GH4’s HDMI OUT to the Atomos Shogun HDMI IN
2. Standard HDMI to Standard HDMI cable from the Atomos Shogun HDMI OUT to the Small HD HDMI IN
3. In the Shogun, the 4K downconvert option should be OFF while connecting the Small HD and turned ON when everything is properly connected.
Our Small HD had a nasty tendency to constantly lose signal for no apparent reason, so step #3 had to be repeated many times throughout each shoot.
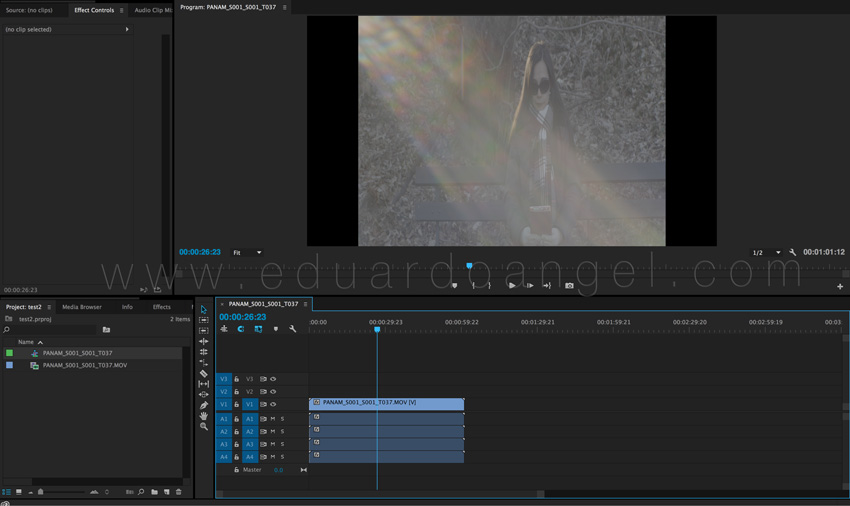
5. Premiere Pro CC 2014 Workflow
To be totally honest, I was shocked by how easy it was to conform the footage in post. Here’s what you need to do:
1. Import the footage the way you normally do.
2. Select the anamorphic clips.
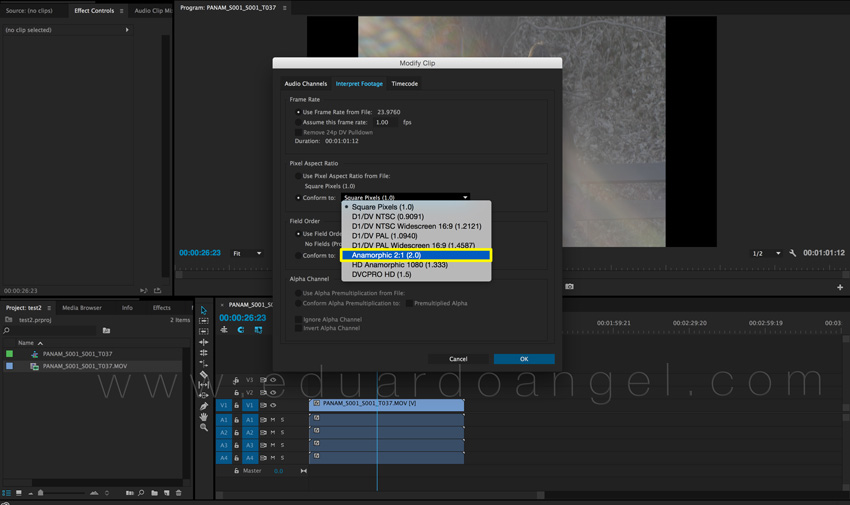
3. Go to clip > Modify > Interpret Footage
4. Under “Pixel Aspect Ratio” select “Conform To” and “Anamorphic 2:1 (2.0).
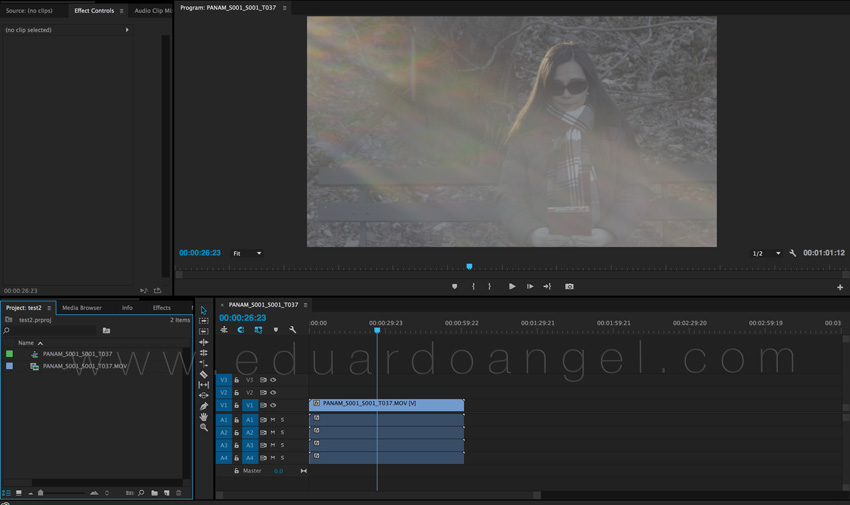
5. Create a “new sequence from clip” and start cutting.
6. Done and done. Wow!
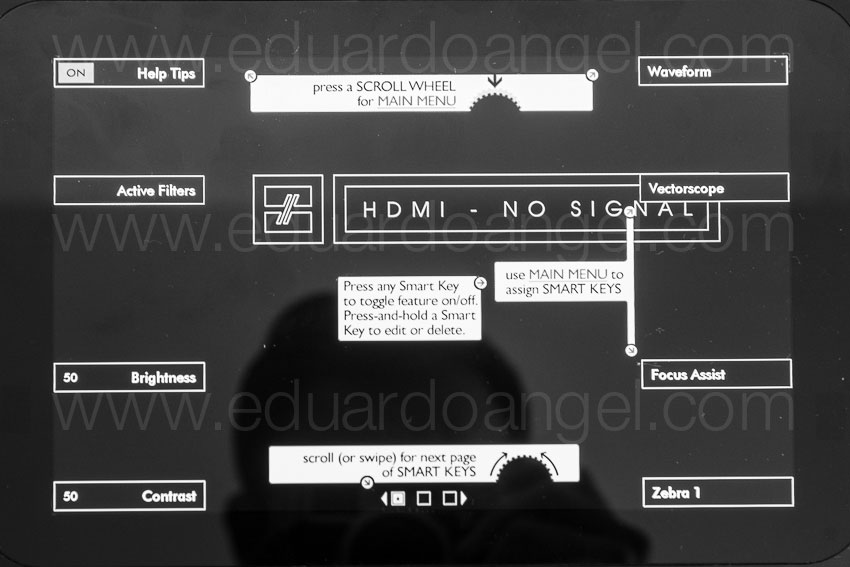
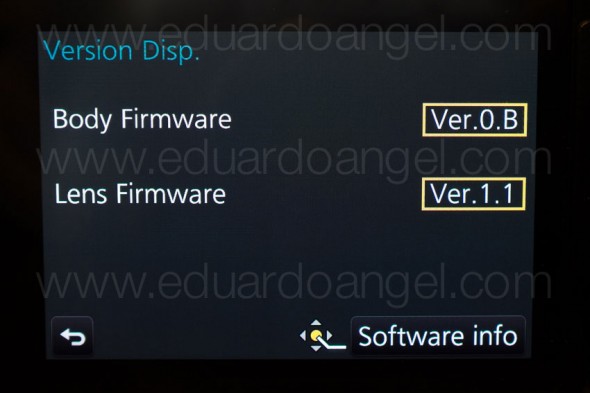
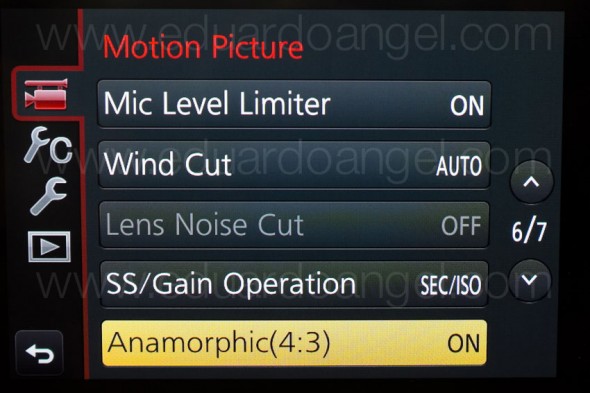
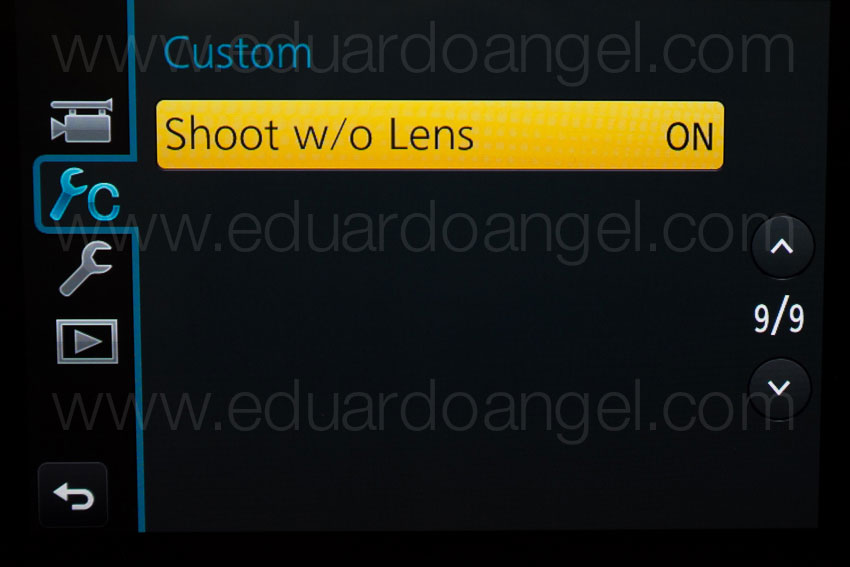
Here are some screen grabs from the camera’s LCD:

6. Focus
Focus is super, extra, hyper critical, especially when shooting with a very flat profile like the one we used. Unfortunately we couldn’t trust the SmallHD and had to rely 100% on the Shogun at a 1:2 zoom.

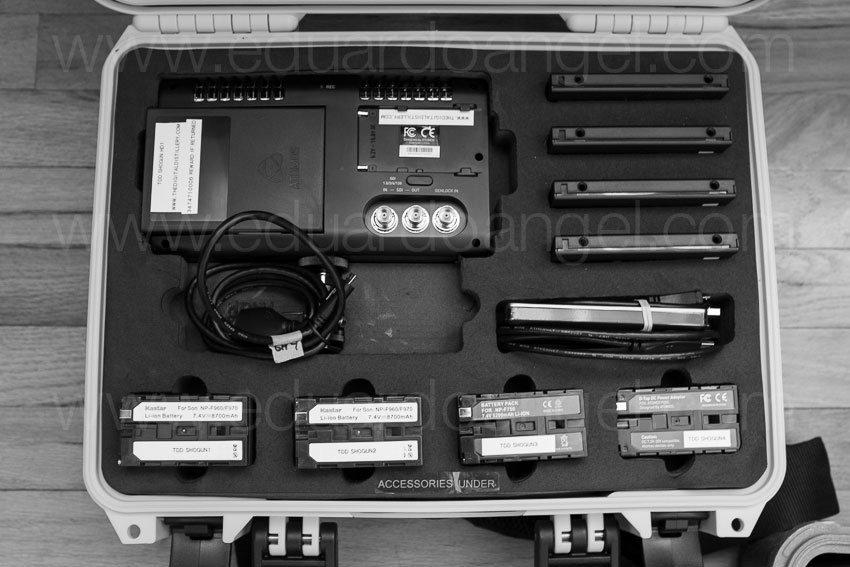
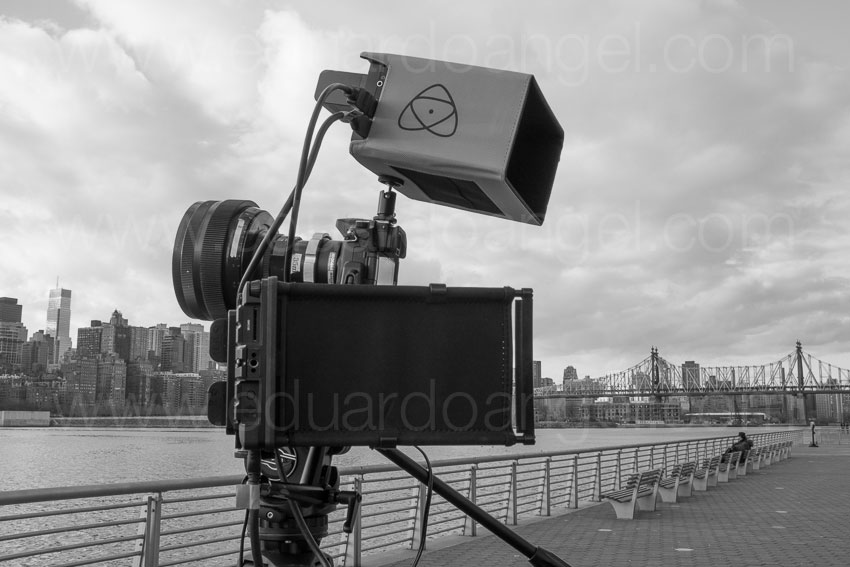
7. Accessories
• A sun hood for your external monitor is absolutely essential (if given the option get the black version).
• Obviously you will need lens adapters if you are planning to use the SLR Magic or Letus AnamorphX options.
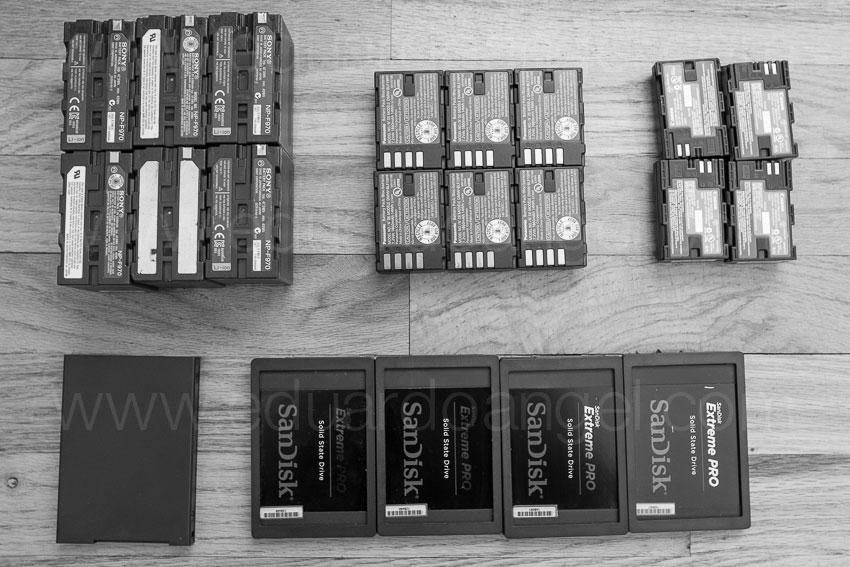
• Make sure you get plenty of batteries, The small battery that comes with the Shogun lasts about 30 min only and we got about one hour of recording time with TWO Canon batteries on the Small HD. Instead of buying tons of batteries I’m a big fan of renting them (more here). The same goes for additional Solid State Drives.
8. Bonus lessons:
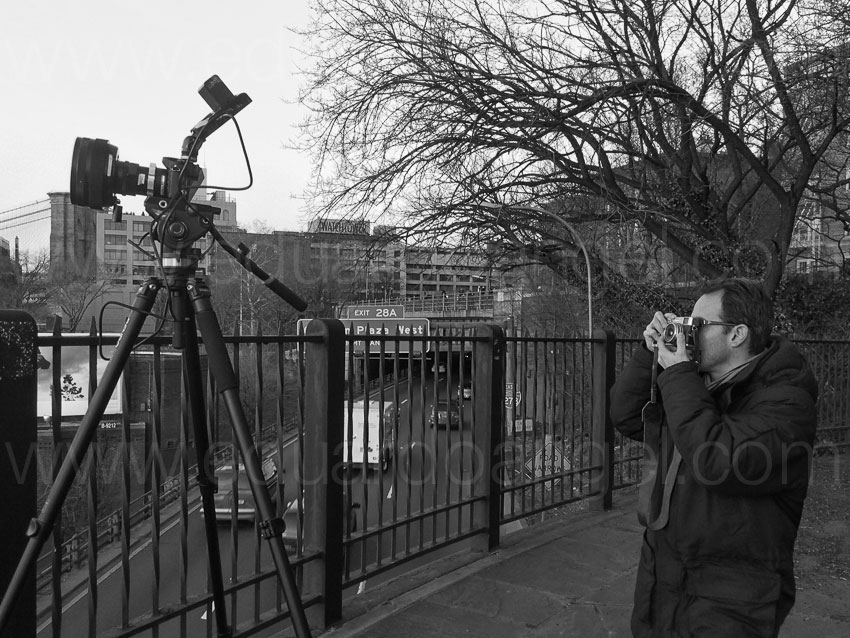
• Shooting anamorphic takes a lot practice and fine-tuning. I’d recommend scheduling at least a full day to test all the gear before a shoot.
• If we keep a small footprint and move fast, we can get a lot done.
• The “shoot without lens” on the GH4 must be turned on in order to work with the Anamorphic lenses.
And…..here are two more videos (not anamorphic) shot with the Panasonic GH4. Check them out and let me know if you have any questions or comments via Twitter (@EA_Photo)
Video
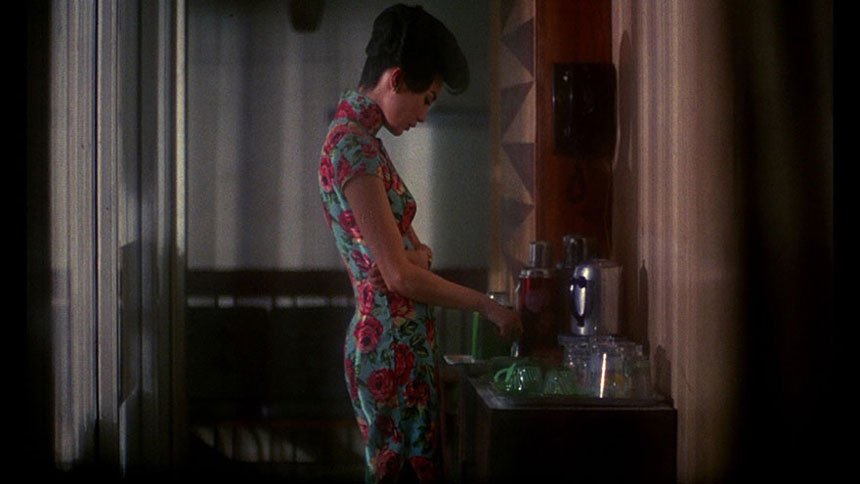
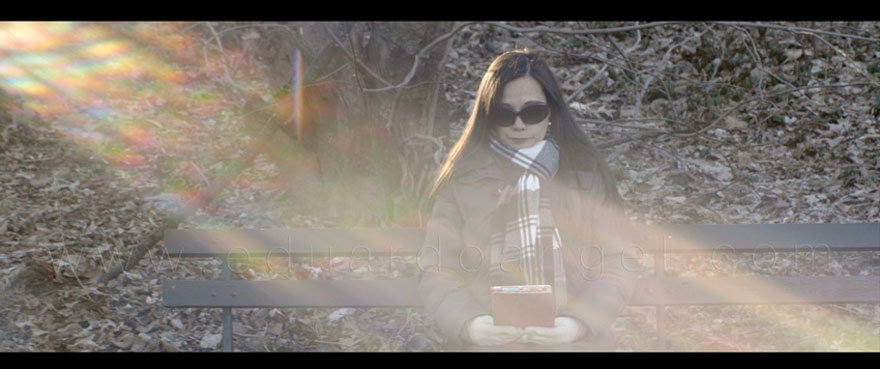
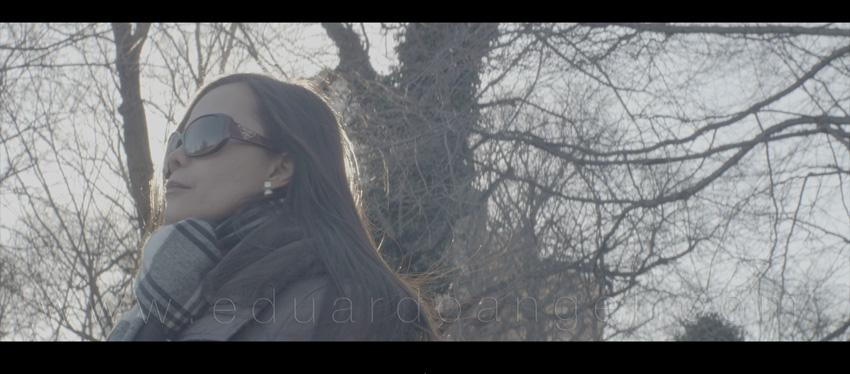
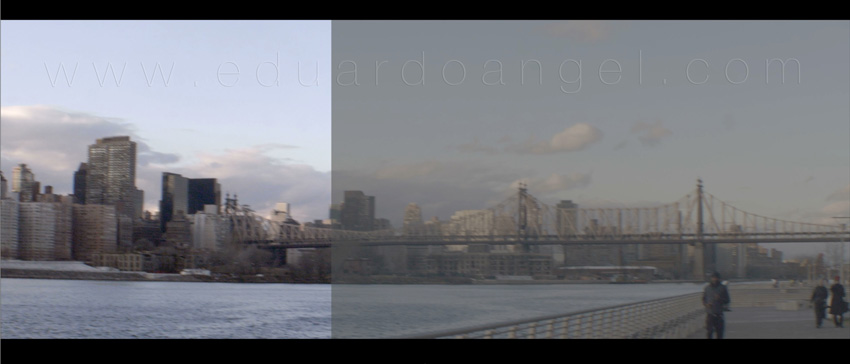
In the Mood for Love Redux.
I love Asian cinema and I feel a strong and special attraction and respect for Wong Kar-Wai’s work, especially his earlier collaborations with Chris Doyle. Wong Kar-Wai is known for his “romantic and stylish films that explore—in saturated, cinematic scenes—themes of love, longing, and the burden of memory.” In terms of photographing urban landscapes, especially at night, I can’t think of a better cinematographer than Doyle.
For the past couple of months I’ve been revisiting his movies, his video interviews, and reading as much as possible about his production methods and unconventional approaches to filmmaking.
Check out the following books to learn more about this amazing director:
“The Sensuous Cinema of Wong Kar-Wai” by Gary Bettinson
“Wong Kar-Wai: Auteur of Time” by Stephen Teo
“Wong Kar-Wai” by Peter Brunette
The long-awaited and complete Kar-Wai retrospective with more than 250 photographs and film stills will be released in September but it can be can pre-ordered now.
In order to better understand his compositional and directorial choices I imported “In the Mood for Love” into Premiere Pro and selected my favorite scenes, including those critical to the story, those that are brilliantly original, and scenes that are flawlessly executed or contain a number of technical achievements (like the impeccable use of dolly moves). I then re-cut all my favorite scenes from the original 94 minutes into a single 18-minute clip (below), always trying to keep the integrity of the story. My goal here is to help someone who hasn’t seen the movie grasp its (very convoluted) story in one 18-minute clip.
If you haven’t see the movie, I highly recommend it, and I’d love to hear from you once you see it.
If you have seen the movie, did I leave any key cinematic moments out?
Video
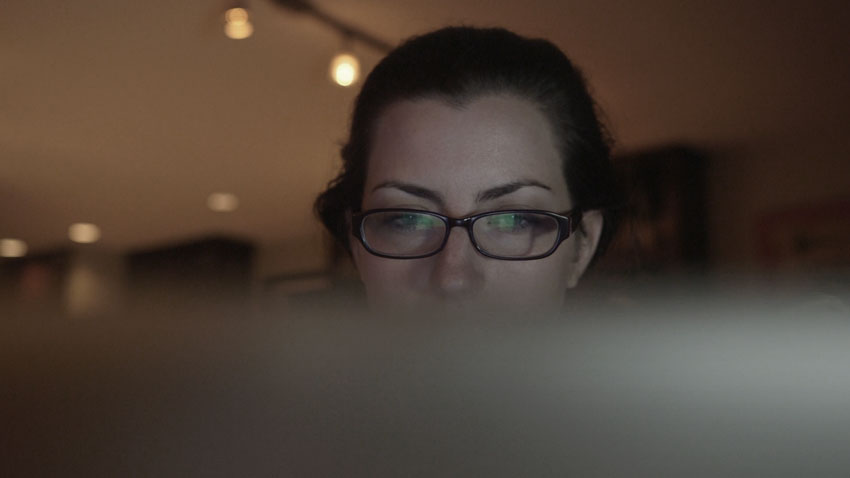
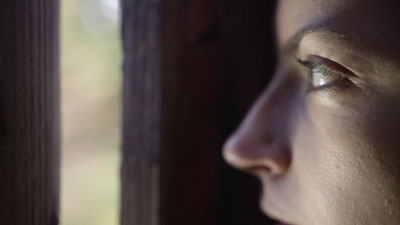
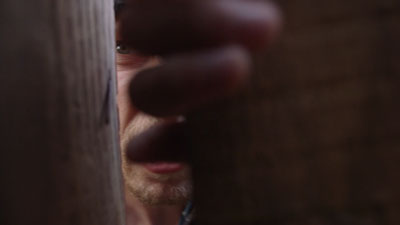
Cinematic Composition for Video Productions on Lynda.com
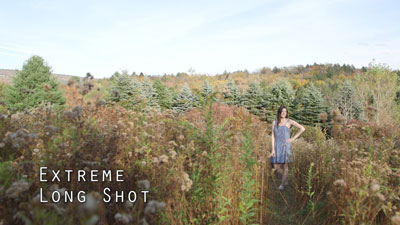
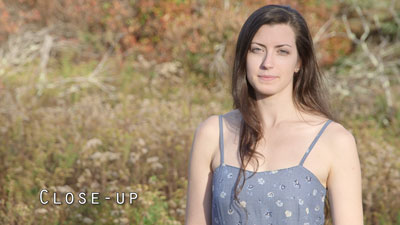
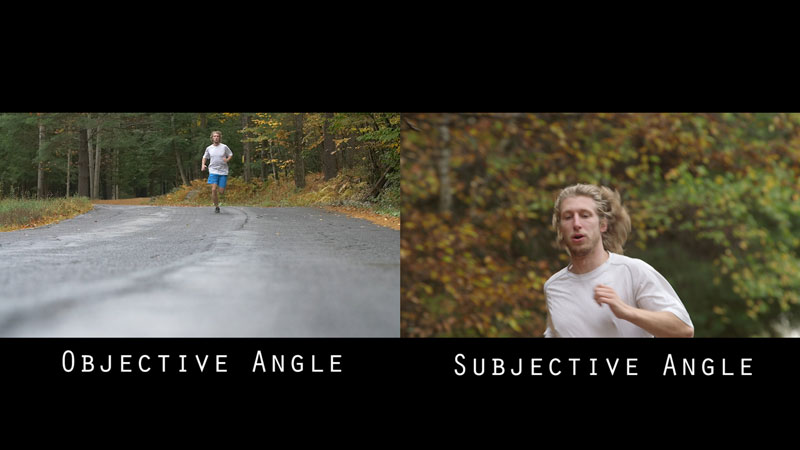
Composition is one of the least understood yet most important aspects of video. Like good storytelling, in order to achieve good video composition you have to make every detail count and keep the audience engaged in your story. In this course, we break down effective cinematic composition, to show how to create different compositional effects using a variety of techniques. Beginning with basics such as shot size, depth of field, and the rule of thirds, we show how to establish a scene, play with perspective and movement, and incorporate some of the most common shot types, including close-ups and group shots. Once you’ve learned the rules, see how to break them, using warped perspectives and intentionally confusing sequences, before exploring technical considerations such as lenses and lighting.
Topics included on this course:
- The basics of composition
- Exploring the rule of thirds
- Comparing balanced and unbalanced compositions
- Understanding the importance of using establishing shots
- Working with point of view
- Modifying the height of the camera
- Understanding the lines of a scene
- Creating depth
- Incorporating unusual or unexpected angles
- Knowing when to break the rules
- Using viewfinder apps
The complete course is currently available on Lynda.com. If you aren’t a Lynda.com subscriber, feel free to use my link for 10 days of unlimited access.
Here are some of the many examples on this course:
Video

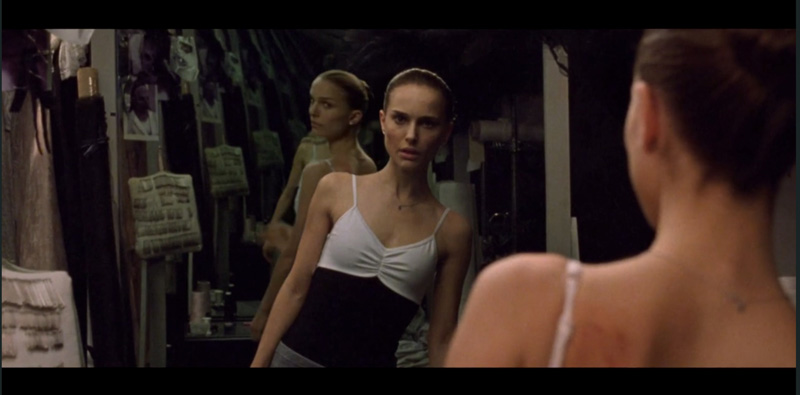
Shooting the Black Swan.
How was the film Black Swan shot? How did the filmmakers deal with all the mirrors? How many lights did they use and what kind? Those were my thoughts while watching Natalie Portman’s remarkable performance. Here, I have compiled the most interesting technical aspects of the movie, gathered from several articles and forums, including a great interview by American Cinematographer’s Stephen Pizzello with the Director of Photography Matthew Libatique.
Mirrors
Regarding the mirrors and avoiding camera reflections, which is the real reason why I did some serious research on this movie, Libatique says “we did as much as we could practically, but we knew there would be moments when we wanted to create seemingly unachievable shots, and for those we just removed the reflections digitally with the help of Dan Schrecker, our visual-effects supervisor at Look Effects. A good example of Look’s work is the scene where Nina is rehearsing in front of a mirror, the lights go out, and her reflection starts moving independently; the camera was right where you see the reflection, but Darren wanted to get tight eye lines, so we had to paint ourselves out in post. For other scenes, it was easier to just hide the camera or shoot from angles where you couldn’t see it. We also used one-way mirrors to get a shot where we created an ‘infinity reflection’ of Nina sitting in front of a dressing-room mirror. We positioned Natalie between two one-way mirrors and just shot from behind them. We wanted the film’s horror beats to be a bit more stylistic.”

Lighting
The main lighting source was “a strip above the dancers’ heads. We had about eight rows of 1K cinema globes running 60 feet across the stage. We just used different gels and put the lights on different channels; we’d go from a green gel to white to magenta, and we also started to mix them, which was nice. It was less complicated than using moving lights. For one sequence, we combined a moon backdrop with a rain effect that we created by filling a pool of water with broken glass and placing it at the base of the background. We just powered Source Fours into the pool and modulated the water movement with fans.”
 Cameras
“The movie was a single-camera shoot except for maybe one day, and our main camera was an Arri 416, which we used with Arri Ultra Prime 16 lenses. We used a Canon 7D or 1D Mark IV for all the subway scenes; I could just carry a 7D and shoot on the subway all day with a very small crew. I did some tests with my wife beforehand to figure out my ASA, my stop, and how I was going to deal with the focus. I didn’t use any rigs with it because I wasn’t trying to shoot in the traditional way. I tested a bunch of different exposures and then brought the footage to Charlie Hertzfeld at Technicolor, who put it in the system so I could look at the highlights, the moiré and the resolution. Then I went back to the drawing board to do more tests. The 7D has more depth of field than the 5D, but I needed that because I didn’t have a follow-focus unit and needed to work really fast. I shot everything documentary-style. I did all the focus pulls by hand, and we’d just look at it on the camera’s monitor. I ended up shooting on a Canon 24mm lens at 1,600 ASA to get as much depth of field as possible at a stop of T81?2.”

Special Effects
Check this short documentary on this movie’s special effects.
Camera Movement
Every performance was covered in long master shots, which “we just augmented with other moves as necessary. To Natalie’s credit, we rarely did more takes for her; if we required additional takes, it was usually for us. We knew we’d be shooting her from the chest up most of the time, but we knew we’d be in great shape, performance-wise, as long as we could see her face and arms. For wider shots, we could just use her dance double. We did almost everything handheld.” The only Steadicam shot is at the climax of the final dance number. Unreal.
The movie is now available on Blu-Ray.
News
Want $70,000 worth of filmmaking gear?
This is awesome. RØDE Microphones (the company that in my humble opinion delivers the best quality at the best price in audio gear) has put $70,000 worth of filmmaking gear up for grabs for their “My Rode Reel” short film competition!
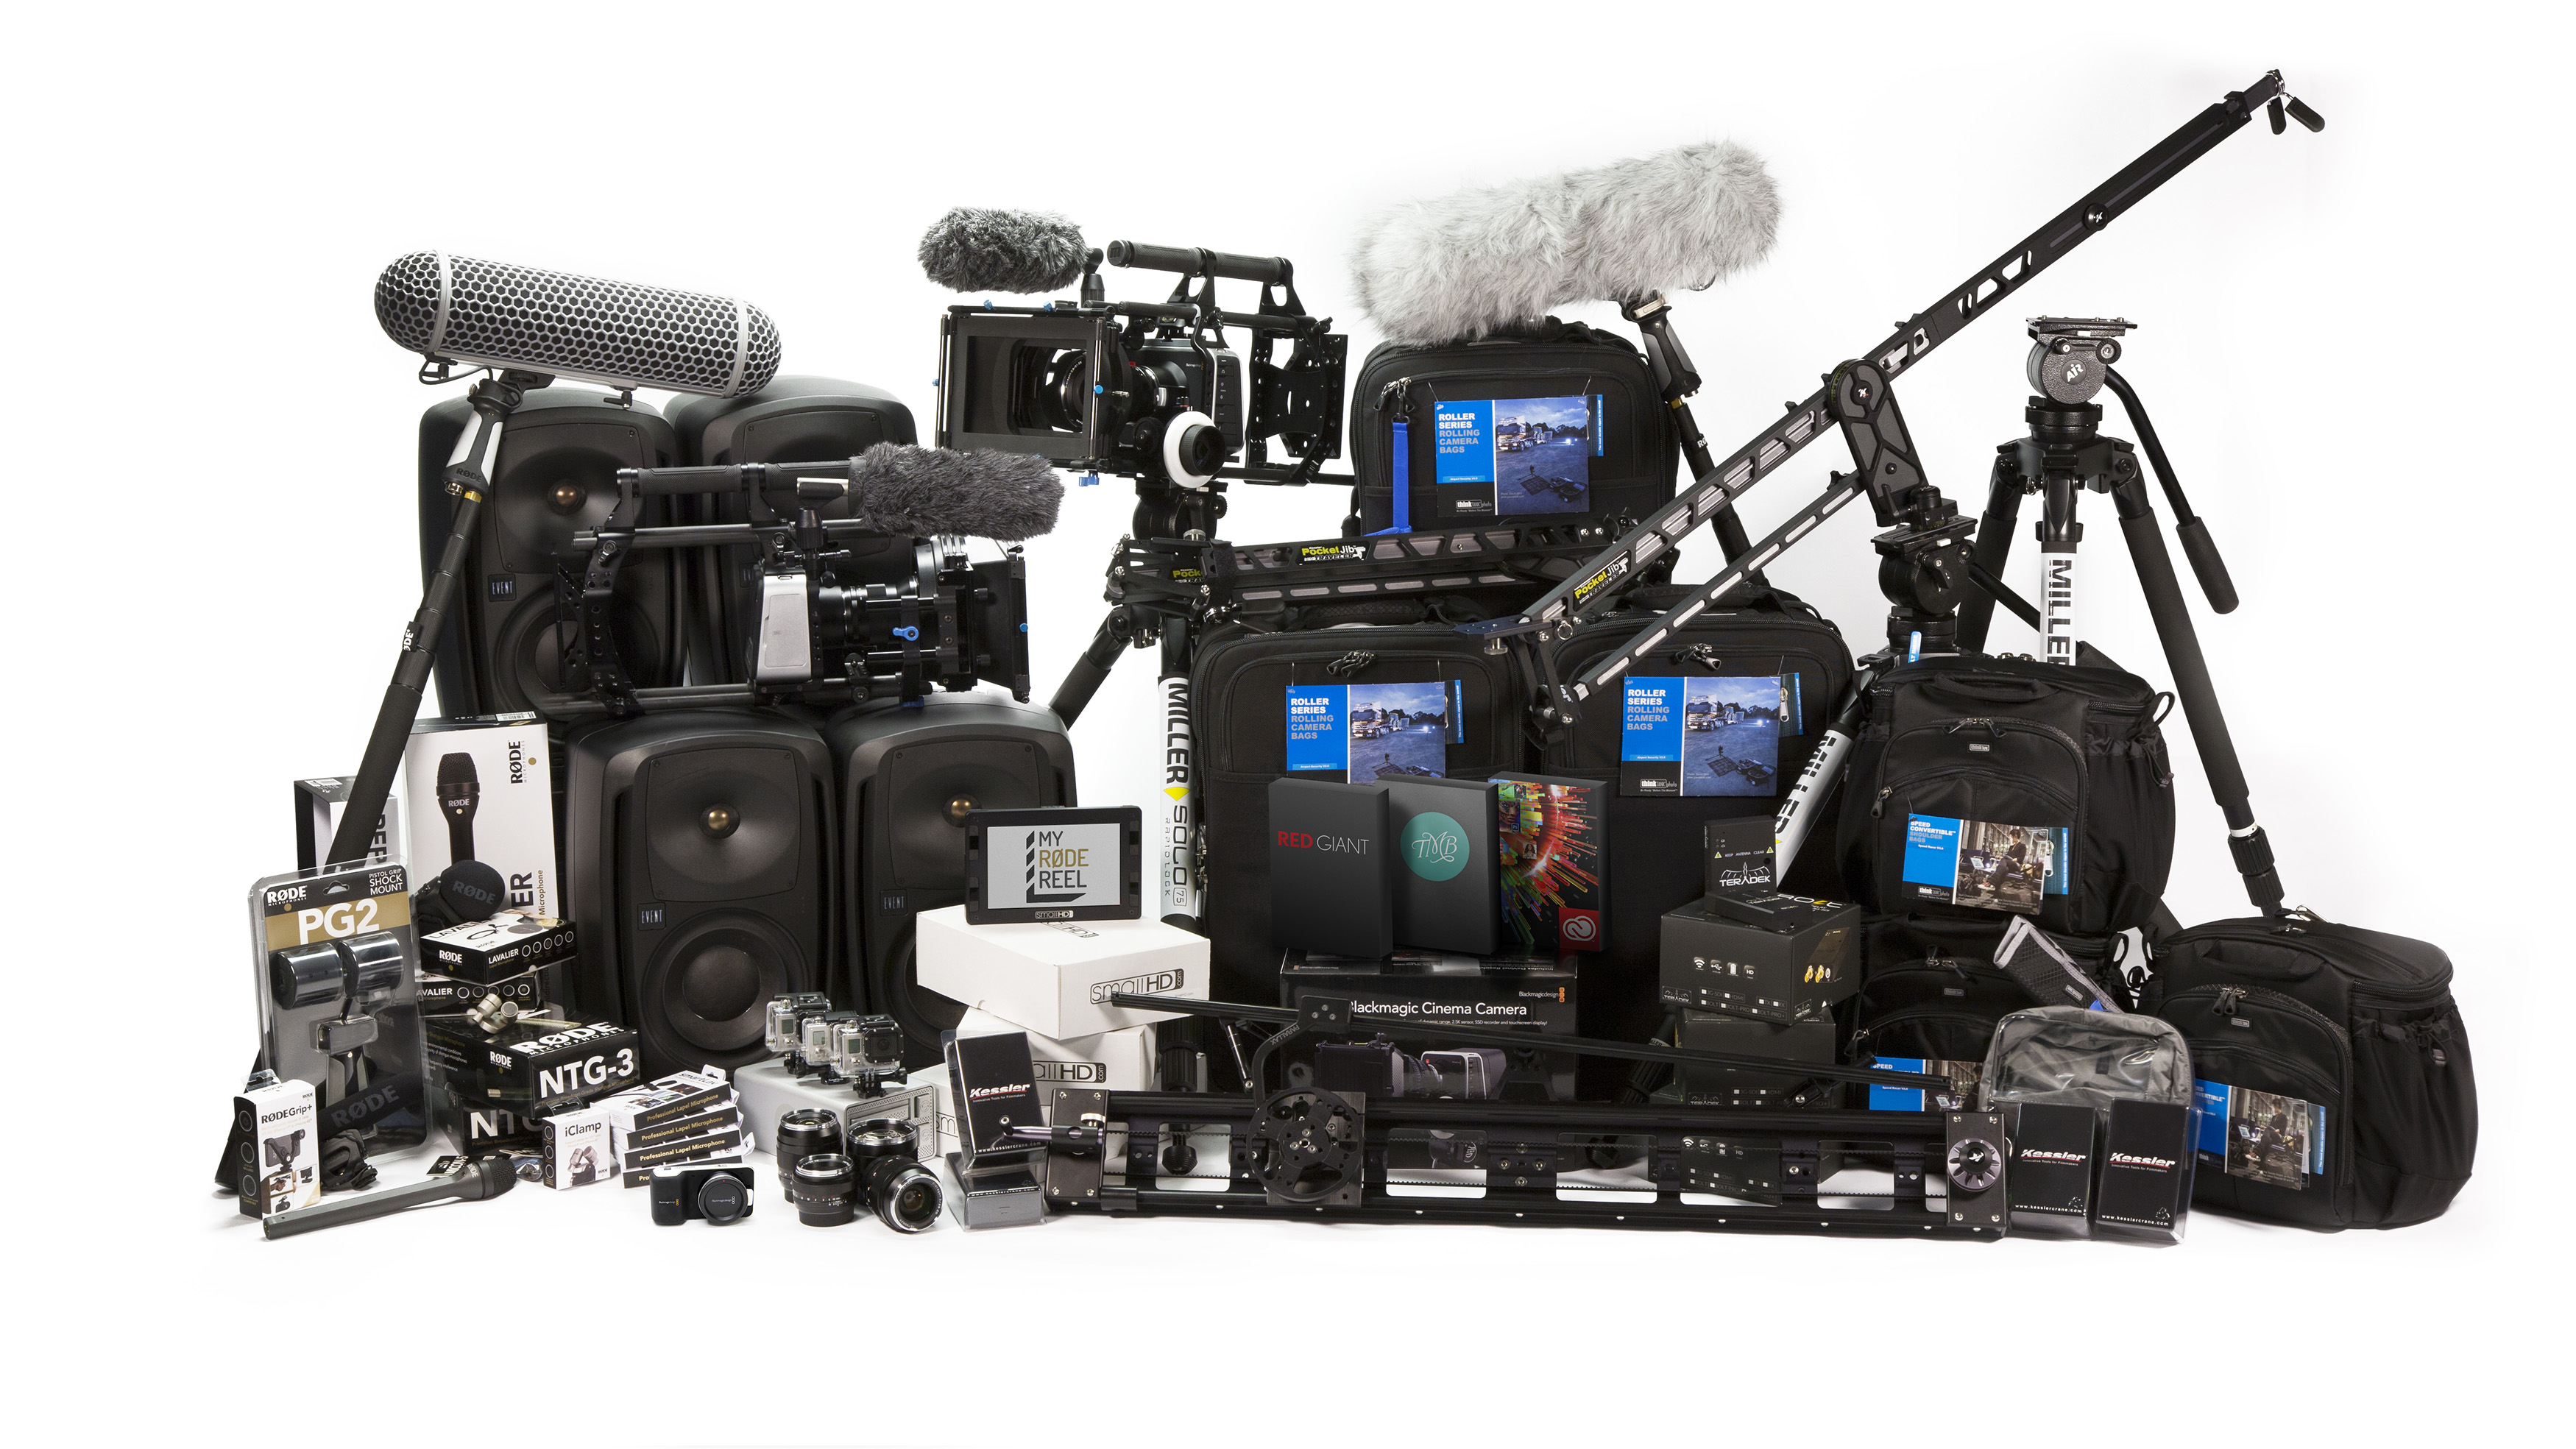
Entries are open from March 1st till May 31st. Watch the video for more info, or visit www.myrodereel.com
Video
Amazon adds storytelling tools to its arsenal.
updated 20140114
Amazon Studios was launched 3 years ago to develop feature films and episodic series. In a new effort to pack another punch to its arch enemy Netflix, as well as increasing its original content catalog, the company has rolled out the beta for “Storyteller,” a free online storytelling tool that (more…)
Video
10 (new) Cool Gadgets for Photographers and Filmmakers. Part 1
1• Edelkrone SliderPLUS
Edelkrone’s SliderPLUS is a super-compact and very smooth slider that easily fits onto Tenba’s Video Backpack. Unlike other sliders, this one moves with the camera, taking full advantage of rails’ length. With a price tag of $500, this toy is at the top of my shopping list.
2• Redrock Micro’s One Man Crew Parabolic Camera Motion System
This amazing gadget consists of a motorized parabolic track slider that “guides the camera on a precision-curved track at any speed while keeping the subject stationary in frame.” The system includes speed control, automatic in and out stops, and 36” of track for camera systems under 20lbs. All for $1,500. If you are part of a small crew doing a lot of corporate interviews or a single photographer creating educational content or product demos, this is an extremely attractive option.
Video
Blogging With Video, Hoping to Go Viral. Really?
Ay ay ay! I might have more than a few issues with this New York Times article “Blogging With Video, Hoping to Go Viral.”
“You want to have a decent camera. A hand-held video camera is nice and offers more features and flexibility, but your smartphone is fine… The only additional equipment you might consider is a separate lavaliere or lapel microphone. And if there isn’t enough ambient light to illuminate your face, spring for a clamp lamp that you can find at most hardware stores… “
Here’s the complete article.
Is “good enough,” good enough? What’s your take?
Video
A movie about the most inspiring Brazilian artist you’ve never heard of.
UPDATE 0905: Mission Accomplished!!!!!

My extremely talented friend Andre Constantini has been working on a feature film called “Bel Borba Aqui.” The movie is about the most inspiring Brazilian artist you’ve never heard of.
While chatting with Andre about the film and his current Kickstarter campaign, I was schocked to know that they have well over 600 hours of footage. Andre shares here snippets of our conversation.
It’s Exponential
I just recently completed my first feature documentary film. With over 600 hours of footage and 3 years in the making, there has been a lot of time invested into the project. I had made short films before but increasing the scope of any project of this magnitude seems to exponentially increase the time it takes to complete it. But I digress, before you start a documentary it helps if you know the story you want to tell or the topic you want to explore.
Put It Out There
One year before I even knew that the subject of my film, a Brazilian artist living in Salvador, Brazil existed, I had a conversation with a colleague of mine expressing my desire to make a feature documentary on a living artist. A year later, I received a phone call from the same colleague stating that he found him and he was in Brazil and that I should come and meet him to see if it would work out.
Always Be Ready to Go
Even though we were just supposed to discuss the possibilities, on the first trip, I brought all of my equipment to shoot and after meeting the first day, we started shooting the second day. When I returned from my week long trip, I had already filmed for three days. This was enough to start cutting a short piece together to excite the subject and support.
The Edit Room
The editing process went along simultaneously with the shooting to some extent, coming up with rough sequences or themes. The key is not the is not where you start, it’s THAT you start. I find that as you have an idea for one scene or footage that you know worked out or you like, start there and find other footage that supports it visually or thematically (maybe even both). This part always takes the longest. But plan to have plenty of time to do this. Personally, I am best when I have large chunks of time where I can focus without distractions.
Here’s the Trailer:
The film is scheduled to release theatrically on October 3rd for a two week run at Film Forum in NYC. Let’s support Andre with his Kickstarter campaign. It could be you needing financing in a few years…
Video
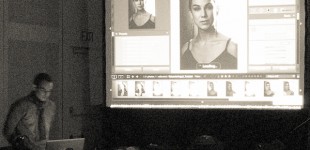
Notes from the Field.
This is a scan from my journal that I bring with me to every preproduction meeting that I have with clients, directors, producers, and others. In this scan you can see my handy “preproduction notes.”

Here’s how my system works: first, I like to get the conversation going by sharing movies that we like and movies that could be related to the project at hand. This helps tremendously in our effort to understand both technically and aesthetically what the client or director is going after, and if we are a good match for the project.
About a year ago I sat down with a director who began envisioning a project as “film noir meets science fiction/kung fu—but in a funny way,” which saved us both a lot of time, as I was definitively not interested!
Let’s take a look at the other things I consider on every video production:
• Script: Do we have a script? Is it from a book or is it an original script? When can I see it? If there isn’t a script, who is going to write it and when? This is a very important step. Even though I always write the scripts for my own projects, it needs to be clearly defined who will perform this integral part when it comes to someone else’s project. I have been using Celtx, and I am very happy with the results. The script is by far THE most important piece on any video production puzzle.

• Shot list: As soon as I have the script, I start creating a shot list: what kind of gear do we need? Do we own it? Do we need to rent it? How many shots can we accomplish in one day? The answers to these questions can vary greatly depending on location, the scenes’ complexity, permits, and even the weather.
• Location Permits: Since most of us don’t have access to Hollywood’s sets and production budgets, being creative is extremely important. Having access to locations that other people don’t have access to is key. There are several beautiful abandoned buildings on Wall Street that no one knows about. In Harlem there are fantastic mansions that you can shoot if you know the right people. Battery Park is Federal property while Central Park is not. Both require shooting permits, issued by different offices.

• Location Scouting: I am often surprised to see how many people ignore this critical step. In cities like New York things change, and they change fast. The park that you so fondly remember is now a parking lot. And that awesome abandoned building? Well, it’s now a luxury condo.
Video
The Sounds of Aronofsky.
The sounds of Darren Aronofsky, including fantastic movies like Black Swan (2010), Requiem for a Dream (2000), Pi (1998), and The Fountain (2006). Simply brilliant.

Video
Canon’s Light Leak Issue.
A few days ago Canon confirmed the light leak issue in the 5D Mark III: “In extremely dark environments, if the LCD panel illuminates, the displayed exposure value may change as a result of the AE sensor’s detection of light from the LCD panel. Canon is now examining the countermeasures and once the countermeasures are decided, we will post the information on our Web site.”

This issue is somewhat serious because I doubt it can be fixed via firmware. It is unclear right now if it is affecting the entire production (which would be a major design flaw) or a localized manufacturing problem. Some dealers are reporting that shipments to Canada and the UK have stopped in the past few days, which seems to be either a recall or that Canon is being extra careful.
In reality, the leak will change about 1/3 of a stop from what the camera considers the “proper” exposure. With the high dynamic range that RAW files deliver nowadays I believe the issue is being push a bit too far. Of course I’d be pissed paying $3,500 for a camera with issues, but technically speaking, I would not stop using it if I had it.
UPDATED: Yesterday Canon had this to say:
“Based on the results of extensive testing this change in exposure value will not noticeably affect the captured image. Affected Product Canon EOS 5D Mark III Digital SLR Cameras whose sixth digit in the serial number is 1 or 2 are affected.
For example,“xxxxx1xxxxxx” or “xxxxx2xxxxxx” ([x] represents any optional number.)”click here to keep reading (more…)
Video
Video Essentials and Video Editing for photographers at SVA.
PDN Magazine recently published what we consider the “13 Products you need to add HD Video to your business.” (You might need the password “tutorials” to download the file.) The article is also available on PDN’s May print issue. If you are new to the world of Video, this list is a great place to start.
During the summer we will be offering two new workshops at the School of Visual Arts (SVA) in New York City: a 2-day “Video Essentials for Photographers” and a 1-day “Video Editing for Photographers” using Adobe Premiere Pro. We hope to see you there!

Video
Stunning tilt-shift video at the Carnival in Rio.
An absolutely stunning Tilt-Shift/Timelapse video of the Carnival in Rio de Janeiro, Brazil. Shot by Sydney photographer and filmmaker Keith Loutit and Jarbas Agnelli.
Video
Same but different – Intro to Digital Cinema.
As a professional photographer, transitioning into the HDSLR Cinema world for the past 3 years has been a fascinating journey. I would like to share the five main similarities and five main differences I have encountered. Read through, I can guarantee it will save you some time.
Similarities
• White balance. Think Jpg. You can tweak the White Balance in post, but you are very limited to what you can do. Instead of using Auto White Balance, set a specific color temperature (5200K for example), especially if shooting with more than one camera.
• Exposure is very critical. Pay special attention to the highlights. It is time to use again that good old Light Meter or get one specifically designed for HDSLR shooters like Sekonic’s L-308DC. Like White Balance, do your best to get it right on camera, not in post.
• Camera Settings. We are still using ISO, aperture, and shutter, but because of the frame rate, the shutter is not really a variable factor anymore. Now, we also need to add fps (frames per second), picture styles, and other interesting things to the mix.
• Composition. We go back to the basics. Rule of thirds, symmetry and patterns, texture, depth of field, viewpoint, and cropping. Luckily, that has not changed. If you have a good eye, you are good.

• Lighting. All cameras are light-tight boxes that admit controlled light only through a lens. Just because we can push sensors to 25,000 ISO does not mean you are telling a story with light. You need to light.
Differences
• Lighting. Wait! Wasn’t this one of the similarities? Yes, it is also a big difference. Remember strobes? They turned into hot lights and continuous lights. Also, keep in mind that now the camera moves, and the light should work for several angles.
Video
Weekend Wrap up.
What a great weekend! Tons of new friends, and a few exciting announcements at the PDN PhotoPlus Expo in New York. My Adobe Lightroom and Digital Cinema seminars went great, big thanks to Victor Ha from Cinevate for his awesome hands-on demo on High Production Value. The 2-day HDSLR Workshop at B&H was really fun. We had a great group of photographers transitioning into digital cinema!
Thank you all for the great feedback and support. Here are some pictures.


If you are interested in HDSLR Cinema, check my upcoming workshops in Washington D.C. (Nov. 5-6), and Los Angeles (Nov. 11-12).
Video
Can’t miss seminars at PDN’s PhotoPlus Expo 2011.
Last week, my great friends Ted Kawalerski, Matt Stanton, and Justin Katz helped me shoot this 45-second video to promote my upcoming seminars at PhotoPlus Expo in New York City.
On Friday, October 28, from 8:45 to 11:45 a.m., I’ll be co-teaching “Portrait Lighting Techniques & Lightroom Workflow” with Bobbi Lane. Expect a very energetic and intense seminar.
The same day, from 3:45 to 5:45 p.m., I’ll be presenting “Intro to Digital Cinema.” This 2-hour class is specifically designed for photographers transitioning into HDSLR video, and my goal is to provide enough tips and resources so that attendees will be able to start shooting video by 6 p.m. that same day. I guess I love challenges. As the title says, this is an introductory class.
To truly understand all the technical concepts, filmmaking techniques, and upcoming trends of this amazing digital revolution, I suggest you attend one of my upcoming 2-day PDN HDSLR Video Workshops in New York (Oct. 30-31), Washington D.C. (Nov. 5-6), and Los Angeles (Nov. 11-12).
Let me know if you have any questions!