Video

Shooting 4K Anamorphic and V-Log with Panasonic’s GH4. Ten Valuable Lessons.
UPDATED: I just added two video tutorials: one comparing “Panasonic’s V-Log L vs. Cinelike D” and the second one “Conforming 4K Anamorphic Footage in Adobe Premiere Pro.”
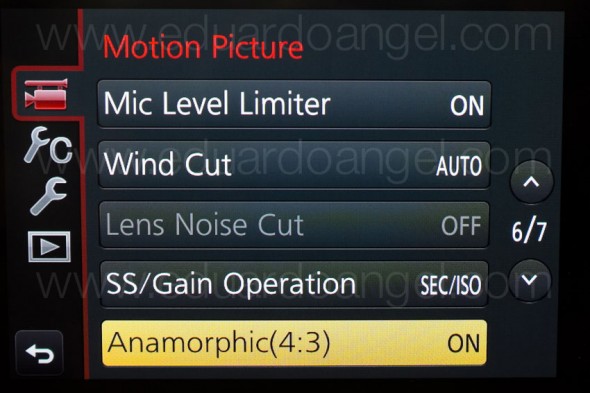
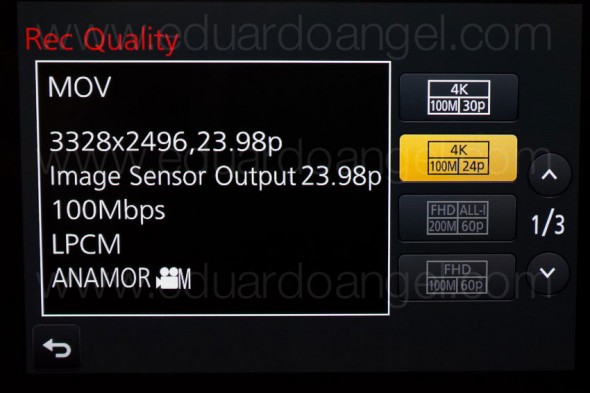
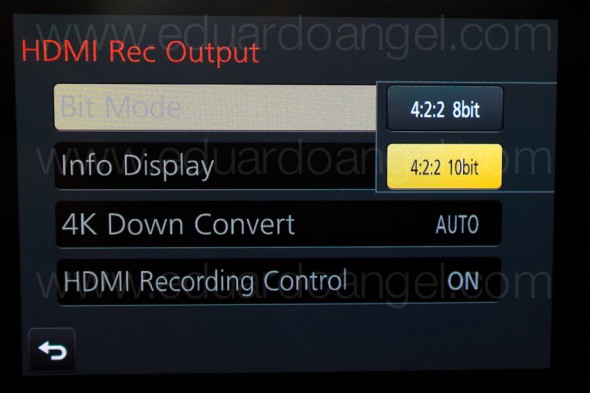
Anamorphic is enjoying a huge comeback. The reasons to go this route vary from project to project, but generally it’s the desire to achieve a different look and use as many pixels from the sensors as possible. Panasonic’s Firmware Update v.2.2 (available here) enables an Anamorphic (4:3) Mode capable of recording video in 3328 x 2496 pixel (equivalent to approx. 8.3-megapixel) resolution at a frame rate of either 23.98, 24, 25 or 29.97 fps. With an anamorphic lens such as 2x Lomo lenses (see below) we now can capture and un-squeeze a 3356×2496 image in post-production. To make things even better, 4:2:2 / 10 bit HDMI output is also available.
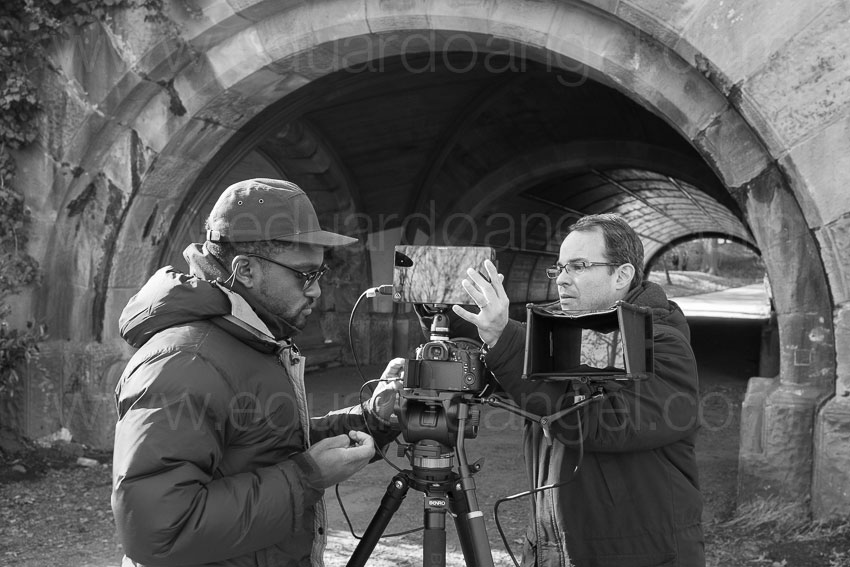
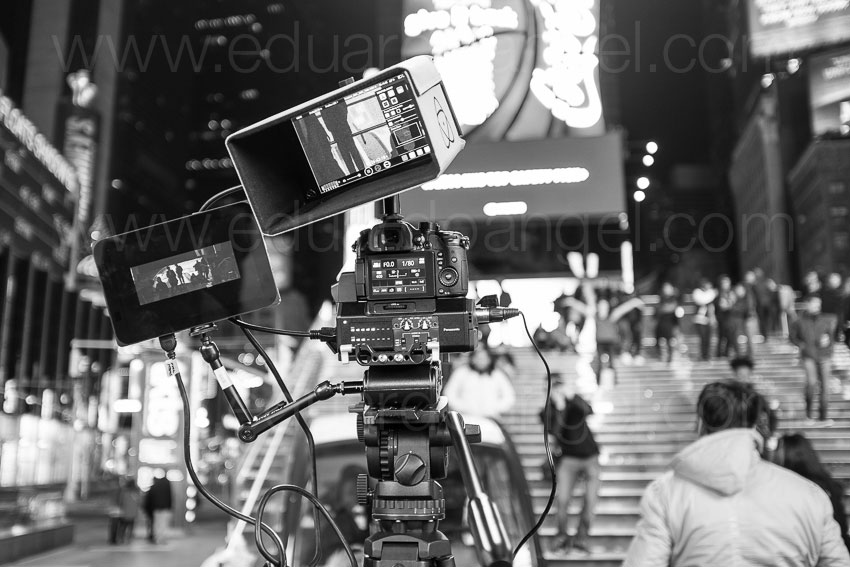
Just like in 2013 when we had the opportunity to field test a GH3 in the Middle East and last year when we shot with one of only three prototypes world-wide of the GH4, for the past couple of weeks I had the privilege to work with director Davis Northern, DP and tech wizard Sean Davis and many other talented people on one of the very first GH4 Anamorphic AND V-Log L projects, shot exclusively for Panasonic North America and produced by The Digital Distillery.
Panasonic 4K Anamorphic and V-Log L – Official Video from The Digital Distillery Inc. on Vimeo.
The project was exciting and very challenging, as working with hardware prototypes and beta versions of software or firmware always is. We had a lot of moving pieces and an extremely tight deadline, but I’m proud of the final results and very satisfied with the lessons learned. This article covers some of the most significant ones, and it is written from my very own personal perspective. As always, I try my best to be as objective and brand agnostic as possible. The lessons aren’t in any specific order and some links will take you to articles with additional information . Please consider using our links to help support our very time consuming articles and tutorials.
Ready? Let’s go!
1. Shooting Anamorphic
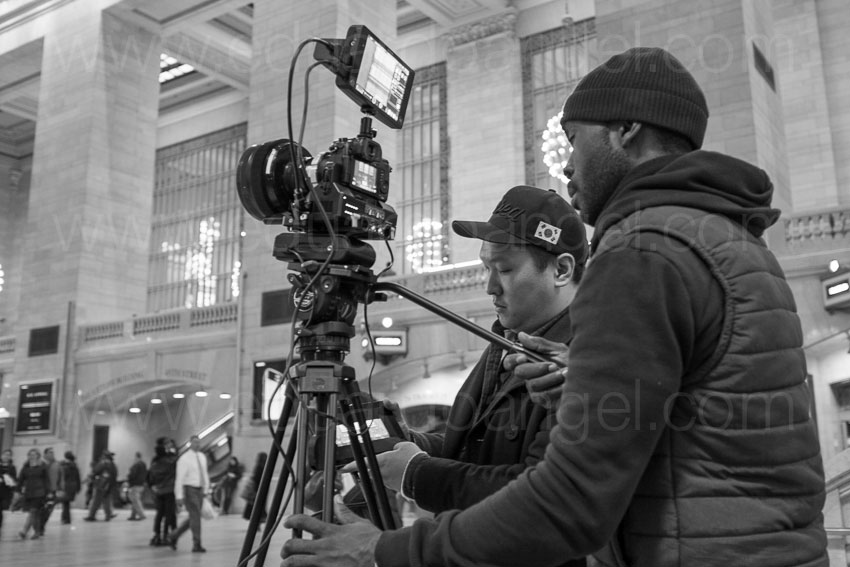
It can definitely be achieved by a very small crew on a small budget. We mostly shot with a crew of three, with very limited gear and time. I’ve always assumed you needed a 2-ton truck and a crew of 30 to pull this off. Clearly, this was not the case for us.
2. Lenses
In terms of lenses, we opted to keep a “low profile” while keeping our options open. In other words, we rented a set of vintage anamorphic Lomo lenses (35, 50, and 75mm) and tested an SLR Magic as well as a Letus AnamorphX 1.8X Pro Adapter and a Veydra Mini Prime.
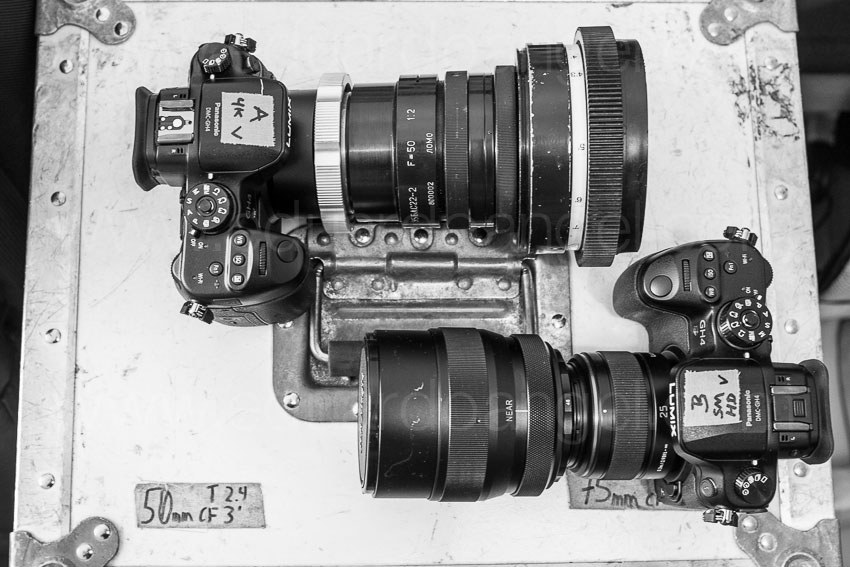
A. Lomo:
The lenses are huge and heavy. Lomo 50mm + 75mm with case = 25lbs. Lomo 35mm with case = 35lbs with each case weighting about 30lbs. Not ideal for the “guerilla” approach we needed for this project. They definitely have a unique look, but are very hard to focus, especially when using a very flat profile. We rented the set for $500/day or about $1,700 for a week including tax. Not cheap by any means but definitely worth the investment in terms of time and quality.


If I were to shoot this project again (or on upcoming anamorphic projects) I probably would test the Cooke Anamorphic/i Lenses (25, 32, 40, 50, 75, 100, and 135mm with a 2x squeeze). Unfortunately these lenses cost about $30,000 each, and the rental rate is about $500 per lens, per day.
B. SLR Magic:
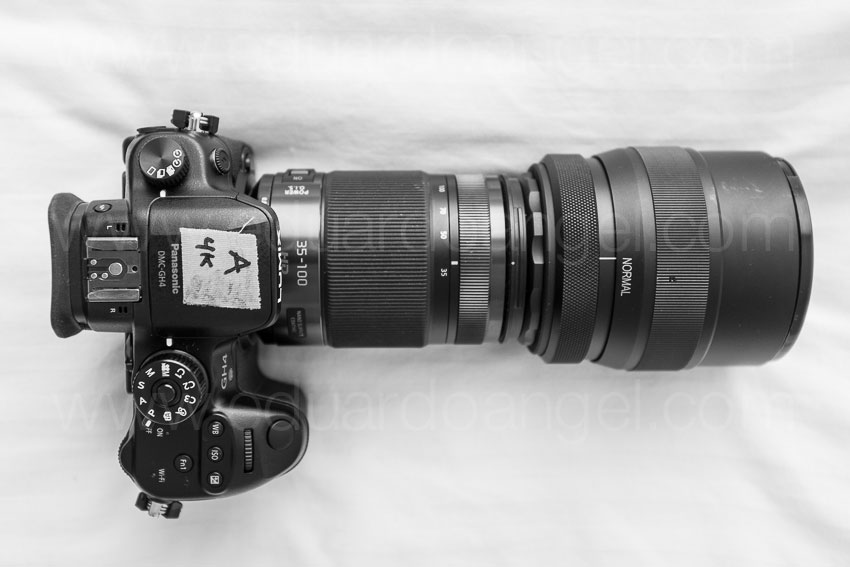
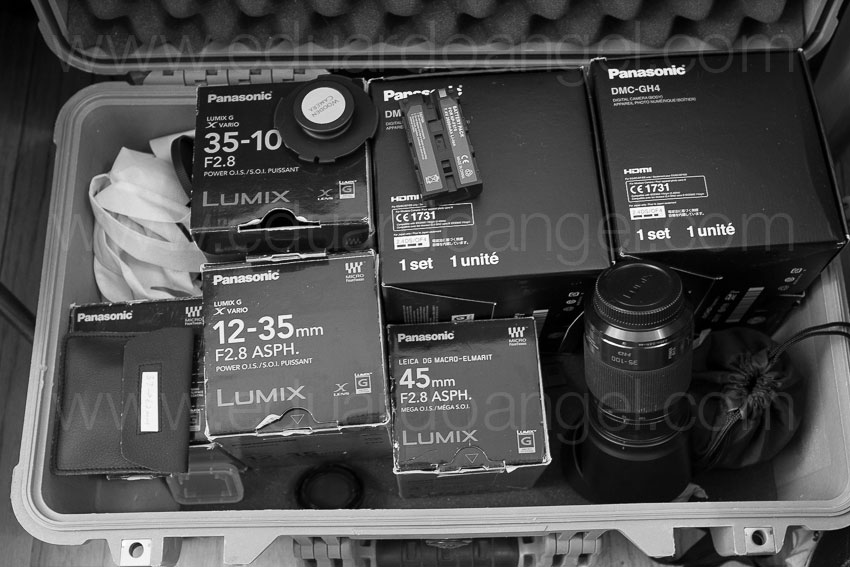
We had access to a very nice selection of Panasonic glass that we wanted to use with an SLR Magic adapter. The first challenge was that the front diameter on all the lenses has to be below 62mm in order to use the step down rings. The second limitation was (for the Panasonic lenses) that anything wider than 28mm would vignette. We could have used the Panasonic 12-35mm lens, at 28mm or longer (kind of pointless), but for some odd reason with the SLR Magic adapter it vignetted all the way even at 35mm. The Panasonic 35-100mm didn’t vignette at 35mm. Go figure. The next usable lens on our Panasonic arsenal was the beautiful 42.5mm Noticron f/1.2, but we needed a step DOWN ring (from 67mm to 62mm) that wasn’t included with the kit. The last option was the Panasonic 35-100mm f/2.8 lens, which worked well but focusing was a MAJOR issue (not Panasonic’s fault). I found the SLR Magic system very finicky and unreliable and unfortunately I can’t recommend using it.
C. Letus Anamorphx:
The Letus Adapter worked much better than SLR Magic but it was also cumbersome. A matte box is pretty much required and there was an issue with one of our widest lenses. The lesson here is, if you are shooting anamorphic, use the real thing.

3. Storage
There’s some heavy math involved when shooting Anamorphic. An anamorphic lens produces roughly a 2X horizontal squeeze of the image onto film. Traditional anamorphic lenses were designed to work on a 4:3 standard. The anamorphic footage captured with the GH4 on the Atomos Shogun is 3840×2160, so not technically 4K but pretty close. Shooting internally (to an SD card) the footage is 3328×2496, so greater vertical resolution than the 4K standard, but not full 4K horizontal resolution. To keep things in perspective, the 4K footage out of the GH4 4096×2160.
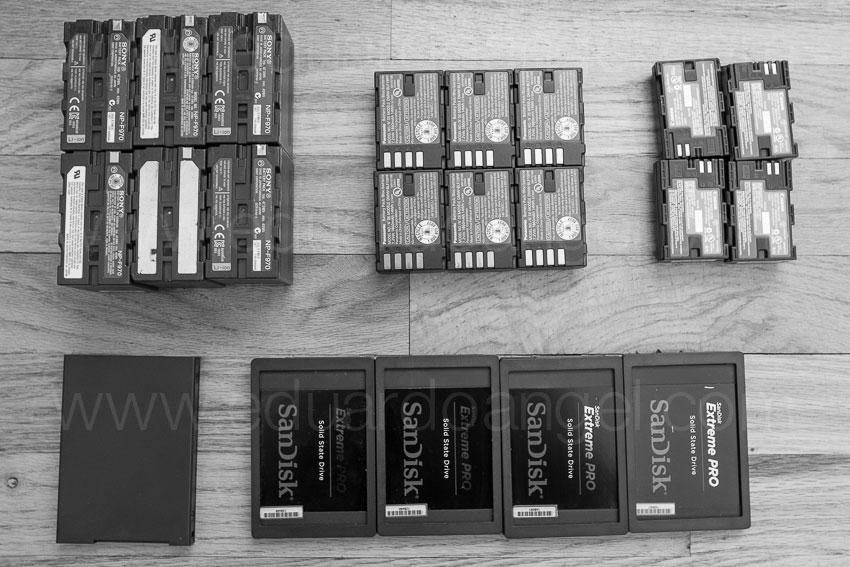
As you would expect, the files are huge. Shooting ProRes 422 you need about 4GB per minute of footage. Two cameras: 8GB, after only one backup you are at 16GB per minute. So somewhere around 20GB per minute is a pretty safe storage estimate for a two-camera setup. As always, we trusted all our very valuable assets to G-Tech Hard Drives.
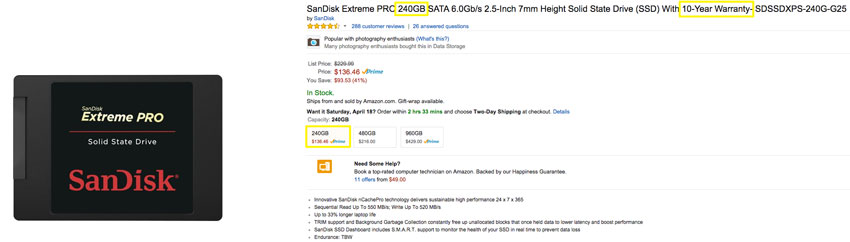
Regarding Solid State Drives, Atomos has a great chart with all the supported drives for the Shogun and other devices. Make sure you triple check the chart before investing in one.
One SECOND of footage takes about 50MB so even if you are shooting into seemingly endless Solid State Drives, being smart about when to start rolling and when to stop can save a lot of storage.
4. HDMI
As we were shooting, Atomos was literally finishing writing the Shogun’s firmware update (available in May or June as a free download) will enable a number of awesome features:
- Anamorphic de-squeeze for Panasonic GH4 and standard lenses
- RAW recording to ProRes, DNxHR and Cinema DNG for compatible RAW formats
- Expanded RAW compatibility to include Sony FS series, Canon, Arri and AJA
- 3D LUTs on HDMI/SDI output
- Cinema 4K DCI support
- Uncompressed V210 support
- Genlock
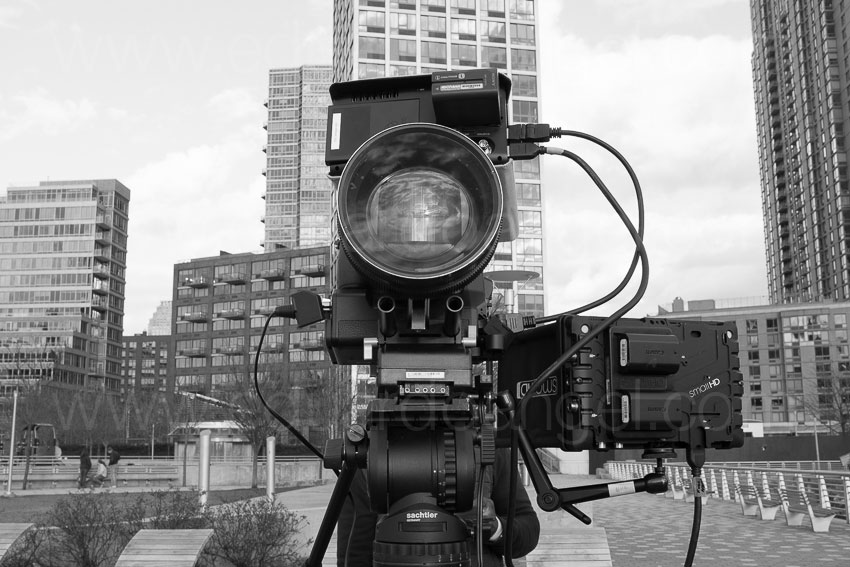
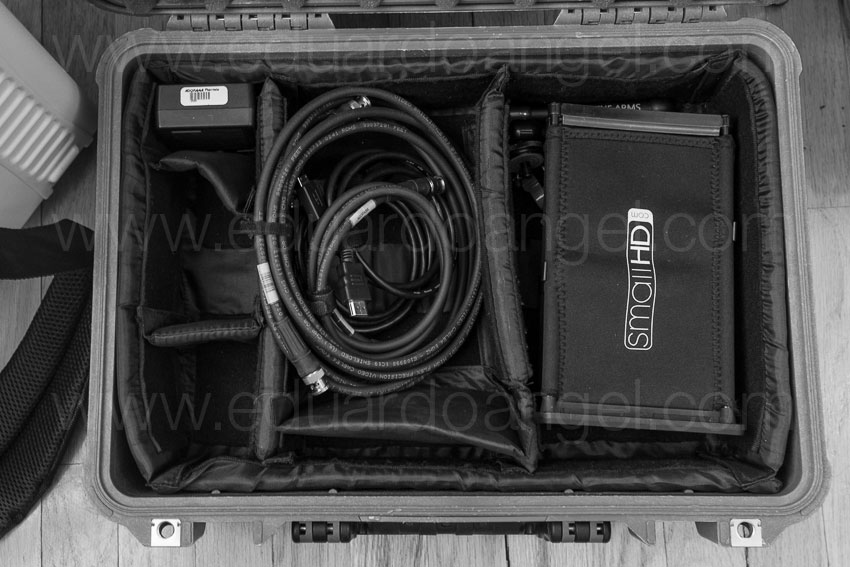
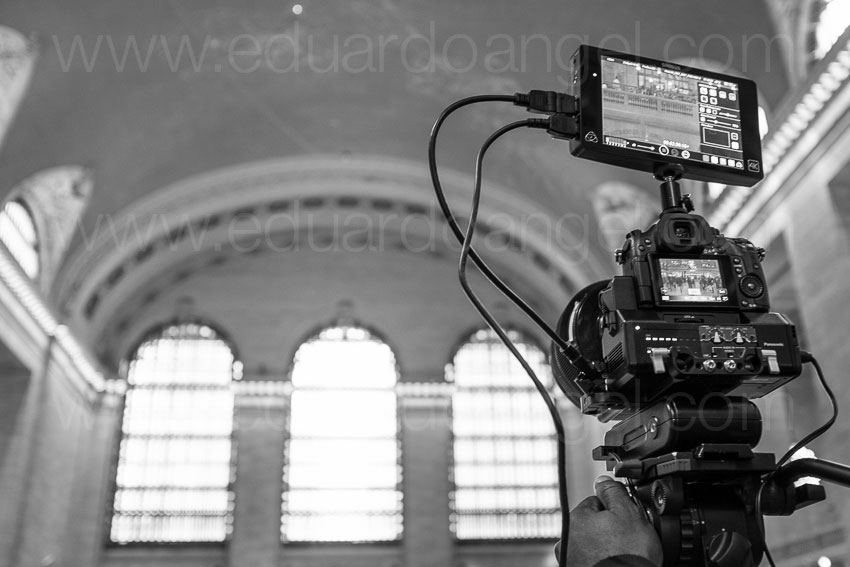
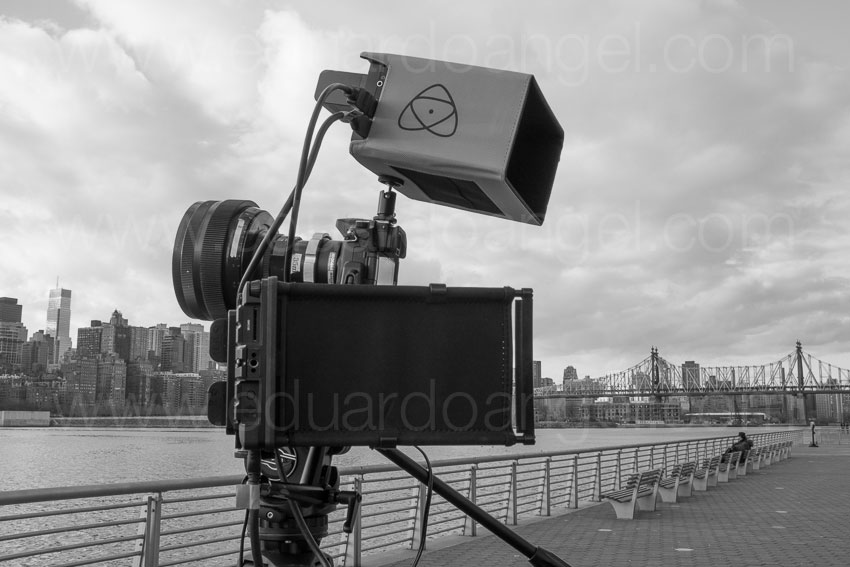
We had to use a Small HD Pro7 (to de-squeeze) and the Shogun (to record in 4K). The setup seems pretty obvious after a lot of trials but it wasn’t at first. Here’s the executive summary that will hopefully save you some time and stress:
1. Micro HDMI to Standard HDMI cable from the GH4’s HDMI OUT to the Atomos Shogun HDMI IN
2. Standard HDMI to Standard HDMI cable from the Atomos Shogun HDMI OUT to the Small HD HDMI IN
3. In the Shogun, the 4K downconvert option should be OFF while connecting the Small HD and turned ON when everything is properly connected.
Our Small HD had a nasty tendency to constantly lose signal for no apparent reason, so step #3 had to be repeated many times throughout each shoot.
5. Premiere Pro CC 2014 Workflow
To be totally honest, I was shocked by how easy it was to conform the footage in post. Here’s what you need to do:
1. Import the footage the way you normally do.
2. Select the anamorphic clips.
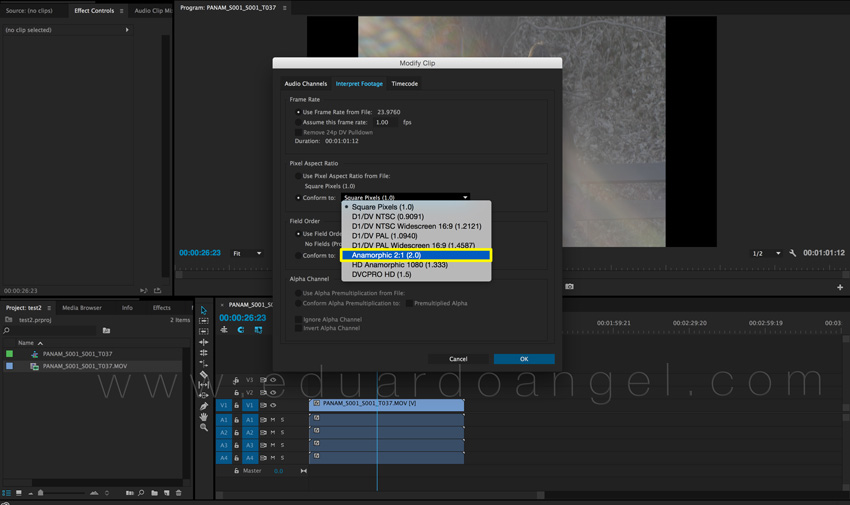
3. Go to clip > Modify > Interpret Footage
4. Under “Pixel Aspect Ratio” select “Conform To” and “Anamorphic 2:1 (2.0).
5. Create a “new sequence from clip” and start cutting.
6. Done and done. Wow!
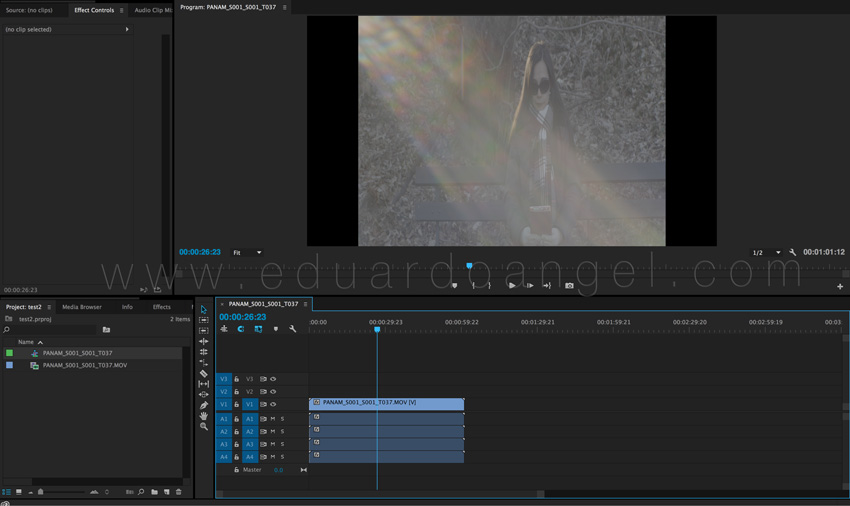
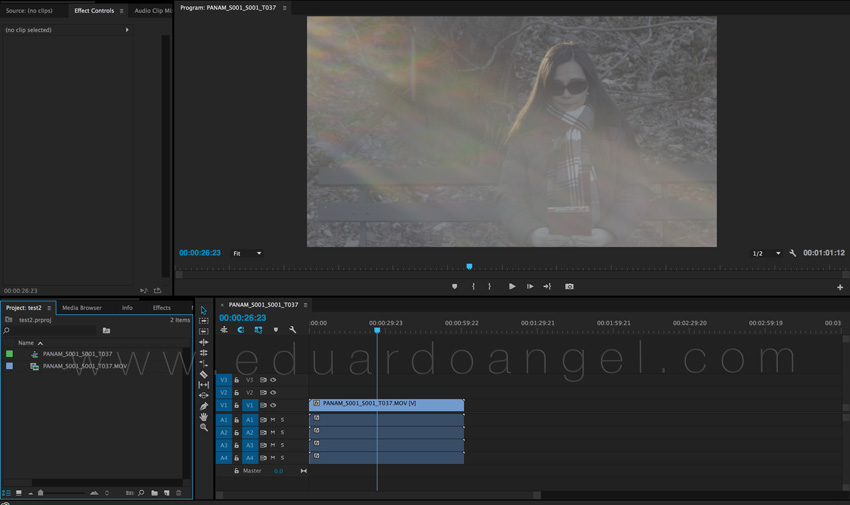

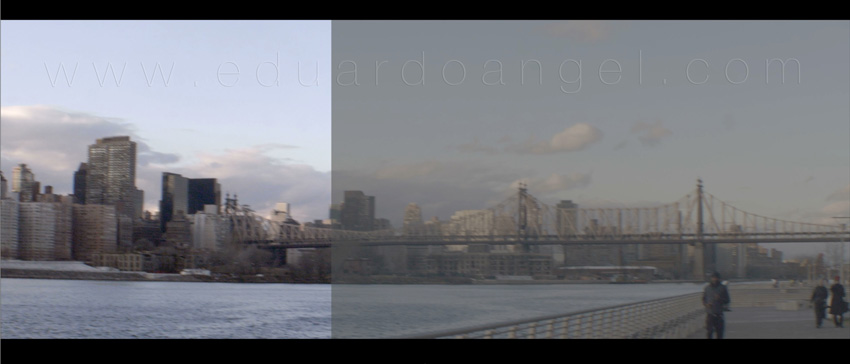
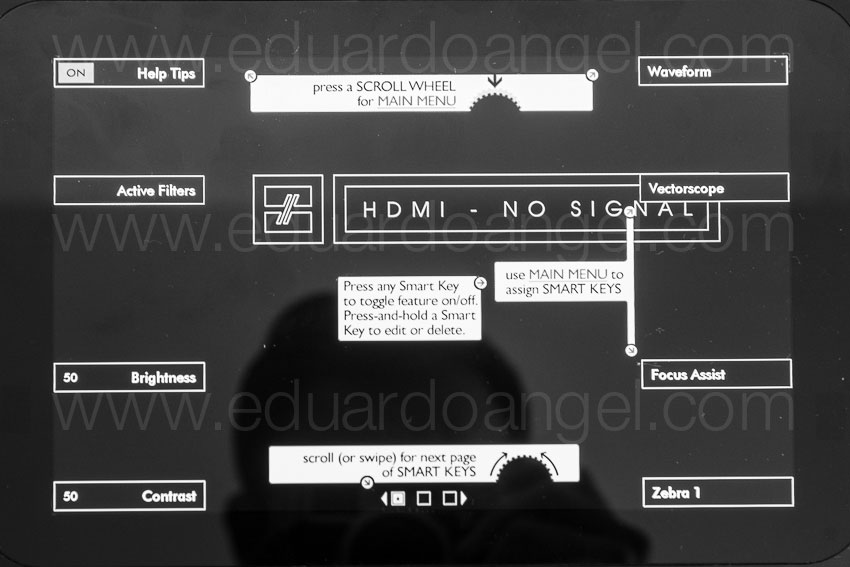
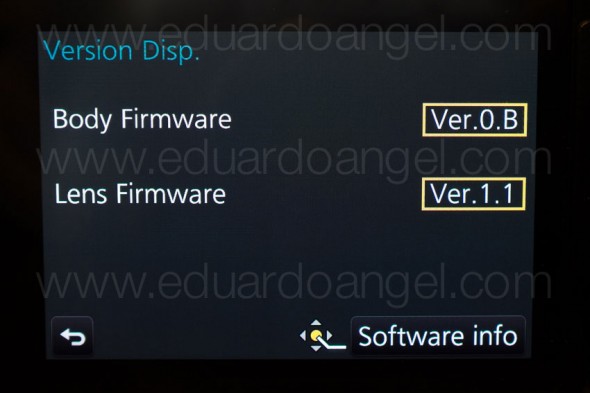
Here are some screen grabs from the camera’s LCD:

6. Focus
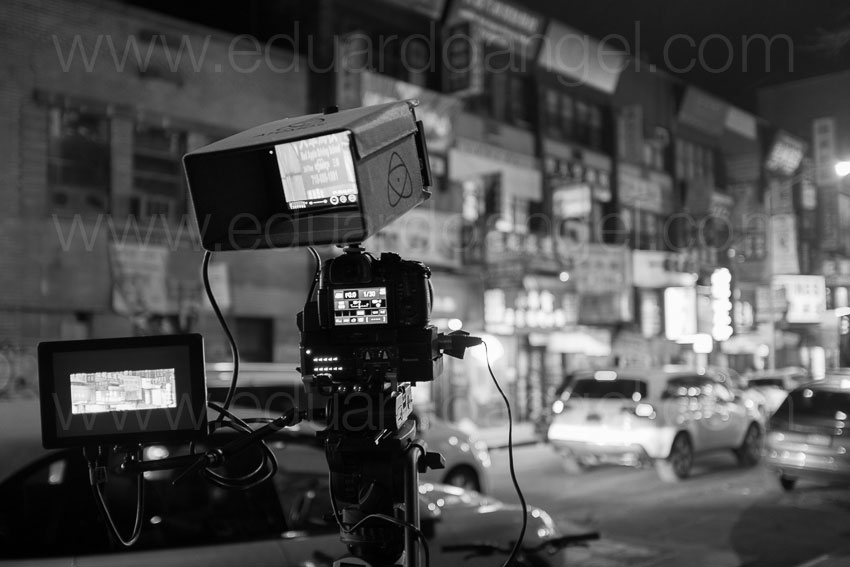
Focus is super, extra, hyper critical, especially when shooting with a very flat profile like the one we used. Unfortunately we couldn’t trust the SmallHD and had to rely 100% on the Shogun at a 1:2 zoom.

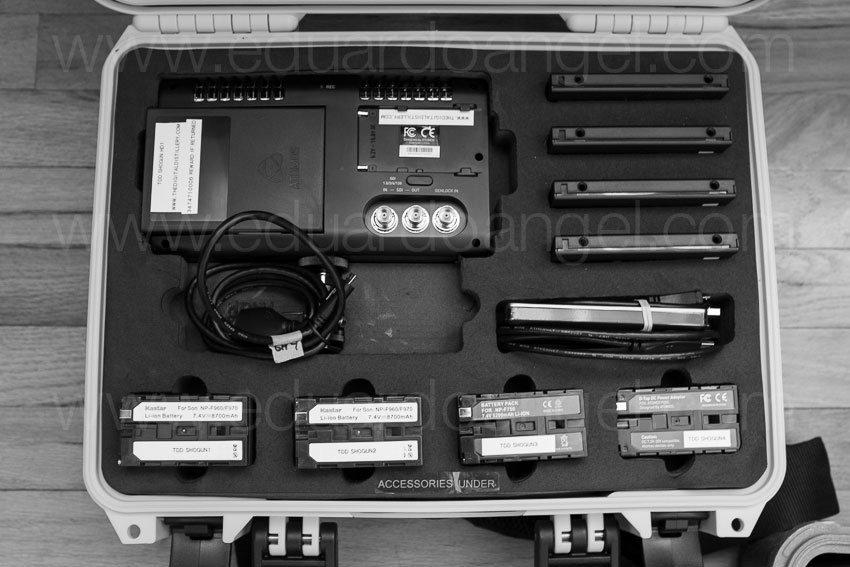
7. Accessories
• A sun hood for your external monitor is absolutely essential (if given the option get the black version).
• Obviously you will need lens adapters if you are planning to use the SLR Magic or Letus AnamorphX options.
• Make sure you get plenty of batteries, The small battery that comes with the Shogun lasts about 30 min only and we got about one hour of recording time with TWO Canon batteries on the Small HD. Instead of buying tons of batteries I’m a big fan of renting them (more here). The same goes for additional Solid State Drives.
8. Bonus lessons:
• Shooting anamorphic takes a lot practice and fine-tuning. I’d recommend scheduling at least a full day to test all the gear before a shoot.
• If we keep a small footprint and move fast, we can get a lot done.
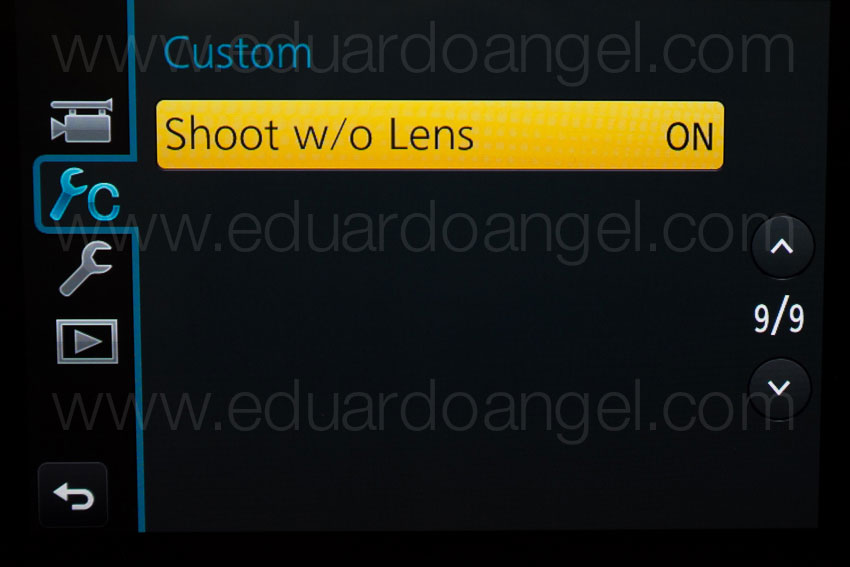
• The “shoot without lens” on the GH4 must be turned on in order to work with the Anamorphic lenses.
And…..here are two more videos (not anamorphic) shot with the Panasonic GH4. Check them out and let me know if you have any questions or comments via Twitter (@EA_Photo)
Video
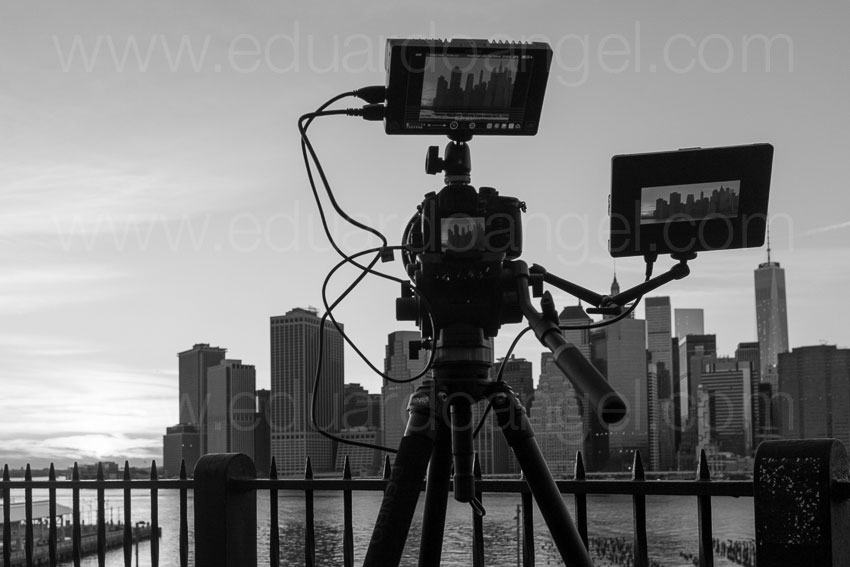
Upgrading from HD to 4K. Worth it?
There are currently 2.7 billion active smartphones in the world. An estimated 800 million were added this year alone. By 2020, Ericsson predicts there will be at least 6.1 billion smartphone subscriptions globally. What’s the big deal? Well, this means 38% of the world’s population has the ability to shoot digital video and stills.
That is not very good news for us as content providers.
The way I see it is that we need to diversify our professional skills, learn as much as we can, learn how to edit, how to grade, how to record better sound, and how to tell more engaging stories. In an ever-changing marketplace, the more you know the safer you are.
Smartphones aren’t the only problem though. The average price of professional editing software went down from $1,300 to $299 in the past 10 years, and this is an average that includes high-end apps like Avid ($1,300) and excellent software applications like Blackmagic’s DaVinci Resolve, which “Lite” version is completely free.
The cost of a cinema-quality camera tumbled from $200,000 in 2001 to $1,000 today.
Photography and film students with current DSLRs have way more resolution and features than any $200,000 camera from 10 years ago. This is incredible!
Before I started shooting 4K I didn’t really know what all the fuss was about. Then I put this chart together. For some of you this might be pretty obvious, but it can’t hurt to check it out.
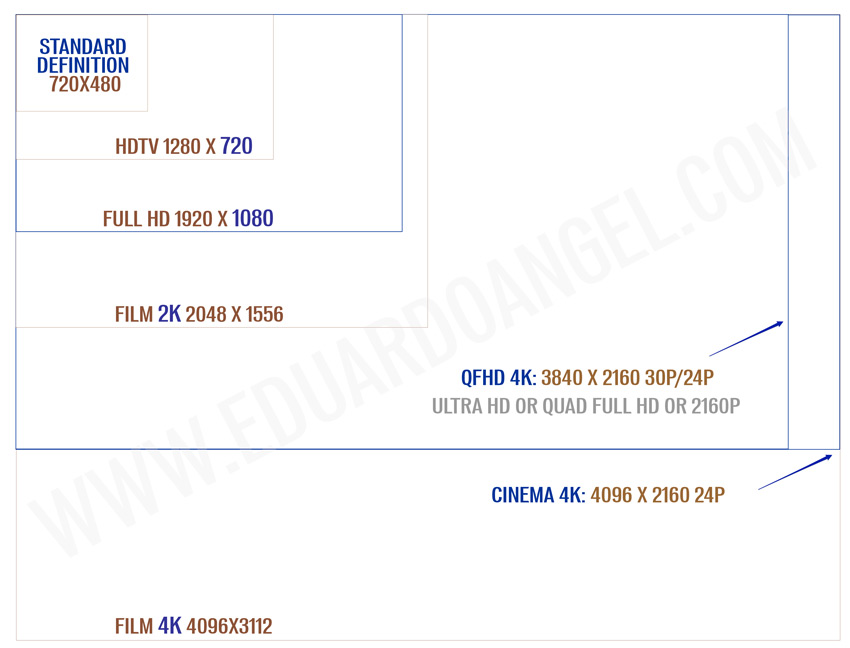
Is upgrading from full HD to 4K worth it? You would think this would be one of the main questions I encounter, but last year at NAB I was absolutely shocked to find out that many companies, mostly broadcast stations, are still shooting SD and that they are now considering making the jump straight into 4K. That’s a pretty big jump, but for some of them it can make a lot of sense.
Should you do it? It depends. Think 35mm digital cameras vs. medium format digital backs. Phase One vs. Canon or Hasselblad vs. Nikon. Most advantages and disadvantages regarding sensor sizes, file sizes, shooting speeds, portability, and especially storage and post-production challenges apply. Except for price. For $2,500 we can now capture 4K RAW or almost literally in the dark. For $1,300 we can record HD slow-mo or 4K internally. And for $500 we can shoot 4K anywhere.
These systems are so inexpensive that they sometimes become a double-edged sword. Their sizes and prices transform them into accessible toys. And that’s where the problems start. Higher resolution often demands new workflow requirements. In RAW form, a 2.5-hour movie shot in 4K at 24fps contains 216,000 frames. The resulting file is approximately 5.6 terabytes of data. That’s ONE camera, BEFORE back ups. But who really shoots that way? Well, David Fincher shot 500 hours of 6K RAW with multiple RED Dragon cameras for his latest movie “Gone Girl.” The end result was 315 terabytes of footage. Crazy? It depends, for normal people with normal budgets, yes. But Fincher was dealing with a time crunch and had to release many actors as fast as possible, so they shot many scenes in loose medium shots and zoomed in and reframed them in post when needed.

I don’t believe 4K UHD is another fancy trend or marketing gimmick to make us spend our hard earned dollars on something that will become obsolete before the year’s end (3D anyone?). I truly see 4K UHD as a natural transition, or evolutionary step, in screen resolution. In 2015 I expect to see many more new models of 4K UHD TV sets than new models of 1080p HD TVs.
This doesn’t mean everything is safe and sound and all the potential issues have been ironed out. For example, a recurrent question I get at all my presentations is “what’s the best way to distribute 4K?” and the answer is far from perfect, as we currently have very limited options.
Let’s take Blu-Ray for example. A Blu-Ray disc can fit 25 GB per layer. A 2K film takes 50 GB, so that technology is currently maxed out. The good news is that as of last September, the Blu-Ray Association announced it would support 4K video at 60 fps, High Efficiency Video Coding (HEVC), and 10-bit color depth. According to this association, the new generation of 4K Blu-Ray disks will have a data rate of at least 50 Mbit/s and may include support for 66/100 GB discs. Awesome!
4K UHD Blu-ray players are being developed in conjunction with the UHD alliance, comprising manufacturers such as Samsung and Panasonic, as well as movie-industry players such as Technicolor, 20th Century Fox, and Warner Brothers. The alliance is not only responsible for establishing standards with regards to specs like 10-bit color and High Dynamic Range (HDR), but also for pushing content creation forward and managing distribution.
The huge appeal of HEVC (High Efficiency Video Coding) is that it essentially doubles the data compression ratio while keeping the same level of video quality and it can support 8K UHD with resolutions up to 8192×4320. I want to think that 8K is extremely far off in the future, and that it will be a very long time before we need such resolutions. But, I (sadly) still remember when a 100MB zip drive seemed impossibly huge and we debated if putting all your assets on a 1GB Microdrive was practical or even irresponsible.
As we all know, both the iPhone 6, and iPhone 6 Plus support HEVC/H.265 for FaceTime. Recently, Microsoft confirmed that Windows 10 will support HEVC out of the box, and DivX developers announced that DivX265 version 1.4.21 has added support for the Main 10 profile of HEVC and the Rec. 2020 color space. Online streaming might also seem like a great solution, but not yet. Netflix recommends a minimum download speed of 5MB for 720p, 7MB for a 1080p and 12MB for 3D movies and a whooping 25MB for 4K.
What’s wrong with this picture? I have a dedicated “business” internet plan. The fastest, and obviously most expensive plan I can get in my area. My download speed is less than 17 MBps, not nearly enough for Ultra HD quality, so broadband speeds will need to increase and prices will have to come down if the interested parties really want 4K to be widely accepted by movie buffs, sports fans, and especially gamers.

A nice advantage of 4K UHD TV sets is that they are backwards compatible, which means that they will work fine with your existing DVD and Blu-Ray players, as well as satellite and cable boxes. They can also “upscale” HD content and display it as best as possible. This past summer some of the FIFA World Cup games were broadcast in 4K. I watched a couple and it was a surreal experience. From certain angles, like shots from the sidelines, it felt almost like physically being in the stadium. The most popular VOD providers like Netflix and Amazon, major cable companies like Comcast and DirectTV, Hollywood studios, YouTube, and even local TV news station are starting to deliver 4K content, so hopefully other services will follow suit. What’s next? Streaming 4K media from a smartphone to an HDTV.
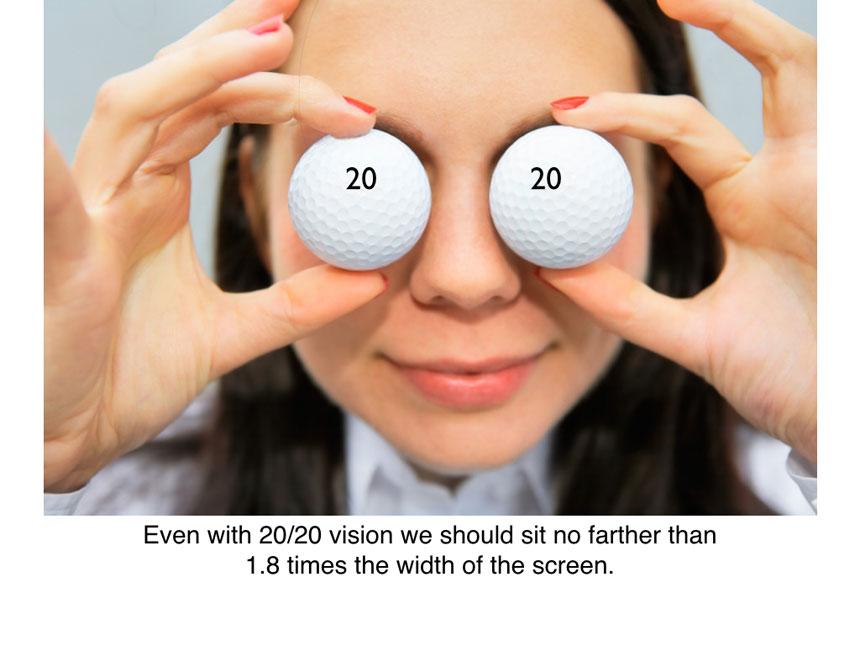
We increasingly have access to very powerful and generally cheaper tools. But tools are just that. When to choose one over another and, most importantly, why it should be chosen are the real questions. Here’s something interesting; Ophthalmologists generally agree that the higher the resolution of your monitor, the better it is for your eyes. Why? Because (according to them) the text looks sharper, and at a certain point, the pixels are so small your brain can’t tell it’s not looking at real stuff. Exciting or sad. Up to you.
Cool Links on 4K:
4K Camera Workflows- Raw, Video, Proxy
Nearly 50% of Video Professionals in UK Never Saw 4K
Netflix to Begin Charging More for 4K Streaming
How 4K Benefits Videographers and Photographers
What 4K means for post production
What Is 4K Video? A Guide to the Rising Industry Standard
The Pros and Cons of Shooting News Footage in 4K
The Wall Street Journal goes 4K video with the GH4
Video
How to quickly enhance your photography portfolio.
On my previous post (I’d recommend reading it first if you haven’t) I walked you through my personal process to edit a large group of images into a more manageable portfolio.
Now is the time to enhance and fine-tune those “final” photos. (more…)
Video
Is Canon following Adobe’s steps?
Canon just released their “EOS Digital Solution Disk V28.1” software suite. As usual, it contains the “Digital Photo Professional”, “EOS Utility” and “Picture Style Editor” applications. So what’s the big deal? For the first time (as far as I can remember) the Solution Disk has been issued only on CDs, but this time it will be available as a download.No conspiracy theory needed here. The real reason behind the online delivery is that many new computers, including the latest Apple iMac (which is super fast and awesome) no longer come with CD drives, so we are all being forced to move to the cloud.
Canon EOS DIGITAL Solution Disk Suite
Support for Mac OS X includes:
• Mac OS X v10.8
• Mac OS X v10.7
• Mac OS X v10.6
And support for Windows OS includes:
• Windows 8
• Windows 8 (x64)
• Windows 7
• Windows 7 (x64)
• Windows Vista
• Windows Vista (x64)
• Windows XP
Keep in mind that you will need a serial number in order to download the software.
Supported cameras will include Rebel SL1, T5i and 1DC along with other updates.
And talking about Clouds and Adobe, on this post I added a link to Adobe’s MAX 2013 Keynote AND and a second link to the best deal for Cre¬ative Cloud I can find ($20 per month). Here’s a previous article on using Adobe Lightroom with Cloud Storage Solutions.
Video
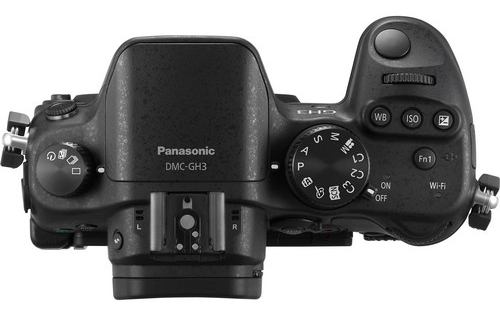
Shooting with the Panasonic Lumix DMC-GH3. Field report and impressions.
The friendly waiter at the Turkish restaurant in Sohar, Oman, saw the camera on the table and asked “Nikon? Canon? Which one is better?” To which I replied, “actually, this is the Panasonic GH3.” He stared at me, his expression turned from excited to perplexed to confused to annoyed within seconds. After an uncomfortable silence he finally asked, “Are you ready to order?”
That was pretty much my reaction when, a few weeks ago, just two days before I started teaching a “Digital Cinema for Photographers” event in Dubai, I found out that Panasonic, a major sponsor of the event, REALLY wanted me and my students to use a couple of GH3s and several lenses in my hands-on workshop.
Panasonic is one of the largest consumer electronics companies, and the GH3 is the third generation of their very successful Micro Fourth Thirds DSLM (Digital Single Lens Mirrorless) system. For a while I have been aware of the low-budget-filmmaking community’s devotion to the hacked DMC-GH2 and its ALL-I codec. I saw the DMC-GH3 at Photokina last year, but I had never before shot a single frame with a Panasonic camera. The bodies that I was given were running Firmware v0.5. Add to this a nine-hour time zone difference and jet lag, and you can begin to imagine my pain.
While I’ll be using some geeky terms, this is not an in-depth technical review, nor a scientific analysis of the GH3. You can dig into tech specs and MTF charts somewhere else. My goal is simply to share my honest and independent impressions, go over the things I liked and didn’t like, and communicate my wish list for future features. I want to emphasize that all the conclusions in this article are subjective and strictly based on my own personal experience.
“I have to warn you, I’ve heard relationships based on intense experiences never work.”
-Keanu Reeves in “Speed”
I have to respectfully disagree with Keanu on this one. Much to my surprise, the camera was much more intuitive than Sony’s NEX system, and several video features got my full attention right away.
FEATURES
• Full HD 1920×1080 60p/50p (NTSC/PAL) with 30p/25p/24p options.
• Ultra-high bit rate video recorded at 72 Mbps (ALL-I) or 50 Mbps (IPB).
• Capable of recording continuously for an unlimited time for NTSC and 29 min 59 sec for PAL.
• Native support for MOV (h.264), MP4, and AVCHD formats.
• Time Code support in the MOV and AVCHD formats.
• Extremely fast and accurate contrast-detection Autofocus.
• A 3.5mm mic input AND a headphone jack AND the option to manually adjust the sound recording levels via touchscreen controls.
• Full-time AF, AF Tracking, and Face Recognition AF are available for VIDEO. The Touch AF mimics rack focusing.
THE WORKSHOP STORY
Not having enough time to field test the Panasonic systems before the Workshop, I shot dummy clips in my hotel room and made sure that the footage would work in Adobe Premiere Pro CS6. The test went surprisingly smoothly. I then set both GH3 cameras to the same video settings: MOV at 1920×1080, 24p, 72 Mbps ALL-I, Standard Photo Style, White Balance at 5500K, got ND filters for all the lenses, extra batteries, and a few Class 10 SD cards. And then I prayed.
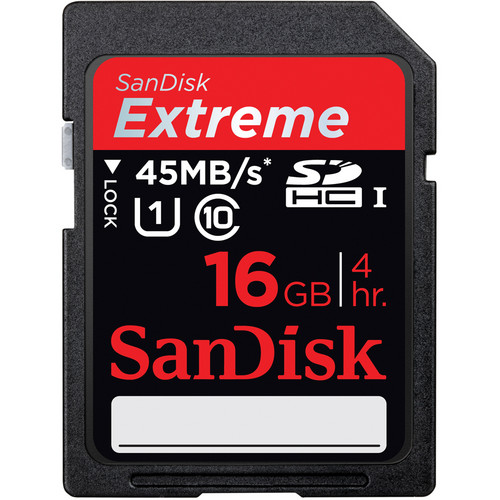
You must use a Class 10 SDHC card when recording Ultra-high bit rate video at 72 Mbps (ALL-I).
Note: It’s extremely important to point out that full HD on this camera requires memory cards with the fastest speed available. My “older” memory cards didn’t work, giving me only four seconds of recording time.
VIDEO
We spent the first day of my three-day Digital Cinema Workshop covering all the technical similarities and differences between stills and video. On the second day, we planned a location shoot with a Capoeira team and spent a couple hours shooting in the afternoon. On the third and last day we covered the different hardware and software requirements for post production and spent three hours editing the footage. I am especially proud of the short clip my students put together in such a limited amount of time and with newly acquired knowledge (and using brand new gear!).
Capoeira in Dubai. Student Project. from Eduardo Angel on Vimeo.
We could obviously use a few more days sweetening the audio, fine tuning transitions, and grading, but for a two-hour shoot and a three-hour edit, I believe this is a good example of what can be accomplished with great teamwork, interesting subjects, and the GH3’s many customizable options.
SAMPLE CLIPS
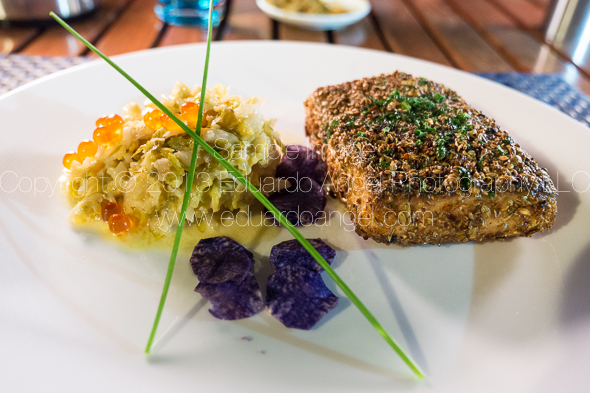
Below you will see a few additional sample clips, all shot as H.264, 1920 x 1080, 23.976 72Mbps ALL-I, using the GH3’s “Standard” profile (Contrats = 0, Sharpness = 0, Saturation = 0, Noise Reduction = 0). The Exposure and White Balance were set manually. The lens was the Lumix GX Vario 12-35mm F2.8 set on AF Tracking mode, which worked very well most of the time. Despite the lens having “environmental sealing,” as you can see the fine desert’s sand inevitably found its way to the sensor. I put the clips together on Adobe Premiere Pro CS6, and have NOT done any grading nor sharpening. These short clips are intended to show you what the GH3 is capable of, not to tell a specific story.
SOMETHING INTERESTING
So, mission accomplished, right? Not so fast. A couple of days later, as I was wrapping up my day, a friend asked “Are you busy? I wanna show you something interesting.” With only the GH3, the 12-35mm 2.8 lens, a 4GB card and a low battery I jumped into his car. The “something interesting” happened to be access to the Royal Suite at the 7-star Hotel Burj Al Arab—a notoriously difficult area to access. With limited amount of storage space and battery life I managed to capture a few keepers.

The 7-star Burj Al Arab hotel resembles a giant sail rising over the Gulf, with changing colors visible for miles at night.

The very next morning (on my “day off”), I headed out to meet an old friend for brunch at the Atlantis. Should you ever find yourself in this neck of the woods, I strongly recommend that you pay the Atlantis a visit. As we enjoyed the seemingly endless food, my friend received a call to drive to Abu Dhabi right away to pick someone up and then drive back to Dubai. Would I like to come? Guess what I had hanging on my shoulder? This time I had a full battery and a 16GB card, but nothing else to shoot the magnificent mosque and the impossibly opulent Emirates Palace. Once again, the GH3 did a fantastic job.
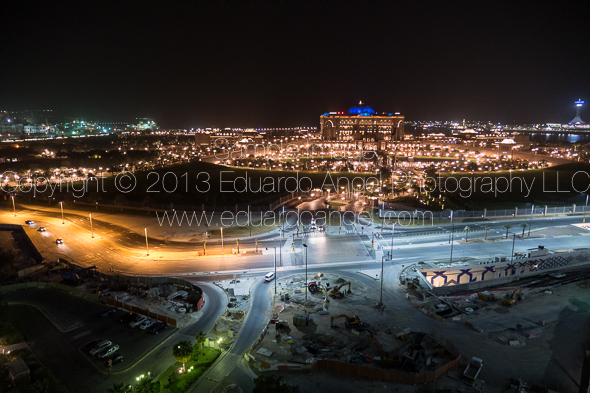
A nice view from a 25th floor overlooking the magnificent Emirates Palace in Abu Dhabi.
MORE FEATURES
These are some of the GH3’s features that are not obvious to the naked eye, but are interesting once you are aware of them:
• A magnesium alloy camera body that Panasonic describes as “splash proof and dust proof.”
• The Panasonic RAW files (RW2) work fine in Adobe Lightroom [add link to LR workshop] but the most current version (4.3 as of this writing) is needed. Unfortunately there are no Panasonic lens profiles available as of this writing.
• All the video formats worked seamlessly on Adobe Premiere Pro CS6. Even the video recorded at 72 Mbps was easy to preview and edit on a two-year old MacBook Pro (with 8GB of RAM and an external 7200 RPM Hard Drive as a Scratch Disk).
• HDMI monitor output can be sent with or without information overlays.
• I had a DMW-MS2 Stereo Shotgun Mic with me, but was happy to learn that the camera’s built-in internal microphones provide stereo audio.
• The GH3’s sensor has a 4:3 aspect ratio.
• Built-in Time Lapse, and HDR but unfortunately it works only for JPGs not RAW.
• Five physical function buttons, and two touch-screen function buttons, all customizable with close to 40 options to choose from.
• Virtually all the key shooting controls are within the right hand’s reach. This frees up the left hand to hold the camera or focus manually.
• Excellent battery life, lasting a full day under normal operation. For extended video sessions I’d consider getting the DMW-BGGH3 Battery Grip.
• Apparently (I have not tested this) the GH3 is also capable of real-time image output to the LVF or the rear monitor AND to an external monitor via HDMI.
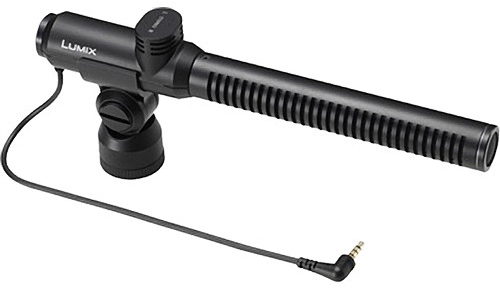
DMW-MS2 Stereo Shotgun Mic
LENSES
I shot extensively (more than 2,000 images in 18 days) with the Lumix GX Vario 12-35mm F2.8. The lens is tiny. And fast. And awesome. It has the equivalent focal length to a 24-70mm F2.8 on a 35mm system but it is a fraction of the size and weight. As you already know, this is a very good start when dealing with packing issues.
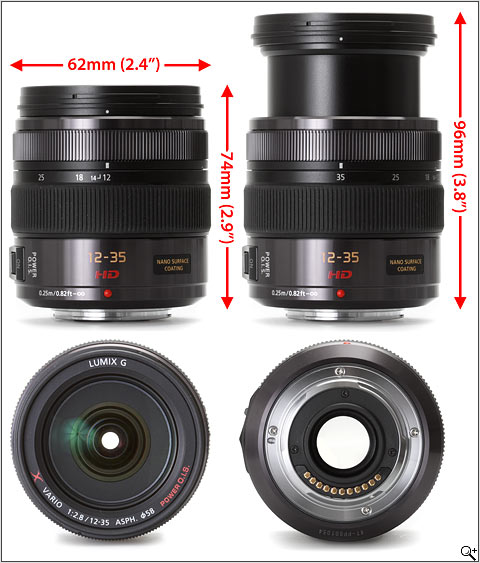
Lumix GX Vario 12-35mm F2.8
In terms of depth of field, the lens behaves like a 16-45mm F3.5 lens on an APS-C sensor, or a 24-70mm F5.6 lens on a Full Frame sensor. It is hard to get used to this, especially when shooting another system simultaneously, but it is not a disadvantage per se.
Click to keep reading (more…)
Video
Cloud Storage Solutions and Adobe Lightroom.
In the past couple of weeks, we have done several One-on-One Consulting sessions where the “Cloud Storage” question came up. This is a very quick overview of the most popular online storage options with pricing and direct links to each.
My own situation:
• My Lightroom Catalog has 70,000 RAW Images. I shoot a lot, but I am merciless editing.
• The entire catalog (NOT the RAW files) takes about 26GB of space.
• The RAW files take about 860GB of space.
This means I need about 900GB of storage space if I wanted to move my Lightroom Catalog, including all RAW files, to the Cloud.
 Dropbox customers are provided with 2 GB for free.
100 GB
Monthly $9.99
Yearly $99.00
200 GB
Monthly $19.99
Yearly $199.00
500 GB
Monthly $49.99
Yearly $499.00
IMPORTANT: If you don’t have a Dropbox account, use this link to get started. You get 2GB for free, and we both get an additional 500MB as a bonus. Hurry up!
Click to keep reading (more…)
Video
Will Lightroom 4 support all my files? Maybe.
Updated 9/22
I’ve been getting a lot of emails asking whether Adobe Lightroom 4 (and/or Adobe Camera Raw 7) will support the file format for certain new cameras.
In Lightroom 4.1 or later, you can import and work with TIFF 16-, 24-, and 32-bit floating point images – also known as HDR (high dynamic range) images. You can use the Develop module controls to edit HDR images, and then render the images for export or printing as 8-bit or 16-bit images. Lightroom can now import DNG format HDR images, but you need to make sure the images are processed version 2012.
To keep things simple, here’s the complete list of currently supported file formats:
• JPEG
• TIFF (8 bit, 16 bit, 32 bit)
• PSD (8 bit, 16 bit)
• DNG
• RAW – Here is the complete list of supported cameras. As you can see, the list keeps growing and growing and now includes Hasselblad, Mamiya/Leaf, and PhaseOne Medium Format Digital Backs.
There are two important exceptions:
PSD files saved without the “Maximize Compatibility” setting enabled
Files with dimensions greater than 65,000 pixels per side
As you already know (if you have been following this blog), Lightroom 4 also supports the most popular HDSLR video formats, including MOV, MPG, AVI, and AVCHD.
Keep in mind that the AVCHD support is limited to MTS and M2TS video files. Video editing applications like Adobe Premiere Pro may need the AVCHD file structure to process the files, which can be a pain. Final Cut Pro 7 won’t even take the MTS files without transcoding them first.
This is how the typical AVCHD file structure looks like:

If you find this information useful please help us share the love. It is good karma!
Video
The Dawn of the Innovated Dead.
Photokina started a few hours ago, and Sony is banging its drums. And loud!
Kazuo Hirai, the brand new CEO (since April), seems to finally come to the realization that in order to compete with Canon and Nikon in the HDSLR arena the company needs to provide products that photographers and filmmakers need, and understand.
The most impressive announcement is the Cyber-shot RX1, which is basically a point-and-shoot with a full-frame sensor.

 • The Specs:
35mm full-frame 24.3MP Exmor CMOS sensor, ISO 100-25600, 14-bit RAW image capture, f/2.0 Carl Zeiss Sonnar T lens with 9 aperture blades, P/A/S/M modes, Full HD 24p/60i/60p video with manual control. Check all the features here.
• The Good:
1080p video recording at 60fps or 24fps.
Manual exposure controls for both stills and video.
RAW shooting.
Automated modes for HDR photography.
• The Bad:
35mm fixed lens, even if it is an F2.0.
For $2,800 it is pretty hard to consider this camera over a full-featured HDSLR. If you are still interested, Amazon is taking pre orders now.
Photography
Visual Serendipity.

After spending a very hot and humid Sunday afternoon in Central Park we were looking for a restroom, and this is what we found instead. Gotta love this city.
Video
Canon EOS M – Part II. Hands-on Review
Exactly one month ago we wrote about Canon’s brand-new mirrorless system. We covered the new features and discussed the reasons why we preordered one here.
Since then we have had the great opportunity to play with one of them and we want to share our impressions in this post.
The Good
• Lenses: We tested the kit lens, an ultra wide “pancake” EF-M 22mm ƒ2.0 and the image quality is amazing. We also tested the EF mount and shot stills and video with the EF 70-200 ƒ2.8 and the EF 24mm ƒ1.4. They both worked like a charm.
• Video: This is a controversial topic. The movie files are recorded in MPEG-4 format, using AVC.H.264 compression and a variable bit rate. The quality is very good, with only a very tutored eye being able to differentiate the M versus the 60D footage. We only shot 1080p at 24 fps and our impressions are based on that test. Read this if you want to understand HD Video compression. Another great video feature that got our attention was that both Program and Manual shooting modes are supported in movie mode. So far, so good. The real issue (as you will read below) is the lack of fast and easy access to adjust exposure.
• Size: The main reason we wanted this camera was so that we could use it as a C (third) camera on our video shoots. Having such a tiny body with the same APS-C 18.0 Megapixel CMOS sensor we have on our EOS 7D (with the latest firmware update) and EOS 60D would allow us to put the camera in tight spaces, and it would make using a handheld rig or a steadycam a much more pleasant experience.
An Overview of What Should and/or Will Be Improved
In all fairness, the camera that we had was a prerelease sample. It was not a production piece, which means that the hardware, as well as the firmware, will be modified and improved.
• Touchscreen: Having a touchscreen is not only great, it makes absolute sense. The more we “flip” and “pinch” our smartphones and tablets, the more second nature these “gestures” become. Have you seen the video of the five-year-old girl who thinks a magazine is a broken iPad?
Click to keep reading (more…)
Photography
Visual Serendipity.

Another hidden gem in Brooklyn. If you are willing to bike with me for 1.5 hours I’ll take you to this location.
Photography
Visual Serendipity.

Woody Allen’s, Manhattan, is about a divorced New Yorker dating a high-schooler, and looking for love in the mistress of his best friend. Quite a dark story there. I’m sure the city has changed a lot since the movie was released in 1979.
Video
Canon EOS M Images.
UPDATED 0828 Canon EOS M – Part II. Hands-on Review
Yes, the answer is a most emphatic YES to everyone who has asked if I plan to purchase the brand-new Canon Mirrorless system. I just placed my order here. You have until October to change your mind. I seriously doubt I’ll change mine.
So, in a nutshell, we have a tiny camera body with a powerful DIGIC 5 image processor, and a very nice APS-C 18.0 Megapixel CMOS sensor, which is the same sensor size one finds in the wonderful EOS 7D and EOS 60D. The touch screen and UI are virtually identical to the brand new Rebel T4i. Apparently you can purchase the body only, but I have only seen the kit with the EF-M 22mm ƒ2.0 pancake lens. All the expected features like ISO settings from 100 to 12800, with expansion to ISO 25600, standard aspect ratios (3:2 plus 4:3, 1:1 and 16:9), and 1080p at 24/25/30 fps and 720p 50/60 fps are there, BUT now we have continuous autofocus.

The hybrid (stills and video) AF system uses “phase-difference AF to achieve approximate focus and drive the lens at high speed, then switches to contrast AF for final focusing.” The movie files are recorded in MPEG-4 format, using AVC.H.264 compression and a variable bit rate. Program as well as and manual shooting modes are supported in movie mode.
And the cherry on top? The EOS M will take EF lenses thanks to the adapter shown below. Enjoy the view.


Canon EOS M Lens Mount Adapter
click to keep reading
Video
Canon EOS 7D firmware update.
The latest firmware update for the Canon EOS 7D will be released at the end of this month, according to brief press release leak on the Canon Professional Network site. is now available for download here.
Canon addresses a number of issues for professional filmmakers and photographers, including a highly anticipated manual audio controls for video. This is extremely exciting, considering that we have filmed all of our episodes of “Conversations with Friends” with the Canon EOS 7D and have been waiting for quite awhile for these new features.
MANUAL ADJUSTMENT FOR AUDIO RECORDING LEVELS
During EOS Movie shooting users are now able to manually adjust the audio recording to one of 64 levels, whilst the sound volume during playback can be set to one of 11 levels. During movie recording noise from the aperture is reduced, and the camera also has an automatic wind cut filter.
Users can also add the camera’s Full HD (1920x1080p) movie footage with 16-bit digital stereo sound, sampled at broadcast quality 48KHz.
In addition, Canon has included a big update to the EOS 7d firmware with GPS Support:
- Mounted Receiver – can be attached to the camera’s accessory shoe or clipped to a belt and tethered via a USB cable.
- Records shooting locations – latitude, longitude and altitude for easy geo-taging and camera direction (fantastic feature for my travels around the world) as an EXIF file of the image.
- Syncing Camera’s Internal Clock – can now synced through the GPS unit using UTC (Coordinated Universal Time) for accurate time recording or syncing clocks on multiple cameras.
- GPS Logging and Google Maps Compatibility with Canon’s free Map Utility software can display the photographer’s route on a map.
Some of the other updated features include:
- Improved RAW Maximum burst – Max Burst Rate now from 15 frames to 25 frames.
- In-Camera RAW Conversion – RAW images can be processed and edited in-camera with dynamic adjustments such as exposure, white balance, picture style, noise reduction and distortion correction. Options can be changed before saving the finished file as a ready-to-print JPEG. Check this article on the benefits of shooting JPGs, even for professionals.
- Image Rating Capabilities
- New Auto ISO Maximum Setting – ISO 100-6400
- JPEG Resizing
- Quick Control During Playback
- File Name Setting – First 3 or 4 characters in the file name can be adjusted, depending on the setting
- Time Zone Setting
- Quick control screen during playback
- Faster Scrolling of Magnified Images
You may download the newest firmware updates in early August at no charge from Canon’s Website here.
Does this update fix all the issues you have been experiencing with your 7D, or did Canon left a major one out? Share your thoughts and comments below.
Video
Adobe Lightroom 4.1 is (finally) available.
The Adobe Lightroom 4.1 update brings support for several new cameras including:
- Canon EOS 1D X
- Canon EOS 5D Mark III
- Canon EOS 60Da
- Canon PowerShot G1 X
- Fuji X-Pro1
- Leaf Credo 80
- Nikon D4
- Nikon D800
- Nikon D800E
- Olympus OM-D E-M5.
Other additional features and enhancements are:
• The ability to process HDR TIFF files. (16, 24 or 32-bit TIFF files)
• Additional Color Fringing corrections to help address chromatic aberration.
• Save photobooks created in the Book Module to JPEG
• Publishing photos to Adobe Revel is now accessible via a Publish plugin
• Corrections for issues introduced in previous versions of Lightroom.
To see all the original features see this article and to understand the new VIDEO features check this one.
How to install the new version? Easy.
1. Open your Lightroom 4 and when the software update dialog pops up click “download.” This will take you to Adobe’s download page.

2. Click on “proceed to download” and “download now.”

3. Save the file to the desktop (so it is easier to find it). The download should take about 3 minutes or less.

4. Double click on the installer, follow the step-by-step instructions.
5. Enjoy.
In two weeks we will be presenting an awesome 2-day Lightroom 4 Workshop at the School of Visual Arts (SVA). We hope to see you there.
Video
How to switch from iPhoto to Adobe Lightroom.
Question: I would like to start using Lightroom as my photo editing software but up until now all my photos have been stored on my iMac and in iPhoto. I am tearing my hair out trying to figure out how to 1) transfer my iPhoto library to an external hard drive and then 2) transfer that to Lightroom. I’ve been reading about this on the Web but am skeptical of trying to do it myself.
Answer: The first step is to find out where are your images stored. Go to Applications/iPhoto and right-click on “show package contents”.

You should now be able to see the iPhoto “library.”
The next step is to decide if you want to keep the images where they are or move them to a new location. Using Adobe Lightroom you can accomplish both tasks. I personally would prefer to MOVE the images to a fast and reliable external hard drive that is only dedicated to the images. More info about Hard Drives here and here.
In Adobe Lightroom’s Import dialog, navigate to the folder that contains you iPhoto Library, make sure MOVE is selected, and select the new destination on the (ideally) external Hard Drive.

The pictures will be MOVED from the iPhoto location, and imported through Lightroom.
By the way. iPhoto is BAD for several reasons. Just two mention two: By default, it creates additional folders and subfolders with the capture time, making your workflow even more time consuming and painful.
Video
Understanding Burst Rates.
Understanding a camera’s burst rate is crucial for DSLR users in certain scenarios. For instance, a high burst rate is helpful for photographers who are shooting fast action, motion, or trying to capture a Henri Cartier-Bresson’s “decisive moment.”

A “burst rate” is the number of consecutive pictures that a camera can shoot continuously until the “busy” signal turns on. When your buffer memory is full, your camera will slow down (or even stop) shooting until the images transfer to the memory card.
The Canon EOS-1D X has the highest burst rate of any EOS Systems out now. A high burst rate is dependent on a number of factors including a large buffer, the camera’s “throughput” speed, the camera’s processing power, as well as the file type and size. To learn more, read this article from Canon’s Digital Learning Center, where we explain burst rates in-depth and compare different high-end systems. We also made this short video to illustrate the article.
Video
Canon’s Light Leak Issue.
A few days ago Canon confirmed the light leak issue in the 5D Mark III: “In extremely dark environments, if the LCD panel illuminates, the displayed exposure value may change as a result of the AE sensor’s detection of light from the LCD panel. Canon is now examining the countermeasures and once the countermeasures are decided, we will post the information on our Web site.”

This issue is somewhat serious because I doubt it can be fixed via firmware. It is unclear right now if it is affecting the entire production (which would be a major design flaw) or a localized manufacturing problem. Some dealers are reporting that shipments to Canada and the UK have stopped in the past few days, which seems to be either a recall or that Canon is being extra careful.
In reality, the leak will change about 1/3 of a stop from what the camera considers the “proper” exposure. With the high dynamic range that RAW files deliver nowadays I believe the issue is being push a bit too far. Of course I’d be pissed paying $3,500 for a camera with issues, but technically speaking, I would not stop using it if I had it.
UPDATED: Yesterday Canon had this to say:
“Based on the results of extensive testing this change in exposure value will not noticeably affect the captured image. Affected Product Canon EOS 5D Mark III Digital SLR Cameras whose sixth digit in the serial number is 1 or 2 are affected.
For example,“xxxxx1xxxxxx” or “xxxxx2xxxxxx” ([x] represents any optional number.)”click here to keep reading (more…)
Video
Reliable RAID Systems, an overview.
Professional photographers and filmmakers, are always (and should be) concerned with storage devices, such as hard drives to create reliable backups and efficient workflows. All hard drives will fail eventually, that is why using RAID (Redundant Array of Inexpensive Disks) systems is often our recommended strategy. A RAID is a set of connected hard drives designed to store digital files and information in a much more reliable manner. Most current RAID units can also monitor a Hard Drives’ system health, fan, and power supply and warn users when there’s a potential failure.
There are several different levels at which a RAID system can be configured. In the photo and video industry, we generally use RAID levels 0, 1, 5, and 6. One way to remember them is: Fastest (0), Mirror (1), Safe (5), and Safest (6).
Interested in learning more about RAID systems? Then read this article we recently wrote for Canon’s Digital Learning Center to better understand how they work, their differences on performance, compatibility and size. Don’t wait until it’s too late to establish a good backup strategy! If you need help, don’t hesitate to contact us.

Video
Are you eligible for a complimentary (free) Lightroom 4 upgrade?
Adobe doesn’t notify customers who purchased single-user licenses about complimentary post-announce upgrades, BUT according to a somewhat obscure company policy, users who bought software (full or upgrade) soon after a new version was announced, might be eligible for a complimentary upgrade. If you followed my instructions on a previous post to purchase Lightroom 4 50% off, you might be one of the lucky ones.You need to contact Adobe directly to find out if you fall in the eligibility period. Let me know how it goes.
If you already purchased the upgrade and have questions about the installation, follow these simple steps here and here.

Video
Upgrading to Adobe Lightroom 4 in 7 simple steps.
The following steps can be used to upgrade Lightroom 1, Lightroom 2 or Lightroom 3, as well as Lightroom 4 Beta catalogs.
Step 1. Download and Install Lightroom 4
Step 2. On your Mac’s finder, find the location of your Lightroom 3 catalog. It should look something like name.lrcat

Step 3. Right click on that file and select “open with Adobe Photoshop Lightroom 4”

Step 4. You should see the “Lightroom Catalog Upgrade” dialog. Be very careful with this step. Catalog names can NOT be changed later. I strongly suggest you click on “change” and determine the best location and name for your upgraded catalog.

—Click to continue (more…)
Video
Installing and upgrading Adobe Lightroom 4.
Today we would like to show you how to install Adobe Lightroom 4 in 60 seconds or less. On Saturday morning we will post a step-by-step tutorial on how to upgrade your Lightroom 3 (or 2, or 1, or even 4 Beta) Catalog to Lightroom 4.
And by the way, don’t forget to come back tomorrow for a new episode of our “Conversations with Friends.“
Video
Canon EOS 5D Mk III, 5D3, 5D Mark III has arrived.
Ok. Let’s start from the beginning: We are looking at a 22.3 Megapixels, Full Frame (36 x 24mm) CMOS sensor system, powered by a DIGIC 5+ processor. Check this article if you want to fully understand the differences between the DIGIC 4 processor on the 5D Mark II, and the new DIGIC 5+ on the 5D Mark III.


Some of the highlighted features include:
• Dual card slots (1 SD/SDHC/SDXC and 1 CF). Sorry, no XQD on this one. What is awesome about the dual cards is that you can a) record the same data to both cards, or b) record different file sizes or types to each card, or c) automatically switch to the second card when the first card is full. That’s great when shooting long interviews, or concerts, for example.
• HDR with +/- 3 stops
• Improvement in noise reduction by 2 stops
• Multiple exposure mode
• 63 zone dual metering system
• +/- 5 stops (the 5D Mark II has only 3 stops)
• iFCL metering system with a 63-zone dual-layer sensor
• File Formats: AVI, RAW, JPEG, H.264, MOV, MPEG-4
• Full HD video recording: 1080/30p, 24p, 25p; 720/60p, 50p; 480/60p, 50p
All the typical features are here: Minimum Shutter Speed (30 sec), Maximum Shutter Speed (1/8000 sec), 100% coverage viewfinder, etc, etc, etc. As expected, durability on the Magnesium Alloy chassis has been improved including a 150,000-cycles shutter, and water and dust additional resistance.
These are the specs that REALLY got my attention:
• It is now possible to check two images side-by-side for sharpness, exposure, etc at different aspect ratios (1:1, 4:3, 16:9) with the new “Comparative Playback” function.
• There’s a Q button that will process RAW to JPG on camera.
• The new camera shares the same exact 61-point High Density Reticular AF system found in the EOS 1D-X (for half the price).
• There’s an iPod-like button to make changes in the movie mode without adding noise to the clips. Smart!

• The 5D Mark III uses the same batteries (LP-E6) as the 7D and 60D.
• The ISO war keeps getting better. The Mark III offers ISO 100-25600 (expandable up to ISO 102,400) for stills, and 100-12800 (up to ISO 25,600) for video. Wow! Now we really could use an iPad as a Key Light!
Here’s an interesting set of high-res JPEGs samples shot at ISO 50 to 102,800. The test was performed under low level halogen lights, which are perhaps the most challenging to digital sensors and noise reduction systems.
Video Features.
There are several serious improvements on this front:
•There are a couple of new video Modes: “Silent and Low Vibration,” but I don’t recall seeing them on the prototype I tested.
• The video resolution is Full HD (1920×1080), and the video format is the same H.264, which I personally love because it runs natively on Adobe Premiere Pro and Lightroom 4, and plays extremely well with online sharing platforms like Vimeo and YouTube.
• The recording buffer has been extended from 12 minutes to 29 minutes and 59 seconds. The 4GB limit is finally over.
• Following Nikon’s D800 improvement, we now have a 3.5mm headphone jack for live audio monitoring and a Wind Filter. Other ports include USB 2, HDMI, Mic Input, and Wireless.

• The LCD screen is virtually the same 3.2″ 1.04 million as the Nikon’s D800. With a screen this size photographers are out of excuses for not using Histograms the way they should.
• There’s a built-in info menu while shooting video, which comes super handy to quickly check important settings like White Balance, Resolution, ISO, Picture Style, etc.
Regarding audio, the changes are pretty exciting:
“The camera includes manual audio level control with 64 levels, adjustable both before and during movie recording. There is also an automatic audio level setting, or sound recording can be turned off entirely. A wind filter is also included. Sound can be recorded either through the internal monaural microphone or via an optional external microphone through the stereo mic input.”
—Click to continue (more…)
Photography
Bye Bye Phocus. Hasselblad gives Lightroom away.
In about two weeks, Hasselblad will start including Adobe Lightroom when you buy an H4D system. Currently only the H4D-60 is fully supported, and there are many lens profiles missing. It is also unclear if the offer extends to Lightroom 4 when it starts shipping or not. Stay tuned.

Video
How to use Histograms to improve your images.
Histograms display a graphic representation of the exposure on a captured image. They provide highly accurate information, but their use is often misunderstood, or, worse yet, ignored. This is why we wrote an article for Canon U.S.A., explaining how to use histograms to dramatically improve your images.

As always, let us know if you have any questions.
Video
A digital image in-depth look. Literally.
Ever wonder how images are captured inside a digital camera? I obviously understand the logic and technology behind the process, but SEEING it is something completely different (and very cool).

The video below, made by Lexar, shows the capturing process and also helps to understand how the speed on memory cards, and card readers, can affect your entire digital workflow.
To learn why the processors are the “brain” of the camera check this article “DIGIC Processors Explained.”
Video
Adobe Lightroom 4 HDSLR video support explained.
UPDATE March 6, 2012. The full version of Lightroom 4 is available now and Adobe cut the price in half: The full version (which used to cost $299) will now be $149. The upgrade version will only cost $79. The beta version (which was downloaded more than 250,000 times) will expire on March 31, 2012.
My birthday was yesterday, and the present arrived this morning. Lightroom 4.0 (public beta) FULL VERSION is now available as a free download from Adobe’s website.
Important things to consider:
• You do not need a serial number and the beta version will not update your current Lightroom 3 (or earlier) catalog.
• The public beta comes in three flavors: Mac (OS X v10.6.8 Snow Leopard) or v10.7 Lion), Windows 32-bit, and Windows 64-bit. Make sure you download the correct version. Each compressed download is about 400MB.
• File support for Lightroom 4 beta, is exactly the same as in Lightroom 3.6 and Camera Raw 6.6.
• The public beta will expire on March 31, 2012, when the final Version 4 becomes available.

Here are the new features, organized from super awesome to awesome:
• HDSLR video support (full details below)
• Soft proofing (found under the Develop Module, not the Print Module as one would expect)
• Photo book layout
• Email directly from Lightroom (works with Gmail, Yahoo, Hotmail, and AOL)
• Publish videos directly to Facebook or Flickr
• Geo location (via GPS metadata) with the Map Module
• Enhanced DNG workflows
• Adobe Revel (Carousel) export workflow
• Additional local adjustments including Noise Reduction and White Balance
• Powerful new Shadow and Highlight controls
• Simplified basic adjustments

Video
Regarding Video Support this is what Adobe has to say:
“Lightroom 3 added the ability to import, manage and tag video files but as the popularity of video capture increases it’s important to provide a single, robust workflow solution that can support all of your imaging needs regardless if they’re still images or video captures. Lightroom 4 adds native playback for a wide variety of formats from mobile phones to high end DSLRs.”
Here’s what I have to say: In version 3, we were able to import video files along with our still images, but to see the clips Lightroom needed to access Quicktime. Now we can play the files inside of LR. Also, by using similar shortcuts from well established NLE (non linear editing) software applications like Final Cut Pro and Adobe Premiere Pro, now we can set In and Out points directly in Lightroom. Shift+I (In) and Shift+O (Out).
Video
5 free mobile Vimeo Apps to edit HD Video.
I recently got a Tablet to more efficiently maintain this blog by using the very good WordPress app, among other apps for photography and digital cinema.
Today my life got a free upgrade with Vimeo’s new apps for iPad, Android, Kindle Fire and Windows Phone. I have been waiting for almost a year since the iPhone app was released, but it was worth the wait. Now I’ll be able to upload, manage and watch my videos right from my phone (highly unlikely since the battery sucks), and Tablet.

The Android app requires Android version 2.3 (Gingerbread) or later. Some of the features include:
• Upload raw or edited footage in HD or SD
• Pause/Resume videos and uploads
• Replace existing videos
• Edit tags, titles, credits, descriptions and privacy info
• Share on Facebook, Tumblr, Twitter, WordPress, email or SMS
• Add your clips to Groups, Channels and Albums
• Download your Vimeo videos to your Camera roll
• Watch videos from the Vimeo Inbox and Watch Later queue
• Stats on daily plays, likes and comments

According to Vimeo, 15% of its traffic now comes from mobile devices. 18% of this blog’s visits are from mobile devices and 30% of those devices are iPhones.
Video
Meet the XQD Memory Card. Works with Nikon D4. Lexar joins the Party.
A few days ago The Compact Flash Association announced a new format to replace CF cards for professional photographers, and HDLSR filmmakers. The new format is called XQD, and has a physical size that falls between CF and SD cards (it is thicker than SD cards, but smaller than CF cards). The interface used is PCI Express, with real world write speeds around 125MB/s, eventually being able to exceed 2 terabytes of capacity. All that was pretty interesting, but I assumed that given the current prices of memory cards, pushing a new format would be a pretty hard sell (literally).
UPDATE 0724: Lexar Announces Plans to Join the XQD Memory Card Party In Q3 of 2012.

Well, I stand corrected. Twice. As you already know, Nikon just announced the D4 camera, which happens to be the very first camera incorporating the XQD technology. And Sony, on a surprising move, has also announced not only one but TWO flavors of the new memory card. A 16GB card for $129, and a 32GB card for $229. The new cards borrow the PCIExpress (PCIe) high-speed serial communications link interface from computers, offer 125MB/s transfer speeds, and can store up to 100 RAW images in continuous shooting mode.


Additionally, Sony will have a new USB 3.0 card reader, and an ExpressCard/34 adapter, and will start shipping the goods next month at the same time Nikon delivers the D4. Just on time for the London 2012 Olympic Games.
Check Sony’s commercial for the XQD. It looks like an awesome video game. Now, would you pay $129 for a 16GB card?
Video
Conversations with Friends.
Today we start with Episode 001 of our bi-weekly series “Conversations with Friends.”
The goal is to meet with different people we find interesting (and opinionated) and simply chat about trending topics, recent developments in technology, new toys that we like or hate and simply have a good time while enjoying a glass of wine. On today’s episode I talk with Justin Katz about the Eye-Fi Pro X2 8GB Wireless Memory Card. Did we like it? Watch to find out.
If you want to participate on our conversations or would like us to cover a specific topic just post a comment or shoot me an email.
Next week I’ll add the link with step-by-step instructions on how to set up the Eye-Fi Card on an iPad, an Android Tablet, and a Mac Book Pro. Here are the card’s features.
The wine we tasted was the 2009 Casarena Malbec, Mendoza, Argentina. It was very good and a great buy for $14.
Video
Can’t miss seminars at PDN’s PhotoPlus Expo 2011.
Last week, my great friends Ted Kawalerski, Matt Stanton, and Justin Katz helped me shoot this 45-second video to promote my upcoming seminars at PhotoPlus Expo in New York City.
On Friday, October 28, from 8:45 to 11:45 a.m., I’ll be co-teaching “Portrait Lighting Techniques & Lightroom Workflow” with Bobbi Lane. Expect a very energetic and intense seminar.
The same day, from 3:45 to 5:45 p.m., I’ll be presenting “Intro to Digital Cinema.” This 2-hour class is specifically designed for photographers transitioning into HDSLR video, and my goal is to provide enough tips and resources so that attendees will be able to start shooting video by 6 p.m. that same day. I guess I love challenges. As the title says, this is an introductory class.
To truly understand all the technical concepts, filmmaking techniques, and upcoming trends of this amazing digital revolution, I suggest you attend one of my upcoming 2-day PDN HDSLR Video Workshops in New York (Oct. 30-31), Washington D.C. (Nov. 5-6), and Los Angeles (Nov. 11-12).
Let me know if you have any questions!