Video

The “41 Essentials” Digital Guide.
We’ve been wanting to do something like this for a very long time, but never seemed to find the time.
Well, today’s the day.
To take the guesswork out of your next gear purchase we’ve picked the best tools for photographers and filmmakers in our “41 Essential Items” Guide. The complementary download is available HERE.
Enjoy!

Video
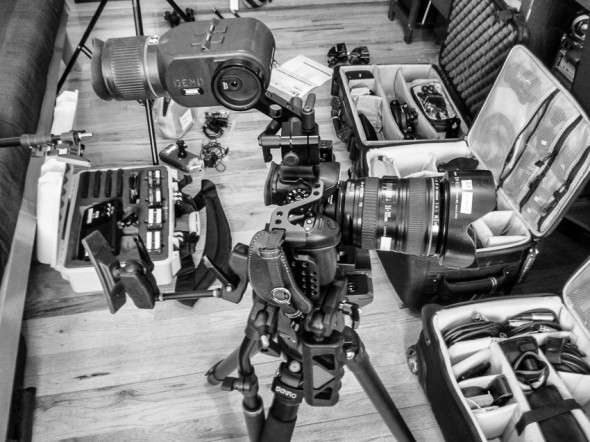
Essential Filmmaking Gear – Lean and Mean.
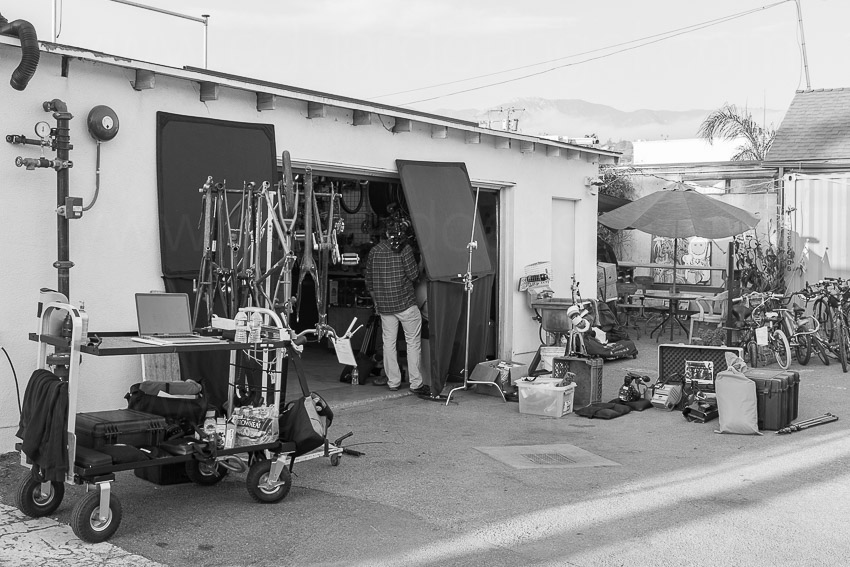
On our previous equipments lists (here’s #1 and here’s #2) we covered the essential gear while working with small crews constantly on the move. Today, we’ll list the equipment we usually bring on “Lean and Mean” jobs. On these jobs we usually spend more time at each location, and don’t need to carry everything on our backs, so we can add a few bigger/heavier tools.
List #3 – Lean And Mean
Hybrid or Video Only Assignments
Small Crew On Location But With Some Time To Prep
Example: Maragas Winery Commercial.
In addition to everything on List #1 and List #2 we typically would add:
1. If the job doesn’t require stills I’d swap the GH4s or the Sony a7R IIs for a couple of Canon C100 Mark II bodies (Amazon and B&H). At this point we are seriously considering investing on a couple of Sony PXW-FS7 (Amazon and B&H), but we are waiting to test it against a Sony PXW-FS5 (Amazon and B&H) to make the call.
2. Depending on the job we would add another camera movement tool, like a Glidecam (Amazon and B&H) or a Ronin (Amazon and B&H) or even jibs and dollies. It depends on many different factors.
3. In terms of lighting I usually bring three 1×1 Bi-Color LED Panels (Amazon and B&H) with batteries (B&H) and two Chimera 1×1 Lightbanks (Amazon and B&H) with grids (B&H). That pretty much covers my basic needs. Another option is a Fiilex kit (Amazon and B&H), which I like a lot, but it is too expensive for most people.
4. A Sekonic Color Meter (Amazon and B&H) and a Sekonic Light Meter (Amazon and B&H) are pretty much mandatory.
5. Most of my grip gear is made by Impact simply because it is inexpensive, versatile and durable. I consider essential a few accessories like adjustable Gaffer Clamps, and Collapsible Reflector Holders (Amazon and B&H) which also double as mic or light stands. These very inexpensive items effectively function as additional crew members.
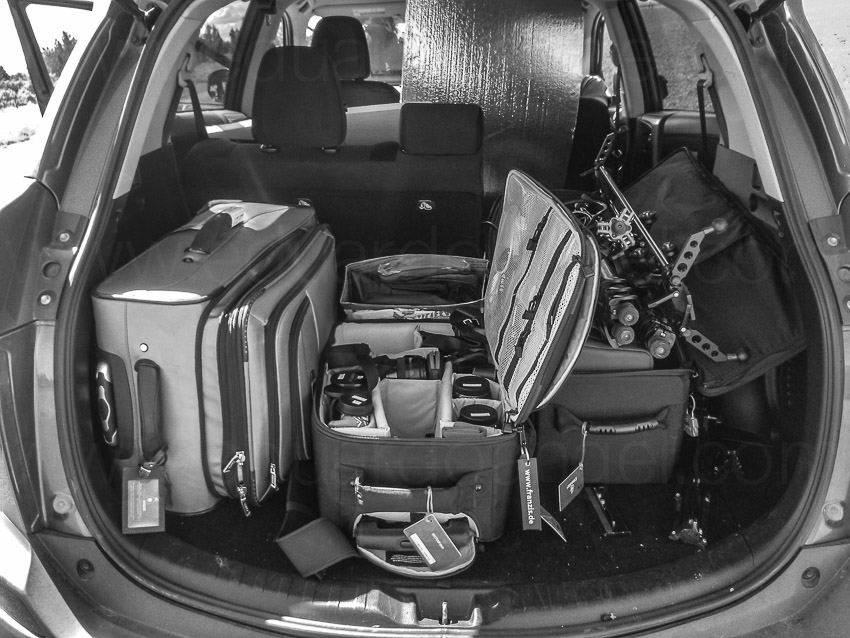
6. We would bring a second Tenba Transport Rolling Tripod/Grip case (2 total) (Amazon and B&H), add a second Benro S8 tripod (2 total) one more Benro S4 monopod (2 total), and a very compact and portable slider (Amazon and B&H) that would take the same fluid head from the S8 tripod and/or the S4 monopod.
Here’s the complete list of what we are currently using.
Well, there you have our essential gear. There isn’t a perfect gear list, just like there isn’t a perfect camera, but the most essential items have been working great for most assignments. Of course, there are those long and complex projects that require everything and the kitchen sink. If I forgot something essential, please let me know here!
We also have produced several Filmmaking courses on Lynda.com, two of them specifically designed for photographers transitioning into video. Check them out!
Video
Essential Filmmaking Gear – The Moving Crew.
On a previous article we covered the essential gear for solo gigs (List #1). On this article, which we call List #2, we’ll concentrate on the equipment required for longer/bigger hybrid assignments where I’ll have a few more people fulfilling different roles (gaffer/grip, second camera/editor, BTS camera/DIT). We are usually moving from place to place very quickly, so traveling light is essential. When possible, I added direct links to Amazon and/or B&H for your convenience.
List #2 – The Moving Crew.
Hybrid Assignments
Small Crew Constantly On The Move
Example: Panasonic Anamorphic.
So, in addition to everything on List #1 we’d typically add:
1. In addition to my sharpest and heaviest lens, Canon 70-200mm f/2.8 (Amazon and B&H), we’d also bring a Sigma 18-35mm f/1.8 (Amazon and B&H), and a Sigma 24-105mm f4. (Amazon and B&H). These are the same exact lenses I used last year on another one-man Hybrid project in Istanbul and Europe. To make the Canon and Sigma lenses work on the Panasonic GH4 we’ll need a Metabones Speedbooster (Amazon and B&H).
2. Having more space and more people to carry bags, I’d also add a Varavon cage (Amazon and B&H) to each camera body. I like these cages a lot!
3. An Atomos Shogun (Amazon and B&H). We previously wrote an article explaining why this is a must have item.
4. As many SanDisk Solid State Drives (Amazon and B&H) for the Atomos Shogun as possible.
5. A USB 3.0 reader for the Solid State Drives (which are generously included in the Atomos Shogun kit).
6. A second 6TB G-Tech External Hard Drive (Amazon and B&H).
7. Two RodeLink kits (Amazon and B&H). They are great for interviews and to record clean sound while doing on-camera tutorials or even getting some BTS. The RodeLinks are extremely light, small, reliable and fairly inexpensive.
8. In addition to the monopod (on List #1) I’d add one Benro S8 tripod (Amazon and B&H).
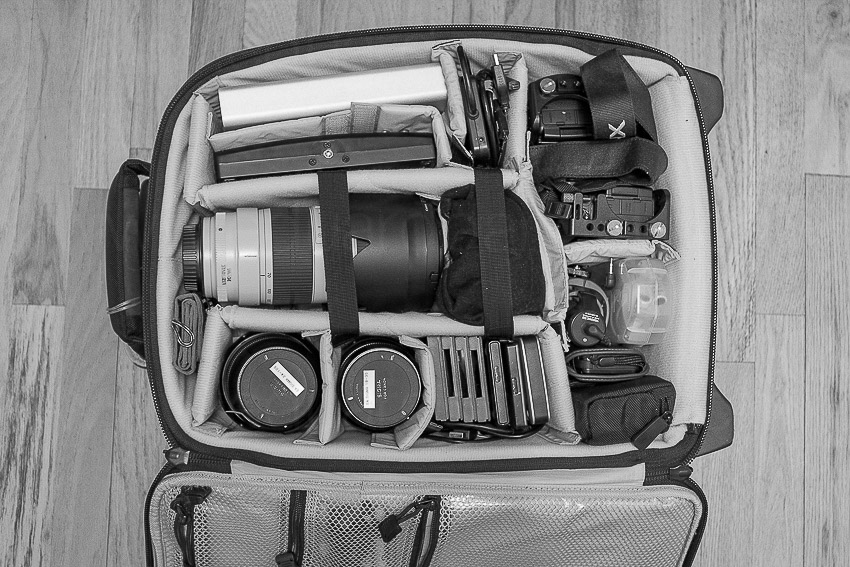
9. I’d add one more Tenba Roadie Hybrid bag (2 total) (Amazon and B&H) for the most expensive, essential and fragile items, namely cameras, lenses, Shogun and hard drives.
10. One sturdy Tenba Transport Rolling Tripod/Grip case (Amazon and B&H) for light stands, tripods, grip, cables, etc. My favorite one is Tenba’s Rolling Case 38”


What else are we using? Here’s the complete list.
As you can see, anyone involved in run-and-gun, single-operator scenarios like weddings, events, corporate shoots, documentaries, red carpet premieres, product launches, sporting events, video podcasts, and even student films could benefit from these lists, so feel free to share them.
We also have produced several Filmmaking courses on Lynda.com, two of them specifically designed for photographers transitioning into video. Check them out!
Coming next week: List #3 – Lean and Mean. Working with a small crew but having a bit more time to settle down and prep. Bring the big guns!
Video
Essential Filmmaking Gear – The Solo Gig.
In aviation, an MMEL (Master Minimum Equipment List) is a categorized list of on-board systems, instruments and equipment that must be operative in order to flight. Any additional equipment not included in the MMEL may break temporarily, but it won’t make the aircraft inoperative. For several years I’ve been attempting to create my own MMEL for “hybrid” productions. My simplest definition of “hybrid” is “productions or assignments where a skeleton crew (from one to four people) is required to produce, direct, shoot video and stills, record sound, and even edit. Most of these assignments will be happening on location, more often than not over several days.”
Like it or not, these gigs are becoming increasingly popular. It sounds crazy and indeed, being on the field trying to wear so many hats at the same time can be extremely stressful. The keys to make these projects run smoothly (and even fun) are simple: invest as much as possible in pre-production, bring only the most essential gear, know your equipment well, and be decisive.
Regarding gear, a substantial challenge is how to pack and travel as light as possible while carrying a full production and post-production setup that is literally on your back, so “essential” in my book is something you will use all the time, not “maybe, just in case, what if.”
Over time, we have created three “lists of essential items”, depending mostly on the crew’s size. When possible, I added the product’s link to Amazon and/or B&H for your convenience.
List #1 – The Solo Gig
Hybrid Assignments
One-Man Crew
Example: Japan.
When working and traveling alone, a single carry-on backpack (like a Tenba Roadie Hybrid bag) contains every item I’ll need for up to three days, except some clothes and toiletries that will go on a smaller backpack the gets checked in or shipped in advance.
Hardware & Software:
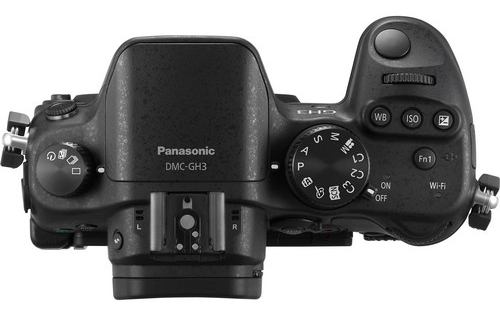
1. A small, light and versatile Camera (“Cam A”) to shoot video. In the photo I have a Panasonic GH4 (Amazon and B&H), but I also like the Sony a7R II (Amazon and B&H).
2. A second camera (“Cam B”) to capture stills and B-roll, ideally identical to Camera A. Having the same brand, model and firmware can save you a lot of time in post. Plus the batteries, chargers, media and lenses are the same.
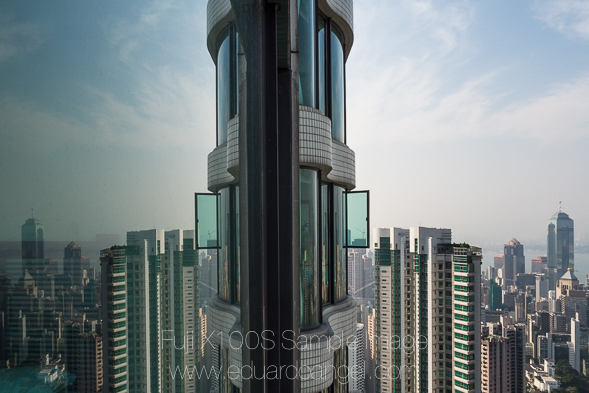
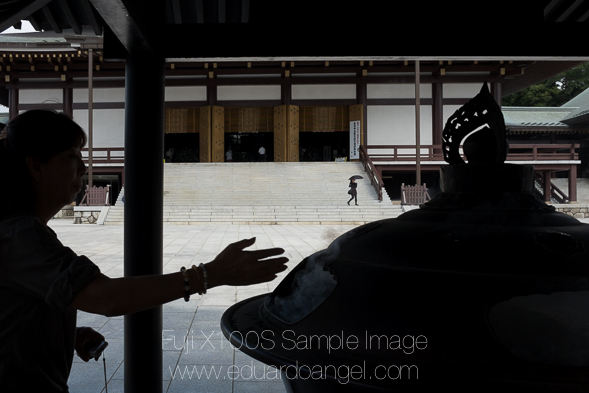
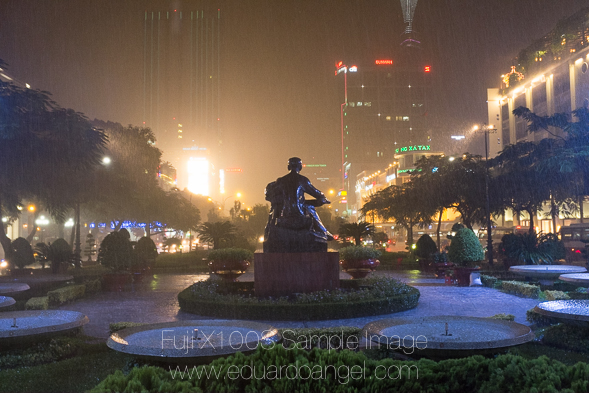
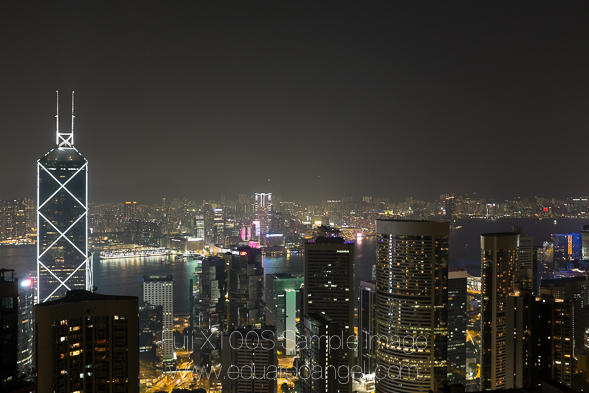
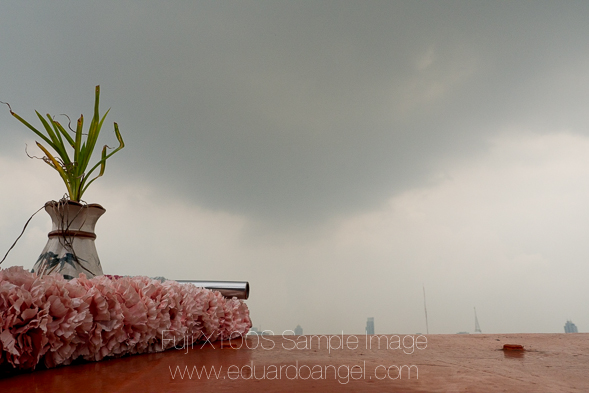
3. I like to carry a third (even smaller) camera for location scouting and behind the scenes stills. My weapon of choice is the Fuji X100s (Amazon and B&H). A compact camera is especially handy after a very long day, when I don’t want to carry more gear but still want to capture a few night scenes of nice-looking dishes during my evening meal. Here’s my original X-100s review. Believe it or not after all these years, I’m still using (and loving) this camera.
4. Two or three lenses. In this case I’d bring a Lumix 12-35mm 2.8 lens (Amazon and B&H) and a Lumix 35-100mm 2.8 lens (Amazon and B&H). I like these lenses because they are the equivalent to a 24-70mm 2.8 and a 70-200mm 2.8, but extremely small and light, yet very sharp and fast (2.8 all the way.)
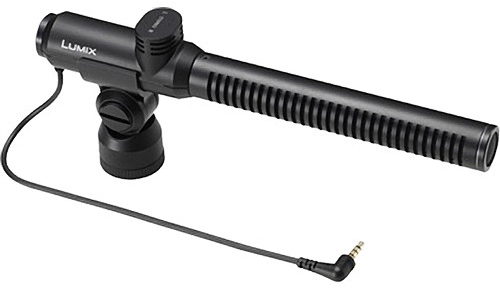
5. For sound I’d bring a field recorder like the H4n (Amazon and B&H) or a more current model and smaller version like Tascam’s DR-05 (Amazon and B&H) to capture interviews and my own production notes.
While like the versatility of the H4n, it is bulky and too slow to start up, so we are considering something newer like the Zoom H1 (Amazon and B&H). I probably would also add at least one Rode VideoMic (Amazon and B&H) to capture soundscapes and decent scratch sound for interviews. And of course, we need to add good headphones to our audio package. (Amazon and B&H).
6. Two (2) G-Tech 1TB external portable hard drives (Amazon and B&H) and one (1) compact, super fast and awesome 6TB G-Tech External Hard Drive (Amazon and B&H). And by the way, I ONLY trust G-Drives, even if they fail every 14years.
7. A 15″ MacBook Pro (Amazon and B&H) with Adobe’s Creative Suite (Amazon and B&H) and Shot Put Pro. Here’s an article on how we use this software to backup our media on location.
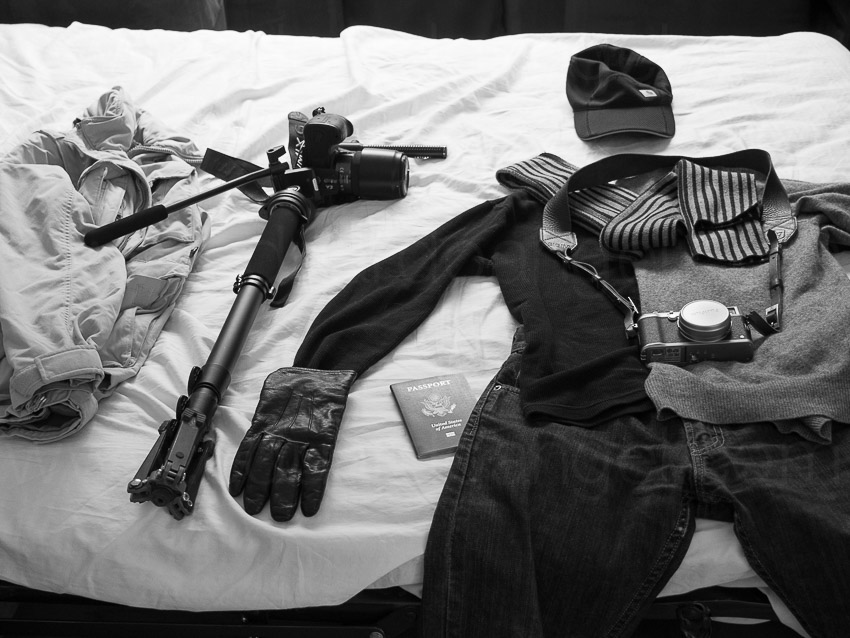
8. A small tripod (Amazon and B&H). This thing is worth its weight in gold. I’ve used it for time lapses, low angle shots, as a handheld rig, car mount, microphone stand, and even to attach small lights for quick interviews. Priceless.
9. Benro S4 Video Monopod (Amazon and B&H). It’s small, relatively light, and sturdy. Works great.
10. A variety of Tenba Tool Boxes (Amazon and B&H) to pack all the batteries, chargers, cables, adapters and other small accessories. At first, they might seem a bit bulky but having everything neatly organized and protected is worth it.
11. One of my favorite photo bags ever, the new Tenba Shootout (Amazon and B&H). It is small enough to meet carry-on size limitations, but large enough to fit my most fragile and essential items. Plus, it is extremely comfortable.
12. In terms of lighting, for these assignments I try to use mostly available/natural light, but I always bring a 5-in-1 collapsible reflector (Amazon and B&H)
13. Two ND filters are essential when shooting daylight exteriors. By the way, we recently found out how to save $250 per filter.
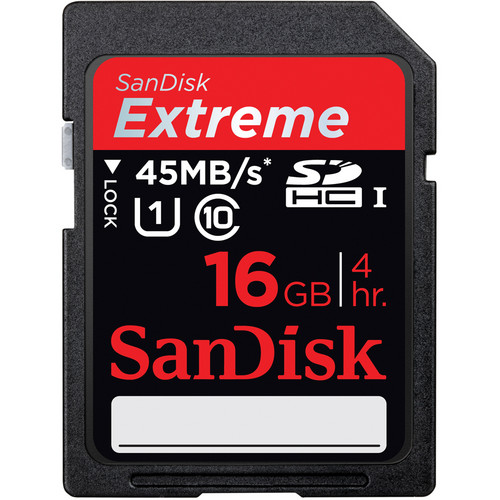
14. Media pouch with ten 64GB SD cards (Amazon and B&H).
15. X-Rite’s Color Checker Passport Video (Amazon and B&H). If you get into the habit of using for a few seconds during production, it will save you hours in post. Guaranteed.
Miscellaneous Items:
1. Obviously, the most important tool if you are crossing any borders: the passport. This website compares the “power” of passports from many different countries, and, as Americans, we are blessed to have the most powerful one.
2. My good ol’ Columbia jacket/vest has been traveling with me to more than 40 countries. It has lots of pockets, a hoodie, and because it has a self-stowing pocket, it sometimes doubles as a pillow on the road. A priceless item, to be sure.
3. Media credentials which sometimes (but not always) can give you special access, get you discounts and the most important part, allow you to travel with some heavy or oversized gear without paying a fortune. Here’s a link to Delta, American, and United Media Baggage policies.
4. A hat, sunglasses and sunscreen — truly essential items.
5. I like to dress in layers and in dark colors when shooting on the road. Black hides dust and stains very easily. A cashmere sweater is worth its weight in gold, well perhaps even more.
6. I always bring gloves unless I’m going to the Caribbean in July, comfortable shoes, and plenty of granola bars.
What else do I bring with me? Here’s the complete list.
As you can see, anyone involved in run-and-gun, single-operator scenarios like weddings, events, corporate shoots, documentaries, red carpet premieres, product launches, sporting events, video podcasts, and even student films could benefit from these lists, so feel free to share them.
We also have produced several Filmmaking courses on Lynda.com, two of them specifically designed for photographers transitioning into video. Check them out!
Are you working with a small crew constantly on the move? In that case here’s our List #2 – The Moving Crew.
Video
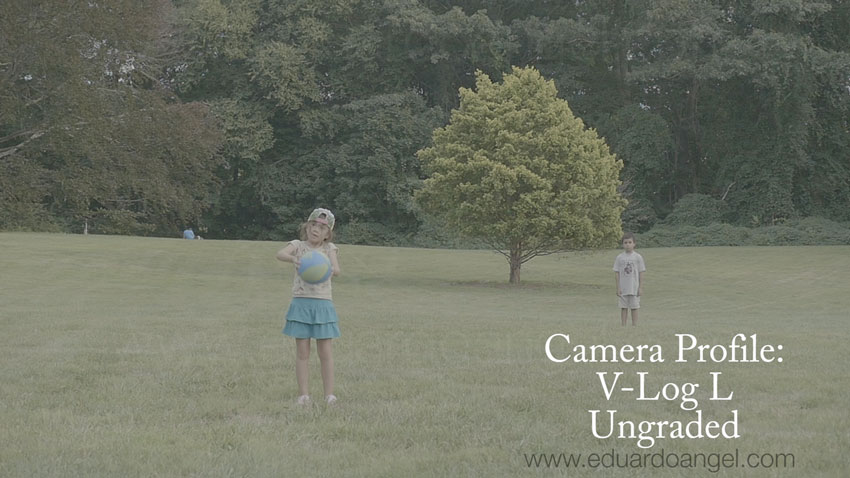
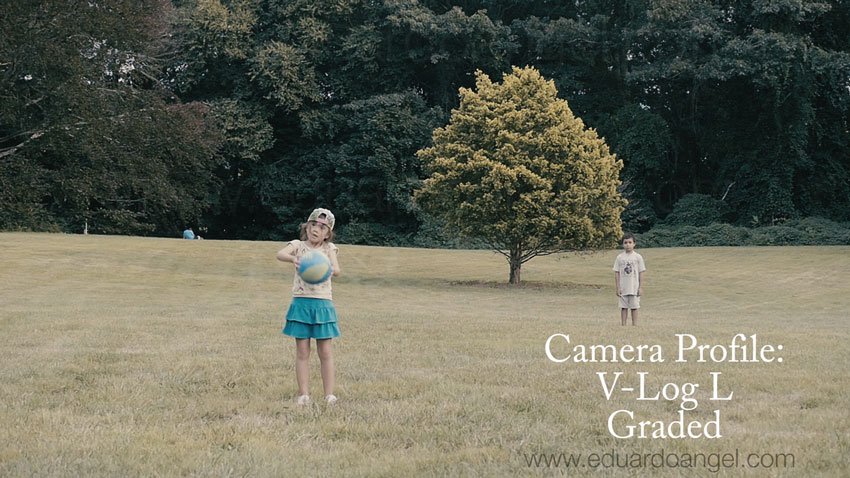
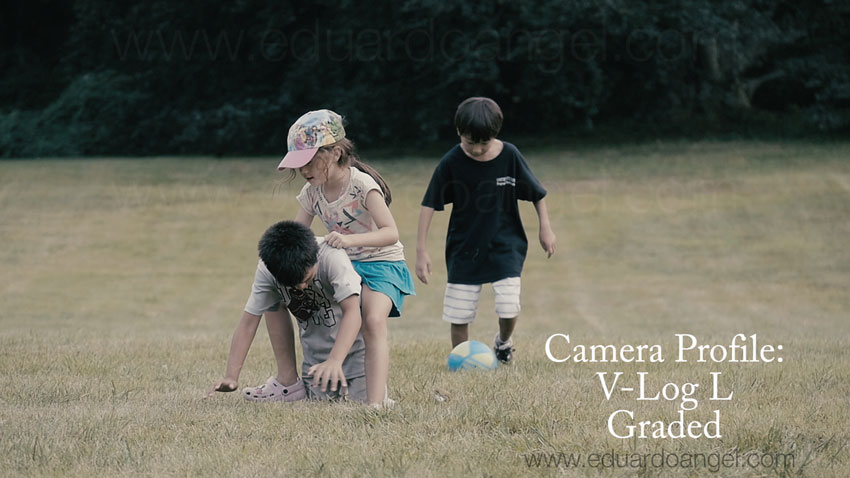
The Panasonic GH4 V-Log L. Graded and Ungraded Samples.
A few tests comparing the Panasonic GH4’s default camera profiles with the brand new V-Log L.
The (very quick) grading was done on Premiere Pro CC 2015 and the super awesome Lumetri Color Engine.


Why is V-Log important? Why should we care about camera profiles and external recorders? Read this and watch this to learn more.
Installing V-Log L on your GH4 is far from intuitive and user friendly, but we’ve got you covered. A complete step-by-step tutorial is available for free right here.
The GH4 firmware update (version 2.3) including V-Log L will cost $100, and it will be available in 2 weeks. You can pre-order it now right here.
Related Posts
- Hybrid Assignments Equipment List: The Essential 41 Items.
- The eternal quest for “the best” digital camera.
- Shooting Anamorphic and V-Log with Panasonic’s GH4. Valuable Lessons.
- 7 things we discovered after shooting 4K with the GH4. You won’t like #4.
- The Pros and Cons of external recorders: Atomos Shogun.
- 4K video under $2K. Meet the Panasonic Lumix GH4.
- I Just Got a Panasonic GH4 – Now What? Hard Drives.
- I Just Got a Panasonic GH4 – Now What? Batteries.
- I Just Got a Panasonic GH4 – Now What? Memory Cards.
Video
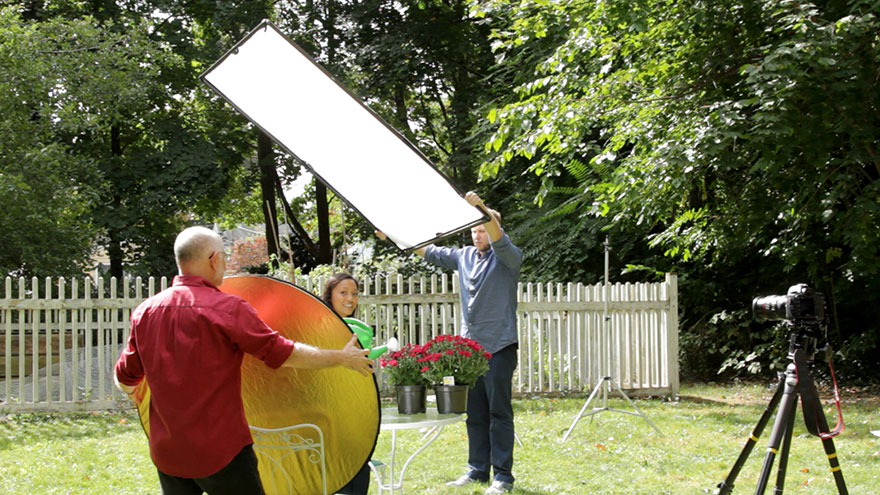
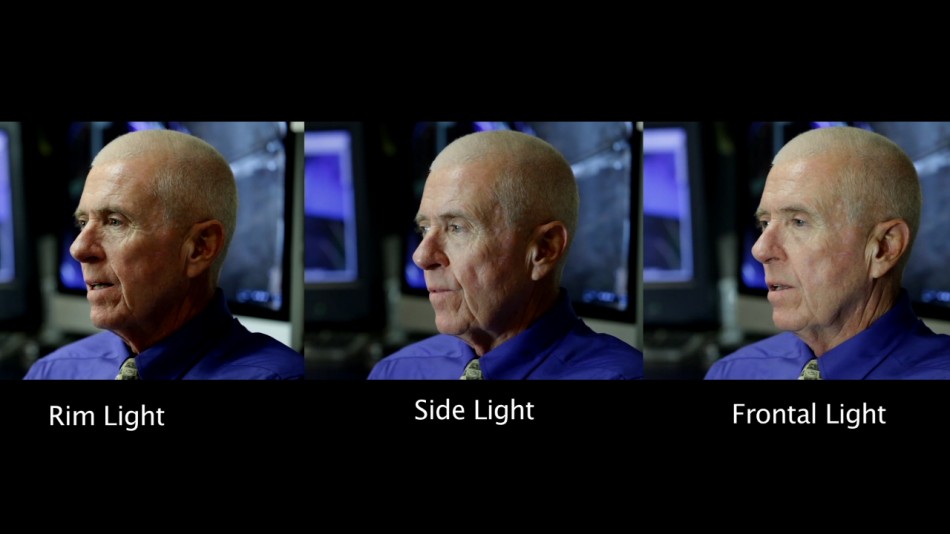
Lighting Design for Video Productions on Lynda.com
Understanding the importance of lighting and the proper use of a light meter and colorimeter raises an average shot to a more sophisticated visual level. And it doesn’t take a Hollywood budget. In this course, we show you how to use simple tools and techniques to make your lighting and your location work together, how to make the most of natural light and augment it with artificial lighting, and how to reveal or obscure objects and subjects in your scene. Along the way, we’ll show you how to evoke certain moods and feelings with light.
Topics included on this course:
• Understanding the role of lighting
• Lighting interior and exterior scenes
• Directing the viewer’s attention
• Enhancing mood in a scene
• Achieving great light under harsh conditions
• Deciding on the right lighting style for your story
If you aren’t a Lynda.com subscriber, feel free to use my link for TEN days of unlimited access.
Here’s one of MANY examples provided during this course:
The complete course is currently available on Lynda.com. As I mentioned above, if you aren’t a Lynda.com subscriber, feel free to use my link for 10 days of unlimited access.
Many folks have been asking about the equipment used for this course. Here are the answers:
We used a variety of lights, but the main ones were Bowens Limelite Mosaic 30x30cm Daylight LED Panel.
As our A Camera we used a Canon EOS C100 Cinema EOS shooting to an Atomos Ninja-2 recorder. As our B and C Cameras we used a couple of Canon EOS 5D Mark III. We used a variety of lenses, but the main one was the Canon EF 70-200mm f/2.8L IS II USM.
And here’s list with our standard camera package.
Video
I Just Got a Panasonic GH4 – Now What? Batteries.
First, the good news. If you already own a Lumix GH3 like we do, the GH4 uses the same exact batteries. The majority of camera manufacturers and other companies like Apple could follow this strategy for a change!
The OK news is that while the DMW-BLF19 battery (one included with every body) is really good, we generally go through two or even three batteries per camera on a video shoot. The Panasonic branded battery goes for $45 on Amazon.
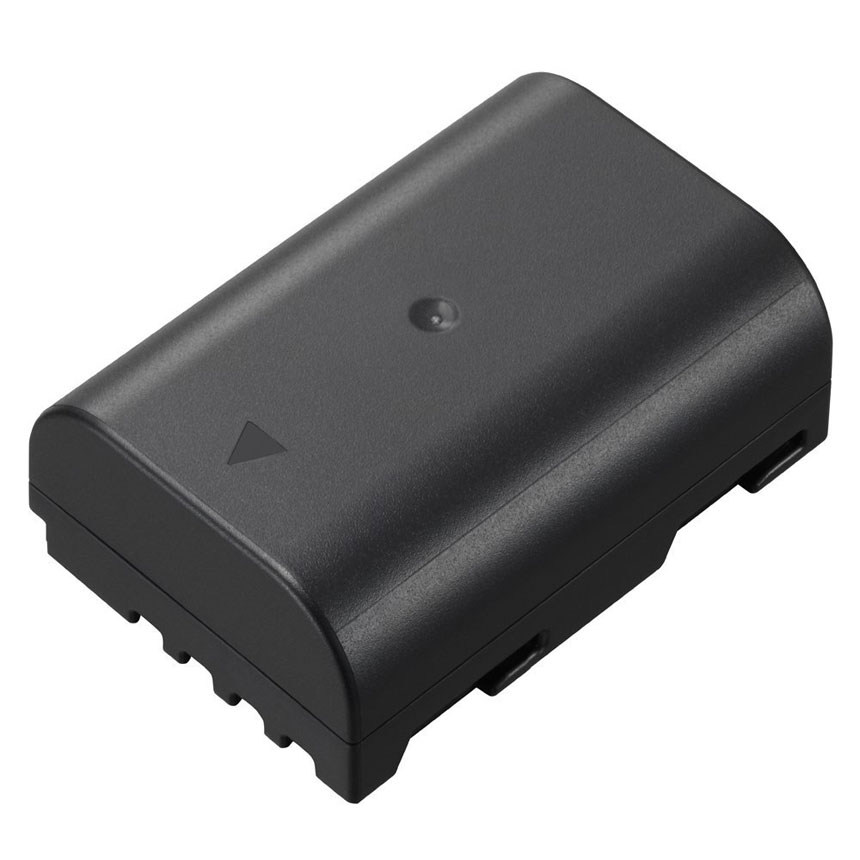
Panasonic DMW-BLF19
A cheaper option is the Wasabi branded version that costs a THIRD of the price ($14.79 on Amazon). Now, an event BETTER deal is the Wasabi kit, which includes TWO batteries and one charger with a European plug AND a car adapter. The price: a no-brainer $31 on Amazon.
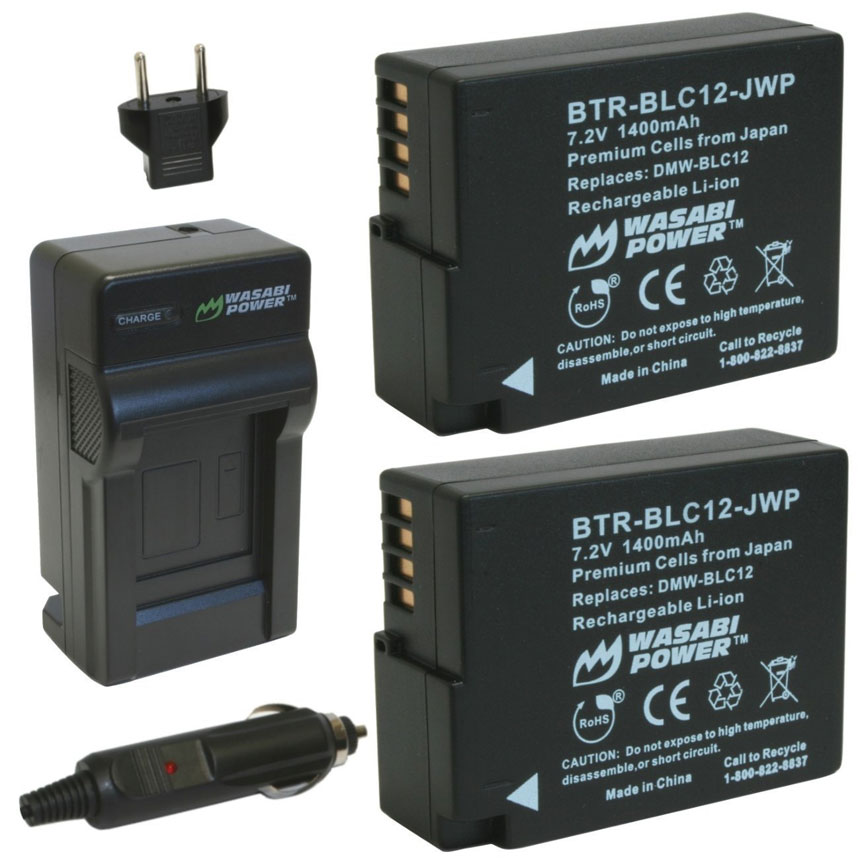
Wasabi Kit for the Panasonic Lumix GH4
I purchased a very similar kit for the Fuji X100S and so far have not seen ANY significant difference in performance between the original Fuji battery and Wasabi’s.
Related Posts
I Just Got a Panasonic GH4 – Now What? Hard Drives.
I Just Got a Panasonic GH4 – Now What? Memory Cards.
7 things we discovered after shooting 4K with the GH4. You won’t like #4.
Dance! The first of a series of videos shot for Panasonic USA to promote the new Panasonic Lumix GH4.
Video

6 Lighting Tips for Shooting Video.
Here’s the thing — we can make a film without sound, without color, and without a single camera movement, but we can never make a film without light. Wehile we can sometimes use available light or cheap practical lights, here are a few things to consider:
1. The biggest advantage of natural light is the price. It is readily available and doesn’t cost much to harness or enhance. If nothing changes and everything can be accomplished in one shoot, one can probably get away with this method.
2. Unfortunately, video often requires shooting over extended periods of time, and tear down and reproduce scenes shot days or weeks before. Additionally, as professional photographers and filmmakers we can’t rely on clouds, having enough windows, or even the weather forecast.
3. We often have to work fast with limited tools. A typical example for us is shooting B-roll the same day we arrive to a new city. Understanding simple techniques like harvesting harsh noon sunlight, or harnessing available shade can make or break a day on location.
4. Even when we can carefully plan our shoot, we need to truly understand the role of lighting in our story so we can select the ideal tools and techniques to develop it.
5. I find it fascinating how warm tones pop out of the frame, while cool colors recede into the frame. Or how through proper lighting we can make the same exact scene look peaceful, enigmatic, elegant, happy, or even scary.
6. As photographers and filmmakers, light is our palette. With light we can provide a sense of space and establish a time of day. We can create beautiful morning light in the evening as well as spectacular moonlight at noon.
Light is such a powerful and adaptable element that by understanding it and mastering it, we can greatly enhance our video productions without breaking the bank. Check out this tutorial, using ONE utility light during daytime:
Like these tips? That’s exactly what my course “Lighting Design for Video Productions” is all about.
Additional free video tutorials are available here!
UPDATE: May readers and Lynda.com subscribers have been asking about the equipment we used on our Lighting course on Lynda.com. Here are the answers:
We used a variety of lights, but the main ones were Bowens Limelite Mosaic 30x30cm Daylight LED Panel.
As our A Camera we used a Canon EOS C100 Cinema EOS shooting to an Atomos Ninja-2 recorder. As our B and C Cameras we used a couple of Canon EOS 5D Mark III. We used a variety of lenses, but the main one was the Canon EF 70-200mm f/2.8L IS II USM.
Video
Amazon adds storytelling tools to its arsenal.
updated 20140114
Amazon Studios was launched 3 years ago to develop feature films and episodic series. In a new effort to pack another punch to its arch enemy Netflix, as well as increasing its original content catalog, the company has rolled out the beta for “Storyteller,” a free online storytelling tool that (more…)
Video
2013 Roundup and our favorite Top 10 Lists.
If there’s one thing we love, it’s lists! Here’s a short and sweet compilation of our favorite “Top 10” lists from 2013. (more…)
Photography
Apple OS 10.9 Mavericks compatibility for X-Rite color solutions.
The recently released Apple OS 10.9 Mavericks may experience communication issues with X-Rite instruments. To resolve these issues, users need to update to the latest X-Rite Device Services (XRD v2.3.2) driver software. (more…)
Photography
Fuji X100S Hands-on Review.
I’ve put this little thing through every imaginable shooting situation, and tried most, if not all, of its settings, shooting more than 8,200 images on four different assignments in 5 countries in less than a month’s time. And yeah, I know, I’m almost a year late to the Fuji party.
But, as I tell my students who seem to be magnetized to the flatiron building after moving to New York, it doesn’t matter if other people have photographed or written about the same subject that you are interested in. It’s exciting to see how each of us uniquely interprets our surroundings. So, here are my personal impressions of the Fuji X100S.
It is important to mention that I am not being paid by Fuji, or anyone else for that matter, to use the camera or write this review. I’m doing this just as a way to give back to the photo community, so if you are inclined to purchase this system, please consider using our Amazon link. It won’t cost you a penny more, and it would definitely allow us to spend more time working on projects like this:
Why the hype?
The Fuji X100S is a small and light, retro-looking 16MP APC-C magnesium body camera with a fixed 23mm f2.0 lens (equivalent to a 35mm focal length on a 35mm camera) that captures 14-bit RAW. It looks and feels like a Leica M8 or M9, but it comes in at about a fourth of the price.
Size and weight
I was going to spend 26 days working in five Asian countries. With a limited amount of free time to explore on my own, I wanted a camera that would allow me to use any form of transportation (biking with a backpack full of lenses and accessories was not an option), that would capture RAW (a cellphone wouldn’t cut it here), and that was inconspicuous (the Canon 70–200mm f2.8 was out).
So, the main reason I chose this system was weight. Many years ago I was willing to carry two bodies with two lenses and a small daypack with water and accessories (monopod, memory cards, filters, batteries, more lenses, cable releases, etc.). Not anymore. I want to travel as light as possible and be able to fit ALL of my clothes and gear in a carry-on rolling backpack.

When I travel, I break all the rules my mom taught me: I talk to strangers, I eat all kinds of weird food (especially street food), I sleep as little as possible, and I intentionally try to get lost. I enjoy discovering cities on foot, often walking 12 hours in a single day. Deep inside myself, and for some masochistic reason, I also wanted to push the limits of my comfort zone. Not having a set of super-fast zoom lenses with me would be a major restriction—but also a liberation.

The Macro Mode focuses as close as 3.9″ (10cm). It works great and focusing is fast. Something to keep in mind when using the Macro mode is that if the Optical Viewfinder is on, the camera will switch to the Electronic Viewfinder.

Day 1. First issue.
After years of using Canon and Nikon DSLR systems, I naively assumed that all camera companies were up to date on battery technology. I was terribly mistaken. If there’s one issue with the X100S it is the battery life. Thankfully, and with proper planning, this is something that can be worked out.
The ONE battery I brought with me lasted a couple hundred images. Assuming I had not charged it completely I went through the same issue the following day. Finding digital gear overseas is often difficult, time consuming, and expensive. Locating batteries for this system in northern Thailand was a nightmare.
If you are planning to buy this camera, I’d recommend getting at least a couple of extra batteries. The original Fuji NP-95 is $38, but you can obtain much cheaper ($10) generic batteries, too. The best deal I’ve seen is this Wasabi kit with two batteries, charger, European plug, and car adapter for $20. A no brainer investment.
Why do you need a second charger? Well, it so happens that the Fuji charger does not tell you the percentage of charge that you have. It is either charging (the light on the charger is on) or full (the light goes off). For some reason, if you take a fully charged battery and attach it to the charger, it can take 10–15 minutes to show that it is full. To add insult to injury, it takes 180 minutes (three hours!) for one NP-95 to charge from dead to full. That’s 50% of the time the battery lasts under normal use without the LCD display. Fuji’s battery charger has no folding plug so it requires a long separate cord. One more thing to pack.
The battery issues continue on the camera: the battery-level meter simply goes from normal to dead in a few images. Just like that. Unlike a DSLR, a mirrorless camera sensor is powered up all the time, even if you are just focusing or reviewing images. If you use mostly the optical finder, turn the “OVF power save mode” on. The display’s info will be dimmed a bit, and the live histogram is no longer available, but it will greatly extend the battery life. I strongly recommend reading pages 18, 36, 41, 47, and 91 from the Camera’s Instruction Manual (available here as a PDF).
On paper, the NP-95 is rated for 300 shots per charge. After all these tweaks, I’m getting an average of 450 shots if I switch from EVF to OVF when possible, if I turn the camera off instead of keeping it on standby mode, and if I don’t use the viewfinder.
That’s a lot of ifs! The battery’s design is also poor, as it allows you to insert the batteries incorrectly and still be able to close the “battery-chamber cover.” You will know if you’ve done it wrong because the camera won’t turn on.
Having the battery life improved to a maximum of 450 pictures gives me about five hours, which is about a third of my working day when traveling. The poor battery performance and long charging cycles were by far the biggest drawbacks using this system on the road.
Focus
On several occasions I could not get the AF to lock, even in bright daylight. In low light the AF does hunt and it is slow. I also had a few instances where the camera “back focused” for no apparent reason.
The AF-C Mode (continuous auto focus mode) was extremely unreliable. The camera is simply too slow to track, lock, and capture a moving subject. Additionally, on AF-C Mode you can only focus on the dead center of the sensor. In my opinion, these two issues defeat the purpose of AF-C.
The manual focus works great. I love the focus peaking feature.
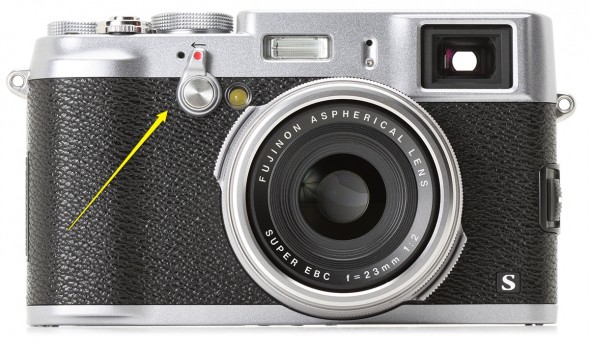
I absolutely love the hybrid viewfinder. It took me a couple of days to realize that the little switch on the front of the camera almost magically changes between the optical and electronic viewfinder.
Lens
The fixed 23mm f2 lens is very sharp, and impressively corrected for distortion. In combination with the sensor’s ability to capture noise-free images up to 3,200 ISO this makes shooting under low-light conditions bliss.
Low Light performance.
As you can see, low light performance is impressive. The sensor performs very well up to ISO 3,200 and decently up to 6,400. Relatively long exposures are not an issue.
ISO 6,400
1-second exposure

ISO 1,600 at f2

Dynamic Range – Highlights and Shadows detail.
Another excellent spec; the detail that this tiny sensor can capture is truly remarkable.

Movie Mode
If shooting video is extremely important to you, stop reading this right now and consider another camera. The camera offers Full HD (1920 x 1080) at 30fps or 60fps and a decent 36MBps bit-rate. But, to access the video mode, you have to select “Movie” in the drive mode menu. You can’t use the optical viewfinder. Manual exposure can only be modified before you start recording. The ISO and ND are inaccessible while in video mode. In terms of quality, if you have good light, perfect exposure, don’t care about sound, can pre-focus, and the camera doesn’t move, the footage is decent.
A three-stop neutral density filter is a welcomed feature. Unfortunately, it is not accessible during Movie Mode.
The built-in Panorama works well.

Workflow
I download and back up my images at the end of each day when I’m on the road. I also add key captions (locations, names, etc.) and a few general keywords. I wanted to create Smart Previews and edit them in my “down time” (doctors offices, the DMV, and long flights are ideal locations). That didn’t quite work out. On a two-year-old Mac Book Pro and a fast portable external Hard Drive, Lightroom 5 took on average two-and-a-half hours to import 450 RAW images, convert them to DNG, and build Smart Previews, which I still consider the best feature in Adobe Lightroom 5.
So, every night, after a day of working and lots of walking, I’d download the cards through Lightroom and charge the batteries, take a shower, grab something to eat, call my wife, return emails and phone calls, plan the following day, and…continue to wait because neither Lightroom nor the battery were ready.
Future enhancements
• I wish the camera had built-in GPS, which in combination with Lightroom’s Maps Module would make captioning images MUCH easier. My poor-man’s workaround is to simultaneously snap a picture with my cellphone at key locations. Since the phone adds the GPS information to the image I can later copy and paste the GPS coordinates to the relevant RAW and video files. Nothing fancy, but it works.
• It takes an annoying “long press” of the shutter button to wake up the camera from stand-by mode.
• If you’re shooting in burst mode, you can’t review individual images or zoom in/out. The images play back in a pointless slideshow. This was truly frustrating, as you can’t know if you got the desired image until you download the files.
Final thoughts
One day, many moons ago, as a student shooting for a newspaper, the photo editor asked me if I had more than one lens. I proudly answered, “Yes, I have three!” To which he replied, “Then use them! All your pictures look the same.”
That was a serious concern I had about spending a month with a single fixed wide-angle lens. I’m glad to report that the advantages in quality and weight greatly outperform this challenge.

The Auto White Balance works very well. The custom white balance is close to perfect.
Is this camera going to help me take better pictures?
Cameras are tools, no different from hammers or toasters, when you get down to it. I own very little gear because I prefer to rent the best tool for each job. That way I keep my overhead low and have access to the latest technologies.
That being said, after a few days getting used to the cluttered and somewhat illogical Camera Menu, I felt like shooting with my first Nikon FE-2, except now I had more than 36 frames and could switch the ISO as I pleased. There was, and is, an inexplicable emotional connection with the X100S—a feeling that I haven’t felt in a decade. Technically speaking, the camera is wonderful. But, there’s more to it. I can and want to take it with me everywhere I go. I have been taking more “snapshots” than ever before. I can get closer to my subjects, and shoot silently and almost invisibly.
If you have been drooling over this camera and are ready to pull the trigger, I hope this review provides that extra little push. It’s OK, go ahead and make the jump! You can tell your spouse that it was my fault. Please consider using our Amazon link. It won’t cost you a penny more, and it would definitively help support this site.
Feel free to leave your comments at the bottom of this page. Also, be sure to join me on Twitter and Facebook, and subscribe to our complementary Monthly Newsletter and our RSS feed.
Video
Tips and Tricks 008: Is there an ideal shutter speed to use in video?
Is there an ideal shutter speed to use when shooting video? We have previously discussed this topic, but we keep getting the same question so let’s go over this again.
The quick answer is yes, there is, and you really need to pay attention to that. (more…)
Video
How to quickly enhance your photography portfolio.
On my previous post (I’d recommend reading it first if you haven’t) I walked you through my personal process to edit a large group of images into a more manageable portfolio.
Now is the time to enhance and fine-tune those “final” photos. (more…)
Video
10 (new) Cool Gadgets for Photographers and Filmmakers. Part 1
1• Edelkrone SliderPLUS
Edelkrone’s SliderPLUS is a super-compact and very smooth slider that easily fits onto Tenba’s Video Backpack. Unlike other sliders, this one moves with the camera, taking full advantage of rails’ length. With a price tag of $500, this toy is at the top of my shopping list.
2• Redrock Micro’s One Man Crew Parabolic Camera Motion System
This amazing gadget consists of a motorized parabolic track slider that “guides the camera on a precision-curved track at any speed while keeping the subject stationary in frame.” The system includes speed control, automatic in and out stops, and 36” of track for camera systems under 20lbs. All for $1,500. If you are part of a small crew doing a lot of corporate interviews or a single photographer creating educational content or product demos, this is an extremely attractive option.
Video
Shooting with the Panasonic Lumix DMC-GH3. Field report and impressions.
The friendly waiter at the Turkish restaurant in Sohar, Oman, saw the camera on the table and asked “Nikon? Canon? Which one is better?” To which I replied, “actually, this is the Panasonic GH3.” He stared at me, his expression turned from excited to perplexed to confused to annoyed within seconds. After an uncomfortable silence he finally asked, “Are you ready to order?”

That was pretty much my reaction when, a few weeks ago, just two days before I started teaching a “Digital Cinema for Photographers” event in Dubai, I found out that Panasonic, a major sponsor of the event, REALLY wanted me and my students to use a couple of GH3s and several lenses in my hands-on workshop.
Panasonic is one of the largest consumer electronics companies, and the GH3 is the third generation of their very successful Micro Fourth Thirds DSLM (Digital Single Lens Mirrorless) system. For a while I have been aware of the low-budget-filmmaking community’s devotion to the hacked DMC-GH2 and its ALL-I codec. I saw the DMC-GH3 at Photokina last year, but I had never before shot a single frame with a Panasonic camera. The bodies that I was given were running Firmware v0.5. Add to this a nine-hour time zone difference and jet lag, and you can begin to imagine my pain.
While I’ll be using some geeky terms, this is not an in-depth technical review, nor a scientific analysis of the GH3. You can dig into tech specs and MTF charts somewhere else. My goal is simply to share my honest and independent impressions, go over the things I liked and didn’t like, and communicate my wish list for future features. I want to emphasize that all the conclusions in this article are subjective and strictly based on my own personal experience.
“I have to warn you, I’ve heard relationships based on intense experiences never work.”
-Keanu Reeves in “Speed”
I have to respectfully disagree with Keanu on this one. Much to my surprise, the camera was much more intuitive than Sony’s NEX system, and several video features got my full attention right away.
FEATURES
• Full HD 1920×1080 60p/50p (NTSC/PAL) with 30p/25p/24p options.
• Ultra-high bit rate video recorded at 72 Mbps (ALL-I) or 50 Mbps (IPB).
• Capable of recording continuously for an unlimited time for NTSC and 29 min 59 sec for PAL.
• Native support for MOV (h.264), MP4, and AVCHD formats.
• Time Code support in the MOV and AVCHD formats.
• Extremely fast and accurate contrast-detection Autofocus.
• A 3.5mm mic input AND a headphone jack AND the option to manually adjust the sound recording levels via touchscreen controls.
• Full-time AF, AF Tracking, and Face Recognition AF are available for VIDEO. The Touch AF mimics rack focusing.
THE WORKSHOP STORY
Not having enough time to field test the Panasonic systems before the Workshop, I shot dummy clips in my hotel room and made sure that the footage would work in Adobe Premiere Pro CS6. The test went surprisingly smoothly. I then set both GH3 cameras to the same video settings: MOV at 1920×1080, 24p, 72 Mbps ALL-I, Standard Photo Style, White Balance at 5500K, got ND filters for all the lenses, extra batteries, and a few Class 10 SD cards. And then I prayed.
You must use a Class 10 SDHC card when recording Ultra-high bit rate video at 72 Mbps (ALL-I).
Note: It’s extremely important to point out that full HD on this camera requires memory cards with the fastest speed available. My “older” memory cards didn’t work, giving me only four seconds of recording time.
VIDEO
We spent the first day of my three-day Digital Cinema Workshop covering all the technical similarities and differences between stills and video. On the second day, we planned a location shoot with a Capoeira team and spent a couple hours shooting in the afternoon. On the third and last day we covered the different hardware and software requirements for post production and spent three hours editing the footage. I am especially proud of the short clip my students put together in such a limited amount of time and with newly acquired knowledge (and using brand new gear!).
Capoeira in Dubai. Student Project. from Eduardo Angel on Vimeo.
We could obviously use a few more days sweetening the audio, fine tuning transitions, and grading, but for a two-hour shoot and a three-hour edit, I believe this is a good example of what can be accomplished with great teamwork, interesting subjects, and the GH3’s many customizable options.
SAMPLE CLIPS
Below you will see a few additional sample clips, all shot as H.264, 1920 x 1080, 23.976 72Mbps ALL-I, using the GH3’s “Standard” profile (Contrats = 0, Sharpness = 0, Saturation = 0, Noise Reduction = 0). The Exposure and White Balance were set manually. The lens was the Lumix GX Vario 12-35mm F2.8 set on AF Tracking mode, which worked very well most of the time. Despite the lens having “environmental sealing,” as you can see the fine desert’s sand inevitably found its way to the sensor. I put the clips together on Adobe Premiere Pro CS6, and have NOT done any grading nor sharpening. These short clips are intended to show you what the GH3 is capable of, not to tell a specific story.
SOMETHING INTERESTING
So, mission accomplished, right? Not so fast. A couple of days later, as I was wrapping up my day, a friend asked “Are you busy? I wanna show you something interesting.” With only the GH3, the 12-35mm 2.8 lens, a 4GB card and a low battery I jumped into his car. The “something interesting” happened to be access to the Royal Suite at the 7-star Hotel Burj Al Arab—a notoriously difficult area to access. With limited amount of storage space and battery life I managed to capture a few keepers.

The 7-star Burj Al Arab hotel resembles a giant sail rising over the Gulf, with changing colors visible for miles at night.

The very next morning (on my “day off”), I headed out to meet an old friend for brunch at the Atlantis. Should you ever find yourself in this neck of the woods, I strongly recommend that you pay the Atlantis a visit. As we enjoyed the seemingly endless food, my friend received a call to drive to Abu Dhabi right away to pick someone up and then drive back to Dubai. Would I like to come? Guess what I had hanging on my shoulder? This time I had a full battery and a 16GB card, but nothing else to shoot the magnificent mosque and the impossibly opulent Emirates Palace. Once again, the GH3 did a fantastic job.
A nice view from a 25th floor overlooking the magnificent Emirates Palace in Abu Dhabi.
MORE FEATURES
These are some of the GH3’s features that are not obvious to the naked eye, but are interesting once you are aware of them:
• A magnesium alloy camera body that Panasonic describes as “splash proof and dust proof.”
• The Panasonic RAW files (RW2) work fine in Adobe Lightroom [add link to LR workshop] but the most current version (4.3 as of this writing) is needed. Unfortunately there are no Panasonic lens profiles available as of this writing.
• All the video formats worked seamlessly on Adobe Premiere Pro CS6. Even the video recorded at 72 Mbps was easy to preview and edit on a two-year old MacBook Pro (with 8GB of RAM and an external 7200 RPM Hard Drive as a Scratch Disk).
• HDMI monitor output can be sent with or without information overlays.
• I had a DMW-MS2 Stereo Shotgun Mic with me, but was happy to learn that the camera’s built-in internal microphones provide stereo audio.
• The GH3’s sensor has a 4:3 aspect ratio.
• Built-in Time Lapse, and HDR but unfortunately it works only for JPGs not RAW.
• Five physical function buttons, and two touch-screen function buttons, all customizable with close to 40 options to choose from.
• Virtually all the key shooting controls are within the right hand’s reach. This frees up the left hand to hold the camera or focus manually.
• Excellent battery life, lasting a full day under normal operation. For extended video sessions I’d consider getting the DMW-BGGH3 Battery Grip.
• Apparently (I have not tested this) the GH3 is also capable of real-time image output to the LVF or the rear monitor AND to an external monitor via HDMI.
DMW-MS2 Stereo Shotgun Mic
LENSES
I shot extensively (more than 2,000 images in 18 days) with the Lumix GX Vario 12-35mm F2.8. The lens is tiny. And fast. And awesome. It has the equivalent focal length to a 24-70mm F2.8 on a 35mm system but it is a fraction of the size and weight. As you already know, this is a very good start when dealing with packing issues.
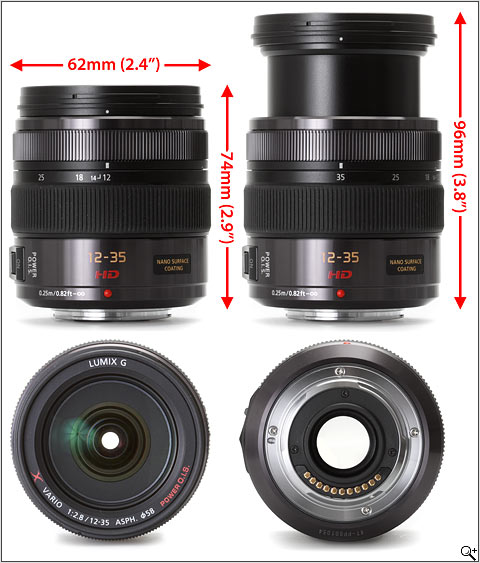
Lumix GX Vario 12-35mm F2.8
In terms of depth of field, the lens behaves like a 16-45mm F3.5 lens on an APS-C sensor, or a 24-70mm F5.6 lens on a Full Frame sensor. It is hard to get used to this, especially when shooting another system simultaneously, but it is not a disadvantage per se.
Click to keep reading (more…)
Photography
Adobe Lightroom Tips and Tricks 006. My Ten Bookmaking Steps.
Custom Book Layout is such a major addition to Adobe Lightroom 4 that it deserved its own module. Blurb provides excellent value, but you can also print at home or using another service.
Even though at first the Book Module doesn’t seem as complex as the Develop Module, there are so many options (including almost 200 professionally designed templates) that it is easy to get lost and frustrated.
This past weekend my students at ICP requested a super simplified version of the steps I take in order to create a book. Today I’d like to share my 10 Bookmaking steps in Adobe Lightroom 4:
1• Determine what the book is about. What is the concept or story?
2• In the Library Module, select the best images that are appropriate for the story.
3• Still in the Library Module, create a temporary Collection (it can even be the Quick Collection) for the best images. At this point, don’t worry about enhancing each individual image. You will have time for that later.
Click to keep reading (more…)
Video
Adobe Lightroom Tips and Tricks 005. Viewing Options.
Grid View, Loupe View, Info View. With so many options, which one should you use and when? Check the tutorial below and learn a few shortcuts that will help you speed up your editing process.
If you have specific questions or want to learn more, we are now offering virtual one-on-one sessions to give you customized solutions and personalized training no matter where you are in the world. Sign up now!
Video
Adobe Lightroom Tips and Tricks 004. Creating Storyboards.
Today’s Tip & Trick is about creating a storyboard in Adobe Lightroom. Have you used storyboards on previews projects, and if so, which application did you use?
If you don’t need all the Adobe Creative Cloud bells and whistles, consider their photography plan which includes Photoshop CC + Lightroom 5 and 20GB of cloud storage for only $9.99/month!
Got specific questions or want to learn more? We offer virtual one-on-one sessions to give you customized solutions and personalized training no matter where you are in the world. Sign up now!
Video
Adobe Lightroom Tips and Tricks 003. Editing Capture Time
Pretty busy week, so we will keep this one nice and short.
Tip 003 – Editing Capture Time.
An issue that many photographers experience while shooting away from home is that they forget to change the time settings on the camera. When downloaded, the images will display the incorrect capture time. Thankfully, this is very easy to fix in Lightroom.
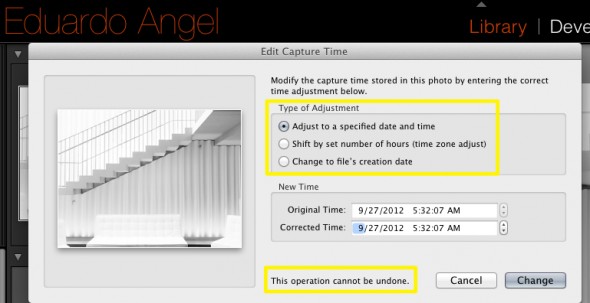
Simply select the image(s) you want to update. Go to Metadata and click on “Edit Capture Time.”
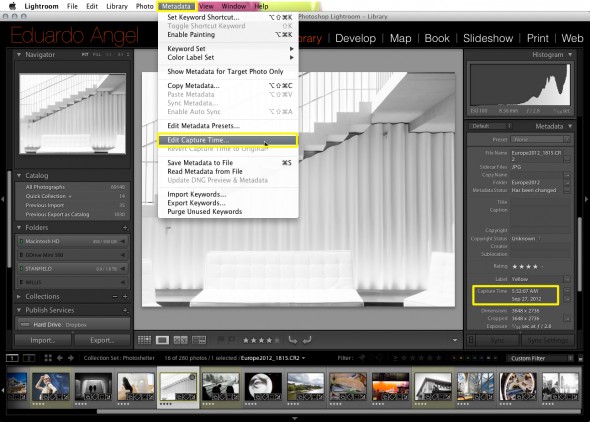
As you can see below, there are three options. Select the one that better matches your needs.
Another situation when this becomes extremely handy is when scanning images. Since the embedded info will be missing a Capture Time you can easily add it this way.
Keep the questions coming and we will keep answering them!
If you don’t need all the Adobe Creative Cloud bells and whistles, consider their photography plan which includes Photoshop CC + Lightroom 5 and 20GB of cloud storage for only $9.99/month!
Got specific questions or want to learn more? We offer virtual one-on-one sessions to give you customized solutions and personalized training no matter where you are in the world. Sign up now!
Photography
Adobe Lightroom Tips and Tricks 002. Exporting directly to Dropbox.
Here’s our second Lightroom Tip & Trick: How to quickly export images from Lightroom to Dropbox and share the link with your clients. Unless you LOVE burning CDs and DVDs you can really use this one. If you don’t have a Dropbox account, you can get one with 2GB of storage for FREE. Yes, you read that correctly. Now, you and I can get an additional 500MB of bonus space each if you choose to use this link which is also free.
This is one way of doing it. Another way is to set up your Dropbox folder as a Hard Drive in Lightroom under your “Publish Services” (see image below).
Click to keep reading (more…)
Video
Adobe Lightroom Tips and Tricks 001. File Naming Templates.
OK. Here we go. The very first Tip on our brand new “Adobe Lightroom Tips & Tricks” weekly series to help you speed up your workflow (and spend some time away from the computer).
Tip 01: Create File Naming Templates. This Tip is especially useful when working on long term projects so your filenames are always consistent. Think for example a year-long project in New York. It can be named New York, or NewYork, or New_york. After a while, it can get pretty messy!
To suggest upcoming Tips & Tricks please add your comments below.
If you don’t need all the Adobe Creative Cloud bells and whistles, consider their photography plan which includes Photoshop CC + Lightroom 5 and 20GB of cloud storage for only $9.99/month!
Got specific questions or want to learn more? We offer virtual one-on-one sessions to give you customized solutions and personalized training no matter where you are in the world. Sign up now!
Photography
Streamlining Adobe Lightroom • NEW Weekly “Tips and Tricks” Series.
The more photos we take, the more photos we need to edit, and the more we need to retouch, back up, search and find. Digital imaging has been great in many ways, like instant review and approval, but it is not making our lives any easier when it comes to time spent in front of the computer.
Photographers need constant access to our photos; we need them to put portfolios and proposals together. After every assignment we need to retouch and deliver the files. Clients will invariably request changes, other versions or different resolutions. When a job is completed, we often need to update our website and blog and start putting new proposals and presentations together.
To make things event more interesting, with recent developments in telecommunications, our clients are expecting that we deliver files right away, and from any location. That is a challenge that we did not have before. All this put together is what I like to call the “constant image cycle”.
Challenge 1
• The more photos we take the more tools we need to manage, organize, and find them.
Challenge 2
• Need to constantly access images to get assignments (proposals, portfolios, presentations, etc.), edit shoots (select best images, retouch, etc.) and deliver final assets.
Challenge 3
• Photographers are expected to deliver images almost instantly and from any location.
All these “challenges” rely on the same non-renewable resource: Time.
I have been a Lightroom user, beta tester, instructor and evangelist since version 1. Actually, I remember beta testing the very first version under the secret code name “Shadowland.” I now use the software almost every day.
After all these years and playing with the app almost every day, I have discovered many great ways to streamline my workflow, mostly by using Lightroom as a database. Starting next week, I’ll be sharing a weekly tip on this blog. Some tips might be familiar to veteran Lightroom users; some approaches might be entirely new. Some will help you to get things done quicker, while others will entirely replace outdated steps. I hope you join me on this project, and as always feel free to ask questions, comment on the tip of the week, and suggest improvements.If you are interested in other topics, please let us know here (and get a chance to win a $100 Amazon Gift Card!).
UPDATE 20130115 Tip & Trick #1, and Tip & Trick #2.
UPDATE 20130214 Tip & Trick #3, and Tip & Trick #4
If you have specific questions or want to learn more, we are now offering virtual one-on-one sessions to give you customized solutions and personalized training no matter where you are in the world. Sign up now!
Video
Meet the Alpa 12 FPS. The Ultimate Open Platform.
The Alpa “12 FPS” (for Focal Plane Shutter) is the best example of both “modular” and “open platform” we have seen. The concept is fairly simple: take a small sliding back adapter and attach a digital “brain.” In reality, it is obviously way more complicated than that.
On the front, the system can take virtually any lens (with the corresponding adapter), including Nikon and Canon lenses, Hasselblad V, Mamiya M, Leica S, view camera lenses from Schneider and Rodenstock, and even Cine lenses from Zeiss.

 On the Back, the system works with pretty much any Medium Format Digital Back. What makes this system unique and brilliant is not only the amazing flexibility but the “brain” that can be configured to control shutter speed, aperture, bracketing, (even for HDR) and flash-sync. I was told that the very well finished prototype I saw was finished just hours before Photokina started.

The system configuration I played with had the FPS body, a Leaf Digital Back with a Zeiss 21mm CP.2 lens and was being triggered with Pocket Wizards…a true digital Frankenstein!


I can see an important demand for this system from landscape and architectural photographers, as well as rental houses all over the world. More images and complete tech specs are available here. If you are truly interested, here are the prices.
UPDATE 20121207 We attended a great event this week by Andre Oldani at Foto Care and learned a lot of new and interesting things. Just a couple of months after we first saw the FPS system at Photokina, Alpa has clearly worked hard and fast to finalize some loose ends and deliver a truly impressive platform.
These are a couple of images from Oldani’s presentation.


Video
Cloud Storage Solutions and Adobe Lightroom.
In the past couple of weeks, we have done several One-on-One Consulting sessions where the “Cloud Storage” question came up. This is a very quick overview of the most popular online storage options with pricing and direct links to each.
My own situation:
• My Lightroom Catalog has 70,000 RAW Images. I shoot a lot, but I am merciless editing.
• The entire catalog (NOT the RAW files) takes about 26GB of space.
• The RAW files take about 860GB of space.
This means I need about 900GB of storage space if I wanted to move my Lightroom Catalog, including all RAW files, to the Cloud.
 Dropbox customers are provided with 2 GB for free.
100 GB
Monthly $9.99
Yearly $99.00
200 GB
Monthly $19.99
Yearly $199.00
500 GB
Monthly $49.99
Yearly $499.00
IMPORTANT: If you don’t have a Dropbox account, use this link to get started. You get 2GB for free, and we both get an additional 500MB as a bonus. Hurry up!
Click to keep reading (more…)
Video
Adobe Premiere Elements 11. Worth it?
Back in May, Adobe announced Photoshop CS6 and Premiere Pro CS6 with a new user interface. Now, the company has added that new look to Photoshop Elements 11 and Premiere Elements 11. Both applications are less intimidating for newcomers, allowing quick and easy organization, editing and sharing of media, and targeted for new photographers or video editors.

Both apps include an image organizer that closely resembles Adobe Bridge, making the most commonly used functions easily accessible, while other tools are hidden away in the menus. The new organizer is laid out as a 3 column panel in Photoshop Elements 11 and integrates with Google Maps, just like the Map Module in Adobe Lightroom 4. Additionally, tagging photos and videos with people or events (mimicking Facebook) is now possible.

Since Premiere Elements includes “Expert” workspaces with interesting transitions and effects, this might be a good product for photographers transitioning into video. The goal is not to become an expert video editor, but understand NLE apps and more importantly, the required assets to put together a video project.
click to keep reading (more…)
Video
Will Lightroom 4 support all my files? Maybe.
Updated 9/22
I’ve been getting a lot of emails asking whether Adobe Lightroom 4 (and/or Adobe Camera Raw 7) will support the file format for certain new cameras.
In Lightroom 4.1 or later, you can import and work with TIFF 16-, 24-, and 32-bit floating point images – also known as HDR (high dynamic range) images. You can use the Develop module controls to edit HDR images, and then render the images for export or printing as 8-bit or 16-bit images. Lightroom can now import DNG format HDR images, but you need to make sure the images are processed version 2012.
To keep things simple, here’s the complete list of currently supported file formats:
• JPEG
• TIFF (8 bit, 16 bit, 32 bit)
• PSD (8 bit, 16 bit)
• DNG
• RAW – Here is the complete list of supported cameras. As you can see, the list keeps growing and growing and now includes Hasselblad, Mamiya/Leaf, and PhaseOne Medium Format Digital Backs.
There are two important exceptions:
PSD files saved without the “Maximize Compatibility” setting enabled
Files with dimensions greater than 65,000 pixels per side
As you already know (if you have been following this blog), Lightroom 4 also supports the most popular HDSLR video formats, including MOV, MPG, AVI, and AVCHD.
Keep in mind that the AVCHD support is limited to MTS and M2TS video files. Video editing applications like Adobe Premiere Pro may need the AVCHD file structure to process the files, which can be a pain. Final Cut Pro 7 won’t even take the MTS files without transcoding them first.
This is how the typical AVCHD file structure looks like:

If you find this information useful please help us share the love. It is good karma!
Video
Notes from the Field.
This is a scan from my journal that I bring with me to every preproduction meeting that I have with clients, directors, producers, and others. In this scan you can see my handy “preproduction notes.”

Here’s how my system works: first, I like to get the conversation going by sharing movies that we like and movies that could be related to the project at hand. This helps tremendously in our effort to understand both technically and aesthetically what the client or director is going after, and if we are a good match for the project.
About a year ago I sat down with a director who began envisioning a project as “film noir meets science fiction/kung fu—but in a funny way,” which saved us both a lot of time, as I was definitively not interested!
Let’s take a look at the other things I consider on every video production:
• Script: Do we have a script? Is it from a book or is it an original script? When can I see it? If there isn’t a script, who is going to write it and when? This is a very important step. Even though I always write the scripts for my own projects, it needs to be clearly defined who will perform this integral part when it comes to someone else’s project. I have been using Celtx, and I am very happy with the results. The script is by far THE most important piece on any video production puzzle.

• Shot list: As soon as I have the script, I start creating a shot list: what kind of gear do we need? Do we own it? Do we need to rent it? How many shots can we accomplish in one day? The answers to these questions can vary greatly depending on location, the scenes’ complexity, permits, and even the weather.
• Location Permits: Since most of us don’t have access to Hollywood’s sets and production budgets, being creative is extremely important. Having access to locations that other people don’t have access to is key. There are several beautiful abandoned buildings on Wall Street that no one knows about. In Harlem there are fantastic mansions that you can shoot if you know the right people. Battery Park is Federal property while Central Park is not. Both require shooting permits, issued by different offices.

• Location Scouting: I am often surprised to see how many people ignore this critical step. In cities like New York things change, and they change fast. The park that you so fondly remember is now a parking lot. And that awesome abandoned building? Well, it’s now a luxury condo.
Video
Canon EOS M Images.
UPDATED 0828 Canon EOS M – Part II. Hands-on Review
Yes, the answer is a most emphatic YES to everyone who has asked if I plan to purchase the brand-new Canon Mirrorless system. I just placed my order here. You have until October to change your mind. I seriously doubt I’ll change mine.
So, in a nutshell, we have a tiny camera body with a powerful DIGIC 5 image processor, and a very nice APS-C 18.0 Megapixel CMOS sensor, which is the same sensor size one finds in the wonderful EOS 7D and EOS 60D. The touch screen and UI are virtually identical to the brand new Rebel T4i. Apparently you can purchase the body only, but I have only seen the kit with the EF-M 22mm ƒ2.0 pancake lens. All the expected features like ISO settings from 100 to 12800, with expansion to ISO 25600, standard aspect ratios (3:2 plus 4:3, 1:1 and 16:9), and 1080p at 24/25/30 fps and 720p 50/60 fps are there, BUT now we have continuous autofocus.

The hybrid (stills and video) AF system uses “phase-difference AF to achieve approximate focus and drive the lens at high speed, then switches to contrast AF for final focusing.” The movie files are recorded in MPEG-4 format, using AVC.H.264 compression and a variable bit rate. Program as well as and manual shooting modes are supported in movie mode.
And the cherry on top? The EOS M will take EF lenses thanks to the adapter shown below. Enjoy the view.


Canon EOS M Lens Mount Adapter
click to keep reading
Video
Canon EOS 7D firmware update.
The latest firmware update for the Canon EOS 7D will be released at the end of this month, according to brief press release leak on the Canon Professional Network site. is now available for download here.
Canon addresses a number of issues for professional filmmakers and photographers, including a highly anticipated manual audio controls for video. This is extremely exciting, considering that we have filmed all of our episodes of “Conversations with Friends” with the Canon EOS 7D and have been waiting for quite awhile for these new features.
MANUAL ADJUSTMENT FOR AUDIO RECORDING LEVELS
During EOS Movie shooting users are now able to manually adjust the audio recording to one of 64 levels, whilst the sound volume during playback can be set to one of 11 levels. During movie recording noise from the aperture is reduced, and the camera also has an automatic wind cut filter.
Users can also add the camera’s Full HD (1920x1080p) movie footage with 16-bit digital stereo sound, sampled at broadcast quality 48KHz.
In addition, Canon has included a big update to the EOS 7d firmware with GPS Support:
- Mounted Receiver – can be attached to the camera’s accessory shoe or clipped to a belt and tethered via a USB cable.
- Records shooting locations – latitude, longitude and altitude for easy geo-taging and camera direction (fantastic feature for my travels around the world) as an EXIF file of the image.
- Syncing Camera’s Internal Clock – can now synced through the GPS unit using UTC (Coordinated Universal Time) for accurate time recording or syncing clocks on multiple cameras.
- GPS Logging and Google Maps Compatibility with Canon’s free Map Utility software can display the photographer’s route on a map.
Some of the other updated features include:
- Improved RAW Maximum burst – Max Burst Rate now from 15 frames to 25 frames.
- In-Camera RAW Conversion – RAW images can be processed and edited in-camera with dynamic adjustments such as exposure, white balance, picture style, noise reduction and distortion correction. Options can be changed before saving the finished file as a ready-to-print JPEG. Check this article on the benefits of shooting JPGs, even for professionals.
- Image Rating Capabilities
- New Auto ISO Maximum Setting – ISO 100-6400
- JPEG Resizing
- Quick Control During Playback
- File Name Setting – First 3 or 4 characters in the file name can be adjusted, depending on the setting
- Time Zone Setting
- Quick control screen during playback
- Faster Scrolling of Magnified Images
You may download the newest firmware updates in early August at no charge from Canon’s Website here.
Does this update fix all the issues you have been experiencing with your 7D, or did Canon left a major one out? Share your thoughts and comments below.
News
How to optimize your reading experience.
Shocking but true: Once upon a primitive time, there were no ebooks. For the past 15 years or so I’ve read an average of 50 books per year, or roughly one book per week. Now, my annual average is close to double this number—all thanks to ebooks, and, more specifically, because of the Kindle reader app and the public library system.
If I buy a book, I’ll read it 20% of the time, since I always use the “I’ll read it tomorrow or next weekend” excuse.
If I check out a physical book from the public library, I’ll read it 50–60% of the time. This situation has an added bonus—since it takes time and effort to pick up and drop off the library books, I make sure that I only get the ones that I really want or need to read.
For the past six months I’ve been getting ebooks in the Kindle format, from both the public libraries in Manhattan and Brooklyn (for some odd reason they work as separate entities) and from Google and Amazon’s vast selection of free ebooks. I am reading them (and this means finishing them) about 80% of the time. So, not only have I doubled my annual reading productivity, but I am finishing 80% of the books I check out as opposed to 20% of the books that I buy.

A few things might explain this surprising improvement. First, I carry the books with me all the time, either on my phone, tablet, or laptop. The Kindle Cloud seamlessly syncs all the books, bookmarks, and even highlighted sections and notes!
Second, since there is a set deadline for the book to expire (you can read Kindle books for seven or 14 days with NO option to renew) I am fighting against time and (mostly) read them in “chronological” order, which means that I read them by expiration date.

And third, the wait time to get Kindle books from the public library can be REALLY long, especially at the Manhattan branches. Sometimes there are 15 copies available and 250 people waiting for them. Since people can check them out for up to 14 days, the wait to get a book can take years, so it’s best to read it while I have it.
Reading on a tablet is visually compelling, and highly portable. Nothing beats the romantic vision of reading a great book on a rainy day while seated next to the fireplace in that cabin on the lake. But reality is quite different. Being able to read on long subway commutes or while waiting for a boring presentation to end is a godsend.
What’s your take?
Video
Adobe Lightroom 4.1 is (finally) available.
The Adobe Lightroom 4.1 update brings support for several new cameras including:
- Canon EOS 1D X
- Canon EOS 5D Mark III
- Canon EOS 60Da
- Canon PowerShot G1 X
- Fuji X-Pro1
- Leaf Credo 80
- Nikon D4
- Nikon D800
- Nikon D800E
- Olympus OM-D E-M5.
Other additional features and enhancements are:
• The ability to process HDR TIFF files. (16, 24 or 32-bit TIFF files)
• Additional Color Fringing corrections to help address chromatic aberration.
• Save photobooks created in the Book Module to JPEG
• Publishing photos to Adobe Revel is now accessible via a Publish plugin
• Corrections for issues introduced in previous versions of Lightroom.
To see all the original features see this article and to understand the new VIDEO features check this one.
How to install the new version? Easy.
1. Open your Lightroom 4 and when the software update dialog pops up click “download.” This will take you to Adobe’s download page.

2. Click on “proceed to download” and “download now.”

3. Save the file to the desktop (so it is easier to find it). The download should take about 3 minutes or less.

4. Double click on the installer, follow the step-by-step instructions.
5. Enjoy.
In two weeks we will be presenting an awesome 2-day Lightroom 4 Workshop at the School of Visual Arts (SVA). We hope to see you there.
Video
How to switch from iPhoto to Adobe Lightroom.
Question: I would like to start using Lightroom as my photo editing software but up until now all my photos have been stored on my iMac and in iPhoto. I am tearing my hair out trying to figure out how to 1) transfer my iPhoto library to an external hard drive and then 2) transfer that to Lightroom. I’ve been reading about this on the Web but am skeptical of trying to do it myself.
Answer: The first step is to find out where are your images stored. Go to Applications/iPhoto and right-click on “show package contents”.

You should now be able to see the iPhoto “library.”
The next step is to decide if you want to keep the images where they are or move them to a new location. Using Adobe Lightroom you can accomplish both tasks. I personally would prefer to MOVE the images to a fast and reliable external hard drive that is only dedicated to the images. More info about Hard Drives here and here.
In Adobe Lightroom’s Import dialog, navigate to the folder that contains you iPhoto Library, make sure MOVE is selected, and select the new destination on the (ideally) external Hard Drive.

The pictures will be MOVED from the iPhoto location, and imported through Lightroom.
By the way. iPhoto is BAD for several reasons. Just two mention two: By default, it creates additional folders and subfolders with the capture time, making your workflow even more time consuming and painful.
Video
Understanding Burst Rates.
Understanding a camera’s burst rate is crucial for DSLR users in certain scenarios. For instance, a high burst rate is helpful for photographers who are shooting fast action, motion, or trying to capture a Henri Cartier-Bresson’s “decisive moment.”

A “burst rate” is the number of consecutive pictures that a camera can shoot continuously until the “busy” signal turns on. When your buffer memory is full, your camera will slow down (or even stop) shooting until the images transfer to the memory card.
The Canon EOS-1D X has the highest burst rate of any EOS Systems out now. A high burst rate is dependent on a number of factors including a large buffer, the camera’s “throughput” speed, the camera’s processing power, as well as the file type and size. To learn more, read this article from Canon’s Digital Learning Center, where we explain burst rates in-depth and compare different high-end systems. We also made this short video to illustrate the article.
Video
Hello Google Drive, bye bye Dropbox?
UPDATED 20141027: Dropbox fights back. Starting now, Dropbox has considerably dropped the monthly price, effectively matching the best offer in town, Google. Now both services cost only $10/month for 1TB (1,000GB). wow….

Dropbox Pro – $10/month

Google Drive – $10/month
Why is Google Drive so cool, you might ask. Well, so it happens that you get 5GB for free and you can get up to 100GB. Dropbox offers only 2GB for free. Is that enough to switch? Let’s see what Google has to say about the new service:
Create and collaborate. Google Docs is built right into Google Drive, so you can work with others in real-time on documents, spreadsheets and presentations. Once you choose to share content with others, you can add and reply to comments on anything (PDF, image, video file, etc.) and receive notifications when other people comment on shared items.
Store everything safely and access it anywhere (especially while on the go). All your stuff is just… there. You can access your stuff from anywhere—on the web, in your home, at the office, while running errands and from all of your devices.
Search everything. Search by keyword and filter by file type, owner and more. Drive can even recognize text in scanned documents using Optical Character Recognition (OCR) technology. Let’s say you upload a scanned image of an old newspaper clipping. You can search for a word from the text of the actual article. We also use image recognition so that if you drag and drop photos from your Grand Canyon trip into Drive, you can later search for [grand canyon] and photos of its gorges should pop up. This technology is still in its early stages, and we expect it to get better over time.
I use Google Drive on Mac, my Android tablet and my Android phone and everything is working REALLY smoothly. A PC version is already available, and Google says that the iOS version will be “coming soon.” You can download the app here and here.

 I have been using Dropbox for a long time and I’ve been pretty happy. But it only gets you 2GB for free, the system is confusing for most people who move the file thinking that they are copying it, the notification system (when someone adds or removes an item) sucks and does not have OCR technology.
click here to keep reading (more…)
Video
i1Profiler update: supports video standards!
X-Rite released an update of i1Profiler, its color management software. Some of the new features are nice (new paper sizes, White point editing, and i1Pro 2 spectrophotometer added support for monitor, projector, and printer profiling). Some are kinda weird (like added Russian language support…)

There are 3 new flavors: i1 Basic Pro 2, i1 Photo Pro 2, and i1 Publish Pro 2. Check the links and the video below to go over all the new features and specs.
The new feature that really got my attention (and should get yours!) is the new Broadcast video standards support: NTSC, PAL SECAM, and Rec. 709 (or ITU-R Rec.BT.709 for the ultra geeks). More about this on an upcoming post.
If you already have i1Profiler software simply open up the software for a free update to v 1.3.1.The process could not be simpler; it is literally one, two and three.
Step 1: Check your current version. For example, my client had v 1.2.0 which is several months old.

Step 2: Download and install the update.

Step 3: Click install and relaunch, and verify that you are running the newest software.

Done and done.
Keep in mind that Apple Mac OS X 10.7 Lion no longer supports software that relies on Rosetta, which affects X-Rite’s legacy apps like i1Match, ProfileMaker and MonacoPROFILER. But don’t worry, the current i1Profiler and ColorMunki software does NOT rely on Rosetta and is fully compatible with Mac OS X 10.5.8, 10.6 and 10.7.
Don’t forget to check our previous related articles on “Five Tips to Consider When Evaluating Prints” and “How to Develop a Highly Productive Printing Workflow in 13 Steps.”
If you have specific questions or want to learn more, we are now offering virtual one-on-one sessions to give you customized solutions and personalized training no matter where you are in the world. Sign up now!
Video
Reliable RAID Systems, an overview.
Professional photographers and filmmakers, are always (and should be) concerned with storage devices, such as hard drives to create reliable backups and efficient workflows. All hard drives will fail eventually, that is why using RAID (Redundant Array of Inexpensive Disks) systems is often our recommended strategy. A RAID is a set of connected hard drives designed to store digital files and information in a much more reliable manner. Most current RAID units can also monitor a Hard Drives’ system health, fan, and power supply and warn users when there’s a potential failure.
There are several different levels at which a RAID system can be configured. In the photo and video industry, we generally use RAID levels 0, 1, 5, and 6. One way to remember them is: Fastest (0), Mirror (1), Safe (5), and Safest (6).
Interested in learning more about RAID systems? Then read this article we recently wrote for Canon’s Digital Learning Center to better understand how they work, their differences on performance, compatibility and size. Don’t wait until it’s too late to establish a good backup strategy! If you need help, don’t hesitate to contact us.

Video
Upgrading to Adobe Lightroom 4 in 7 simple steps.
The following steps can be used to upgrade Lightroom 1, Lightroom 2 or Lightroom 3, as well as Lightroom 4 Beta catalogs.
Step 1. Download and Install Lightroom 4
Step 2. On your Mac’s finder, find the location of your Lightroom 3 catalog. It should look something like name.lrcat

Step 3. Right click on that file and select “open with Adobe Photoshop Lightroom 4”

Step 4. You should see the “Lightroom Catalog Upgrade” dialog. Be very careful with this step. Catalog names can NOT be changed later. I strongly suggest you click on “change” and determine the best location and name for your upgraded catalog.

—Click to continue (more…)
Video
Installing and upgrading Adobe Lightroom 4.
Today we would like to show you how to install Adobe Lightroom 4 in 60 seconds or less. On Saturday morning we will post a step-by-step tutorial on how to upgrade your Lightroom 3 (or 2, or 1, or even 4 Beta) Catalog to Lightroom 4.
And by the way, don’t forget to come back tomorrow for a new episode of our “Conversations with Friends.“
Photography
The million-dollar question: Where are my ICC profiles stored?
The million-dollar question: Where are my ICC profiles stored? And the answer is, it depends on your Operating System (OS). When you first install your printer’s driver, a variety of standard profiles are added by default to the corresponding folder on your system. You can also download ICC profiles, or create your own custom profiles in which case, you will need to drag and drop them to the corresponding folder:
Windows 98/ME
\Windows\System\Color
Windows XP/Vista/7
\Windows\System32\Spool\Drivers\Color
Mac OS X
Username/Library/ColorSync/Profiles
or
HD/Library/ColorSync/Profiles
Now, what about Apple’s OS X 10.7? Ah, that crazy Lion…
For some odd reason, someone at Apple decided that the user library where the profiles are installed should be hidden by default, and only someone with Admin privileges should have access to it. That’s why most profile-managing and image-editing software applications (like Adobe Photoshop) that need access to the profiles are having a hard time “seeing” them.
Here’s my simplest workaround: While holding down the option key, navigate to “Go” on the menu bar, click on the ColorSync folder, and click again on the Profiles folder. Done.
I recommend dragging the (now temporarily visible) Profiles folder to your Favorites in the side bar so you can access them at any time.
