Video
Waveforms over Histograms, any day of the week.
When it comes to exposure, there are two mainstream approaches. One can expose to the right, while the other approach allows one to expose for middle grey. Exposing to the right, also known as ETTR, is typically achieved by using a histogram, while exposing for middle grey is better achieved by using a waveform monitor.Histograms
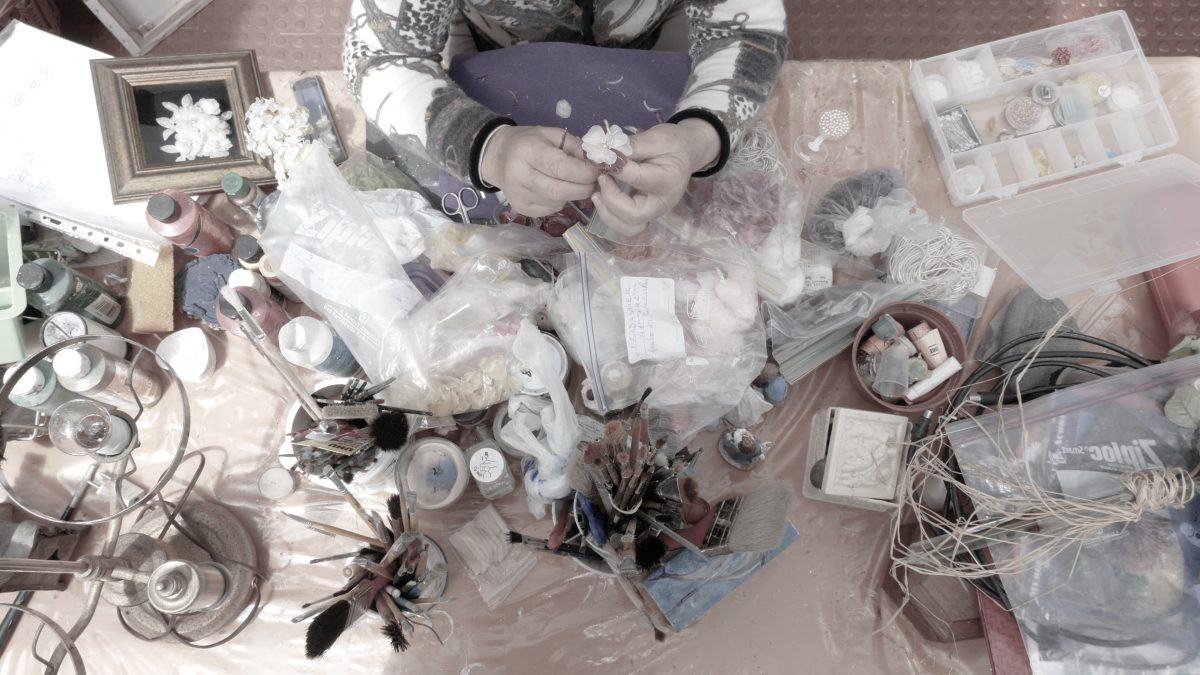
A histogram shows information horizontally, the blackest black on the left, and the brightest white on the right. Using a histogram is a common, and valid, approach for lots of circumstances. My issue with histograms is that they don’t show us WHICH parts of the image are dark or bright, just how much of the whole image is exposed at each value. While the exposure for a certain scene might be correct, the overall exposure most likely would be inconsistent from shot to shot. This might not be an issue while shooting stills, but it can be when shooting video.Waveforms
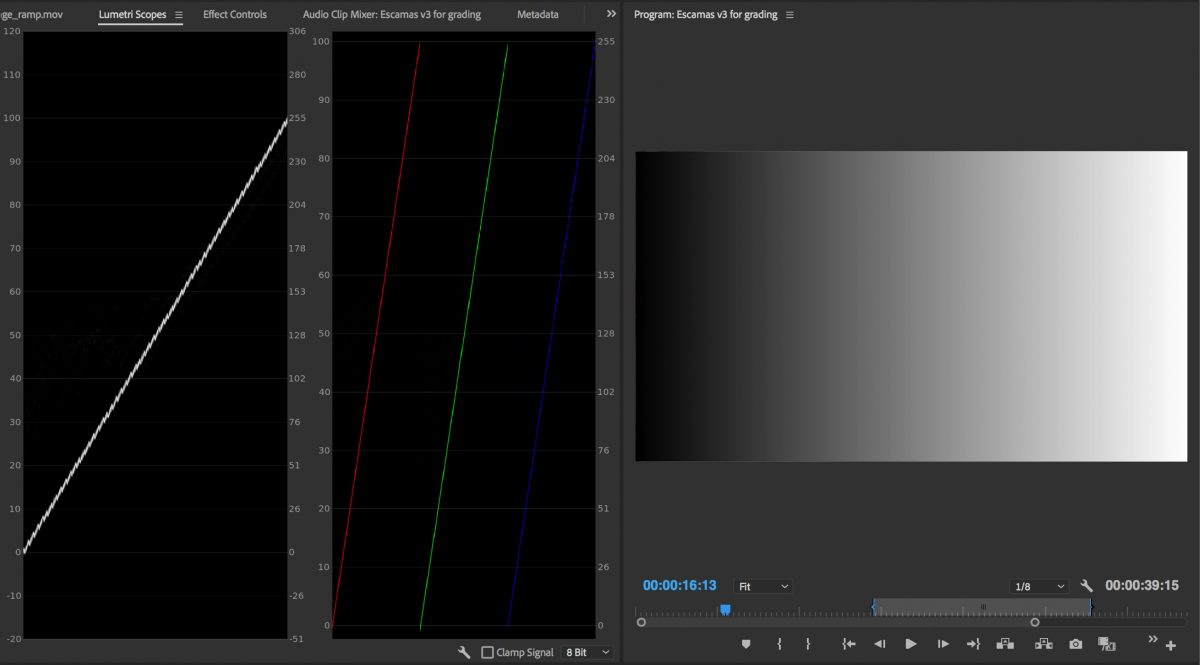
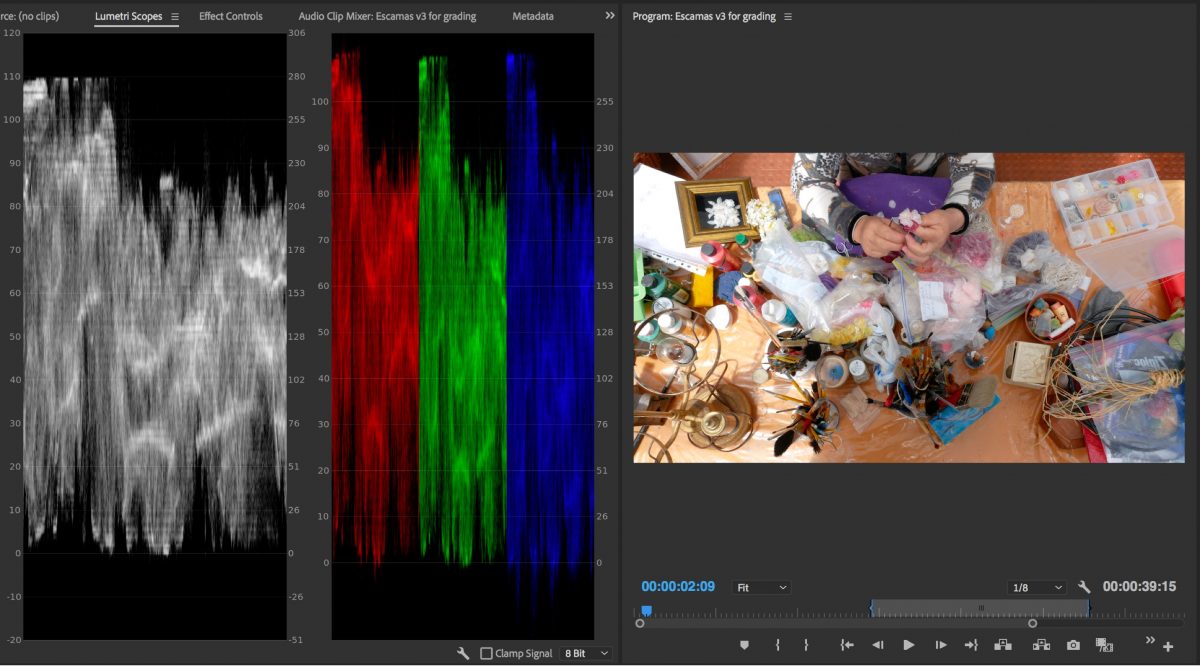
Unlike histograms, waveforms do represent an abstract version of the image. The waveform’s data on the left mirrors exactly what’s on the left of the frame, what’s at the bottom of the waveform mirrors what’s at the bottom of the frame, etc. You can use the tiny monitor on your camera, or you could use a properly calibrated, large and bright external monitor/recorder. Totally up to you. =) Regardless the viewing device, let’s compare a standard “tonal range ramp” on a Histogram and on a Waveform Monitor. Even though the image goes from pure black to pure white (from left to right) the histogram is just showing us the overall exposure. On the contrary, on the waverform monitor, we clearly the tonal range going from 0 to 255.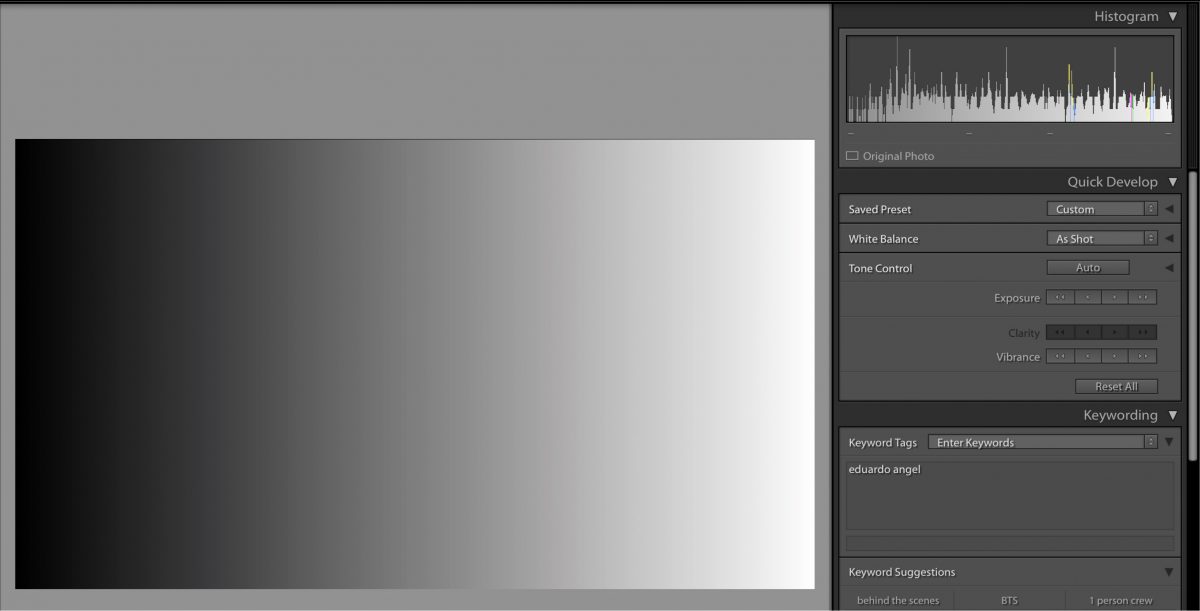
Typical Exposure Recommendations for REC 709
- 100 IRE Highlights
- 70 IRE Caucasian Skin Tones
- 45-55 IRE 18% or Middle Grey
- 0 IRE Blacks
Exposure Recommendations for LOG
- 80 IRE Super White
- 61 IRE White
- 55 IRE Caucasian Skin Tones
- 42 IRE Skin Tones
- 15 IRE the lowest IRE to avoid Noise
- 7.3 Black
Video
On editing photos and telling stories.
Wow! Our video interview with PhotoShelter hit a nerve! We have received over a 100 emails and tweets with additional questions. That is awesome!
For the people requesting the GH3 article, here’s the link, for the ones asking about Custom White Balance for Video, here’s the link, for the ones asking for additional Lightroom 4 Tips and Tricks, here’s the link, and here are a TON of additional articles on photography and filmmaking. Enjoy! (more…)
Video
Interview with ADF at Photokina.
Here’s another interview from last week at Photokina, this time for the Arbeitskreis Digitale Fotografie or ADF, which means the “Working Group on Digital Photography” and is the equivalent to the APA or ASMP in the U.S.
This link has an interesting collection of photography links in Germany, including museums, education, journals, and other relevant online services.
Photography
X-Rite’s Coloratti Photographers.
What a great honor to be part of the amazing Coloratti team, which includes the world’s top professional photographers, whose vision, passion, leadership, and partnership are recognized and valued by X-Rite. I am clearly in excellent company.

Video
i1Profiler update: supports video standards!
X-Rite released an update of i1Profiler, its color management software. Some of the new features are nice (new paper sizes, White point editing, and i1Pro 2 spectrophotometer added support for monitor, projector, and printer profiling). Some are kinda weird (like added Russian language support…)

There are 3 new flavors: i1 Basic Pro 2, i1 Photo Pro 2, and i1 Publish Pro 2. Check the links and the video below to go over all the new features and specs.
The new feature that really got my attention (and should get yours!) is the new Broadcast video standards support: NTSC, PAL SECAM, and Rec. 709 (or ITU-R Rec.BT.709 for the ultra geeks). More about this on an upcoming post.
If you already have i1Profiler software simply open up the software for a free update to v 1.3.1.The process could not be simpler; it is literally one, two and three.
Step 1: Check your current version. For example, my client had v 1.2.0 which is several months old.

Step 2: Download and install the update.

Step 3: Click install and relaunch, and verify that you are running the newest software.

Done and done.
Keep in mind that Apple Mac OS X 10.7 Lion no longer supports software that relies on Rosetta, which affects X-Rite’s legacy apps like i1Match, ProfileMaker and MonacoPROFILER. But don’t worry, the current i1Profiler and ColorMunki software does NOT rely on Rosetta and is fully compatible with Mac OS X 10.5.8, 10.6 and 10.7.
Don’t forget to check our previous related articles on “Five Tips to Consider When Evaluating Prints” and “How to Develop a Highly Productive Printing Workflow in 13 Steps.”
If you have specific questions or want to learn more, we are now offering virtual one-on-one sessions to give you customized solutions and personalized training no matter where you are in the world. Sign up now!